See How Quicklime Was Made And Used In Ancient Building Techniques

YouTube

Making And Using #Lime #Mortars

An article originally written for "Rural Wales" the magasine of CPRW

"The operation of modern #cement and lime mortar is quite different. Cements set by a non-reversible chemical action to form a solid, non yielding mass. #LimeMortars set by the absorption of #CarbonDioxide over a much longer period of time. An understanding of the chemical action of lime is therefore helpful.

"Lime is derived from #limestone or Calcium Carbonate (#CaCO3), which has been burnt in a lime kiln at over 800 degrees centigrade to produce #quicklime or #CalciumOxide (#CaO). In this process carbon dioxide and any water is driven off. Quicklime is potentially dangerous having an avid thirst for water. This process creates a lot of heat and produces #SlakedLime or #CalciumHydroxide (Ca(OH)2). Builders merchants stock this material having been reground to a fine powder and called #HydratedLime.

"The slaking process releases enough heat to cause the water to boil or spit. For this reason water must NEVER be added to quicklime. The lime must ALWAYS be added slowly into the water in a metal container. For the inexperienced builder or home craftsman, slaking is therefore not recommended.

"#HydratedLime can be used as the basis of all lime plasters and mortars. It will slowly absorb free carbon dioxide in the atmosphere and revert to #CalciumCarbonate. A triangle has therefore been completed converting the #calcium back to its original chemical form of limestone. For this reason lime mortars have the potential for #ContinuousRecycling."

Learn more:
http://www.users.callnetuk.com/~gwynedd21/home/JN/LIME.HTM

#SolarPunkSunday #SustainableBuilding #Recyclable #Reusable #LimePlaster #LimeMortar #AncientTechnology #TraditionalTechnology #SustainableBuildingMaterials #ZeroWaste

MAKING AND USING LIME MORTARS

#India - How to Make #Lime From Scratch

December 2018

"How did they create their own #QuickLime?

"First Gautam and his friends built the kiln out of cob (see above). Next, he collected a bunch of oyster and clam shells from seafood sellers. You don't crush the shells, they are left whole so they are easy to identify post burning, because the entire burned shell will be converted into #CalciumOxide or pure lime.

" 'Research stated the shells needed to be fired between 800-1200℃. Any less and it wouldn't have the reaction that turns it into lime, and any more would melt the shells,' he informed us.

"I asked him how he measured the temperature. 'Figuring out the temperature was tricky at first, but luckily a professional potter friend came to the rescue and we used a thermocouple to measure the temperature for the first two trials. After that it became easier because then I knew it took between 40-60 mins to achieve that 800-1200 degrees required for my kiln.'

Making Lime from Scratch - An Overview

1. Build a kiln from cob, or some other material that can stand 1000 degrees heat.
2. Collect some oyster/clam shells, or limestone (see video below).
3. Light a fire in your kiln and add your limestone/shells. Get the temperature up to between 800 and 1200 degrees.
4. Extract the shells (if using) and put them in a vat.
5. Put on protective clothing (mask, goggles, gloves, onesie etc)
6. Add warm water to the burned shells and watch the mixture bubble and throth. Be careful. Lime is caustic and can burn.
7. The longer you leave that substance slaking (submerged in plenty of water), the better quality lime you get."

https://www.themudhome.com/mudbuilding/how-to-make-lime-from-scratch

#SolarPunkSunday #DIY #ClamShells #OysterShells #CobBuilding #CobKiln #Kilns #Seashells #SeashellLime

How to Make Lime From Scratch

Lime. Oh lime. So versatile. So useful. But sometimes so difficult to know which kind you’re buying. You may remember my beginners' guide to different kinds of lime I penned last time . Sometimes...

THE MUD HOME

NOTE: As someone pointed out, this is a DANGEROUS process and requires a lot of safety precautions. I would refer to other instructions with more safety measures. I posted this more for the uses of #Lime (as opposed to using tons of chemicals).

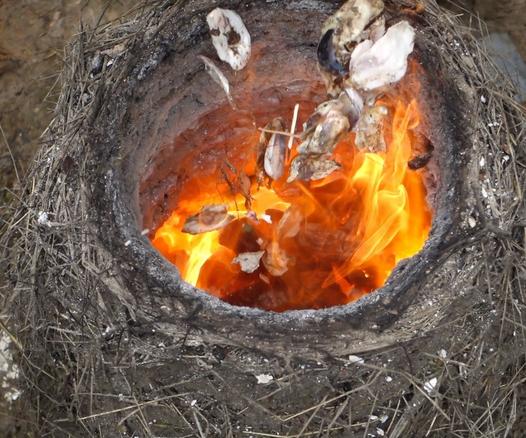
Burn #Seashell #Lime in a Primitive Straw/Clay #Kiln!

By skillcult

"In this project we use Earth, Water, Fire, Air, Animal, Vegetable and Mineral to make something with a multitude of practical uses. The text is detailed and stands alone, but the videos are very useful and entertaining. Video #1, the Quicky version, is the 7 minute general interest, entertainment version. Video #2, buildcult, is the long educational 20 minute version. I'd recommend watching the short version first, before reading this instructable, so that you have a visual reference. I did my best to make it worth 7 minutes of your life. I conceived this project for the Brave the Elements contest, which you can vote in here, hint hint.

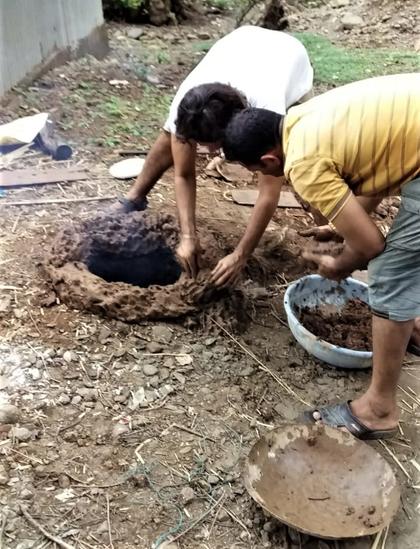
"The goal is to build a kiln from natural materials in order to burn and slake #lime for #seashells. Lime is immensely valuable! If lime disappeared tomorrow, civilization would fall hard! It is the main ingredient in cement and can be used to make #mortar and #plaster. It can also be used in the arts for #limewash and fresco, in #Soapmaking, mixed with casein (milk protein) to make #PreIndustrial waterproof #glue and #paint, for smelting and refining metal, and to remove hair and prepare skins for rawhide, hide glue or tanning. Ever read the ingredients on your tortillas or tortilla chips and seen 'traces of lime'? That’s because lime is used in processing #corn kernels to make tortillas, hominy and grits, which is easy to do at home. Not only does it make corn more nutritious and digestible, but it also lends to the unique flavor of those products. Beet sugar is processed with lime too. Lime is also used to potentiate certain drug substances such as betel nut and coca leaves, a small bit of lime being chewed with the plant material to activate it. So, yeah, wow, lime is one of the most useful substances ever!

"A WORD ON SAFETY: A lot of people think that lime is some deadly scary chemical that will burn you face off. It’s not… not really... well, maybe. #QuickLime is dangerous, but that is a brief transient state. During #slaking, the quicklime will give off heat and boil vigorously, so that is dangerous since the stuff can splatter around and is not only hot, but also highly alkaline. So, yeah, okay, maybe doing a face plant in a boiling tub of quicklime may burn your face off. Don’t do that! Otherwise, the stuff is not that horrible, and people have been making #tortillas, mixing mortar, plastering walls and tanning leather without goggles and hazmat suits for a very long time. It is also non-toxic. You definitely don’t want your pets drinking lime water or your kids playing with lime, but that is due to it’s concentration mostly, and not to inherent toxicity. When diluted, it becomes less and less caustic and is at some point completely harmless. Once converted to #CalciumCarbonate by drying, it’s just like egg shells, sea shells or stone, not only non-toxic, but actually used as a #calcium supplement. So, don’t get it in your eyes, keep it away from children and pets, be careful when slaking and use common sense and everything will be fine. It will temporarily dry skin though skin though, so be aware of that.

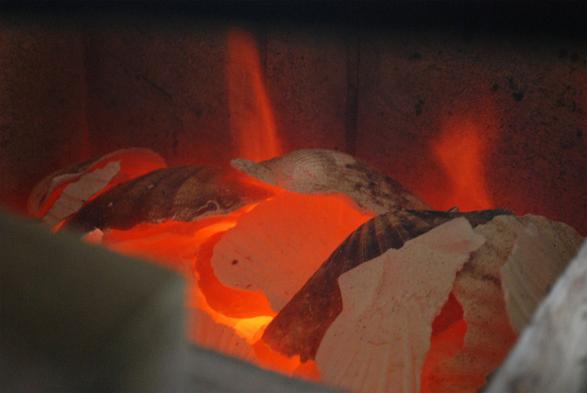
"Before we get to the fun stuff, let me explain how this works. Don’t be intimidated by the chemistry terms, they aren’t important. The changes lime goes through have a name, The Lime Cycle. By heating stone or shells red hot, about 900 Celcius (called calcining), we can change lime from it’s stable inert form, calcium carbonate, into #Calciumxide. Calcium oxide, aka Qucklime, is the most unstable and highly reactive form of lime. Quicklime reacts violently with water, giving off tremendous heat and boiling vigorously. This reaction with water makes it into #CalciumHydroxide, which is similar to #lye, but not as strong. This is the form that is used the most in the arts and industries mentioned above. If the lime is kept under a layer of water, it will not only keep forever, but it improves with age! This stuff is called lime putty. You may be more familiar with the dry lime you can buy in a bag, which is dry calcium hydroxide. This bagged powdered #HydratedLime is widely available, but inferior to wet #SlakedLime putty. You can hardly buy lime putty, and it is very expensive, but you can make it! For more on the forms of lime see my article, Understanding Lime.

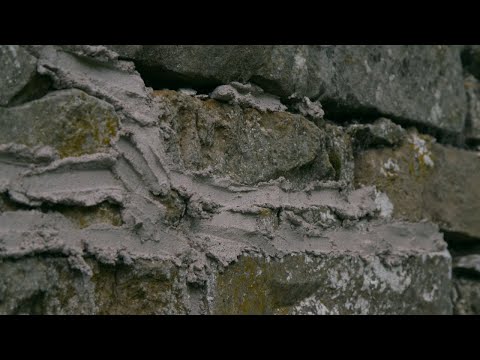
"Basically, #LimePutty is like liquid rocks. Once it is allowed to dry with exposure to air, it absorbs carbon from the atmosphere and turns back into a hard rock (or shell, which is pretty much the same thing). Think about that for a second. That is awesome!

"And thus the lime cycle is completed from rock or shell, to quicklime, to lime putty, and back to rock/shell.

"In my book, it doesn't get much funner than burning and slaking lime, so lets get this party started!"

Learn more:
https://www.instructables.com/Burn-Seashell-Lime-in-a-Primitive-StrawClay-Kiln/

#SolarPunkSunday #OldTech #LowTech #LoTech #DIY #TraditionalTechnology
#AncientTechnology #CalciumCarbonate #TraditionalMortar #History #HistoricalMethods #OldTech #SeashellLime

Burn Seashell Lime in a Primitive Straw/Clay Kiln!

Burn Seashell Lime in a Primitive Straw/Clay Kiln!: In this project we use Earth, Water, Fire, Air, Animal, Vegetable and Mineral to make something with a multitude of practical uses. The text is detailed and stands alone, but the videos are very useful and entertaining. Video #1, the Quicky version,…

Instructables

Burning #SeaShells to make #quicklime

Posted on November 10, 2018 by Per Storemyr

"Burning seashells to make quicklime once was a great tradition in the #NorthAtlantic region. In Millstone Park, Hyllestad (W-Norway), we have built two #limekilns, reviving old lime burning traditions, involving #craftspeople, volunteers and the public. Recently we burnt sea shells to make #LimePaint and #mortar! Read about the experiment in a new poster and web article."

https://per-storemyr.net/2018/11/10/burning-sea-shells-to-make-quicklime/

#SolarPunkSunday #TraditionalTechnology #AncientTechnology #Romans #Vikings #CalciumCarbonate #TraditionalMortar #Plaster #Paint #Limestone #Marble #History #HistoricalMethods #LowTech #OldTech

Burning sea shells to make quicklime

Burning sea shells to make quicklime once was a great tradition in the North-Atlantic region. In Millstone Park, Hyllestad (W-Norway), we have built two limekilns, reviving old lime burning traditi…

Per Storemyr Geoarchaeology & Conservation

An Experienced Wood Firer Shares #Kiln Plans for a Small Instructional #WoodFiredKiln

Design your own wood kiln using these wood kiln plans!

by John Thies

Excerpt: "I set out to build a very versatile and efficient wood-firing kiln that could be used by students who had interest in a complete hands-on experience, from the preparation, loading, firing and unloading to the final clean-up phase. I didn't want to interfere with the successful larger firings, in which students can get a large volume of wood-fired pots without the in-depth hands-on experience. The new kiln would allow me to cut down on the extensive labor, fuel and overhead costs of my larger kiln.

I named the new kiln '#Manabigama' at the suggestion of my friend Phil Berneburg, former technical editor for CM. In #Japanese, mana means educational or learning, bi means a thing of beauty, and gama means kiln.

The Manabigama is a traditional design with a few simple modifications. I see it as a cross between an #AnagamaKiln and a #GroundhogStyleKiln. Basically, it is a crossdraft tube built into the side of a hill. The overall interior dimensions are 24 inches in width, 7 feet in depth, 40 inches in height. Its firebox is in the front, incorporated into the inside with a grate system, and extra air intakes are built into the front and sides. This is done to provide more secondary air intake to help burn green or wet fuel. The firebox is plenty adequate being 2 feet wide, 2 feet deep and 30 inches high from the floor to ware level. The chimney has inside dimensions of 9 inches deep by 18 inches wide and is 12 feet high. The shape is a long rectangle with two straight, 18-inch-tall side walls and a catenary arch built on top. This creates ample headroom for ease of loading, as well as extra height for stacking and tall pieces.

There is approximately 24 cubic feet of ware space, more than enough for teaching purposes. The kiln door is in front, only halfway down, and is bricked up including the stoke hole. It can be loaded in two to three hours, fires evenly to Cone 10-12 in eight hours tops, or if you choose, you can fire two to three days depending on how much ash buildup you like. The consumption of fuel is also minimal-less than half a cord of wood. When loading the wood kiln, be sure to use wadding to prevent pots from sticking to shelves.

All in all, the Manabigama is a very simple design to build. It is capable of yielding wonderful ash-glazed pieces with a minimum of labor, fuel and overhead costs. And it is a fantastic wood-fired kiln for teaching without the tremendous strain of a large three-chambered kiln."

https://ceramicartsnetwork.org/daily/article/An-Experienced-Wood-Firer-Shares-Kiln-Plans-for-a-Small-Instructional-Wood-Kiln

#SolarPunkSunday #WoodFiredKiln #DIY
#Kilns #Pottery #Quicklime? #DIYKilns #TraditionalTechnology #Adaptation

An Experienced Wood Firer Shares Kiln Plans for a Small Instructional Wood Kiln

John Thies, an experienced wood firer, shares his wood kiln plans for building a small, instructional wood kiln. If you've ever thought of building a wood kiln, don't miss the great information in the

Default

#Wikihow - How to Make a #BrickKiln

Guide to making and using an easy #DIY brick kiln for firing #pottery

Co-authored by Tony Hoang

Last Updated: March 26, 2024

"Brick kilns have been used for thousands of years to create pottery, tiles, and other common objects. Whether of simple or complex design, all brick kilns use a wood fire to harden objects inside. You can easily make brick kilns once you’ve determined the needed dimensions and identified a flat clear area outdoors. By laying brick to build the kiln’s walls and covering it with a piece of iron or ceramic fiber for its roof, you can start firing your own pottery in no time."

https://www.wikihow.com/Make-a-Brick-Kiln

#SolarPunkSunday #WoodFiredKiln #DIY
#Kilns #Homesteading #Pottery #Quicklime #BackyardKilns #TraditionalTechnology

How to Make a Brick Kiln: 15 Steps (with Pictures) - wikiHow

Guide to making and using an easy DIY brick kiln for firing potteryBrick kilns have been used for thousands of years to create pottery, tiles, and other common objects. Whether of simple or complex design, all brick kilns use a wood fire...

wikiHow

#India - How to Make #Lime From Scratch

25/12/2018

Making Lime from Scratch - An Overview

1. Build a kiln from cob, or some other material that can stand 1000 degrees heat.

2. Collect some oyster/clam shells, or limestone (see video below).

3. Light a fire in your kiln and add your limestone/shells. Get the temperature up to between 800 and 1200 degrees.

4. Extract the shells (if using) and put them in a vat.

5. Put on protective clothing (mask, goggles, gloves, onesie etc)

6. Add warm water to the burned shells and watch the mixture bubble and froth. Be careful. Lime is caustic and can burn.

7. The longer you leave that substance slaking (submerged in plenty of water), the better quality lime you get.

"Lime. Oh lime. So versatile. So useful. But sometimes so difficult to know which kind you’re buying. You may remember my beginners' guide to different kinds of lime I penned last time. Sometimes though, all the CaOs and NHLs in the world won’t help you, because you live in a place that doesn’t regulate too carefully, and your lime turns up in mysterious dog-eared bags which inspire anything but confidence.

In that case you can always do what Gautam Singh in Mumbai did. Cut out the middle man, and make it yourself. He shared his process in our members' only Facebook Group last week, and I think it's fabulous.

" 'Unsure and concerned about of the quality of lime we were purchasing, especially for some tadelakt work, we made a small kiln to make our own lime,' says Gautam, who is still battling on with plaster work over there in Mumbai. I’ve got to hand it to him, he’s not a quitter:)

'It's specifically for tadelakt,' he says, and 'I’m happy to say it works, and wasn’t too complicated or time consuming either.' Oh...music to my ears!

How did they create their own quick lime?
First Gautam and his friends built the kiln out of cob (see above). Next, he collected a bunch of oyster and clam shells from seafood sellers. You don't crush the shells, they are left whole so they are easy to identify post burning, because the entire burned shell will be converted into Calcium Oxide or pure lime.

'Research stated the shells needed to be fired between 800-1200℃. Any less and it wouldn't have the reaction that turns it into lime, and any more would melt the shells,' he informed us.

I asked him how he measured the temperature. 'Figuring out the temperature was tricky at first, but luckily a professional #potter friend came to the rescue and we used a #thermocouple to measure the temperature for the first two trials. After that it became easier because then I knew it took between 40-60 mins to achieve that 800-1200 degrees required for my kiln.'

Initial Troubles

In the beginning Gautam thought he'd failed. But in fact it's a good example of how things are sometimes not what they appear. 'After our first firing attempt, we went through the burnt matter, extracted all the shells and put them in a pot. Then we tried adding water. But there was no reaction!'

Our pioneer thought perhaps he hadn’t fired the shells at a high enough temperature. He prepared his kiln for a second attempt. It was then he chanced upon a golden nugget of online information advising the use of warm water (not cold) to slake the burnt shells. The Mumbai team decided to try it.

'So we used the same shells, added warm water and voila! It started boiling and reacting violently,' he says."

Read more:
https://www.themudhome.com/mudbuilding/how-to-make-lime-from-scratch

#SolarPunkSunday #SustainableMaterials #Quicklime #AncientTechnologies #Science

How to Make Lime From Scratch

Lime. Oh lime. So versatile. So useful. But sometimes so difficult to know which kind you’re buying. You may remember my beginners' guide to different kinds of lime I penned last time . Sometimes...

THE MUD HOME

Ahhhh... Using a hand-drill to start a fire. Now that takes me back to my days at the Wilderness School! I'd love to try and make a pottery-kiln (I'll be researching that soon...)

#Australia - Making #lime with Primitive Technology

"When heated above 840 degrees Celsius, the lime decomposes into calcium oxide (CaO) or #Quicklime and releases carbon dioxide (CO2). When water is added to the quicklime it becomes calcium hydroxide Ca (OH)2 or #LimePutty. From here the calcium hydroxide can then be shaped into a form and allowed to set.

Carbon dioxide enters the lime putty as it dries causing it to turn back into calcium carbonate. The new calcium carbonate has then set, remaining solid and water resistant.

In my local geography, calcareous rocks such as limestone are absent leading to a difficulty in acquiring the feed stock for lime making. However, I was still able to make lime by collecting the shells of large terrestrial snails that are native to the rainforest here. The unoccupied shells of these snails were gathered up and stored at the hut. Fire wood was gathered and packed neatly into the kiln.

Importantly, the firewood was stacked on top of the grate rather than underneath it in the firebox as is the normal procedure for firing pottery. Using an ordinary updraft pottery kiln in this configuration allows it to reach much higher temperatures than would be possible during normal use. The wood was lit from above and the fire burned down towards the grate. Alternate layers of shells and wood were added on to this burning fuel bed. After adding the last layer of wood to act as a 'lid' to prevent heat loss from above I left the kiln to finish on its own, unsupervised. The whole process took about an hour and a half.

When the kiln had cooled down a few hours later, I took out the calcined shells. Not shown in the video was the fact that some shells got so hot, the dirt stuck to them turned into slag and fused to them, possibly with the lime acting a flux lowering its melting point. This extreme heat (+1200 c) should be avoided as the over burnt lime becomes 'dead lime', unable to slake in water. Most shells were still useable though. They were taken out of the kiln and had water added to them.

An exothermic reaction then ensued. Heat was produced as the lime quicklime turned into slaked lime. The water heated up creating steam and the shells decomposed into a white paste. The paste was stirred and crushed pottery was added to it as an aggregate (sand is normally used for this, I just had a lot of old pot sherds lying about to dispose of).

This lime mortar mixture was then formed into a block shape and left to dry. It took about a week and a half to set as we have had extremely humid, wet weather. The block was observed to have set demonstrating its properties.

What I created is actually lime mortar, typically used for mortaring bricks and tiles together. It’s basically the ‘Glue’ that holds together the building blocks of masonry structures. From my research 20 kg of lime mortar is used on a 1 m square section of brick wall. 5 kg of lime to 15 kg of aggregate (sand, grog etc.) per a 1 m square section of bricks. The shells, though large, are not terribly abundant. A method for finding shells efficiently needs to be made before considering making lime mortar in this fashion. From my experience sand bars in a creek sometimes accumulate snail shells from higher up in the mountains. In these spots, water velocity decreases and shells in the water tend to drop out of the water column. Additionally lime may be partially replaced with ordinary wood ash in mortar without a corresponding decrease in strength. To conclude, making lime in a land without limestone is possible but can be problematic when trying to do so on a large scale."

Watch:
https://thekidshouldseethis.com/post/making-lime-with-primitive-technology

YT:
https://www.youtube.com/watch?v=Ek3aeUhHaFY&t=46s

Wordpress:https://primitivetechnology.wordpress.com/

Patreon page: https://www.patreon.com/user?u=2945881

#SolarPunkSunday #SustainableMaterials #TraditionalTechnology #ZeroWaste #Mortar #LimeMortar #Snailshells #Adaptation #AncientTechnologies #Science #AnimalProducts #LocalMaterials

Making lime with Primitive Technology

Making use of the unoccupied shells of native rainforest snails around his original land, Primitive Technology makes lime mortar by firing them in his

The Kid Should See This
How to Make Quicklime #howto #diy #Quicklime