TIL: xoshiro256, a PRNG with party tricks =)
https://www.pcg-random.org/posts/a-quick-look-at-xoshiro256.html
TIL: xoshiro256, a PRNG with party tricks =)
https://www.pcg-random.org/posts/a-quick-look-at-xoshiro256.html
🇺🇦 #NowPlaying on #KEXP's #VarietyMix
Rotate:
🎵 Grey Type

from the album Lower Hz EP
2/2 re #OCR
All three were set to #rotate and #deskew. None rotated the page that was sideways, but they all #deskewed pages that needed it. Kofax was the speediest of the bunch, then #OCRmyPDF not far behind and #Foxit was by far the slowest.
File size Foxit produced the smallest file size, #Kofax created files double the original. OCRmyPDF struggled here, ballooning the original size by at least 6 times larger.
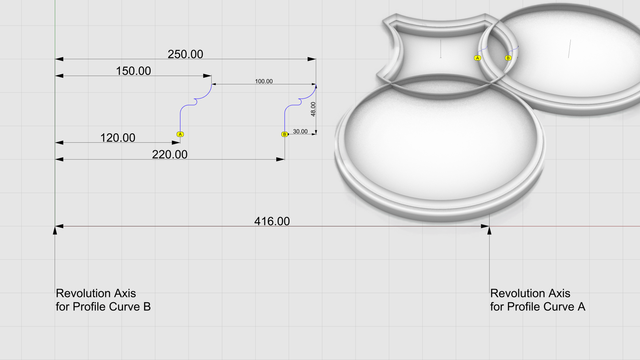

Plan for the #ModernIonicCapital If the design in https://pixelfed.social/p/Splines/807569519962747338 looks daunting, let me assure you it is far simpler than the work that went into the reconstruction of just the #scroll for the #classicIonicCapital. Be sure to check out #MileStone4 at https://pixelfed.social/p/Splines/795361973789834465. With the modern #IonicCapital, the designers went back to the basics of using just straight lines and circular arcs to define the geometry of the essential elements of the capital. No #braids, #keystones, or #modillions, and no #helix curves or #sinusoids. We start the floorplan for the modern ionic capital with a circle of radius 5/6 of µ (120 when µ = 144) which marks the neck of the #columnShaft. Tangent to this circle is a large circle of radius 296 units centered on the X axis exactly 416 units from the column axis. This is the circle that marks the curve of the #abacus, which is always tangential to the column shaft at the neck. This circle also marks the curved faces of the interior portion of the #volute wedge. Without the raised volute spirals, the interior wedge appears flush with the abacus as they follow the same circular arc. Concentric to this large circle is another circle with a radius of 280 units to mark the extent of the raised volute spirals which are 16 units thick. Another concentric circle of radius 266 units marks the outer edge of the top of the capital. The gap between the outermost large circle and the innermost concentric circle is 30 units, and that is reflected in another pair of circles centered on the column axis with radius of 250 units and 220 units to define the four corners. The capital footprint fits in a square 396 units wide — or 24.75 parts horizontally from axis, per #Scarlata in https://babel.hathitrust.org/cgi/pt?id=mdp.39015031201190&view=1up&seq=45. Use this with the sketch in https://babel.hathitrust.org/cgi/pt?id=mdp.39015031201190&view=1up&seq=142

#EggsAndDarts continuation of https://pixelfed.social/p/Splines/796958366767133979 Successive egg slabs are 1/2 part or 4 units away from each other. So the thinnest part of the dart is 4 units. The tip of the dart is at point P, which is 22 units from the major axis for the egg slab. The inside egg is 4 parts or 32 units wide, and we will start with the dart fin also at 32 units wide, even though a portion of the fin will be sliced off when the egg is sliced by the red cutting plane. To find the start and end of the fin, draw a vertical line from P of length µ/2 or 72 units. Offset that line on both sides by 16 units. Mark the intersections of these lines with the outline of the largest ellipse with points A and B. Draw an oval centered on AB with major radius 16 units and minor radius 2/5 of that, or 6.4 units. Divide each arc of the oval into 5 equal parts and mark AD and EF at 2/5 of that. Copy the oval from its top point C to D as well as E. Mark the intersection of the copies at F. Trim the 3 ovals to get 4 arcs AD, DF, FE, and EB. Join them and close the curve with a straight line from A to B. Draw a square 12 x 12 whose bottom edge is centered on P. From each of the top 2 corners, draw a circle with diameter 4 units, shown by RS. #Reflect point P using the major egg axis as a #mirror to get point Q. Draw a #circleThrough3Points P, Q, and R. The origin of the circle, point O should be 3.5 units directly below the base of the large oval. Draw a vertical line up from S to where it is tangent to the side of the large oval. Trim the straight line and arcs to get the left profile of the dart starting with A, passing through S and T, and ending at P. Join all 4 segments and reflect them using the line PC as the mirror. These mirrored copies are the #rails along which we will sweep the fin of the dart with #sweepTwoRails operation to create the dart, but we must orient the fin to be perpendicular to the rails first
Photography Turntable Test
#photography #videography #video #camera #turntable #rotate #rotation #av
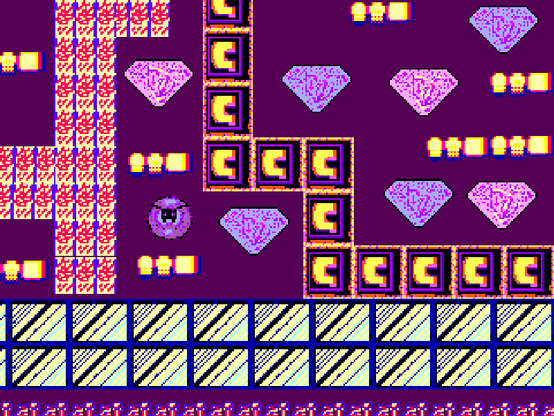
Little Circle Crystals
And this is my drawing based on the same theme. It is a world of flashlights. Such, a world where everywhere flashlights do some light. And their bright light shows a space here. And around - there are some structures. And this is a labyrinth. And you jump by flashlights. They are starting point for actions.
#2dart #pixelart #msdos #retrogame #ball #crystals #galaxy #other #arcade #rotate #80s #mysterious #owl #explore #discovery #space #16bit #8bit #retrocomputers