Finally took the time to publish another oddly specific model for #3Dprinting.

Průša CORE One+ Spoolholder for 250g mini spools (eg. Buddy3D, Amolen)

https://www.printables.com/model/1499153-prusa-core-one-spoolholder-for-250g-mini-spools-eg

If you’re occasionally using tiny 200-250g spools, like they come with variety packs, filament tasting sets or generous samples, this model is a reliable solution to spool-wobble.

Locks into place like the original spool holder, but works reliable with tiny spools.

#Prusa3D #COREONE

@3dprinting

#Prusa #CoreOne users: Do you find that the filament retract feature is actually helpful? I don't change filaments that much. It *does* however produce a stick of filament I keep having to dispose of.

I don't use this on my MK4S as it completely does not work.

#3DPrinting

There is in fact no calibration procedure for the side filament sensor. You can’t fail QA at the factory if you just don’t Q the A!

It might just be an issue with a magnet not being pushed in far enough, but regardless it’s going to require complete removal of the side panel. Love to get all these basic-ass printer assembly 101 mistakes.

I almost don’t want to bother because the INDX setup obviously doesn’t use this sensor at all, but that would leave me with no way of doing filament runout properly.

I did fix the z-axis binding, I think. I printed the alignment tools but I think it was really just the screws being too tight. Tighten the screws, but not Too Tight!

#3DPrinting #Prusa #CoreOne

#Prusa #CoreOne continued: it’s been really cold so I let the printer sit overnight. Also I was rather annoyed yesterday.

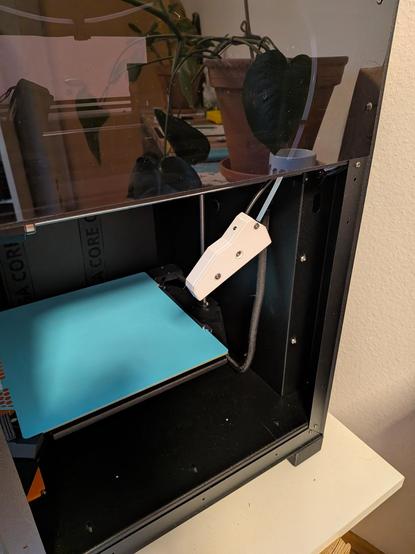
Step one: remove protective plastic. They installed the rivets on top of the plastic, which means I’m left with these little shreds of plastic film. Also a non-zero chance of pulling the rivets out. The front panel has no film at all and is covered in dust and handprints. Not sure why they wouldn’t install the panels properly and then put plastic on top of everything, like I’ve definitely gotten from a Chinese company.

Step two: plug in the power cable. Just like the MK4S, the outlet does not offer a confident connection. Routing is just weird.

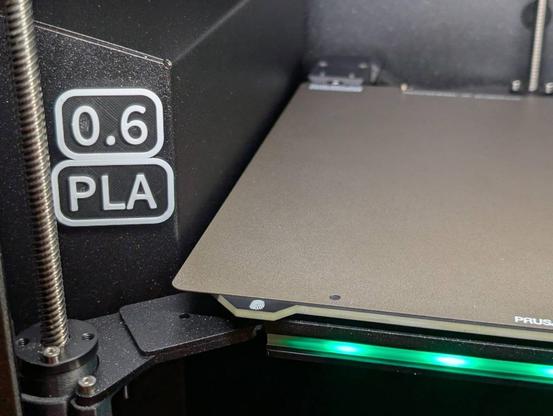
Step three: install build plate.

The whole heat bed fucking wobbled at this point. The left mount is very loose, the rear mount is a little loose, and the right mount has no screws at all. There are no spares included, so this is definitely a showstopper if you don’t have any. M3x18 if you’re asking.

I also looked at the heat bed wiring cover at this point and it looks funny… either a screw is missing or is completely mangled. Nope, it’s a torx head, which is probably sensible.

Why is American manufacturing dead? It offers incredible quality!

#3DPrinting

So I spent $xxxx on an "assembled" #Prusa #CoreOne and... the xLCD assembly is missing screws and square nuts. Can you run it like this, yes, but you probably shouldn't.

If it weren't for the fact that this is my 3rd Prusa and I have just enough spare nuts lying around, I'd be dead in the water until at least Wednesday, and that's assuming the local subsidiary addresses my issue and not Prusa in Prague.

As always the Prusa parts have optimistic tolerances so there was some light hammering and inappropriate use of screwdriver bits. But the xLCD is attached now.

Also, I get that these are pseudo-industrial machines, but if you got something new that looked like this from Amazon you'd get refunded. Wear marks all over the place, dust, and some of the paint on the door handle is coming off. On the plus side, no China factory smell.

#3DPrinting

#FreeCadFriday - what a perfect day to do a new design! Here's the interim result since this morning. A test print is on the #Prusa #coreone now. It will eventually be part of a birthday present.

The basic #Prusa #CoreOne build is done! Had a few issues with heat sensor wiring (me being an idiot and flipping two cables) and the Z-axis making loud scary sounds and getting stuck. Wires were switches around, bed mounts were loosened and retightened and now it seems to be working. Right now it's doing the fastest and most aggressive #Benchy print I've ever seen. In lipstick red no less. It's pretty awesome to see something you assembled yourself work so flawlessly.

When I say basic, it's because this printer has some way to go still. I'm mounting an #mmu3 and a top filament box. Forgot the name of it, but I'll post an update. Probably not until after Christmas.

Spare part finally arrived and the #Prusa #CoreOne build is back on track and slowly progressing! I'm having a great time assembling it! 😂

#diy #3d #hardware

I'm having issues with my Prusa CoreONE 3D printer, it reboot itself when printing very large PETG prints. Looks like static electricty problem, one of the X/Y stepper motors isn't grounded properly. And it discharges through the motors to the control board which causes the reboots.

https://forum.prusa3d.com/forum/postid/753098/

#3dprinting #prusa #coreone

Page 5 | Core One crash/restart

Page 5 | I've been having a strange issue with my Core One in that after a print, sometimes the printer would just turn itself off and restart. Was ...

Original Prusa 3D Printers

Got an issue with printing #opengrid ...grids: The first layer is still perfect - as I am used to on my C1 - but the second layer then does not stick to the first one very well, as you can see on the image. I guess the issue is that there is a chamfer on the bottom, so the second layer is printed with overhang and thus does not fully connect to the first one.

Any ideas on how to counter that issue?

#3dprint #3dprinting #prusa #coreone