所以說,為什麼呢?
同一張照片用手機拍了用螢幕看,和用一卷770元的底片拍,跑一趟送洗,在街上閒晃等待,回家戴上手套裝進正片夾,再投影到牆上的感動就是⋯
手機攝影讓人無感,
牆上映出的畫面讓心靜了下來。

所以說,為什麼呢?
同一張照片用手機拍了用螢幕看,和用一卷770元的底片拍,跑一趟送洗,在街上閒晃等待,回家戴上手套裝進正片夾,再投影到牆上的感動就是⋯
手機攝影讓人無感,
牆上映出的畫面讓心靜了下來。
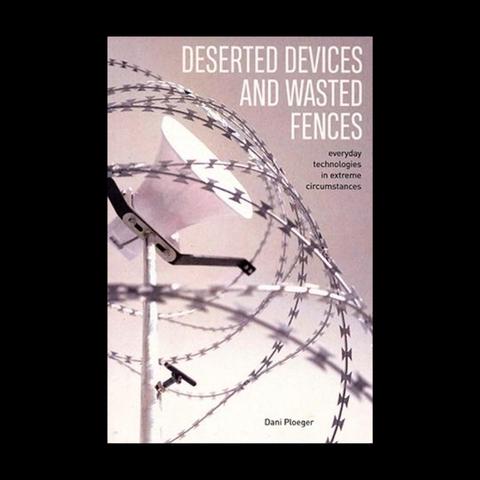
Dani Ploeger - Deserted Devices And Wasted Fences, everyday technologies in extreme circumstances
https://archive.neural.it/init/default/show/3294
#deserteddevices #artistbook #videoart #videoartist #slideprojector #mediahistory #mediaarthistory #computerhistory #mediaarchaeology #retrocomputing #vintagetechnology #obsoletetech #deadmedia #digitalheritage #retrofuture #hacktivism #hacktivismo #hacktivist #hacking #digitalactivism #mediaactivism #commoning #communicationstrategies #ewaste #electronicwaste #ewasteart #criticaltheory #criticalinformationstudies #artsciencetechnology #analoguedigital

Adapting a Huge Vintage Kodak Slide Projector Lens for Photography
Browsing through an antique shop, I stumbled upon a Kodak slide projector with a very peculiar attachment: a large lens. This particular lens caught my eye as it was an absolute behemoth. It was heavy and had “ISCO GERMANY” engraved into it.
After seeing the price of only $10, I had no choice but to bring it home with me. My intentions were realized but not well thought out; remove the lens and convert it to fit on my DSLR.
After poking and prodding the projector, I assumed the lens was removable and went at it with a screwdriver. Thankfully this assumption was right, and it was removed easily. The lens is nearly a foot long, the front glass has a diameter of four inches and it is HEAVY. The aperture is fixed at f/3.5 and the focal range is an adjustable 300-400mm.
After a quick clean of the glass, I began to think “how the hell am I going to attach this thing to my camera?”.
With the lens now removed, cleaned, and still the same gargantuan hunk of glass and metal it was beforehand, it was time to see if it could even work on a modern DSLR. The rear diameter of the lens and element looked similar in size to that of my Helios 44/2, which uses an M42 mount.
The Helios 44/2 is a vintage Soviet lens and M42 is a lens screw mount that was common on older film SLRs, and it is easily adapted to most modern DSLRs. Measuring and comparing the rear elements and lens diameters with calipers confirmed that they were nearly identical to each other.
Fueled by curiosity, I removed the M42 to EOS adapter from the Helios lens and attempted to attach it to the rear of the Isco lens with tape, which didn’t work (surprise, surprise). I don’t give up very easily (yes, I do) so I decided to keep going.
Screwing just the M42 adapter into my DSLR allowed me to use live mode with no lens attached. With the camera now in live mode, I held the Isco lens about an inch or so in front of the hole where a lens should be attached. To my surprise, I could see, and I could vary the focus by changing the distance between the lens and the camera. It was crude, unsafe, and dumb but it worked!
Now I needed to design an adapter that would be a little less crude than this setup.
My initial design was a simple barrel focusing system, so I began by modeling a few tubes in CAD; easy, right? The first tube was 40mm long, and the inner diameter was only a hair larger than the rear outer diameter of the lens barrel. This allowed the tube to be pressed over the rear of the lens, about 8mm down, and held in place via friction.
The female adapter.
With what I’ll call the male side complete, I began work on its female counterpart. Fortunately, it was just another tube with an inner diameter slightly larger than the male tube's outer diameter, allowing it to slide freely when inserted. I also added a base to the bottom outer diameter, which would allow me to glue an M42 to EOS adapter to it, so it could be mounted to the camera.
The male adapter.
I exported the models and 3D printed them in black PLA. After a bit of sanding and cleanup, I glued the M42 adapter to the outer female base, pressed the male side of the adapter over the rear of the lens, and then slid over the female side of the adapter. To my surprise, everything fit well and worked!
Focus was obtained by sliding the lens further or closer to the camera, like using a handheld telescope. The focal range was correct for just a guess, and I was able to take plenty of interesting photos with it. However, it was difficult to obtain accurate focus as it was tedious to use.
Taken with the barrel adapter.
Moving a heavy, awkward-shaped lens just the right amount to get an image in focus was difficult, as I found I would pull the lens too far out of the barrel or push too far inward. This led me to rely on moving myself rather than the lens to get images in focus. I also had a fear that the glue at the base and the M42 adapter would fail and sheer the lens from the camera.
To solve these problems, I adopted a helicoid design for the focusing barrel and integrated the EOS mount, so there was no need to glue one on. Helicoid focusing barrels make use of a simple spiral or thread to guide the lens in the barrel. This threaded barrel allows you to screw or unscrew to bring the lens closer or further away from the camera’s sensor to focus the image.
The updated helicoid design was a simple one, sticking with the initial barrel adapter premise, I just added some threads, and changed a few dimensions. The female end of the adapter was extended, totaling 48mm, and I incorporated a receiving thread to the inner diameter. The receiving thread is 1.5mm wide and deep, essentially a half-circle, with a pitch of 40mm.
The helicoid female adapter.
Since the pitch was so great, I was able to add another thread of the same dimensions directly across, forming something similar to a double helix, for more stable threading. I then modeled an EOS adapter where the outer base was in the previous design, so there was no need to glue one on.
The male end of the adapter was also extended, and I added threads to the outer diameter of the barrel. The threads were made 1mm wide and deep for clearance, with the same pitch of 40mm.
The helicoid male adapter.
The overall length of the barrel is 50mm, but I only modeled threads on the first 10mm. This allows the adapter to be screwed fully in and able to travel the entire focal range without the threaded male section exiting the barrel.
I was able to add a “stop” to the end of the female barrel, so the lens could not be unscrewed so much that it would fall out. This stop was a simple ring with the same inner and outer diameter of the female barrel that had no threads on the inner diameter. Once the male end was threaded in, the stop was glued in place.
The stop.
Phew, that was a lot. However, after exporting the files from CAD, printing in the same black PLA, and assembling everything together, the results were in!
It worked better than the initial design. It’s much easier to focus and there’s no fear of the adapter breaking; plus, it’s a little more “refined” looking. All in all, this was a fun project to follow through and I can’t wait to take more photos with this setup.
About the author : Nicholas Morganti is a photographer and tinkerer who always has too many projects to finish. He is currently a student studying electrical engineering, and his passions outside of his studies include photography, filming, writing, and the arts. You can find more of his work on his website and Instagram. This article was also published here.
#doityourself #equipment #walkthroughs #3dprinted #adapted #adapter #find #kodak #lens #nicholasmorganti #slideprojector #vintage

How I Converted My Afghan Box Camera Into a 4×5 Slide Projector
I have been shooting 4×5 color transparencies or commonly known as color slide film for many years but the best that I could enjoy them was to put them on the light table and viewing them through a loupe. Unlike my 35mm and 120 slides, I have never seen them projected big simply it is not easy to locate a 4×5 slide projector.
4×5 slides on a light table
For the last few years, I tried searching online on how to do it yourself (DIY) and build a 4×5 slide projector but no one seems to have made them before. There are commercially produced 4×5 slide projectors, but I have never seen one in real life. I have not even seen them on the used market on eBay before but even if they are available they are going to cost a lot and even more to ship.
It was only recently that I saw this YouTube video by DIY Perks on how he made a 4K LCD projector that triggered me to think about making a 4×5 projector again. In the video, he explained how he made use of the Fresnel lens instead of the conventional thick condenser lens.
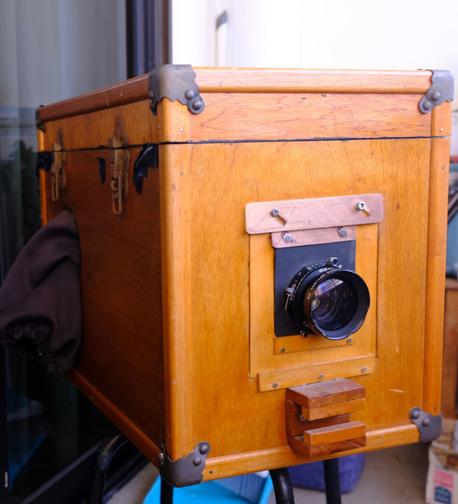
Afghan box camera
With this new knowledge, I started to think about how I could convert my Afghan box camera into a slide projector. For those who do not know the Afghan box camera, it is a camera and darkroom built into a single box. If you need more info on how to build one you can refer to this amazing eBook by Lucas Birke on his Afghan box camera project.
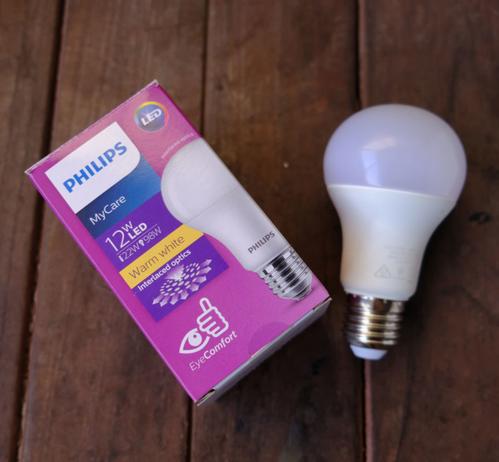
Light Source
Philips 12B LED light bulb
The most important part of the side projector is a powerful light source. The conventional projector will use a powerful but hot incandescent or halogen light bulb. However, for this project, I went to the store and find the highest wattage LED Bulb. This turned out to be a 12 watts LED light bulb from Philips. It is also warm light which is what slides are usually projected with. It was said the slides usually come with a blue tint to balance out the warm light.
I wired with up with a socket and attached it to the back of the box camera using 2 screws.
Warning : Live wire is involved. DO NOT do this yourself if you are not confident and knowledgeable/trained.
Fresnel Lens
Fresnel lens sold as magnifying sheets
I went online and bought 2 magnifying reading sheets that are usually used for reading but I guess they would work for this purpose. On every sheet, there will be one side that is made up of the Fresnel lens, which is a series of concentric circles, and the other side will be smooth, so it is important to place the sheets in the right orientation. The one nearest to the light bulb has the Fresnel lens facing away from it and the other piece will have the concentric circles facing the bulb. In this manner, the light from the bulb will be collimated By the first piece and converged by the second piece.
It is also important to find out the true focal length of the Fresnel lens. The DIY perks video shows you how. My two lenses have focal lengths of 90mm.
Fresnel lens separated by a narrow strip of plywood
To mount the lenses I just got two pieces of plywood with a window cut in the center and I 3D printed some corners to mount the lenses to the plywood. To attach the two Fresnel lens plywood in the Box camera I just use two narrow strips of plywood and two elastic bands to act as a spacer between the two boards. The idea here is to be able to convert this back to a box camera instead of turning it permanently into a slide projector.
Lenses
Fujinon 210mm lens
For the lens, I continue to use my Fujinon 210mm, which is my large format photography shooting lens. I find that it still does a decent job in projecting the image, but I’m not sure if there is a difference in projection quality if I were to use an enlarger or projector lens.
Focusing
In order to focus the image on the screen, I use the focusing rods that are already part of the box camera system. This box camera is designed to take 5×7 inches photo negative so I removed the existing ground glass and made a 4×5 slide mount to hold it to the holder and to block off excess light.
Testing
Fully projected Finally I saw my 4×5 slides big!
For testing, I set up a piece of 5-foot white fabric backdrop mounted across two light stands and was placed about 3 meters from the slide projector in the darkened room with all the lights off.
Hurrah! I was able to get a good image on the screen! I was certainly very impressed and I to be able to see my large format slides on such a big screen finally!
Conclusion
While this slide projector is not bright enough to be used in an auditorium, it is good enough for the personal viewing of 4×5 slides at home. You will need a very dim room to enjoy the slides at a view distance of 3 meters. There is certainly room for improvement but that will be for another DIY project.
About the author : Cheng Qwee Low is a (mainly) film photographer based in Singapore. In addition to using cameras ranging from 35mm to ultra-large-format 8×20, Low also enjoys alternative processes such as kallitype and albumen printing. The opinions expressed in this article are solely those of the author. You can find more of Low's work on his website and YouTube. This article was also published here.
#doityourself #ideas #walkthroughs #4x5 #afghanboxcamera #chengqweelow #diy #homemade #howitwasmade #largeformat #projector #slideprojector


How I made my own 4 x 5 slide projector on a budget
#diy #4x5 #cheapdiy #cheapdiyproject #chengqweelow #diyprojector #projector #slideprojector

I have been shooting 4 x 5 color transparencies or commonly known as color slide film for many years but the best that I could enjoy them was to put them on the light table and viewing them through a loupe. Unlike my 35mm and 120 slides, I have never seen them projected big simply […]

