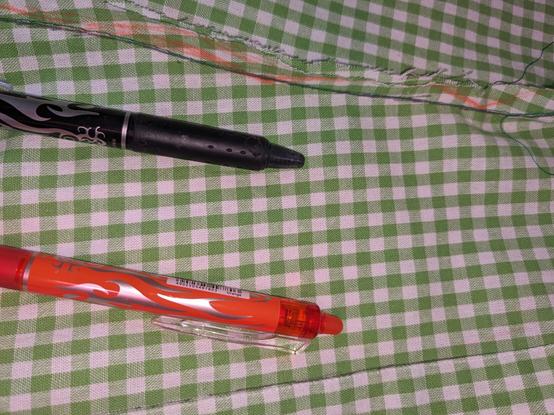
Today I started by stitching the cut ends of three new pieces of fabric so that they don't fray when we wash them at 90C to pre-shrink before making them up into anything. #Sewing
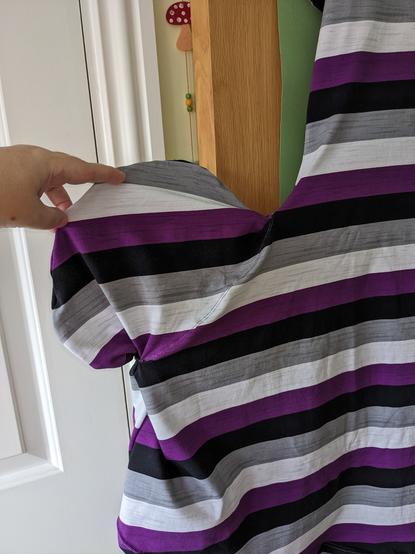
I have also stay-stitched the neck and arm holes on the dress pieces and started pinning the long seams, matching the stripes, but I've ground to a halt because I remembered pockets. I need to make and place pockets now, not add them in later.
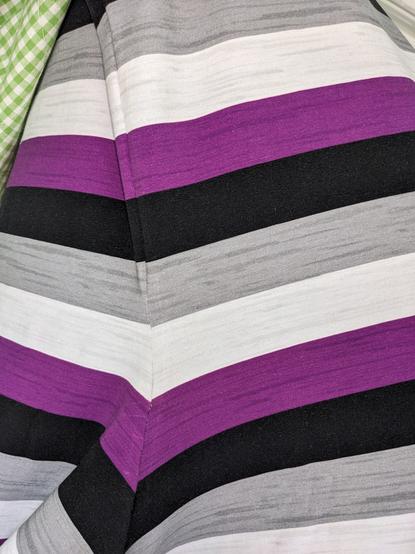
I am not the most sensible person. I have pattern-matched the stripes on the pockets so that if they are turned inside out it will look stripy. Before I even start on the sleeves. *whimper*.
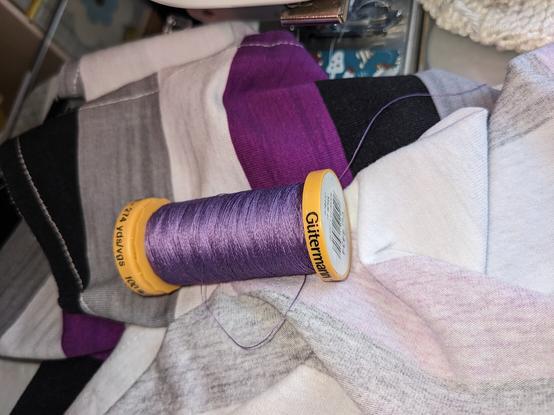
Chose thread colour, pinned things, did NOT attempt to pattern match the stripes on the sleeves, now I'm at the stage of actually SEWING. Wish me luck.
Pausing to eat but the pockets are done, the side seams are fauxverlocked, the neckline is finished, and I've hemmed one sleeve. I've lost my needle threader so tidying the threads on that hem will have to wait. I still need to hem the other sleeve and the skirt.
(I gave my spare needle threader to the offspring teaching themselves bookbinding, because of course I did.)
Almost all hemming done, all that's left tomorrow is a bit of thread tidying. I can do all that by hand without clearing my sewing space (boxes of fabric and piles of haberdashery live on the chair and table beside the sewing machine, and move to the bed for me to use it).
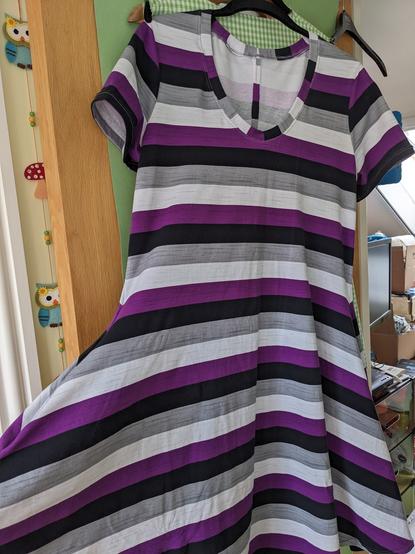
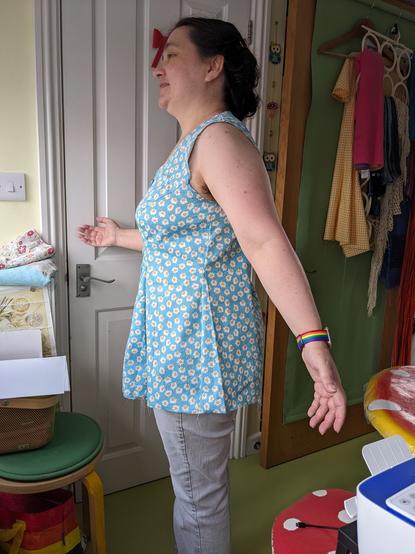
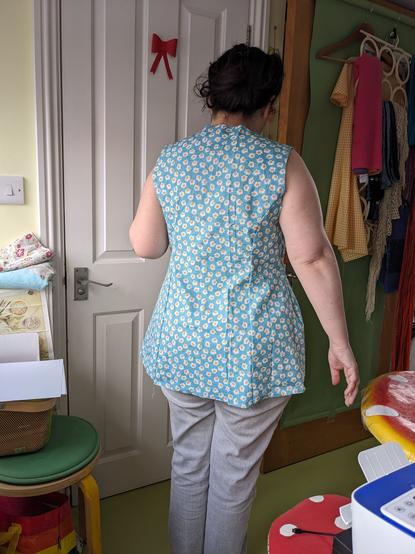
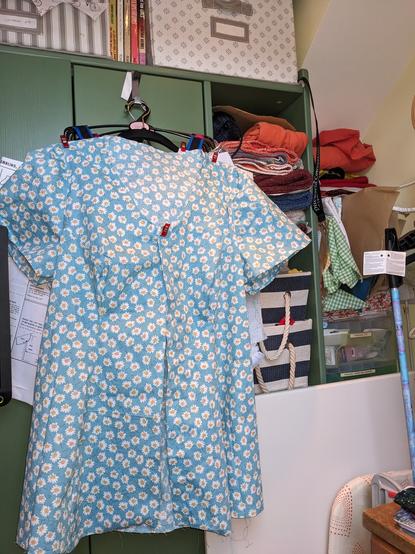
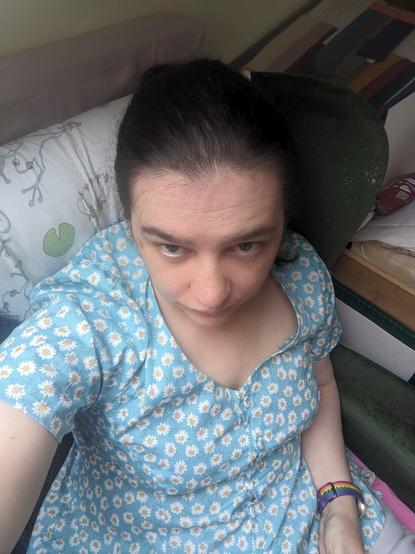
I finished the dress! It's Ellie and Mac Slow Sunday dress with mid-scoop neckline, fuller skirt, and short sleeves. I added the pockets to the pattern myself because they were inexplicably omitted by the designer.
I was going to make the high neckline but it would have needed a complete Full Bust Adjustment, whereas with the mid scoop neckline it just needs a decent bra.
After finishing the dress, and eating a curry while wearing a white shirt, and rinsing the white shirt in cold water and putting stain remover on it, I ironed five metres of 150cm wide linen. That's enough for today.
Ironed 3m of 1.5m wide shirting cotton. Lying down now. But there's only one big piece of newly acquired fabric left to iron.
Today I looked again at the princess-seam, button-front top/dress I'm trying to adapt. I learned things since I last looked at it and I'm going to do slightly bolder adjustments before giving up entirely and finding a new starting point. #Sewing https://mastodon.art/@artbyailbhe/110300145057261071

Ailbhe (@[email protected])
Attached: 1 image Stage one, the bust alteration is good. Next, waist alteration, I think.
So today I avoided adjusting the top by starting on a pincushion I can wear on a finger so it's handy when I'm fitting things or ironing things.
Long long ago, when I made facemasks, the fabric layout resulted in a lot of same-shape scraps. I kept them because they looked like leaves or feathers or something. #Sewing #ScrapBusting

I pinned some together and with 2.5mm seam allowances it takes eight to make a ball. And obviously a flat ball is a flower.
When I sew, I put my thread offcuts into a little bag clipped near my sewing machine. Very tiny snippets of fabric go in there too. Only 100% natural fibres though, because of the reasons.
I got my cardboard bobbins of old basting thread, which I save for handsewing, and started stuffing and quilting the ball. #Sewing #ScrapBusting

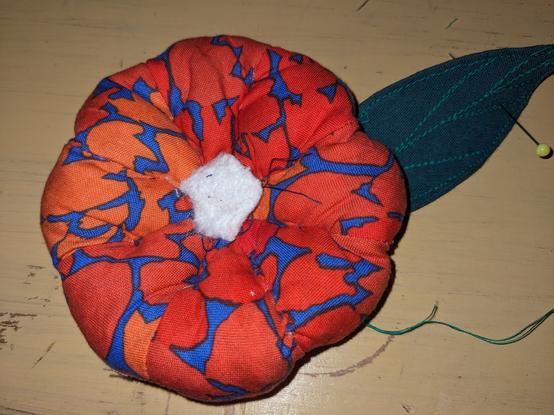

I finished my pincushion! Now we find out if it's better than holding everything in my mouth until I get back to a table. #Sewing
Yesterday I went back to this top. I slit all the seams from hem to under the bust, and pinned wildly. I clipped a few curves to make things work better. Today I'm going to sew up the amendments and have a think.
https://mastodon.art/@artbyailbhe/110300145057261071
https://mastodon.art/@artbyailbhe/110300145057261071
Ailbhe (@[email protected])
Attached: 1 image Stage one, the bust alteration is good. Next, waist alteration, I think.
I started by sewing yesterday's modifications and taking photos so I could see. It's basically the right size -- the places where it was much too big have been almost eliminated. After taking these photos I spent the rest of my sewing session trying to fix the shape of the bust, but I stopped before I got tired enough to make mistakes. Even before modifying today, it fit the various essential measurements well enough to allow for following my basic shape and allowing movement, breathing etc.
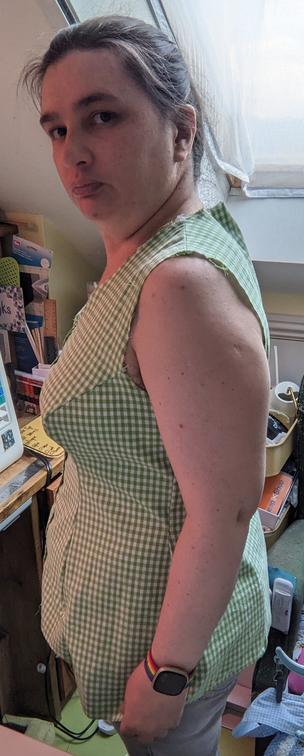
I did wake up tired today so it was all very slow. But that's an #mecfs thing, not the fault of the garment.
I've started today by unpicking the seams either side of the back panel, from the hem to near the armscye, and pinning to make it slightly wider across the hips. I think that will remove the triangle in the small of my back. But I'm expecting to need additional fabric, not just what's in the original pieces, so I'll try this on pinned rather than baste. When I can stand, I mean. #Sewing
I pinned the back again and I think this works. I definitely think this works well enough to attempt to make a new pattern. So now I'm going to iron it to eradicate my pen marks and then go over both sides of every seam with marker, unpick it, and trace it.
... first I'm sorting my scraps of tracing paper on case any will be useful
I had used orange frixion pen to mark the fabric as I was pinning it etc so I used black to trace along all the basted seams on both sides before unpicking them.
Then I could lay the fabric flat under my tracing paper, and copy the new black seams in orange. And finally I used the original pattern under the newly traced one to see how different it is -- very. #Sewing
Truly I can procrastinate this process forever. I know doing this work now will lead to years of blissful clothes-making but I want to skip this step.
Yesterday I transferred the pattern to paper and cut the pieces out, but today I realised that I'd been so tired I skipped all the marks, and also I'd cut the edge furthest from me really poorly, so today I fixed that and started assembling. I'm again really tired so I didn't get much done. #Sewing
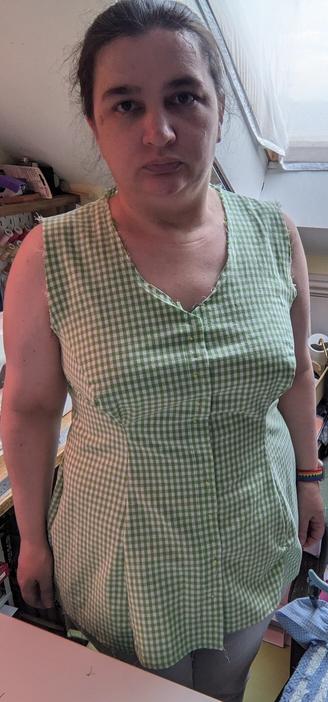
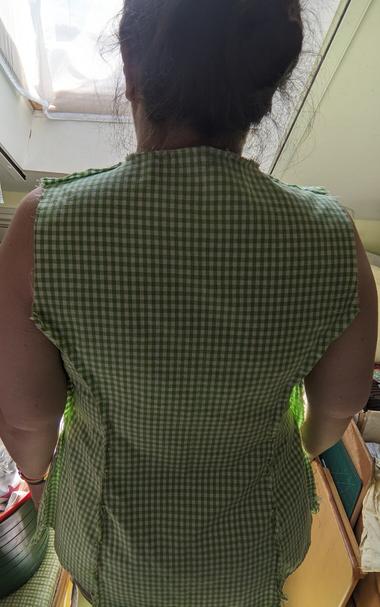
I did it! It's not ironed but I'm so pleased with myself. I want to finish it off now -- seams and neckline and buttons -- but I'm satisfied that my paper pattern is good enough.
After taking these photos I had a phonecall in the warmest bit of my space before changing out of it and now the underarms are a bit ick. I'm going to rinse them in cold water and then finish sewing. #Sewing

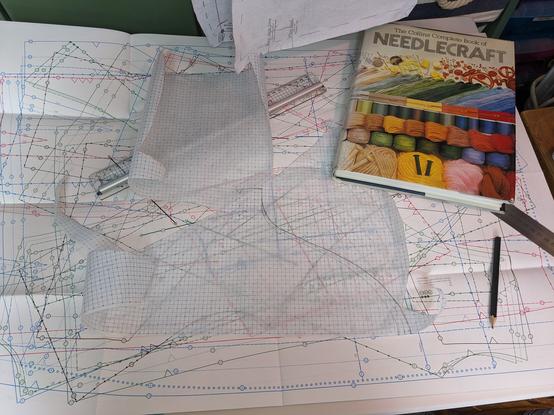
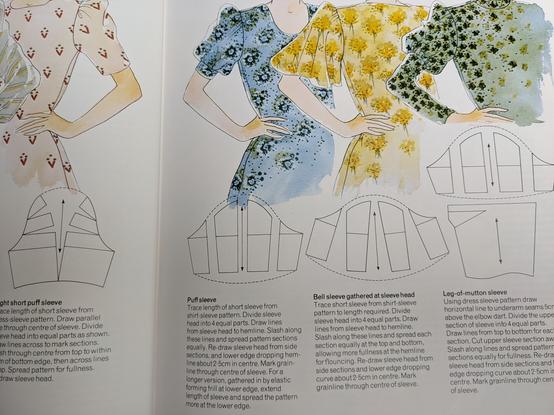
I'm going to try to design a sleeve. The sleeve head in the sheet at the back of "The Collins Complete Book of NEEDLECRAFT" (1981) is about the right size to start with, and there's a diagram of how to change the shapes inside.
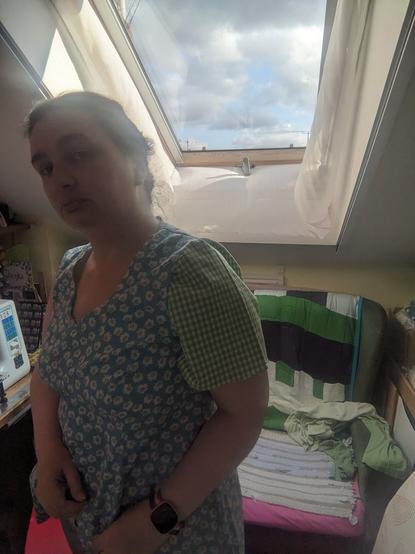
I used the green gingham mockup to test my sleeve shape, because I have ZERO spare fabric, and then made sleeves. Tomorrow I might get as far as facings. #Sewing
I'm trying to decide how much I need in terms of facings. I might only want to bind the collar and reinforce the placket to hold the buttons. I'm not sure how to decide.
... I don't have any buttons I like. I think I'm going to cover buttons instead. Somebody stop me.
I've made pattern pieces for neckline facings and cut them out of the fabric scraps.
I've done a button and a buttonhole. I'm so close to finishing. It's just that the finishing is the time consuming, fiddly part. And involves a LOT of ironing. #Sewing
I've typed up instructions so that next time I make this I know what order to do things in so that all the felled seams are neat, and tomorrow I'll do more actual sewing. I need to do buttonholes and attach and cover buttons, fell down the seams, and finally hem it.
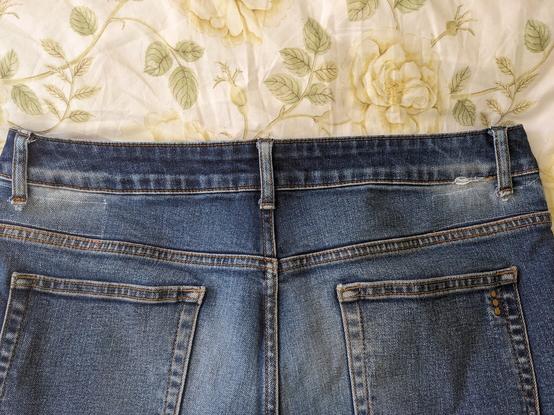
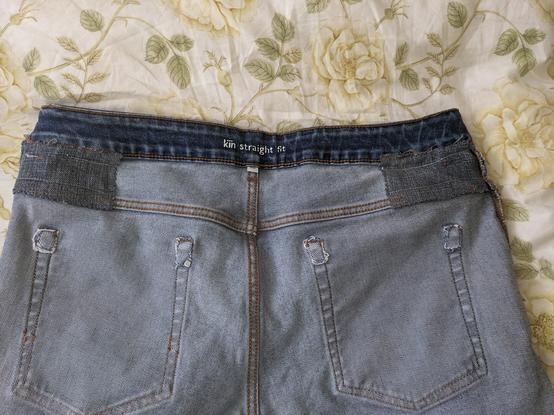
Mended jeans -- belt loop tore a hole in the back so I reinforced both rear side belt loops and reattached the flapping one. #Sewing #Mending
Today I mended a duvet cover using my new vintage sewing machine from 1940 (not to be confused with my old modern machine from 1990-ish) and it was SO EASY. The extra space in what I believe we call the "harp" made a huge huge difference.
#Sewing #Mending #SewingMachine (link to thread with pictures of the vintage machine: https://mastodon.art/@artbyailbhe/110780146951341100)
#Sewing #Mending #SewingMachine (link to thread with pictures of the vintage machine: https://mastodon.art/@artbyailbhe/110780146951341100)

Ailbhe (@[email protected])
Attached: 4 images The case of my 1940 Singer 201K handcranked sewing machine. The way the storage and case works is so, so simple and clever. #SewingMachine #Sewing
Today I tried to fell the seams on the top I'm making and when I was trimming the seam allowance I cut through the actual garment in TWO places, though I'll be able to mend it by sewing it down to the folded seam inside, and then when I tried sewing it I went WILDLY wrong. I think my felling foot can only really handle straight lines and *mild* curves, not the bust on this shirt's princess seams. I mean the princess seams on this shirt's bust. I'm so tired.
Yes, of course I'm basting them *from now on*, I just thought I didn't have to. Pff.
Felling down the curves on princess seams for a bust that is 25% bigger than the underbust is *tricky*. #Sewing
Hemmed it. Only buttons and buttonholes yet to do. Memo to self: sort out hem length on the pattern pieces, they were crenellated like a moderately well-defended English church.
The top fits. I can do my hair while wearing it, which involves a lot of moving my arms right around behind and above my head. I can stand up straight or slouch -- which makes it look slouchy but doesn't make it tight anywhere or seem to strain any of the seams.

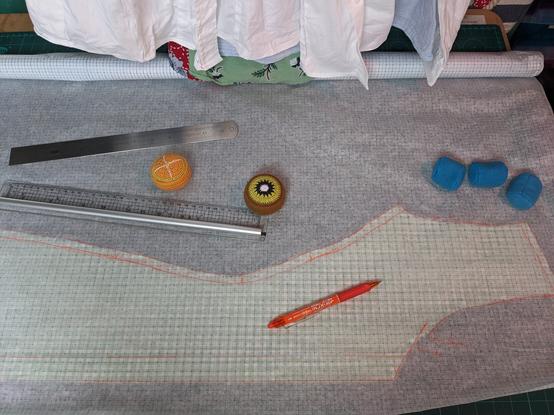
So today I'm looking at my chair cover. I bought the fabric AGES ago -- possibly years? -- but I was going to wait until I had rewebbed the seat. I'm not going to do that. The cover I'm replacing was made with a remnant which wasn't quite big enough but it will still give me a good idea of how to start, I'll just have much more in the way of seam allowances so I'll be able to finish it better. I think my mother made it 15 years ago. #Sewing #Mending #Upholstery

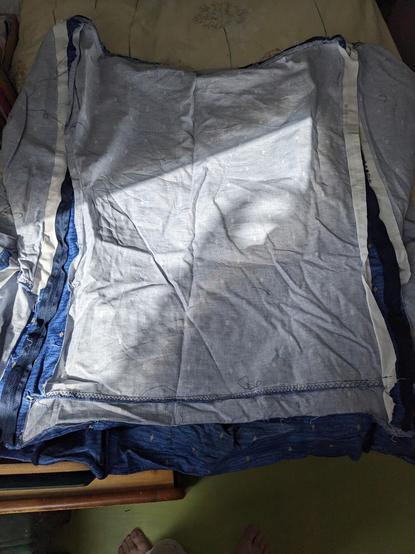
The first thing is to unpick the old cover and trace around the bits onto pattern paper, I guess.
Unpicked AND LABELLED the two seat side pieces, both of which were originally pieced because there wasn't enough fabric and my mother wasn't working from a pattern of any kind. I'm too tired to trace them today but I can do it tomorrow perhaps. I notice that they're not identical. #Sewing #mecfs
Today I am mending and altering: first, shortening bra straps 3½"/8.5cm (folded length)
And today I did some hand mending, because this shirt is too feeble to darn with a machine zigzag but not quite destroyed enough to go into the rag bag. When I got it, it was smart enough to wear for parent-teacher meetings. #Mending #Darning #Sewing
So I'm back at the chair cover. I've unpicked all the pieces I think I need to, to make pattern pieces, and I've started tracing around them. But I've realised I need to learn a lot more about inserting a zip, because this looks very neat and I don't know how to do that.

Ailbhe (@[email protected])
Attached: 3 images So today I'm looking at my chair cover. I bought the fabric AGES ago -- possibly years? -- but I was going to wait until I had rewebbed the seat. I'm not going to do that. The cover I'm replacing was made with a remnant which wasn't quite big enough but it will still give me a good idea of how to start, I'll just have much more in the way of seam allowances so I'll be able to finish it better. I think my mother made it 15 years ago. #Sewing #Mending #Upholstery
I have cut out the three pattern pieces for the arms of the chair and only needed to make one change when I draped the paper on the chair, so I'm confident that when I cut the fabric and baste things together it will work ok. I wrote on every paper piece NO SEAM ALLOWANCE so I hope I remember that.
Decided to prewash at 60C, so started the day by putting 400cm x 141cm of fabric in the washing machine. Now I'm back on my bed with coffee, looking at the last pieces of the previous chair cover which I have yet to transfer to paper pattern pieces.
The label on the parcel says 100% cotton but the website info panel says 52% cotton 48% polyester. #FibreContent
My fabric is drying, but not yet dry, because it's folded over. Four metres is a lot. And I finished tracing all my pattern pieces, in spite of getting bored and covering up the unused holes in my pegboard as a break. https://mastodon.art/@artbyailbhe/110837783377549859

Ailbhe (@[email protected])
Attached: 1 image I got tired of transferring chair shapes to pattern paper so I decided to improve my sewing space. This desk is permanently in the room, but when I need to I can clamp an A1 drawing board to a little folding table for a large flat surface. #SewingSpace #Organising
I had to iron and trace around it with chalk in stages, because although the pattern piece fits on my A1 drawing board, that's because it has no seam allowance. So that was a bit fiddly. But once the piece was cut out, I could sit and watch telly while I threadmark it. #Sewing #SewingSpace
My elbow hurts from threadmarking but I've done the back of the back, the front of the back, the seat, the front of the front, and the backs of both wings so far. I've cut out the fronts of the arms but not marked them, and I've yet to cut out the fronts of the wings, the insides and tops of the arms, and the outsides of the arms.
Then I need to make a pattern for the seat cushion, and use that as a practice for making and attaching piping, and fitting a zip.
Then I can assemble the cover.
All the pieces are cut out and only the two smallest have not been threadmarked. Tomorrow I'll make a pattern for the cushion (I bought the foam ages ago, wrapped it in a sheet temporarily, and have been sitting on it ever since) and hopefully cut the cushion pieces.
I will need to teach myself piping. #Sewing
I've cut the pieces for the seat cushion. I think I'm going to make the bottom of the cushion from scraps pieced together. The two pieces for the three long-zipped box sides were as long as the width of the bolt of cloth so what's left is *extremely* tidy and I have lots of interesting scraps for antimacassars and so on.
Having a little rest now and then I'll see about finding my rolls of zippers.
Found a zipper roll and cut a bit of zip long enough to open all three sides of the cushion, then added a second slider in the opposite direction so it opens from the middle to both edges. Hopefully that will make it easier to get the cushion in and out when I wash the cover.
Made the rectangle for the bottom of the cushion using three scraps from cutting the wiggly shapes for the main chair cover. I've run out of ways to procrastinate the piping. Hm. #Sewing
PINS ARE SHARP
*bleeding very slightly*
Basting in the zippered panel for the three sides of the cushion, which is fine until I reach the curved nose. I do not like sewing the curved nose. But I think this is ok?
When I've finished basting the top edge with the curve, I'll do the bottom edge and see if the cushion fits. It *should* but I'd rather find out before I sew a million tiny stitches with a hand cranked machine. #Sewing
Finished the fiddly basting, put the inside-out cover on the cushion and pinned the base in place, and *unzipped the cover* so I could just sew everything.
It's not perfect, and the internal seams are not finished, but it's done. #Sewing
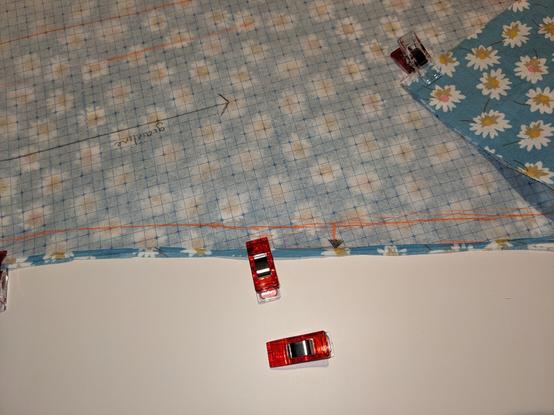
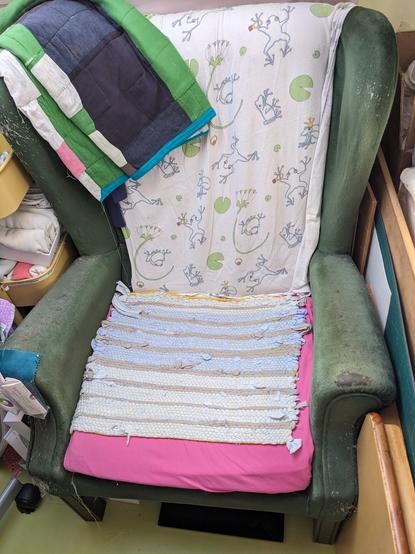
I've started basting and pinning the pieces of the chair cover together. The wings are ok. Both sides of the arms are ok. The front of the arms seems to be too big but it's hard to tell how much right now.
I stitch-marked the original seam lines in light blue, I'm basting in dark blue, and my pinheads are yellow. I'm really glad I stitch-marked because the chalk is almost completely invisible on every fiddly curve after basting. #Sewing
Edited to add: the close-up is a much closer colour.
It's 27C in my room but there's lots of air flow so I don't feel too bad. I've chalked a line 1.5cm away from the first draft (using my NEW TOY prym mouse basically in mid air) and pinned that at the front of the arm, and now I'm having coffee while I recover.
I've started the final basting for several seams - red thread, biggest stitch on the handcranked machine. When these are done I'll apply the piping to the front of the arms and wings and when THAT'S done I'll do the final stitching on all the seams, remove the three colours of working-in-stages thread, and hopefully finish the internal seams. Or at least pink them.
@artbyailbhe *takes a note*