Afternoon #repairProject. Warning - hacking may ensue.

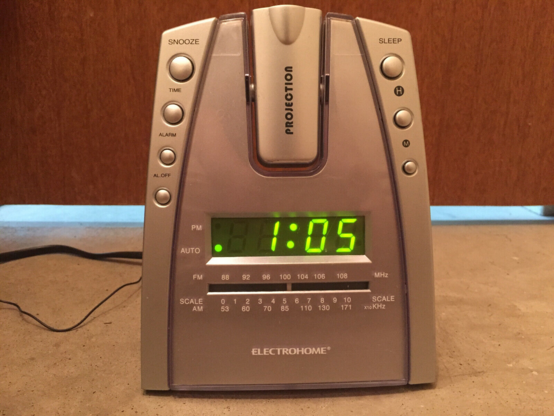
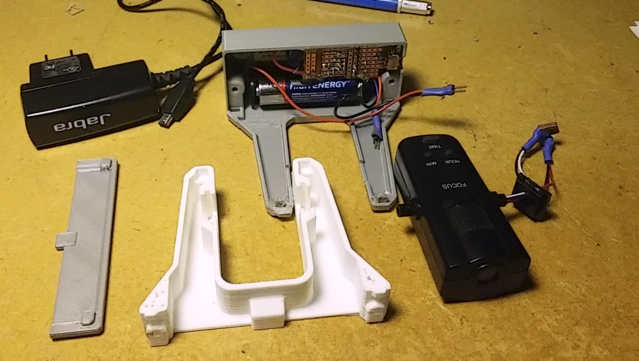
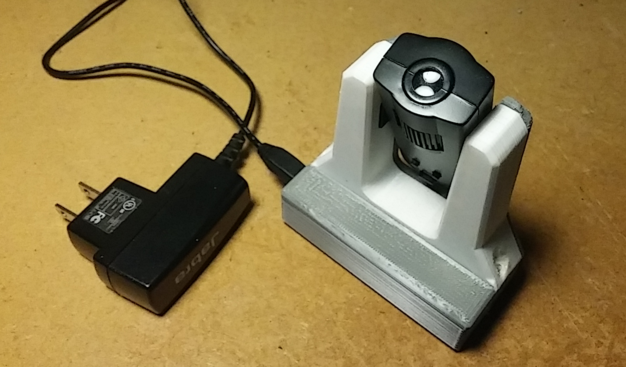
This 15yr old (?) clock radio has suddenly stopped doing the one thing we use it for – projecting the time onto a corner of the bedroom ceiling. It's just out of view, unless you're looking for it.

Of course, once it's gone, you go nuts all night looking for it.

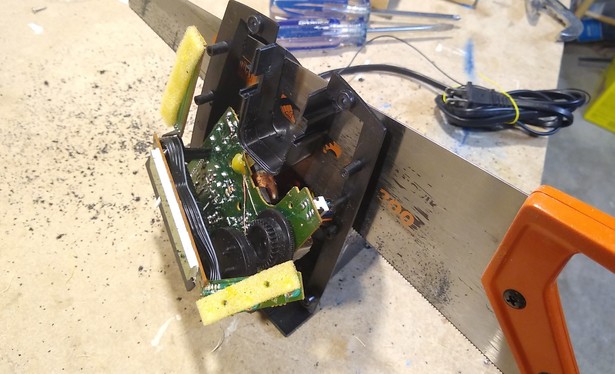
More about the unit…

1/?

#repair #diy #fixit

We like a very dark room, as recommended for good sleep-hygiene, so all other lights are out.

The dumb thing has a non-extinguishable large LED display on its face, so that is normally blacked out with tape.

It also has an old fashioned radio, but we have a decent IP-radio which serves us nicely.

The unit was a clear-out at CdnTire for about $9 when we bought it yrs ago. I always meant to open it and permanently cut power to the main display.

2/?

A weird thing is that the projector clock has its own time-setting buttons!

It's clear they did the cheap-and-easy thing: just found a little clock chip intended maybe for a watch or a travel clock & packaged it, sending only power. #UX be damned.

The more elegant user-friendly solution being one time keeper sending signals to a projector unit.

But that's kind of a feature for my hacking idea – maybe I can just fix the projector failure, and discard the rest of the unit!

3/?

So the repair part of this #repairProject took about ten seconds to figure out.

Turns out there's a little "projector on/off" button on the back.

I don't operate nor really ever see the unit BTW. It's on the other side of the bed tended by my SO, and I'm kind of just seeing it for the first time since we bought it. It's just always been there and I don't need to think about it.

Looks like the switch failed.

4/?

That button never gets used, it's on all the time. Looks like it's a latching pushbutton.

I suspect the switch's latch mechanism's plastic parts have degraded, and it released and won't latch anymore. It's a 10cent part but this also offers more opportunity to the hacking part of the plan.

I could just solder-bridge the switch and be done with a 5min repair. The soldering iron is already hot in anticipation. #notAEuphemism

5/?

…But that hacking opportunity still seems appealing.

I think I'll proceed until it potentially mushrooms into a big thing that will consume my weekend.

Plus I haven't even disassembled anything. Where's the fun in that?

6/?

Coffee refreshed and clk radio opened up.

It's a funny mix of 60s and 90s technology.

Single-sided phenolic circuit board, with rough snap-off daughter card chunks. Wire jumpers for 2nd side routing.

A mix of labour-intensive thru-hole components, but a smattering of 1206 surface mount Rs and Cs. A few repair jumpers. Barnacles are cheaper than a new board fab.

At least the radio tuner isn't waxed string.

7/?

Cheap gear analysis is always the most informative - but while there's lots of cost reduction here, there are some obvious costs and complexities that could easily be cut still - ie so many screws, and all slightly different when they don't need to be.

But hey, I'm not redesigning, I'm hacking.

Y'know I used to run a big corp consumer-product tear-down project for a few years. That was rather fun - though it was focussed on much tinier items than this.

Anyways soldering iron calls.

8/?

I see they went a long way since this unit was discontinued and sold off for $9.

This is what comes up when you search for it now.

Sounds like there isn't a separate clock inside the projector anymore? Anyone got one?

9/?

This is probably the "don't try this at home" part… but aw, what the heck, get your saw out and have at it.

10/?

Back to this! I cut off the salient mounting points for the swivel projector, so I can measure the bits and 3Dprint a new base.

But for now I wired up the projector independent of the big clock radio body and duplicated its biasing reqmts and it seems happy.

The LED needs about 20mA at 2V, but the clock needs less than two microAmps at 1.5V.

11/?

Just need to track down a suitable power supply. A battery won't last very long.

Although I might power the clock from a battery, that'd be viable.

More this weekend! Will add on here. :)

12/?

Further to last Friday's hacking of the old projection clock radio.

I was really missing the time on the corner of the ceiling during the night, so last weekend I took a minute to make a little battery connector board to put the projector back into service until I could 3Dprint a housing and rig up a power supply.

That allowed me to discard the entire body of the clock-radio itself into the e-waste pile.

13/?

Earlier this week I used #Blender to rough out a housing design for the projector, allowing it to pivot and with a cavity to hold a power-sup board.

The projector needs both 1.25V and 2.0V, for which I was going to build a circuit. I realized tho' that for the 1.25V and 1.5µA power requirement of the clock chip I could keep the AA battery which would last for years.

It would also be a power-failure backup, so I left the battery in place for that part.

14/?

I did make a little LM317 regulator circuit while my 3Dprint of the housing was working.

I scavenged a wall 6V adapter and its matching weirdo connector from a long-obsolete Jabra headset.

It provides a nice easy 2V and 20mA for the projection LED.

15/?

Earlier this week then, I had a usable 3dprint (with a few soldering-iron edits) and I made all the parts fit.

Hot glue is our friend.

16/?

So all the parts fit together and we were again able to see that gentle, dim, red glow of the time in the corner of the ceiling again these past few nights.

The regulator circuit seems happy, nothing getting warm to melt my 3Dprinted case. Seems like a success.

Should be good for a few more years.

17/17

#hardwareHacking #ReduceReuseRecycle #electronics #3Dprinting

@ottaross I thought about getting one, but ended up getting a big display that can be seen in any light and dims at night.

@dan613 I found that it's difficult to get a device that will go dim enough, as we like a really super-dark room for good sleep.

I find myself in hotel rooms with tape trying to cover up all the LEDs and such. lol

@ottaross

What about replacing the red LED with one of those fancy color changing RGB things?

@GustavinoBevilacqua I have lots of those around, might be fun to have a colour changing button.

Oh I'd have to alter the assembly though, as the multicolour ones I have are different packages.

Maybe for a next iteration!

@ottaross @GustavinoBevilacqua Red is best for night vision, though. It doesn't interfere with the spectrum the rods are sensitive to (green/blue).
@ottaross Red Shirt Jeff, is that you? 😁 @geerlingguy

@ottaross

What about a sort of ticker to read toots on the ceiling?

@GustavinoBevilacqua that would be a fun addition, but would probably keep me awake lol.

I'll have to look at the lens arrangement to learn from it for future projects tho.

@ottaross That appears to be the same clock model as the one in our Langley, BC hotel room!
@srgower Neat - any buttons on the back of the swivel projector piece, do you recall?
@ottaross I can't remember if the button was on the swivel piece or the base, but my memeroy is suggesting it was on the swivel piece.
@ottaross I have that magnasonic! The UI for resetting the time was so painful I replaced it. Let me know if you need it for parts!
@philw ah neat. Yeah they had a good idea but I'm not sure about the execution.
@ottaross So when can we expect you to have your hamradio licence eh? 🙂
@va3db lol - I used to look through the ham radio book as a teenager, thinking it was all unfathomable. I guess you prob don't need to build your own gear anymore.