You can find my #FreeCAD file on #Thingyverse and here there are some real-world photos of the part.

https://www.thingiverse.com/thing:6964410

Huh? I've had a model published at #thingyverse - and now it's gone. I still can see it in my statistics, but if I click on it it says:

"It looks like this Thing has been removed or has never existed in Thingiverse."

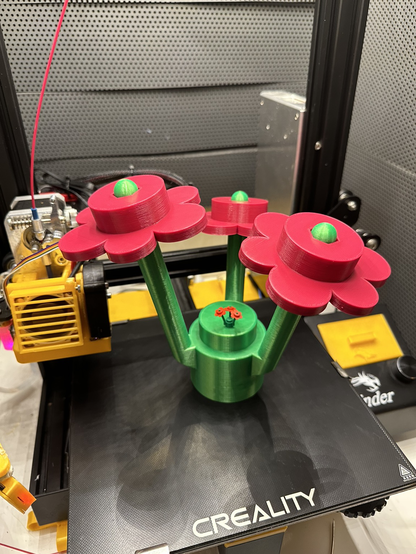
Has anybody ever experienced the removal of a thing on thingyverse? In this case it was kind of a remix, I took the inspiration from a print I had in my hand, then rebuilt it totally from scratch AND labeled it as a remix from the original model I found on thingyverse...

Angenommen, ich hätte auf #printables oder #Thingyverse einen Kabelroller von irgendwem heruntergeladen und mein Netzkabel sieht nach einer Weile so aus wie unten. In Zukunft haftet dafür die jeweilige Platform, also zum Beispiel #Prusa.

#eu #produkthaftung #3DPrinting

Und Platformen wie #thingyverse und #printables gehen mit Sicherheit einer Geschäftstätigkeit nach. Wie wird wohl #Prusa sicherstellen, dass keines der Modelle auf https://printables.com Schaden anrichten kann? Kann man sicherlich gerichtlich in jedem Einzelfall im Land des Klägers klären.
Das wird vermutlich docker auch mit jedem docker-container in ihrem Repo tun müssen.

#EU #Direktive #Produkthaftung #3Dprinting

3D models database | Printables.com

Printables.com

@j usually people put that stuff on the same pages like #Thingyverse or #Tindie...

After all, whether it's laser-cut, milled, stamped or 3D printed is kinda irrelevant for the core functionality of it amd the choice between the methods usually comes down to price, avaialability, requirements and aesthetics...

In fact, I've seen some hot swap drive caddies for regular 5,25" slots that can hold 8x2,5" SSDs and 19" cases with 3x 5,25" bays at the front.

But needless to say I do appreciate that!

Muss man die gießen? 😳 #lego #3ddruck #thingyverse #CrealityEnder3Pro
Beer Crate battery holder AA/AAA/9V/18650 Stackable by Marzochi

Battery holder in shape of beer crates, AA and AAA optionAA holds up to 12 batteriesAAA holds up to 20 batteries-External dimension 59L x 55W x 52H-Nozzle 0.4-Resolution 0.28 ( it can be lower for better quality, but I did not find necessary)-No supports needed-Build plate adhesion: skit ( if your printer adhesion isn't good I would suggest print it with Raft on, due to the triangular holes in the bottom )-Biggest bridge is 25 mm long-Infill doesn't affect-Shell : 3 wallsNo post printing needed for the basic version, if you go with the stackable the bottom rim has to be super glued in place ( may have strings if your retractions isn't perfect set up but will work anyway)Hope you enjoy itThis project disappeared from Thingiverse and I had a backup *The difference for the V2 version is the bottom "x" more resistant, making the bottom more resistant, don't forget that to make the pieces stackable you need to paste "beer_crate_stackable_rim.stl" at the bottom of the chosen model.Thanks Todd Quatier! Gratitude!

Thingiverse

Some #3D Prototyping: Caliper Depth Base / Depth Measuring Bridge for 6" / 150mm Mitutoyo Caliper by Spambouncer - Thingiverse
https://www.thingiverse.com/thing:3662726

#things #digital_design #physical_objects #rapid_prototyping #3D_objects #3D_printing #reprap #fabrication #laser_cutter #laser #thingaverse #thingyverse

Caliper Depth Base / Depth Measuring Bridge for 6" / 150mm Mitutoyo Caliper by Spambouncer

I needed a Depth Measuring Bridge for my Mitutoyo Digimatic Absolute AOS Caliper. (You can read my - german - Review of this Caliper here). Because I needed it today (when else?), I "desingned" one from scratch. OK. The price was another argument for doing it instead of buying an original Part. :-/ I have also found that the measuring foot can also be used for other calipers, for example from Tesa, Blankenhorn or even these so-called $ 1.50 Things from aliexpress, ebay or Amazon. The caliper must not be wider than 16mm. So, here ist is, printed with my AnyCubic i3 MEGA, with Filament from Goedis: Black PLA. I suggest 20% infill, 0.15 mm Height of Layer, 1,06% Flow, 215° Nozzle, 60° Heatbed and 60% Cooling. (I use an Titan Extruder and Sunon Fans, you'll try it with your Standard PLA Settings). Also, I refer to add supports for the recess. See Screenshots. You'll need a M4x8mm Screw to counter the Caliper in the Measuring Bridge. But do this with feeling and very carefully, because the part could bend and then the measurement accuracy is no longer given. In the worst case, you can also damage the flanks of your calliper! I suggest also to print the measuring foot upright, that is, the measuring surface printed on the printing bed. This is most likely to give a good surface at the crucial points and a right angle. It should be clear that this part is only as good as your printer is calibrated. For serious purposes, I recommend buying the original. But for sensitive parts for example, that thing is just right. I recommend following sets of screws, so you have enough of them for the rest of the Week ;-) : 460 Countersunk Screws and 1080 Cylinder Head Screws. If you need a left-handed version, just mirror it. But you will know that yourself. ;-) 31.05.: Added Version with Threads on both Sides, so you can use the thing as left- or right handed Added a 10mm higher Version with two more screw holes. So the caliper sits bombproof. Some of the links are affilate. If you buy something, I get a small commission. The price you pay is the same. Thank you.