Hario Mugen Dripper Review

Share
Article

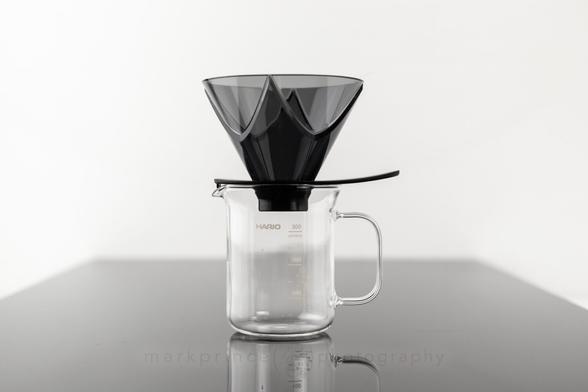
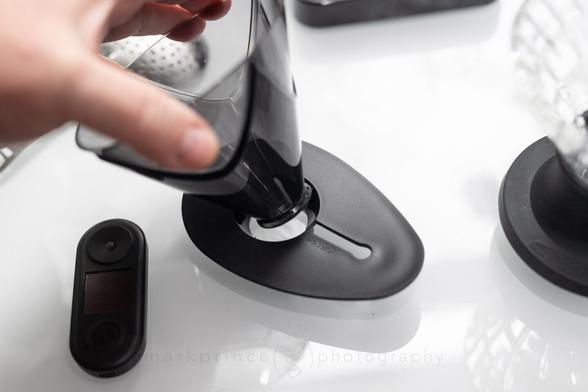
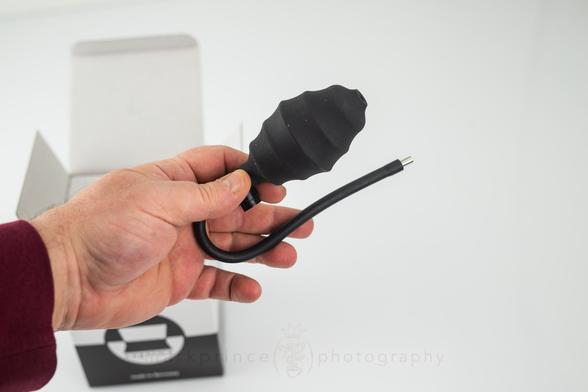
The Hario Mugen Ready to Go
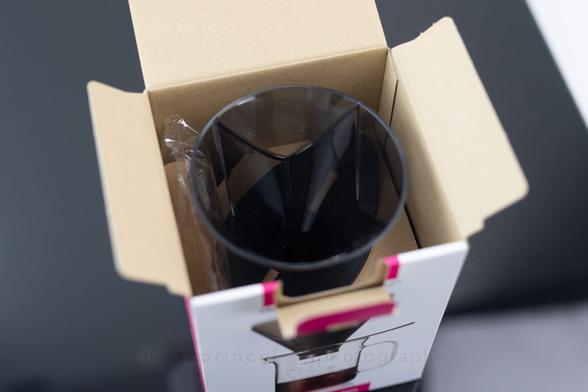
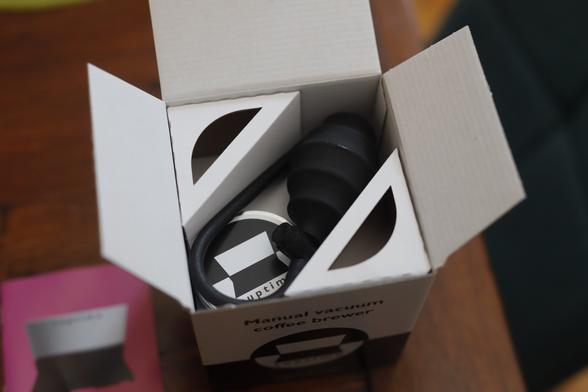

Box Opened


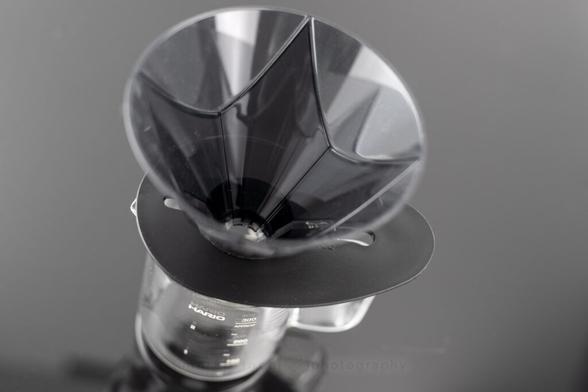
Inside the Mugen Dripper
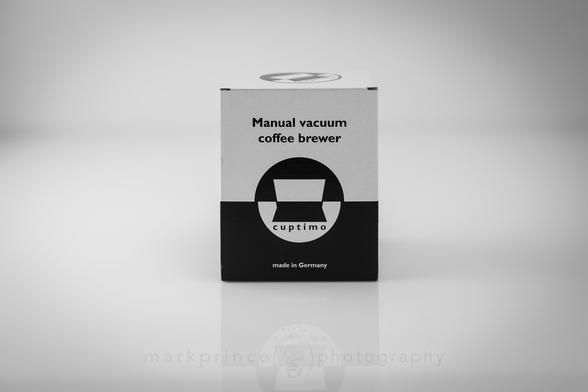
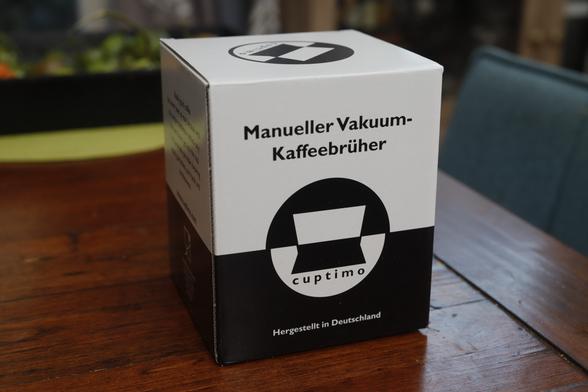

Hario Mugen Box


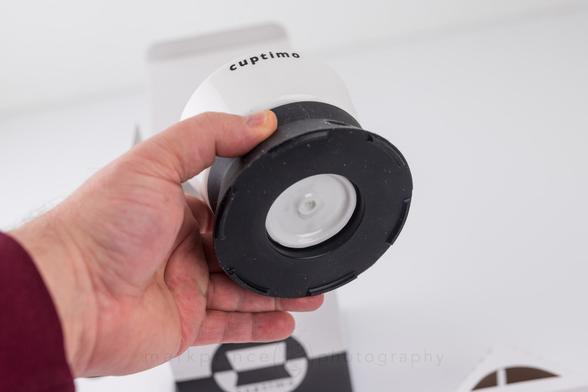
Logo Detail on Mugen Stand


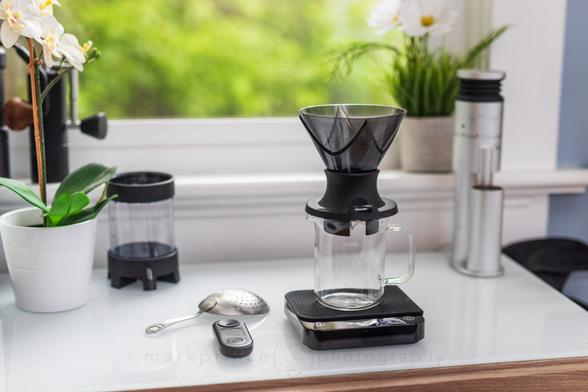
Hario Mugen Ready to Brew


Hario Mugen Brewing


Hario Mugen Brewing


Hario Mugen and Beaker Brewing
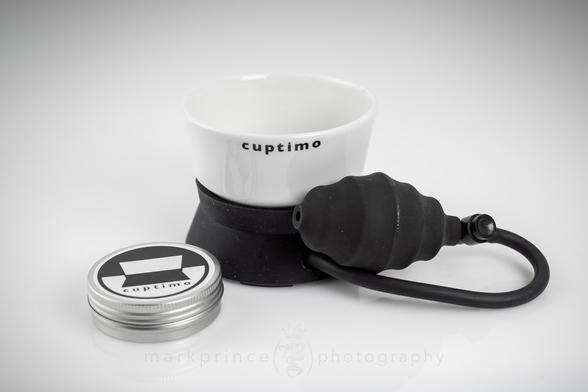

All the Parts


Cone of Spent Coffee in a Hario Mugen
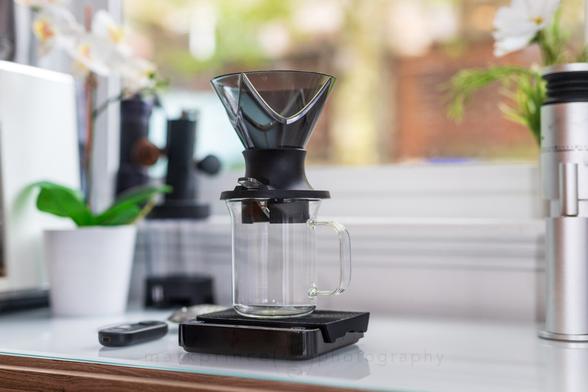
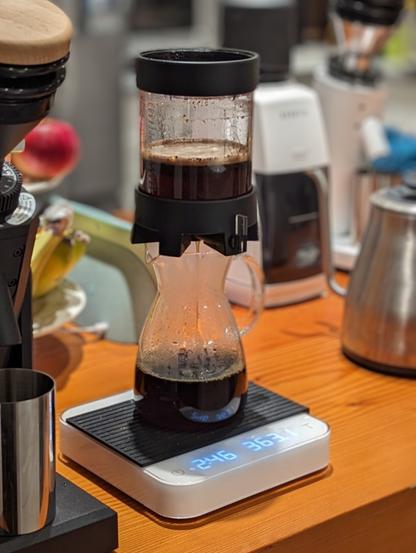

Full Brewer


The Mugen unboxed


Slurry in the Mugen at start of brew

Background

At first glance, almost everyone thinks this is a variant of Hario’s V60 system. I made the mistake myself when first spotting it on Hario’s social media channels. But it is a different beast

The Mugen has mostly flat sides, so the Hario V60 paper will adhere to them when wet, limiting the flow through of coffee to the bottom of the cone. This is exactly how the Chemex works too, and that makes these two brewers a rather unique breed. Almost all pour over systems and designs, from Kalita to Melitta, feature ribs or accordion paper filters to promote sidewall flow and extraction of brewed coffee. Some brewing water also manages to bypass the full coffee bed in those brewers.

The Mugen (and the Chemex) don’t have this brewing style. Though Hario hasn’t specifically stated this, the Mugen also adheres (heh heh) a bit more to the current trend of no-bypass brewing.

What’s particularly interesting to me is this: Hario designed the Mugen for a more hands off, easy brewing style that doesn’t require a lot of hands on work. I have seen some folks online complicate up the brewing process quite a bit with the brewer, trying to do a typical V60 brew on it. That misses the mark a bit. I have not seen many talk about the no-bypass style this dripper can offer.

I have a lot more to say about the no-bypass elements of this brewer, and also modifying it somewhat by inserting it into a Hario Switch device to turn it entirely into an immersion, no-bypass brewer similar in usage and results to a NextLevel Pulsar. That is going to be its own article, based in our How To section, later this year.

For this review, we’re reviewing the Hario Mugen based on the way Hario designed it and how they say it should be used. That doesn’t mean you shouldn’t experiment with the brewer if you want to. It just means that Hario wanted to produce a bulletproof, “hands off” brewer, and we’re going to test it that way to see if they hit the mark.

Out of the Box

The Mugen from Hario looks like a stylized V60, until you realise there’s no ribs inside. There are small air channels in the diamond pattern inside the brewer (a good thing) but no ribs. This puts the brewer in the Chemex territory, as a filter paper brewer that does all its extraction through the bottom of the cone, not the sides.

Mugen Interior

There’s no ribs inside the Mugen, just very small air channels to help maintain coffee flow through the bottom of the filter.

Hario sells the Mugen in white ceramic as well as clear and and dark tinted polycarbonate resins. The ceramic model should retain more heat during the brew process, but I find Hario’s resin also work pretty well at retaining heat during a brew.

The funnel opening on the Mugen is a bit smaller than the Hario V60 models, which feature their ribs right to the funnel open, presenting a larger overall exit space. The diameter of the opening on the Mugen is only 1-2mm smaller than the V60s I own, but it’s a solid round hole with super tiny airflow notches, whereas V60s have the exposed rib ends.

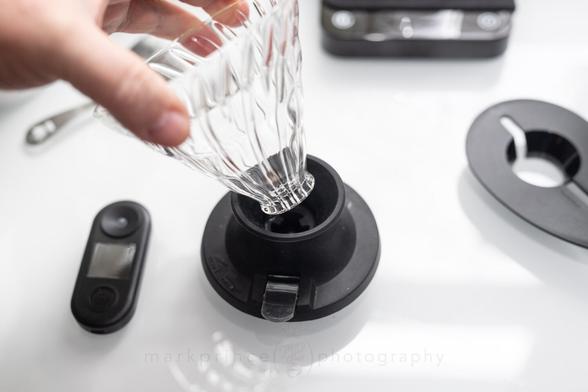
The bottom plate of the Mugen is a new design from Hario as well, designed to be easy to handle and fit a wider variety of carafes, mugs and cups. It has a lip at the rounded end to latch onto the edge of the cup or carafe you’re brewing into. The dark resin model we have for testing is very lightweight, and very easy to clean.


The Hario Mugen Box. We bought the model with the included carafe.

Glad to see Hario is going easy on the packing plastic bags. Kudos

Because we bought the kit with the beaker, it included extra paper filters as well.

Not too shabby – for under $25, you get a complete brewer with filters, filter holder, and brewing carafe.

The Hario Mugen and Hario Beaker

The logo detail on the Mugen’s stand / holder.

The Hario Mugen with the unbleached paper filters (what it ships with) inside.

Here’s how the filter looks when wet – it adheres to the sides, effectively creating a no-bypass brewer.

Using the

Hario is specific about the Mugen’s design ethos: it can produce a great cup of coffee without the need to do a bloom phase, or staged pours, or even stirs. They advise adding your coffee, pouring all (or most) of your brewing water in right away, and letting the brewer do its thing over a 2 minute period.

Hario’s Brand Ambassador, Tetsu Kasuya (the 2016 World Brewers Cup Champion, so he knows what he’s talking about) explains the technique and reasons for the designs.

https://youtu.be/ATgeSolqXSU

Hario’s base formula for the Mugen is to use a finer grind than V60 (not much) and around 25g coffee for 300g of brewing water used. We followed that ratio, which is only slightly off the CoffeeGeek Ratio of 8g/100g for pour over (24g/300ml).

Also, if you were ever driven nuts by the meticulous super timed pours, stirs, pauses you see V60 aficionados do, the Mugen might be just right for you, because Hario advise pouring all your brewing water (yep, all 300ml) in about 15 seconds, aggressively covering all the grounds and creating agitation, then… just walk away and let the brewer drain out over the next one and half minutes. If you don’t see it fully drained out 90 seconds after you ended your pour, you ground the coffee too fine. If it drains in less than 90 seconds, you ground the coffee too coarse. Pretty straightforward.

It did take several tries to get our grinder dialed into Kasuya’s recommended 90 second draw down time; we had to go coarser on the grind, dialing in a bit more coarser than I even like to use with a V60. Once I got there the finished cup was… okay.


Prewet (wash) the paper filter so it adheres to the side of the Mugen dripper (and washes out some of the paper taste)

Pour fast – all 300ml water – within 15-20 seconds, using the speed and flow to create all the initial agitation

No need for a scale – just fill to within 5mm of the lip of the Mugen within 15 seconds, and that’s roughly 300ml poured.

When the brew is done, you should see a cone shape of spent coffee inside the dripper.

Based on the video, Kasuya looks to be using a darker roast than what we use, so my next step was to alter the grind to add 15, then 30 seconds to the draw down time, keeping the water amount and dose the same.

I found going to a 1:45 to 2:00 draw down time worked best for the coffee I was using (Social Coffee’s Volcan Azul from Costa Rica) Total brew time is up to 2:15, allowing for the 15 second pour. This got me curious – how could my timing tests be better than what a World Brewing Champion does? So I got some of Social’s darkest roast (Farmer’s Collective) and gave it a try. Sure enough, brewing it using Kasuya’s recommendation delivered the best overall cup.

So long story short – if you’re brewing lighter roast coffees, extend the contact / drawdown time by adjusting your grind, for the best results.

Lastly, I discovered you don’t really need a scale with this brewer if you’re following Hario’s recommended use. As long as you’re pouring rapidly, pouring all your brewing water into the Mugen within 15 seconds, just stop pouring once you’re about 3-4mm from the rim of it. That is roughly 300ml of water. You can skip a scale for the ground coffee too, if you want: just grind out 3.5 tablespoons (flat) of coffee,  that’s roughly 25g.
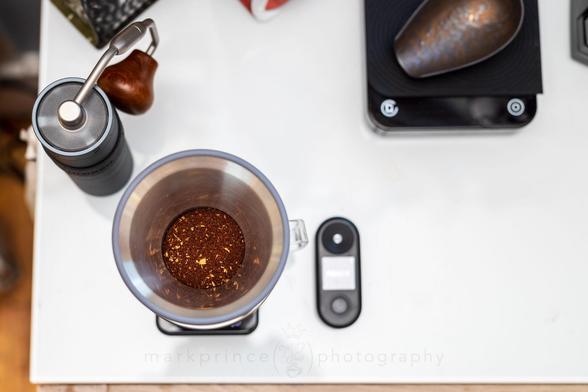
The Ideal Grind

It took a bit to get the grinds right, but this is what they look like for a 2 minute drawdown with the Mugen.

Brewing with the Hario Mugen

After a lot of play and working with Hario’s method for brewing with the Mugen, we came up with a method that works well for lighter roast coffees. 

25 grams of coffee. 300ml brewing water. 15 second pour. 2 minute drawdown. In this demonstration, we’re using Social Coffee’s Volcan Azul from Costa Rica.

https://youtu.be/z28H9nAyFVM

We put the Haro Mugen up against the Hario V60, using our standard technique (altering the water amount used and grind, but brewing with 300ml water), and the Chemex 6 cup, brewing with Kasuya’s Mugen technique, using the same coffee, same grind, and same water volume.

In short, the V60 produced the best cup. But it wasn’t a clear winner. It lacked a bit of sweetness that the Mugan brew had, but gained a lot in more flavour nuance to the cup. It also required a lot more hands on effort, and if my goal is the best pour over I can produce, sure, the V60 method is the clear choice. But if I want a really good cup of coffee without thinking about it too much (especially when waking up) the Mugen brew got the job done.

The Chemex was interesting. It comes down to the paper, but the draw down took a lot longer with the Chemex: about 2:45 in total (plus 15 seconds to pour). I did saturate the filter paper first with boiling water. The Chemex brew had more body and depth to it, but also had a bit more of the astringent flavours that come from over extraction. It all has to do with the extra contact time. If I ground the coffee coarser like I usually do for a Chemex, I’m guessing the cup quality would improve as the draw down time would be shorter.

Another test that we didn’t do, but would be interesting is matching up the Mugen to the variety of no-bypass methods out there for other brewers. We’ll save that analysis for a future feature on no-bypass brewing.

Fast, Capable, Good Coffee

The Mugen is not the best drip coffee maker out there, but it doesn’t require a lot of hands on work, once you have the grind dialed in. Produced better results than the Chemex, but the V60 beat it.

Conclusion

If you’re in Japan, a Mugen drip brewer costs you just $5 (688 yen). The ceramic one is $11 (1500 yen). That’s a steal. Especially considering the cheapest Chemex 6 cup is just shy of $50 US 

In the US, the Hario Mugen is $14 for the resin model (or less – as I type this, it is $10!), and $22 for the ceramic. Still excellent value, and worth the price if only to experiment with it.

The best thing about the Mugen is the ease of use to deliver a pretty good cup of coffee. A practiced V60 method will almost always beat it for cup quality but you have to work at it to get there. If you just try using the Mugen brew method with a V60, you’re going to not be happy with the results.

Hario Mugen, Ready to Go

Hario’s interesting take on the Chemex brewing method is a decent performer.

Hario clearly intends the Mugen to be a foolproof, set it and forget it brewing device, and using their prescribed method offers good results. The biggest alteration might be the flow through timing: go a bit longer for lighter roasts (adjust you grind coarseness to do this adjustment) or a bit shorter for darker roasts. Otherwise, stick to 25g coffee used, 300ml water used, and bob’s your uncle.

Of course, it’s your coffee, so experiment as much as you want! But out of the gate, using the Mugen in Hario’s simplified, hands off way, it produces a pretty good cup of coffee!

#chemex #hario #HarioMugen #nobypass #pourOver #review

Let's talk about the brewer graveyard. You know, that cupboard where expensive, well-intentioned coffee gear goes to be forgotten. For some of us, the Espro Bloom is sitting right there in the back.

It was a brewer with a real identity crisis. The paper filters were expensive and hard to find, and brewing without them was a masterclass in frustration. You’d either get a fast, sour cup or a choked, bitter stall. Many of us just gave up. After spending way too much time with this thing for CoffeeGeek, we realized the problem wasn't the brewer, it was us.

The big secret is to stop treating it like a pour-over. It's a unique no-bypass brewer that demands a smaller dose and a coarser grind. Once you work with its fussy design instead of against it, the results are stunningly clean and consistent. It’s so sensitive, in fact, that we now use it as a benchmark for testing new grinders.

We’re putting the finishing touches on a definitive guide that covers the whole story: the history, the step-by-step recipe (with grinder settings), and the deep-dive theory. If you have one of these brewers, get ready to rescue it. The coffee it can make is absolutely worth it.

#Coffee #SpecialtyCoffee #CoffeeBrewing #HowTo #EsproBloom #NoBypass #BrewingGuide

At the SCA trade show this year, there was a little sumthin sumthin towards the back of Hario’s booth that many folks may have missed (Jay Caragay, however, did not miss it!). It is the new variant of the Hario V60, called the Hario V60 Suiren Coffee Dripper.

The Hario Suiren, in a fully customized version, with black and green ribs.

The Suiren is not available officially yet in North America, but guess what: you can order one, with zero shipping charges (it’s coming from Japan), direct from the US Amazon site, right now for under $24! And you can also order a set of six spare ribs in one of six different colours (eight will eventually be available) to really customize your brewer. I don’t know how long this availability will last, but if you want one, you can order one, today.

What Exactly Is It?

The Hario Suiren is an open-air kinda pour over brewer, based on the same rib structure, and angles that the original V60 has inside all the filter holders in that series. But something’s missing: any surface area between those ribs! Its basically the polar opposite of a no-bypass brewer. 

Now this kind of brewer – one that exposes the main filtering material to full airflow around it – isn’t new. Cloth pourover systems always worked this way, and over the years we’ve been sent various “out in the open” filter holders for Melitta cone filters, flat bottom filter papers, and even aftermarket designs for the V60 filter papers.

The V60 paper filters kind of float in the brewer, held in place by the ribs.

What does make this new and interesting is just how beautiful Hario’s execution is of this brewing device. They are selling the Suiren in several variants, including basic black, basic white, and single colours. They are also selling it in “limited edition” mixed colours. And the give even more creativity, you can buy six coloured ribs to really customize your Suiren and make it entirely your own.

The Suiren ships in a flat-pack box, IKEA style, because you have to assemble it when it arrives. Inside the box is the filter holder / carafe rest, the filter’s main hub, and two boxes each containing six removable ribs. Click the ribs into the slots in the circular hub (12 ribs per brewer), and then click the assembled ribs and hub into the filter holder. 

The box the Suiren comes in; next to it are how the spare ribs are shipped.

The material is all plastic, and appears at first glance to be a different type of plastic than what Hario is using in their plastic V60s. It seems a bit more pliable, “softer” if that’s a thing. Don’t misconstrue though – the plastics are very high quality and once assembled the brewer is very sturdy.

We bought three brewers and two sets of spare ribs, direct from Hario Japan. One set featured alternating black and white ribs. The second set had three colours, in four ribs: red, white and blue (perfect for the 4th of July!). The third set was just black ribs, and also the cheapest option, costing about $6 less than the multi colour versions. We also bought green and purple rib sets.

That’s another thing that makes this brewer so fantastic: you can modify it visually to really make it your own. Choose the rib colours that suit your mood, your work area, or your kitchen. I firmly believe the more you feel your coffee device is meant specifically for you, the more you’ll get out of it.

Green’s kinda my colour of choice for most of my life, so this mix of green and black speaks to me.

Brewing with the Suiren

We’ve experimented a lot with open air filter designs in the past, and something always seemed to happen that went against expectations and assumptions: you think the coffee would brew faster with more flow through, but that isn’t the case; if anything, the brews slow down a tad compared to normal, enclosed (and ribbed) filter holders. It took me a long time to figure out why this was happening. Eventually I figured it out via experiments we did in the CoffeeGeek Lab back in 2011.

But it was time to see if the Suiren did the same thing.

Pre-wetting the filter, note how it adheres to all the ribs very well. No worries about any sags or dips in the filter paper when brewing.

And sure enough, the brew times with the Suiren, head to head with a standard V60 brew, were just a tad slower to finish. Magic? Naw. There’s a cause. But first, here’s what I did for both brews.

I set up my first brews with the Suiren side by side with #2 V60 ceramic brewer. Same coffee, same dose, same grind. Same filter paper. Same prewet procedure. Both on the scale, both geting a bloom pour of 2x the coffee volume (21g brewed, 42g bloom pour). Pause 30 seconds. Then pour water at around 2-3g a second to 150g total water weight. Pause 30 seconds. Finish to 300g water weight. 

Pouring water during the second brew phase with the Suiren.

Both pours were completed at around 3:10 mark. The standard V60 finished brewing by 4:10. The Suiren? 4:15. Weird, right?

Temperature is the cause. The open air concept of the Suiren does something a closed porcelain or plastic V60 does less of: it allows heat to escape the brewing slurry faster. Things cool down quicker in the slurry. The finished brew temperature in the cup is lower, with the Suiren. That’s what can slow down the brew and extraction: the hotter the water is, the more efficient it’s going to travel through ground coffee.

You can see this visually with the Suiren: moisture collects on the ribs, showing the dissipation of heat from the filter paper and brewing slurry.

See the collecting moisture on the ribs? That’s an indicator of heat escaping: the slurry is cooling down faster, thus slowing down the extraction.

Measuring both brews after with a DiFluid R2 refractometer, they were almost identical, at around 1.32-1.34%

Regardless of all this, the Suiren was producing cups that seemed a bit more “mellow” than the standard V60; a bit softer, but by no means sour or lacking in body or depth. If I had to come up with one word, it would be “less sharp” (I guess that’s two words). And for my palate, that’s a good thing. 

Basically, if you are a fan of super bright coffees, you might not like this brewer. Also, I was able to visualize the bypass happening out of the sides of the paper filter (though it proved impossible to photograph); you definitely want to use a 14:1 ratio with this brewer to get a properly extracted cup. If your pursuit is getting 300ml of brew from 15g of ground coffee, this brewer ain’t gonna do it. Go no-bypass. 

Brewing coffee with the Suiren produces a nice, mellow, balanced and rich cup.

Sure is Pretty

Look: I appreciate beautiful design engineering in coffee (to the point where I’m pretty critical of “engineer-designed UI”) and wow, did Hario ever hit a home run here. For $23 or less, this is a strikingly beautiful brewer. And you can completely customize it! 

My partner in life is pretty blasé about all things coffee and espresso, given our house is full of the stuff. But she loves the look of the Hario Suiren so much, she actually posted a photo to her own Instagram account, which is saying something: I think the last time she posted something coffee related was half a decade ago!

When you wet the paper filter, it adheres in a very artistic way to the ribs.

Honestly, for $23 or less, this is a no brainer. Who knows how much it will be once the middlemen and importers start stocking it over here in Canada and the USA. I’d probably pay as much as $35 or more for this, given its unique look and ability to deliver a more mellow, less sharp cup of coffee. 

But for now, you can buy this via Amazon in the US, with it being shipped direct from Japan. There’s only one colour choice available at the moment (black), but you can also order sets of the ribs to customize your own.

And if you made it this far, here’s a gallery of some other photos I took of this pretty brewer.

https://coffeegeek.com/blog/new-products/hario-suiren-first-look-review/

#hario #harioSuiren #noBypass #pourover #suiren

TAKE MY MONEY! - Hario Suiren - SCA Expo 2024

YouTube

Hario Mugen Switch Brewer Hack

Hario Mugen / Switch Brewer Hack

This guide details a dead-simple hardware hack: mating the Hario Switch immersion base with the generic Hario Mugen dripper. We’ll walk you through the setup and then dive into a specific recipe designed to squeeze the best performance out of this hybrid device. Consider this recipe a baseline—once you nail this, I encourage you to experiment like crazy.

For the data-minded, here is the breakdown: we are dosing 15g of coffee ground quite coarse — think standard French Press — and brewing with 300ml of water. The total brew time clocks in around 4 minutes. You might look at that 1:20 ratio and expect a watery cup, but trust the process: the immersion mechanics yield a surprisingly robust and heavy-bodied coffee.

Time Needed: 5 minutes

Equipment Cost $ 75

Necessary Supplies

Fresh Roasted Coffee
Filtered Water
Hario V60 Paper Filters

Necessary Tools

Hario Switch Brewer ($25)
Hario Mugen Dripper ($15)
Coffee Scale ($15)
Pour Over Kettle (stovetop: $20)
A Good Grinder (price not included)

Hack and Recipe Steps

Disassemble the Switch Brewer

Once you get both brewing devices, pop the glass V60 filter holder out of the Switch body by wiggling it back and forth as you pull it out. It’s in tight, but should be easy to remove.

Disassemble the Mugen Brewer

Remove the Mugen Dripper (it comes in both plastic and ceramic versions, but the holder it sits in is plastic) from its holder. If you like pop the V60 into that hand held flat wedge the Mugen used to sit in, and use that as your V60 brewer going forward.

Build the Hack

Insert the Mugen Dripper into the Switch base; it should soft-click into place. You’ve just built your new brewer!

Saturate the Paper

Whenever brewing with a “no-bypass” device like the Mugen, it is vitally important to fully saturate the hario #2 paper filters you place in the Mugen, and make sure it is entirely adhering to the side walls with no real air gaps.

We want this to be a full no-bypass brewer once you flip the Switch’s… er, switch to start the flow of brewed coffee.

Once this is done and drained, close the Switch’s toggle.

Measure Your Coffee

Our recipe is a 1:20 ratio, so 15g of coffee for 300ml of water being used. Measure it out, then pop it into your quality grinder. If you’re using a hand grinder, like the 1Zpresso X-Ultra, set it to 1+5 on the dial. It will only take about 20 seconds to grind.

Add Coffee To Filter

Add the ground coffee to the Mugen / Switch brewer, settling it into a nice level surface, or in our case here, with a slight dimple in the middle.


Do Initial Pour

Add your initial half volume of your total brewing water you plan to use. In our case it’s 150ml. Pour quickly, but evenly to fully saturate the grounds.

Stir it Up

Now for some agitation: give the slurry a good but gentle stir for about 3 or 4 seconds. Enough to really saturate everything, and accelerate the extraction process.

Wait 60 Seconds

Wait 60 seconds to let the coffee fully saturate and immerse then open the Switch’s flow valve. 

Begin Next Pour

Begin the next 150ml pour of brewing water, swirling and saturating the entire surface. Go slow, about 5g of water per second. This will get you up to around 3:15-3:30 in the total brewing time.

Let the Brew Complete

Now all that is left to do is to wait for the brew to complete. If you hit the right grind, this method should take around 4 minutes, start to finish. The final draw down can take longer or shorter times depending on your grind.

Measure or Taste the Results

Because we have to, the TDS was measured once the brew was complete: our 1:20 ratio of coffee to water delivers the same TDS levels that a normal 1:15 ratio brew would, in a traditional pour over. And the taste is excellent!

Of course, this is just one recipe. I encourage you to really experiment with this brewer, and you’ll find some further suggestions below.

Further ThoughtsHario Mugen Switch Hack

Several things are at play with this hack, all open to experimentation. I’m also not going to tell you what is worse or better tasting; I will leave that up to your tastebuds.

As I stated in the preamble, the brew recipe prescribed above is quite different from Hedrick’s 10 minute brew in the original video. That shows the range of experimentation you can dive into. Just in case you didn’t click the link above to his video, here it is, in its entirety.

https://www.youtube.com/watch?v=aR3tgBsSwmM

Full / PartialImmersion Brew

With 15-18g of grounds in the chamber, the Mugen can technically accommodate up to 300ml of water without any flow-through. But be warned: that is living dangerously. We are talking surface tension holding back a flood right at the rim. If you have nerves of steel and decide to fill it to the absolute edge before opening the valve, you get a full immersion brew in a single pass.

During testing, our kitchen counter saw a variety of immersion experiments:

  • The “All In”: Full 300ml (with a brief midway stir), followed by a pause before opening the valve.
  • The “Rule of Thirds”: Valve closed for the first 100ml, open for the second 100ml, pause, then pour the final 100ml.
  • The “Half-and-Half”: 150ml in, slight stir, open valve to drain, close valve, and repeat for the second 150ml.
  • The Hybrid: The method described in the step-by-step above.

There was even a slightly unhinged attempt at a 600ml brew using the “Half-and-Half” method, starting with 30g of coffee and filling the Mugen to the brim twice. Because why not?

Ultimately, the method prescribed in the step-by-step wins out. It strikes the best balance between flavor profile and the limited amount of patience available before the caffeine actually kicks in.

If you do choose the full immersion route, keep in mind it is suspiciously easy to over-extract and end up with excessive bitterness or astringency. Lance Hedrick managed to avoid this in his recipes, but he was exercising surgical control over flow and agitation. For the rest of us, the flow-through hybrid method cuts down on that risk significantly; though, to be fair, the occasional successful full immersion brew can be absolutely spectacular.

The Finished Brew

The finished brew has a similar final TDS to a traditional 1:14 ratio pour over (around 1.25-1.30), but used less coffee. The taste is still as full and complete and balanced as ever, with no real astrigency, even though the extraction rate is higher.

More onNo-Bypass Brewing

No-Bypass is a trendy, popular thing right now. In fact, one of my favourite “out of the box” non espresso brewers at the moment is a no-bypass brewer called the NextLevel Pulsar. Ironically, that brewer is basically Lance Hedrick’s “Percolative Immersion” brewer brought to life as a complete brewer, no hack required.

The Pulsar, Hedrick’s hack of the Tricolate and Switch, and our Mugen Switch hack all provide the ability to do a full immersion brew, but they also provide a no-bypass brewer, which maximizes the extraction ratios for your brewed coffee. The Mugen Switch works differently than the Pulsar and Tricolate because in those, the bed of coffee is a flat disk with a relatively wide surface area; in the Mugen, it is cone shaped.

This does have different extraction properties, and the Mugen Switch hack gives you some additional options to play and experiment with. For instance: if you’re finding astringency is a problem because of the extended contact time and early swirling and stirring done in the brewer, change things up: don’t stir at all in the first stages. Only apply a gentle stir once the flow through is ongoing, after you’ve poured all your brewing water. This will have the double effect of a) increasing the drain rate at the end, and b) increases the extraction a bit less because your brewing water isn’t as hot as it was at the start of the brew.

Again, it’s all about experimenting.

Switch, Pulsar and Mugen

The Hario Switch, NextLevel Pulsar, and Hario Mugen, side by side. The right two are no-bypass, the left two are full immersion brewers.

Which HackIs Better?

That is not a decision for this guide to make. If you already own a Switch and a Tricolate, go ahead and try the Hedrick hack. Knock yourself out.

If you hate the idea of DIY hacking and just want a device that does immersion and no-bypass brewing out of the box, buy a Pulsar. Just remember that the Pulsar hurts the wallet a bit more at roughly $60 or higher. The Hario Mugen and Switch combo can cost as little as $40. Plus, that $40 nets you two complete brewers. You get the no-bypass Mugen Switch hybrid and a perfectly usable V60 dripper leftover.

In terms of elegance, the Mugen Switch hack feels vastly superior to the Tricolate version. Even Hedrick admits marrying the Tricolate to the Switch base is a bit rough. It requires some awkward maneuvering to drain the last bit of coffee. There is also a genuine risk of the Tricolate and Switch base separating mid-brew. Nobody wants 93°C water all over the counter. By comparison, the Mugen fits into the Switch holder base like it was born there.

Another factor is the dead space. The Tricolate hack leaves a wash of under-extracted water sitting between the filter holder and the Switch interior. For light or small brews, this dilution matters. Hedrick used a massive dose of coffee (25g to 350ml) which yields a high finished extraction strength. That hides the dilution problem. If you are trying to extract more from less coffee, as in the recipe above, that watery gap could mess up the flavor profile.

Then there is the geometry of the coffee bed itself. The Pulsar and the Tricolate hack both rely on a flat disk of grounds spread over a wide area. The Mugen hack presents an inverted cone where the bed is wide at the top and narrows to a near point at the bottom.

After hundreds of brews on both styles, the preference here leans heavily toward the conical no-bypass profile rather than the flat disk. But taste is subjective. You might find the Pulsar profile hits the spot better.


Why We Are Updating This Guide

It has been about 20 months since we first published this little experiment, and the concept has certainly taken on a life of its own. There’s been extensive threads dissecting the method on Reddit and various Discord servers. I’ve also noticed a sudden wave of YouTube influencers releasing their own videos on a similar setup. It is always heartwarming to see how great ideas just seem to spontaneously occur to so many content creators all at the exact same time (a wink and a nod there).

The chatter has also evolved to include Hario’s latest release, the Neo. Some enthusiasts are now trying to mount that high-bypass, fast-flow dripper onto the Switch base. I have to admit that particular combination leaves me scratching my head.

The Neo is built for speed and air flow, so sticking it on an immersion base feels like buying a Porsche just to sit in rush hour traffic. We will dive deeper into the mechanics of that specific brewer in our upcoming Snapshot Review of the Hario Neo. For now, I’ve refreshed this guide to keep the focus on the Mugen hack because it remains the most logical pairing for this setup.

#2 #hario #HarioMugen #HarioSwitch #howTo #immersionBrewer #noBypass

New updated content at CoffeeGeek: our updated Snapshot Review of the #Hario Mugen Dripper. At under $15 (and currently $10 USD) it's a must buy if you're into pour over coffee (and especially want to experiment with no-bypass brewing).

#nobypass #pourover #hariomugen

cc @coffee

https://coffeegeek.com/reviews/snapshot/hario-mugen-dripper-review/

Hario Mugen Review

Hario's newest drip brewer, the Mugen, promises great coffee with very little barista techniques. Does it deliver? Let's find out.

CoffeeGeek

So I thought the #Cuptimo was a bit of a joke, really. I mean a blood pressure style pump, attached to a pourover #coffee maker?

While it is a bit "hacky", it actually works really, really well. One of the things I dislike about #nobypass coffee brewing is the dwell / draw time. Some devices take up to 10 minutes.

This creates a vacuum in the vessel below, when you choose to create that vacuum. Said vacuum completes the brew quickly.

They're onto something here.

cc @coffee

Interesting little #nobypass brewer arrived on Friday for us to put through some paces. It's kind of a hybrid of a pourover, no-bypass brewer, and a siphon coffee maker.

Yup, that's a squeeze bellows. It actuall creates suction and a vacuum in the vessel you're brewing into (kind of like how a siphon coffee maker creates a vacuum after you remove the heat source).

It's the Cuptimo coffee brewer, out of Germany.

#pourover #siphoncoffee

Ceado, the grinder maker, is going all in on demonstrating the new Ceado Hoop at the Milan HOSTS expo (one of the biggest trade shows for specialty coffee in the world).

Check out their big custom booth for the #nobypass #pourover coffee maker. Pretty impressive.

The #NextLevel Pulsar #nobypass coffee brewer with flow control is rapidly becoming my favourite non-espresso brewer for 2023. It's incredibly versatile, easy to use (no complex pours), and produces a stellar cup with slightly less coffee than a comparable #V60 brew.

Review coming soon on CoffeeGeek. If you want to buy one now, google NextLevel Pulsar (and tell them to get on Mastodon!)