Hario Mugen Switch Brewer Hack
Hario Mugen / Switch Brewer Hack
This guide details a dead-simple hardware hack: mating the Hario Switch immersion base with the generic Hario Mugen dripper. We’ll walk you through the setup and then dive into a specific recipe designed to squeeze the best performance out of this hybrid device. Consider this recipe a baseline—once you nail this, I encourage you to experiment like crazy.
For the data-minded, here is the breakdown: we are dosing 15g of coffee ground quite coarse — think standard French Press — and brewing with 300ml of water. The total brew time clocks in around 4 minutes. You might look at that 1:20 ratio and expect a watery cup, but trust the process: the immersion mechanics yield a surprisingly robust and heavy-bodied coffee.
Time Needed: 5 minutes
Equipment Cost $ 75
Necessary Supplies
Fresh Roasted Coffee
Filtered Water
Hario V60 Paper Filters
Necessary Tools
Hario Switch Brewer ($25)
Hario Mugen Dripper ($15)
Coffee Scale ($15)
Pour Over Kettle (stovetop: $20)
A Good Grinder (price not included)
Hack and Recipe Steps
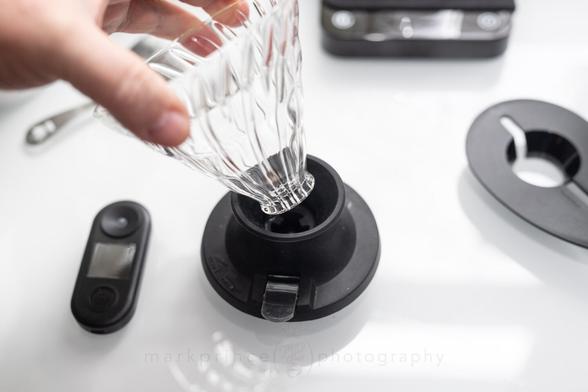
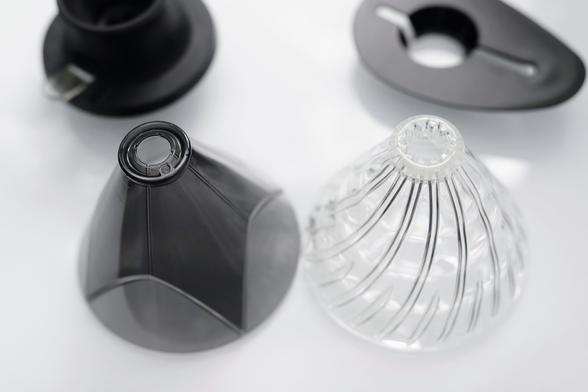
Disassemble the Switch Brewer
Once you get both brewing devices, pop the glass V60 filter holder out of the Switch body by wiggling it back and forth as you pull it out. It’s in tight, but should be easy to remove.
Disassemble the Mugen Brewer
Remove the Mugen Dripper (it comes in both plastic and ceramic versions, but the holder it sits in is plastic) from its holder. If you like pop the V60 into that hand held flat wedge the Mugen used to sit in, and use that as your V60 brewer going forward.
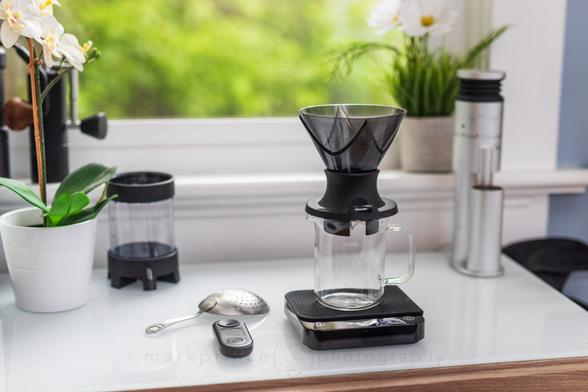
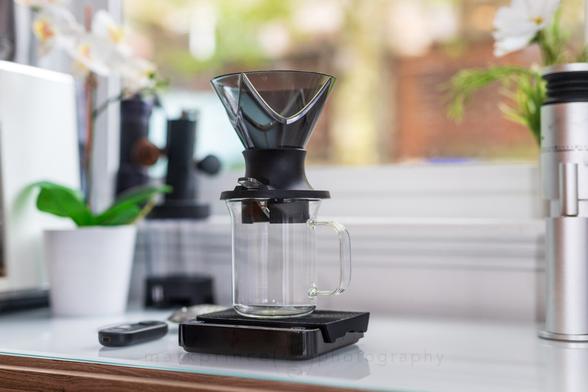
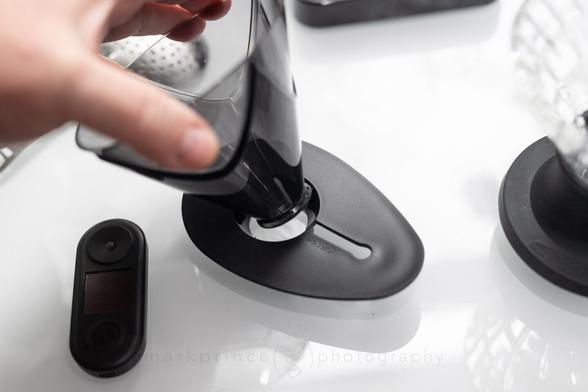
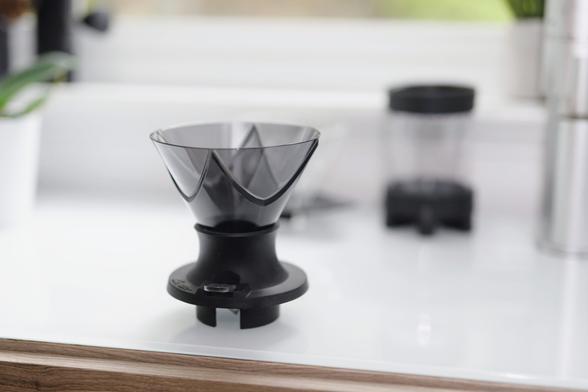
Build the Hack
Insert the Mugen Dripper into the Switch base; it should soft-click into place. You’ve just built your new brewer!
Saturate the Paper
Whenever brewing with a “no-bypass” device like the Mugen, it is vitally important to fully saturate the hario #2 paper filters you place in the Mugen, and make sure it is entirely adhering to the side walls with no real air gaps.
We want this to be a full no-bypass brewer once you flip the Switch’s… er, switch to start the flow of brewed coffee.
Once this is done and drained, close the Switch’s toggle.
Measure Your Coffee
Our recipe is a 1:20 ratio, so 15g of coffee for 300ml of water being used. Measure it out, then pop it into your quality grinder. If you’re using a hand grinder, like the 1Zpresso X-Ultra, set it to 1+5 on the dial. It will only take about 20 seconds to grind.
Add Coffee To Filter
Add the ground coffee to the Mugen / Switch brewer, settling it into a nice level surface, or in our case here, with a slight dimple in the middle.
Do Initial Pour
Add your initial half volume of your total brewing water you plan to use. In our case it’s 150ml. Pour quickly, but evenly to fully saturate the grounds.
Stir it Up
Now for some agitation: give the slurry a good but gentle stir for about 3 or 4 seconds. Enough to really saturate everything, and accelerate the extraction process.
Wait 60 Seconds
Wait 60 seconds to let the coffee fully saturate and immerse then open the Switch’s flow valve.
Begin Next Pour
Begin the next 150ml pour of brewing water, swirling and saturating the entire surface. Go slow, about 5g of water per second. This will get you up to around 3:15-3:30 in the total brewing time.
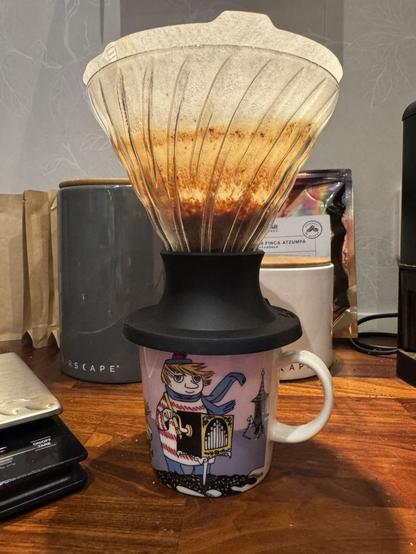
Let the Brew Complete
Now all that is left to do is to wait for the brew to complete. If you hit the right grind, this method should take around 4 minutes, start to finish. The final draw down can take longer or shorter times depending on your grind.
Measure or Taste the Results
Because we have to, the TDS was measured once the brew was complete: our 1:20 ratio of coffee to water delivers the same TDS levels that a normal 1:15 ratio brew would, in a traditional pour over. And the taste is excellent!
Of course, this is just one recipe. I encourage you to really experiment with this brewer, and you’ll find some further suggestions below.
Further ThoughtsHario Mugen Switch Hack
Several things are at play with this hack, all open to experimentation. I’m also not going to tell you what is worse or better tasting; I will leave that up to your tastebuds.
As I stated in the preamble, the brew recipe prescribed above is quite different from Hedrick’s 10 minute brew in the original video. That shows the range of experimentation you can dive into. Just in case you didn’t click the link above to his video, here it is, in its entirety.
https://www.youtube.com/watch?v=aR3tgBsSwmM
Full / PartialImmersion Brew
With 15-18g of grounds in the chamber, the Mugen can technically accommodate up to 300ml of water without any flow-through. But be warned: that is living dangerously. We are talking surface tension holding back a flood right at the rim. If you have nerves of steel and decide to fill it to the absolute edge before opening the valve, you get a full immersion brew in a single pass.
During testing, our kitchen counter saw a variety of immersion experiments:
- The “All In”: Full 300ml (with a brief midway stir), followed by a pause before opening the valve.
- The “Rule of Thirds”: Valve closed for the first 100ml, open for the second 100ml, pause, then pour the final 100ml.
- The “Half-and-Half”: 150ml in, slight stir, open valve to drain, close valve, and repeat for the second 150ml.
- The Hybrid: The method described in the step-by-step above.
There was even a slightly unhinged attempt at a 600ml brew using the “Half-and-Half” method, starting with 30g of coffee and filling the Mugen to the brim twice. Because why not?
Ultimately, the method prescribed in the step-by-step wins out. It strikes the best balance between flavor profile and the limited amount of patience available before the caffeine actually kicks in.
If you do choose the full immersion route, keep in mind it is suspiciously easy to over-extract and end up with excessive bitterness or astringency. Lance Hedrick managed to avoid this in his recipes, but he was exercising surgical control over flow and agitation. For the rest of us, the flow-through hybrid method cuts down on that risk significantly; though, to be fair, the occasional successful full immersion brew can be absolutely spectacular.
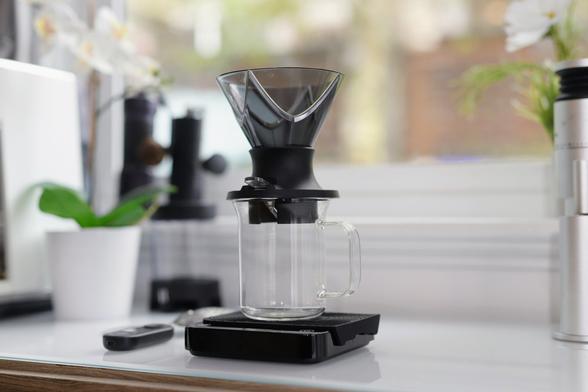
The Finished Brew
The finished brew has a similar final TDS to a traditional 1:14 ratio pour over (around 1.25-1.30), but used less coffee. The taste is still as full and complete and balanced as ever, with no real astrigency, even though the extraction rate is higher.
More onNo-Bypass Brewing
No-Bypass is a trendy, popular thing right now. In fact, one of my favourite “out of the box” non espresso brewers at the moment is a no-bypass brewer called the NextLevel Pulsar. Ironically, that brewer is basically Lance Hedrick’s “Percolative Immersion” brewer brought to life as a complete brewer, no hack required.
The Pulsar, Hedrick’s hack of the Tricolate and Switch, and our Mugen Switch hack all provide the ability to do a full immersion brew, but they also provide a no-bypass brewer, which maximizes the extraction ratios for your brewed coffee. The Mugen Switch works differently than the Pulsar and Tricolate because in those, the bed of coffee is a flat disk with a relatively wide surface area; in the Mugen, it is cone shaped.
This does have different extraction properties, and the Mugen Switch hack gives you some additional options to play and experiment with. For instance: if you’re finding astringency is a problem because of the extended contact time and early swirling and stirring done in the brewer, change things up: don’t stir at all in the first stages. Only apply a gentle stir once the flow through is ongoing, after you’ve poured all your brewing water. This will have the double effect of a) increasing the drain rate at the end, and b) increases the extraction a bit less because your brewing water isn’t as hot as it was at the start of the brew.
Again, it’s all about experimenting.
Switch, Pulsar and Mugen
The Hario Switch, NextLevel Pulsar, and Hario Mugen, side by side. The right two are no-bypass, the left two are full immersion brewers.
Which HackIs Better?
That is not a decision for this guide to make. If you already own a Switch and a Tricolate, go ahead and try the Hedrick hack. Knock yourself out.
If you hate the idea of DIY hacking and just want a device that does immersion and no-bypass brewing out of the box, buy a Pulsar. Just remember that the Pulsar hurts the wallet a bit more at roughly $60 or higher. The Hario Mugen and Switch combo can cost as little as $40. Plus, that $40 nets you two complete brewers. You get the no-bypass Mugen Switch hybrid and a perfectly usable V60 dripper leftover.
In terms of elegance, the Mugen Switch hack feels vastly superior to the Tricolate version. Even Hedrick admits marrying the Tricolate to the Switch base is a bit rough. It requires some awkward maneuvering to drain the last bit of coffee. There is also a genuine risk of the Tricolate and Switch base separating mid-brew. Nobody wants 93°C water all over the counter. By comparison, the Mugen fits into the Switch holder base like it was born there.
Another factor is the dead space. The Tricolate hack leaves a wash of under-extracted water sitting between the filter holder and the Switch interior. For light or small brews, this dilution matters. Hedrick used a massive dose of coffee (25g to 350ml) which yields a high finished extraction strength. That hides the dilution problem. If you are trying to extract more from less coffee, as in the recipe above, that watery gap could mess up the flavor profile.
Then there is the geometry of the coffee bed itself. The Pulsar and the Tricolate hack both rely on a flat disk of grounds spread over a wide area. The Mugen hack presents an inverted cone where the bed is wide at the top and narrows to a near point at the bottom.
After hundreds of brews on both styles, the preference here leans heavily toward the conical no-bypass profile rather than the flat disk. But taste is subjective. You might find the Pulsar profile hits the spot better.
Why We Are Updating This Guide
It has been about 20 months since we first published this little experiment, and the concept has certainly taken on a life of its own. There’s been extensive threads dissecting the method on Reddit and various Discord servers. I’ve also noticed a sudden wave of YouTube influencers releasing their own videos on a similar setup. It is always heartwarming to see how great ideas just seem to spontaneously occur to so many content creators all at the exact same time (a wink and a nod there).
The chatter has also evolved to include Hario’s latest release, the Neo. Some enthusiasts are now trying to mount that high-bypass, fast-flow dripper onto the Switch base. I have to admit that particular combination leaves me scratching my head.
The Neo is built for speed and air flow, so sticking it on an immersion base feels like buying a Porsche just to sit in rush hour traffic. We will dive deeper into the mechanics of that specific brewer in our upcoming Snapshot Review of the Hario Neo. For now, I’ve refreshed this guide to keep the focus on the Mugen hack because it remains the most logical pairing for this setup.
#2 #hario #HarioMugen #HarioSwitch #howTo #immersionBrewer #noBypass