💡 Bang voor flitsfotografie? Die harde schaduwen en overbelichte gezichten zijn verleden tijd! In mijn nieuwste artikel deel ik hoe jij je flitser transformeert van vijand naar creatieve bondgenoot. #flitslicht #lightmodifiers #fotografie https://cameraguru.nl/fotografietips-en-tutorials/flitstechniek-beheersen-voor-scherpe-en-natuurlijke-fotos/
Light Modifiers for Portrait Photos: A Beginner's Guide

A beginners guide to light modifiers used in portrait photography, from the softbox to the grid spot to the scrim.

PetaPixel

Look Beyond the Softbox to Spice Up Your Portrait Lighting

What kind of lighting do you use as a portrait photographer? Softboxes are great and popular, but that also makes them potentially overused and boring. If you want to spice up your portrait lighting, you can look into expanding your toolbox beyond the softbox and into other kinds of lighting.

Why You SHOULD Use a Softbox

First, let's take a look at some reasons why you should choose the trusty softbox for your portrait shoot.

“Good” Light in No Time

Some light shaping tools are definitely fairly easy to use. You really can’t go wrong with putting a softbox on your light and firing away. Especially now, when many brands such as Profoto or Godox have added TTL to their lights. It has become almost effortless these days to get good light quickly.

The reason I say "good light," and not my personal mantra of "no light is good or bad," is because softbox lighting has become synonymous with good. We all like a nice soft-lit portrait -- at least it seems that most photographers and viewers of photos do.

Any beginner who has little to no knowledge of light will be blown away by the difference a front-facing Speedlite and a softbox will have. I know I was when I first put a softbox on a light. Back then, it seemed like the new breakthrough in my work. Yet, doing the usual perfect light setup for portraits soon became boring and I couldn’t stand making the same picture over and over.

After all, I’m not aiming to be a one-hit-wonder like a-ha or Los Del Rio. I’d rather be like David Bowie and reinvent my work from album to album.

Softboxes Are Everywhere

Another reason to use softboxes is a lot more subtle. It's that they are simply everywhere. For example, if you rent a studio, you’re likely to find a softbox on a light. For someone who just came to the studio and knows next-to-nothing about light, it will seem only intuitive to wheel the big light in.

Some might even mistakenly believe that the softbox is a permanently attached part of the light (this is an actual story I heard from someone). In a way, your mindset may be the product of people ubiquitously using softboxes.

Why You Should Consider Looking Beyond the Softbox

Softboxes are great, yet I tend to use a variety of light shaping tools for my work, and softboxes actually come out rather rarely. How come?

Crafting Different Aesthetics

The key to fashion photography these days is to craft an aesthetic rather than execute a setup. Naturally, this implies being able to use any light modifiers and make the light from them fit the brief. Softbox lighting is akin to creating a light setup without giving it too much thought.

I have found that photographers are often scared to go outside of their comfort zone and pick something different up. That is rather perplexing to me, as there is an endless stream of photos out there that have been lit in exactly the same way. In fact, it can be its own genre of work: boring softbox photos.

Thus, the first reason to not use softbox lighting is that it is potentially boring.

Standing Out

If you want to make it in the fashion industry, you need to have a way of standing out. Art buyers get thousands of emails a day from various photographers, and when they end up choosing someone, they will inevitably pick someone they remembered. It is unlikely to be an artist whose work looks like everybody else's.

I’m not saying to not have softbox lighting in your portfolio at all -- I’m inviting you to not be afraid to change your light and make it more unique.

Another reason to stay away from softboxes is for educational purposes. There are over hundreds of different light shaping tools that are manufactured specifically for photographers. There are an infinite amount of objects that can influence light. You can take a simple shower curtain and create some unique looks with it. Another one is a water bottle, one more is a fancy window, and of course, let’s not forget about prisms and mirrors just to name a few.

In the grand scheme of things, it is apparent that softboxes are very much the tip of the iceberg when it comes to lighting. How much more can you create if you choose to raid your local rental house and ask for a Hardbox instead of the softbox?

The Profoto Hardbox light shaping tool creates an extremely hard light that mimics direct sunlight.

A portrait captured with the Profoto Hardbox.

Understanding the Raw Nature of Light

Spicing up your light by making a different choice than softboxes will also help you understand not only how individual modifiers work, but also how light works in its raw form. This can be helpful when you start working with scrims, flags, and other modifiers that allow you to sculpt light around the subject.

Sculpting is perhaps the highest form of light shaping, where you are carving out a statue out of raw material. That way, you will be able to pick a light shaping tool that suits you, and if that is a softbox, you will be able to be smarter about using it. Perhaps you will choose to place a grid on your softbox, or perhaps you will angle it in a weird way you hadn't considered before, or maybe you will put a black flag in front of it because that’s what you need.

This knowledge will only accumulate if you choose to be different from most photographers and not be content with only using softboxes.

A mix of soft and hard light. Soft light on the face, and hard light on the heel.

Parting Thoughts

I want to stress that I don’t think softboxes are bad or that you are stupid or incompetent for using them. On the contrary, they are fantastic tools that have a purpose to serve, and that purpose is to create soft diffused light. That light isn't good or bad. It can be appropriate for portraiture or any genre when you make the conscious choice to use such modifiers.

But a softbox is not the right modifier for getting other types of light if that’s what you actually need. The way to be at one with all modifiers is by always keeping an open mind and not being afraid to change sets or rent out a modifier you never tried before. Allow yourself to make lighting mistakes, have mishaps, or even choose the "wrong" modifier at times. If you are unaware of what is not fitting, how can you know what is?

Image credits: All photographs by Illya Ovchar.

#educational #inspiration #lighting #advice #fashion #fashionphotography #ideas #illyaovchar #lightmodifiers #opinion #portrait #portraitphotography #portraiture #softbox #tip

Look Beyond the Softbox to Spice Up Your Portrait Lighting

Why portrait photographers should consider going beyond the trusty softbox in order to expand their vision and skills.

PetaPixel

12 Unusual Light Shaping Tools for Creative Portrait Photos

One of the most frustrating things I see is photographers limiting their knowledge of light to one modifier. So much so, that there are people who can build whole portfolios with just one single type of light. While this is not wrong, it must get boring for the viewer after some time. That is why I went searching for some of the most unusual light shaping tools.

Here are 12 that I found and tested, in no particular order. Note that some products may be discontinued, so you may need to find them on the used market or rent them if you're interested in trying them yourself.

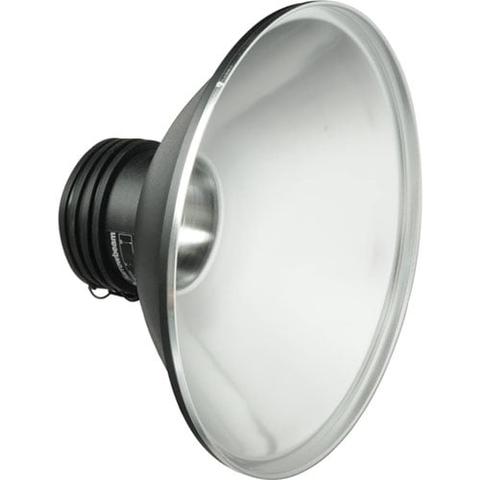
#1. Narrowbeam Reflector

The Profoto Narrow-Beam reflector is made from highly reflective metal and can be used to create either very even light patterns with little falloff or the opposite. Because it can create even patterns with no falloff, it’s perfect for lighting backgrounds. On the other hand, when used as a modifier with dramatic falloff, it can produce a narrow beam (pun intended) that will light up just the face of a model such as in the image below. In order to light her up purple, I focused a narrow beam of light on her.

Photo: Illya Ovchar // @illyaovcharphoto @wonderfulmachine
Hair&Makeup: Alice Högberg // @som_alice
Styling: Alina Ellstrom // @Alinaellstrom
Model: Sanna Bjelm // @sannabjelm
Agency: Sweden Models Agency // @swedenmodelsagency
Post-Production: Zahar // @justlike_magic

#2. Cine Reflector

The Profoto Cine Reflector is a rather versatile light shaping tool originally made for video usage. In simple terms, it’s a regular Profoto zoom reflector to which you can attach various lenses, barn doors, and even a PAR. Out of the 5 lenses provided, I used the Fresnel in order to create the dramatic falloff you see. Further, I attached barn doors to get a horizontal penumbra. Lastly, a PAR (mirror-like cone inside of the reflector) increased my light output and gave it even more specularity.

Photo: Illya Ovchar // @illyaovcharphoto @wonderfulmachine
Hair&Makeup: Alice Högberg // @som_alice
Styling: Alina Ellstrom // @Alinaellstrom
Model: Sanna Bjelm // @sannabjelm
Agency: Sweden Models Agency // @swedenmodelsagency
Post-Production: Zahar // @justlike_magic

#3. ZoomSpot

The Profoto ZoomSpot is a modifier that uses optical lenses to produce very fine light patterns. In a way, it is a very advanced version of an optical snoot. The beauty of a ZoomSpot is that it has controls that let you adjust focus and shadow edge width. I used the ZoomSpot for two images to show two functions.

Firstly, I used the ZoomSpot’s four metal shutters to create the strip of light you see on the model. Making it slightly out of focus let me have an interesting transition between the red fill and white key.

Photo: Illya Ovchar // @illyaovcharphoto @wonderfulmachine
Hair&Makeup: Alice Högberg // @som_alice
Styling: Alina Ellstrom // @Alinaellstrom
Model: Sanna Bjelm // @sannabjelm
Agency: Sweden Models Agency // @swedenmodelsagency
Post-Production: Zahar // @justlike_magic

Secondly, I wanted to create a theatrical effect with it. Here I used the iris which let me create the circle you see.

Photo: Illya Ovchar // @illyaovcharphoto @wonderfulmachine
Hair&Makeup: Alice Högberg // @som_alice
Styling: Alina Ellstrom // @Alinaellstrom
Model: Sanna Bjelm // @sannabjelm
Agency: Sweden Models Agency // @swedenmodelsagency
Post-Production: Zahar // @justlike_magic

#4. Striplight

The striplight is like a stripbox, but it is a lot more expensive and a lot more niche in its application. The problem most softboxes have is that they can never produce a perfectly straight and even light. Despite the double layer of diffusion, there is still a noticeable hotspot in the middle and a gradual falloff towards the edges. It doesn’t make a difference if the light you use has a recessed or exposed flash tube, all the matters is that light is concentrated in one spot.

A striplight solves that problem by having an even light distribution. This, essentially means three long flash tubes that create a perfectly even narrow strip of light. This does imply needing several generators to run the system. Striplight XL needs two generators, while M and S need one.

Photo: Illya Ovchar // @illyaovcharphoto @wonderfulmachine
Hair&Makeup: Alice Högberg // @som_alice
Styling: Alina Ellstrom // @Alinaellstrom
Model: Sanna Bjelm // @sannabjelm
Agency: Sweden Models Agency // @swedenmodelsagency
Post-Production: Zahar // @justlike_magic

This is useful when reflections are crucial, such as when working with latex or other shiny surfaces.

#5. HardBox

The hardest light you can get. The Profoto HardBox is essentially a modifier that minimizes the size of your light source. The way it works is by making the flash tube smaller. Every flash tube has a horseshoe shape which is relatively round. The beauty of a HardBox is that it takes that round tube and turns it into a small strip of light by turning the flash tube sideways. The HardBox has a black interior, so a lot of light is absorbed. Because of this, it can get very hot, I was in for an unpleasant surprise.

Photo: Illya Ovchar // @illyaovcharphoto @wonderfulmachine
Hair&Makeup: Alice Högberg // @som_alice
Styling: Alina Ellstrom // @Alinaellstrom
Model: Sanna Bjelm // @sannabjelm
Agency: Sweden Models Agency // @swedenmodelsagency
Post-Production: Zahar // @justlike_magic

The light it produces has razor-sharp shadow edges and can be perfect for bringing out detail in your subject. It can also be used with gels as I did in the image below. In order to create this look, I had just one HardBox placed far away. In order to create the red color effect, I found a large gel and placed it as close to the model as I could. In fact, you see a little bit of the gel in the top right corner. Nonetheless, that way, I would get a sharp edge from red to white.

#6. Ringflash

The ringflash is another must-try light shaping tool. It’s an easy way to get a “soft” light without taking up any space. The magic of the ringflash is that it creates a perfect shadowless light. Well, there are shadows but we don’t see them because they're precisely behind the model. This is because the light direction is coaxial with the lens. You can try achieving a similar effect by placing a Speedlight very close to the lens, however, the result will be far from a ringflash. An easy way to tell a ringflash was used is by looking at the catchlights. In my photo they are round.

Photo: Illya Ovchar // @illyaovcharphoto @wonderfulmachine
Hair&Makeup: Alice Högberg // @som_alice
Styling: Alina Ellstrom // @Alinaellstrom
Model: Sanna Bjelm // @sannabjelm
Agency: Sweden Models Agency // @swedenmodelsagency
Post-Production: Zahar // @justlike_magic

The image I created using a ringflash is an intimate portrait. Because the light produced is so soft, it was perfect for capturing a flattering image of the model. It was also crucial for me to focus only on the face, allowing the rest to blend. In order to achieve this, I placed 2 flags on either side and used a black background that was very far away from where the model was sitting.

#7. Flooter

The Broncolor Flooter can be described as a Fresnel lens is a modifier that creates a classic movie light. A Fresnel lens is ideal for creating a contrasting light with a long throw and dramatic falloff. Another useful feature of a Fresnel is the ability to focus the beam. The Flooter can be used to light up large sets as well, for you can create wide beams with it.

Photo: Illya Ovchar // @illyaovcharphoto
Hair&Makeup: Karina Jemelyjanova // @karinajemelyjanova
Model: Francesca // @frxnciska
Agency: Face Model Management Hungary // @facemodelmanagementhungary
Post-Production: Zahar // @justlike_magic

#8. P45 Reflector

Broncolor’s P-series reflectors have a numbering system where the digits reflect (pun intended) the light spread. Tightest of them all: P45. It is not very common to use such a long throw reflector, but that depends on what your goal is. The beauty of a long-thrown reflector is that it can be used to produce hard contrasted light.

Photo: Illya Ovchar // @illyaovcharphoto
Hair&Makeup: Karina Jemelyjanova // @karinajemelyjanova
Model: Francesca // @frxnciska
Agency: Face Model Management Hungary // @facemodelmanagementhungary
Post-Production: Zahar // @justlike_magic

The image you see is a prime example of using a P45 reflector. Because of the narrow light spread, I placed it fairly close in order to get a dramatic falloff on the neck. Further, I used barn doors to limit spill on the hair and the rest of the model's body.

#9. Satellite Staro

The Broncolor Satellite Staro is a large perfectly round modifier that is diffused. Being large helps it create soft light while being diffused works towards evening out the light spread. As you can probably tell, it will be one of the best modifiers to use for classic beauty photography.

Photo: Illya Ovchar // @illyaovcharphoto
Hair&Makeup: Karina Jemelyjanova // @karinajemelyjanova
Model: Francesca // @frxnciska
Agency: Face Model Management Hungary // @facemodelmanagementhungary
Post-Production: Zahar // @justlike_magic

This is exactly what I did. The makeup look had very soft tone gradients which begged for a soft beauty light. Unlike the beauty dish, the Satellite Staro produces a perfectly even light, while the beauty dish has a “sweet spot” in the middle.

#10. Pulso F4 Spotlight

The Broncolor Pulso F4 Spotlight is a modifier that can have multiple functions. By default, it comes with a Fresnel lens which will let you focus the light to some degree. To be an absolute control freak with your light, you will need a projection attachment. It will be like an optical snoot, but this one (unlike the ZoomSpot) is designed for much finer patterns. As you can clearly see, the circle is perfectly focused with a razor-sharp edge. In fact, you can create your own gobo masks and project them using the Pulso F4 Spotlight.

Photo: Illya Ovchar // @illyaovcharphoto
Hair&Makeup: Karina Jemelyjanova // @karinajemelyjanova
Model: Francesca // @frxnciska
Agency: Face Model Management Hungary // @facemodelmanagementhungary
Post-Production: Zahar // @justlike_magic

#11. Mini-Satellite

The Broncolor Mini-Satellite is a highly reflective large modifier that creates a focused beam of light. In a way, it acts as a mirror. The light created is exceptionally hard and contrasted, moreover, it is closest to real sunlight. A Mini-Satellite will bring out every detail, as well as catch any reflections.

For the image I took with the Mini-Satellite, I was looking for a modifier that would give me detail in the white gesso on the face, as well as catch the metallic texture in the makeup. I deliberately placed it rather low in order to get a sharp triangular nose shadow.

Photo: Illya Ovchar // @illyaovcharphoto
Hair&Makeup: Karina Jemelyjanova // @karinajemelyjanova
Model: Francesca // @frxnciska
Agency: Face Model Management Hungary // @facemodelmanagementhungary
Post-Production: Zahar // @justlike_magic

Lastly, because the mini satellite produced a very focused beam of light, I was able to direct it away from the hair, which added more form and structure to the whole image.

#12. Boxlite

The Broncolor Boxlite is yet another specialist modifier used commonly for product photography. The reason being is that it produces an even light spread with fine edges which is exactly what one needs when working with shiny reflective surfaces. The Boxlite I used was rather small, and I placed it close to the model to get dramatic falloff on the neck as well as a clearly visible straight reflection edge on the brush.

Photo: Illya Ovchar // @illyaovcharphoto
Hair&Makeup: Karina Jemelyjanova // @karinajemelyjanova
Model: Francesca // @frxnciska
Agency: Face Model Management Hungary // @facemodelmanagementhungary
Post-Production: Zahar // @justlike_magic

Closing Thoughts

These are just some of the unusual modifiers that exist out there. In fact, there is an infinite number of modifiers. You could even use an IKEA flashlight and a glass prism to make some very unusual and unique light. So, what is an unusual light modifier? Everything that light interacts with that you use for your photo. Moreover, these modifiers mentioned in this article are all expensive and all bar one cost north of one grand. Hence, it rarely makes sense for you to buy them.

I would, however, encourage you to rent as many as you want to and create photos using the modifiers I mentioned in this article.

#educational #equipment #boxlite #broncolor #cinereflector #flooter #godox #hardbox #illyaovchar #lighting #lightmodifiers #minisatellite #narrowbeam #p45 #portraiture #profoto #pulsof4 #ringflash #satellitestaro #striplight #zoomspot

12 Unusual Light Shaping Tools for Creative Portrait Photos

Looking to get creative with your portrait photography lighting? Here are 12 more unusual light modifiers you should check out.

11 Popular Light Modifiers Compared: Which One Is Right for You?

Picking the right light modifier is often crucial to the success of the image. With hundreds of different modifiers to choose from, there is really nothing you can’t do. However, a wide choice often ends up confusing or possibly scaring photographers.

With an overwhelming majority resorting to a softbox for all work, few explore the possibilities that different modifiers offer. For this article, I took 11 of the most popular light modifiers and compared them to each other.

Methodology

For this comparison, I metered each light so that it would give the same exposure at the end. I shot all images on a Canon 5D Mark IV with a 24-70mm f/2.8 lens that was placed on a tripod. When working with an umbrella, the light was simply turned around and tilted.

Bare Bulb

The most simple way to light is to just stick a bare-bulb flash in front of the camera and fire away. This light doesn’t have any particularly nice falloff, it just goes from light to shadow which isn’t flattering to the face in most applications. That said, I’ve used this setup in the past in order to light my fashion images, but before using hard light I made sure that the makeup artist has done their best to make the skin perfect. Hard light means a lot more retouching as it brings out a lot of unflattering skin imperfections.

20-Degree Grid

This is essentially narrowing down the light spread. When used bare bulb, a flash may spread the light 180 degrees or 360 degrees depending on the model. However, this is not always useful when it comes to things such as spotlighting. For example, when using gels you may want to narrow down the light spread so that the colors of gels don’t mix. This is where the grid is useful. In this picture, you see that it eats up a little light, and makes the falloff more dramatic. The background has less light on it, and you can in fact see the falloff into darkness. The shadow quality on the face is nearly identical to the bare-bulb flash.

Magnum Reflector

This is the best way to replicate sunlight. It’s a great modifier for creating a hard but natural-looking light. I use it a lot for fashion work where I need a hard light. One other benefit of the magnum reflector is that it increases light output. The Profoto OCF magnum is able to give me two stops more power which is welcomed on outdoor shoots. It produces a shadow with somewhat graduated edges. Overall there is a lot of highlight-shadow contrast. A fill light would be recommended to even out the image.

2×3′ Softbox

This is a more traditional portrait look. A 2×3′ softbox is very popular among many photographers. It is easy to see why: it produces a very smooth light that has a gradual falloff. Because most softboxes feature a reflective interior, they will produce some clipping. The catchlights in the eyes are rectangular, which makes it looks like a window. There is still contrast, but it's not drastic.

Overall, this is a great versatile modifier that is fantastic for most off-camera-flash applications. The main difference between softbox sizes would be the area it covers and the size of the highlights. A small softbox will bring out more skin detail because it is hard while a large one will be much nicer on skin given that the distance is the same. The same applies to all other surfaces. An embroidered dress will benefit from hard light, while a chiffon one will appreciate softer light.

1.3×1.3′ Softbox

This is the smaller version of the square softbox. given its size, you can see immediately that the light is getting harder. There is more clipping(bright spots on the skin). This softbox is useful for close-up portraits where the face is the main focus. Trying to light a full-body shot with this will render it useless. Another way to use a small softbox like this would be in product work, as that often demands a fine and small patch of light.

3-Foot Octabox

This is just one more softbox. The round shape of the octabox is preferred by photographers who want to get round catchlights. Another reason to use a round softbox is that horizontal and vertical shadows will be the same. The larger the light source, the softer the light. If a softbox is 3 feet horizontally and 1 foot vertically, it will produce a soft horizontal but a hard vertical shadow. The difference is best seen when one edge is significantly longer than the other. You can see that a 2×3 softbox has slightly harder vertical shadows and softer horizontal ones, whereas an octabox has them consistently soft.

Silver Beauty Dish

Because the interior of this modifier is reflective, it will produce specular light that will result in skin clipping. Overall it makes a concentrated light spread with faster falloff and deep contrast. The silver beauty dish will give you more power because of the specular interior. Each beauty dish has a so-called sweet spot where the thrown shadow from the disk in the middle is. A silver beauty dish will have a very small one so you must be very precise with the placement. This can be useful when working on location in harsh sunlight. Another application for the silver beauty dish is in sports photography where contrast is used to accentuate the shape of athletes. Photographer Gary Land has used the silver beauty dish in much of his commercial sports work.

White Beauty Dish

This modifier is quite popular among many beauty photographers. It is used to produce a classic beauty light. As you can see, the light is diffused and quite soft with less highlight-shadow contrast. The white beauty dish produces a wider light spread, and the sweet spot is much larger allowing for a more laid-back approach to light. The white beauty dish is much more flattering on the skin as it conceals details. Using a grid on this beauty dish will narrow down the light spread a lot, while with a silver one the difference will be not as clear. The white beauty dish is useful in day-to-day portraiture and beauty photography.

Umbrella White M

One of the simplest modifiers, and in fact the most versatile one, is the white umbrella. It has a white interior making the light diffused. The skin doesn’t clip while having a smooth texture to it. There is not too much shadow-highlight contrast. This modifier is just over 3 feet in diameter when open and 1.5 feet closed making it travel-friendly. A white umbrella is the go-to for producing soft bounced and flattering light. In large studios, on sets, a white umbrella is a popular choice for lighting a background for the even and large light spread that it gives.

Umbrella White M + 1.5-Stop Diffusor

Adding a diffusor to the umbrella will produce less highlight-shadow contrast, as well as give an even more even light with less gradual falloff. Bear in mind that it will eat up a lot of power. This has become a popular setup among famous portrait photographers such as Annie Leibovitz or Clay Cook. Annie Leibovitz often gives her assistant a white umbrella with a diffusor to use as a key light. Placing it close to the face will give a flattering light, but with a lot of definition.

Umbrella White XL

The biggest light modifier in my fleet is the 165cm (65”) umbrella. A large source will produce very soft light, while a white surface will make it bounced. The size of this modifier means that there is not a lot of contrast, and the shadow to highlight gradations are very long. Just by looking at the shadow on the wall, you can see that it is minute. This modifier is often used in my work as a fill light, or as a key for full-body images. Placed far enough, it can produce a light that doesn’t have any thrown shadows at all. Another application of a large light source like this one would be for e-commerce work where everything is shot against a white background and shadows are not welcome on it.

Umbrella White XL + 1.5-Stop Diffusor

Adding a diffusor to the large umbrella does the same job as the one with a smaller modifier. It reduced contrast and almost eliminated clipping. The diffuser is helpful when creating fill light. Most of the time, I use the xl umbrella with a diffusor, as it is just that bit better.

Closing Thoughts

There are hundreds of more modifiers, and I will be doing my best to show what each does in the future. Still, knowing when to use a softbox and when an umbrella can be instrumental to you have a diverse portfolio that can impress clients.

#editorial #equipment #comparison #headtohead #illyaovchar #learninglight #light #lighting #lightmodifiers #modifiers #photographylight #portraiture

11 Popular Light Modifiers Compared: Which One Is Right for You?

Photographer Illya Ovchar compares 11 popular light modifiers used in portrait photography and compares the results.