Arduino Audio and MIDI Frameworks

I’ve been collecting bookmarks for interesting Arduino audio projects for a while now, and having now played with the XIAO SAMD21 I started looking back over my list for other things to try.  One thing that occurred to me is that there are a now a number of more powerful audio frameworks available for a range of microcontrollers, so in this post I’m doing an introductory “look see” at some of them, largely as “notes to self” to come back to them for some more detailed projects in the future.

Note: Many of these require a 32-bit processor, which is one of the reasons I’ve not looked at them so far.

Warning! I strongly recommend using old or second hand equipment for your experiments.  I am not responsible for any damage to expensive instruments!

If you are new to microcontrollers, see the Getting Started pages.

Mozzi

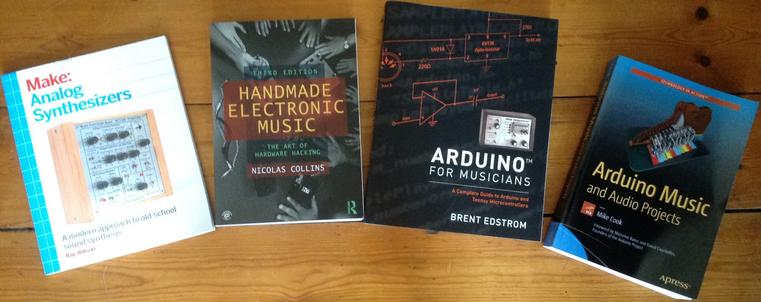
I’ve spent quite a bit of time with Mozzi of course, the synthesis library for Arduino that supports a large range of microcontrollers, including the “original” 8-bit Arduino ATmega328P, so I won’t go over that again here.

For a starting point with Mozzi, see: Arduino PWM MIDI Synthesis with Mozzi.  For using Mozzi on a 32-bit SAMD processor, there is more here and here.

But Mozzi isn’t the only game in town, especially if we’re expanding out to 32-bit microcontrollers.

The Arduino Sound Library

https://www.arduino.cc/reference/en/libraries/arduinosound/

This is an official Arduino library that supports SAMD21 based microcontrollers using an I2S digital to analog converter. It is designed for the MKR series of official Arduino boards.

Interestingly it appears to only support I2S audio devices for sound input and output.  That seems like a little bit of a missed opportunity to me in that the SAMD21 has a built-in DAC, but I guess analogWrite() deals with access to the DAC relatively easily.

It is designed for official Arduino SAMD architecture boards – so those in the MKR series.  It might work on other SAMD architecture boards, I haven’t looked into it in detail.

Phil Schatzmann’s Arduino Audio Tools

https://github.com/pschatzmann/arduino-audio-tools

This is a suite of open source code for audio stream processing, providing a range of audio sources (e.g. microphones, Internet streams, files, sensors, and so on) and sinks (e.g. DACs, PWM audio, MP3, codecs, audio modules, etc).

It can be used to build audio players, processors, effects, file processors, audio visualisers, networked audio tools, and so on.

I believe it supports the following microcontroller architectures:

  • ESP32 (S and C variants)
  • ESP8266
  • RP2040 (MBED and non-MBED)
  • AVR
  • STM32
  • SAMD

It supports several audio output boards too, including: ESP32-A1S based boards (ES8388 or AC101 codecs); VS1053 modules; and WM8960 modules.

I believe this is a library for audio processing, not necessarily audio synthesis.

Marcel Licence’s ML Synth Tools

https://github.com/marcel-licence/ML_SynthTools

This is a comprehensive synth library for producing synthesizers, organs and effects.  Most of the code is open source, but there are certain key elements that are provided only in pre-built library form.

It provides libraries for the following microcontrollers:

  • ESP32
  • ESP8266
  • XIAO SAMD21
  • Teensy 4.1
  • Daisy Seed
  • Raspberry Pi Pico RP2040
  • STM32F407

As well as the synthesizer core oscillators there are modules for arpeggiators, effects, meters, scopes, and MIDI file playing.  Here are some example builds using the library:

Although it isn’t fully open source, this non-the-less looks like it would be worth taking a more detailed look.  The provided videos of Marcel playing are particularly excellent.

MIDI Controller Libraries

There are a number of Arduino libraries for building MIDI controllers. Here are a selection of some that I’ve found so far.

OpenDesk MIDI Platformhttps://github.com/shanteacontrols/OpenDeck

This is a set of firmware and two official PCB designs for MIDI controllers. In addition to the official boards, it also supports many microcontrollers, including:

  • Arduino Mega 2560
  • Arduino Nano 33 BLE
  • Raspberry Pi Pico
  • XIAO RP2040
  • Teensy++ 2.0

And many others. It includes a web-based configuration utility for defining the MIDI commands for the controls.  Official boards are available on Tindie and you can read more about them here: https://shanteacontrols.com/.

It supports a range of buttons, encoders, potentiometers, force sensitive resistors, certain touchscreens and can provided feedback using LEDs and displays.

Control Surfacehttps://github.com/tttapa/Control-Surface

This is a general purpose library for building MIDI input and output control devices.  It supports a wide range of microcontrollers, including:

  • AVR (Uno, Mega, Leonardo).
  • Arduino Nano Every and 33.
  • Teensy.
  • ESP8266
  • ESP32
  • Raspberry Pi Pico

It supports a range of MIDI transports, including serial, USB, “direct serial” (using Hairless MIDI) and MIDI BLE. It also supports a range of buttons, potentiometers, rotary encoders, switches, keyboard matrices, and so on and can provide visual feedback using a range of LEDS and displays.  It has built-in support for multiplexers, shift registers and LED drivers.

It includes a huge number of example projects to browse.

MIDIPalhttps://github.com/pichenettes/midipal

This is a “MIDI Swiss Army Knife” that, with the additional of a display and rotary encoder, can provide a wide range of MIDI processing functions.  It includes an editor application for programming MIDI filters.

This is a “native” AVR application, not for the Arduino environment.

Notes and Volts MIDI Controllerhttps://www.notesandvolts.com/2016/04/arduino-midi-controller-buttons.html

This is provided for completeness as it is a fairly common codebase for people to find and use with an Arduino. It supports a range of potentiometers and buttons and makes the task of configuring them as a MIDI control device relatively straight forward.

Closing Thoughts

As I say, this post is really almost a bit of a “to-do list” of things that look interesting and that I might try to take a more detailed look at, at some point.

If you have experience of any of these frameworks or libraries; or have suggestions of others that might be worth a look, do let me know in the comments!

Kevin

#ArduinoAudioTools #ControlSurface #dac #esp32 #fmSynthesis #i2s #midi #midiController #MIDIPal #MLSynthTools #mozzi #OpenDesk #pwm #rp2040 #samd21 #synthesis #xiao
Getting Started

This site will be bringing you simple electronic music projects utilising easily available components and microcontroller platforms such as the Arduino. If that is largely gobble-di-gook to you, th…

Simple DIY Electronic Music Projects

Ok, starting to get a little silly now, but I thought I'd try to use the AY-3-8910 as a 4-bit DAC for Mozzi synthesis...

https://diyelectromusic.com/2025/07/14/arduino-and-ay-3-8910-part-4/

#Arduino #AY38910 #Mozzi #SorryNotSorry

Arduino and AY-3-8910 – Part 4

After Part 3 I started to go back and add MIDI, and changed the waveform on the touch of a button, and then started to wonder if I could add envelopes and so on.

And then it occurred to me, I didn’t really need to re-implement my own synthesis library, I could probably write a custom audio output function for Mozzi and get it to use the AY-3-8910 as a 4-bit DAC…

https://makertube.net/w/ast3HQ2a3fCanKy9Pr6qUc

Warning! I strongly recommend using old or second hand equipment for your experiments.  I am not responsible for any damage to expensive instruments!

These are the key tutorials for the main concepts used in this project:

If you are new to Arduino, see the Getting Started pages.

Parts list

  • Arduino Uno.
  • AY-3-8910 chip.
  • Either GadgetReboot’s PCB or patch using solderless breadboard or prototyping boards.
  • 5V compatible MIDI interface.
  • Jumper wires.

Mozzi Custom Audio Output

Mozzi supports a wide range of microcontrollers with a range of different output methods from PWM, built-in DACs, I2S, through to custom output options with DMA or something else.

I’m not going to go over how Mozzi works here, but here are details of how to run with the different audio output modes here: https://sensorium.github.io/Mozzi/learn/output/

The key option for me is MOZZI_OUTPUT_EXTERNAL_CUSTOM. There are a number of configuration options that must be set prior to include the main Mozzi file as follows:

#include "MozziConfigValues.h"
#define MOZZI_AUDIO_MODE MOZZI_OUTPUT_EXTERNAL_CUSTOM
#define MOZZI_AUDIO_BITS 8
#define MOZZI_CONTROL_RATE 64
#define MOZZI_AUDIO_RATE 16384
#define MOZZI_ANALOG_READ MOZZI_ANALOG_READ_NONE
#include <Mozzi.h>
#include <Oscil.h>
#include <tables/cos2048_int8.h>
#include <mozzi_midi.h>
#include <mozzi_fixmath.h>

This sets up the audio synthesis parameters to 8 bit audio with a sample rate of 16384Hz.

Implementing a custom audio output this way requires two functions. One for the audio output and one to tell Mozzi when it is time to call the audio output function.

I would rather have used MOZZI_OUTPUT_EXTERNAL_TIMED which handles the calling at the correct AUDIO_RATE for me, but that relies on the use of the ATMega328’s Timer 1, but in this case Timer 1 is providing the 1MHz clock for the AY-3-3810.

But rather than implementing yet another timing routine, I just used the micros() counter to decide if it was time to generate audio or not.

void audioOutput(const AudioOutput f)
{
int out = MOZZI_AUDIO_BIAS + f.l();
ayOutput(0,out);
}

unsigned long lastmicros;
bool canBufferAudioOutput() {
unsigned long nowmicros = micros();
if (nowmicros > lastmicros+58) {
lastmicros=nowmicros;
return true;
}
return false;
}

To get samples produced at the required 16384Hz sample rate means there needs to be one sample produced 16384 times a second. There thus needs to be a sample every 60uS. If I implement the above function checking for nowmicros > lastmicros + 60 then the resulting sound is slightly flat (in tuning). I’m guessing this is related to the overheads of the function call and logic, so I’ve gone with lastmicros+58 and that sounds pretty good to me.

My ayOutput() routine takes an 8-bit sample and cuts it down to the 4-bits required for a level on the AY-3-8910.

FM Synthesis on the AY-3-8910 (sort of)

I wanted to try the FM synth mode just to see what would happen and thought it would be interesting to switch between the carrier sine wave signal and the modulated signal by pressing the button.

Unfortunately, I just could not get the button logic to work, even though I could see the state of the pin (A5) changing.

Finally after an hour or so of puzzling why such an apparently simple test of logic wasn’t working, I realised what the issue must be. Mozzi, for the AVR microcontrollers, has its own fast ADC routines. It turns out that these were interferrng with using A5 as a digital input pin.

It is fairly easy to override the Mozzi fast ADC though by setting MOZZI_ANALOG_READ to NONE.

The Mozzi code has a carrier and modulator waveform running at audio rate and an index running at the control rate to bring the modulator in and out.

It is just about possible to see the FM modulation on the oscilloscope as shown below.

Of course, the AY-3-8910 isn’t actually doing FM synthesis itself. It is just acting as a 4-bit DAC, but it is still quite fun to see.

Find it on GitHub here.

Closing Thoughts

This is all getting a little pointless really, as there is nothing being done that the Arduino Nano couldn’t do better on its own, but it is a bit of fun to see where this thread ends up.

There are a number of interesting angles now. One of which would be to utilise all three channels. This could provide a form of additive synthesis, it could perform some fixed interval additional oscillators, or it could be used for 3-note polyphony.

Now that Mozzi is running it is also possible to do anything Mozzi can do, and that includes implementing envelope generation.

Kevin

#arduinoNano #ay38910 #include #mozzi

Arduino, AY-3-8910 and Mozzi

PeerTube

First application is now up for my Arduino Nano Mozzi EuroRack module. This is a basic VCO, largely based on HAGIWO's Arduino #Mozzi VCO but reimplemented and with a few extras.

https://diyelectromusic.com/2025/01/05/eurorack-6hp-arduino-mozzi-module-basic-vco/

#SynthDIY #arduino

EuroRack 6HP Arduino Mozzi Module – Basic VCO

This is the first project based on my EuroRack 6HP Arduino Mozzi Module. It is loosely based on HAGIWO’s Arduino Mozzi VCO Module. Warning! I strongly recommend using old or second hand equip…

Simple DIY Electronic Music Projects

EuroRack 6HP Arduino Mozzi Module – Basic VCO

This is the first project based on my EuroRack 6HP Arduino Mozzi Module. It is loosely based on HAGIWO’s Arduino Mozzi VCO Module.

https://makertube.net/w/hnocMAhYkajd8nX2vwuR2u

Warning! I strongly recommend using old or second hand equipment for your experiments.  I am not responsible for any damage to expensive instruments!

These are some previous posts for the main concepts used in this project:

If you are new to Arduino, see the Getting Started pages.

Parts list

The Circuit

This uses the EuroRack 6HP Arduino Mozzi Module with the pots and jacks assigned as shown below.

The four potentiometers control the following:

  • POT 1 – OSC 1 core frequency offset (from V/Oct CV).
  • POT 2 – OSC 2 frequency ratio OSC1.
  • POT 3 – Waveform for both oscillators: sine, triangle, saw, square.
  • POT 4 – Octave: 1 lower, normal, 1 higher, 2 higher.

There are three CV inputs:

  • V/Octave pitch.
  • OSC1 vs OSC2 gain.
  • Pitch modulation.

The Code

The code is inspired by that of HAGIWO’s Mozzi VCO, in that I’m using Mozzi with two oscillators, with multiple waveforms, and I’m using HAGIWO’s gain profile for CV. But I’ve added a few extras and have rewritten the core Mozzi code to hopefully be a little more optimal.

The main V/Oct calculation has to happen every scan and HAGIWO uses a look-up table in PROGMEM for the fractional voltages that correspond to each value of the ADC and then uses those in the standard Volts to frequency equation:

Freq = BaseFreq . 2^CV

For a 10-bit resolution (the resolution of the Arduino ADCs) this requires 1024 values across the whole 5V range. That equates to 4.8828mV per step (5/1024) and as full octave of 12 steps is 1V that equates to 83.3mV per semitone.

The various CV recommendations I’ve seen suggest using a BaseFreq equal to C4, which is 261.6256 Hz in the calculation unless it is for a LFO or clock in which case a BaseFreq of 2Hz is recommended – which corresponds to 120 bpm if used for a clock. The BaseFreq is the frequency used for 0V. Many analog synths will accept negative voltages to go lower, but as this is an Arduino it only supports 0V to 5V.

HAGIWO uses a table of float values and uses floating point arithmetic to work out the frequency. I’ve opted to use fixed point arithmetic and also rather than store the CV “step” values in the table have pre-calculated the whole 2^CV for each step.

Here is some Arduino code that will output the required look-up table values. My full version will first output the individual voltage steps to 6 decimal places; then for the float version of 2^CV; and finally for the fixed point 16.16 equivalent – that is 16 bits for the integer part and a fixed 16 bits for the binary equivalent of the decimal part.

The code below just does the last part. This is using the FixMath library which was written for use with Mozzi (more here).

#include <FixMath.h> // Designed for use with Mozzi

int res = 10; // 10-bit resolution
float maxv = 5.0; // Max voltage

void setup() {
Serial.begin(9600);

int max = (1<<res) - 1;
float cvstep = maxv / ((float)max+1.0);

Serial.print("\n\n");
Serial.print("Resolution=");
Serial.print(res);
Serial.print(" bits (0 to ");
Serial.print(max);
Serial.print(")\tV/step=");
Serial.print(cvstep,6);
Serial.print("\n");

float cv = 0.0;
for (int i=0; i<=max; i++) {
if (i%16 == 0) {
Serial.print("\n");
}
float freqpow = pow(2, cv);
UFix<16, 16> q16n16fp = freqpow;
Serial.print("0x");
Serial.print(q16n16fp.asRaw(), HEX);
Serial.print(",");
cv += cvstep;
}
}

void loop() {}

I’ve used this to create the q16n16 version of the 1024 values required to calculate the frequency for each of the 0..1023 values that the 1V/Oct analog input could provide, covering the full 5V range. This is stored in the header file v2voct.h that is part of the code.

This does mean that any calculation of frequency must be done using the FixMath 16.16 values, for example:

UFix<16,16> q16n16potfreq = mozziAnalogRead(POT1);

This code takes the unsigned integer value (0 to 1023) from mozziAnalogRead and automatically turns it into a 16.16 fixed point format value in variable q16n16potfreq – note that in each case the decimal part will be zero as the starting point is an integer between 0 and 1023.

When reading values in from the look-up table, they have to be pulled in “raw” as they are already in the 16.16 format. But as Arduino doesn’t know anything about this format, they have been declared as uint32_t values in the PROGMEM structure, but then need to be read back out and treated as 16.16 values as show below.

#define CVSTEPS 1024
static const uint32_t q16n16fp [CVSTEPS] PROGMEM = {
0x10000,0x100DE,0x101BD,0x1029C,
...
};

UFix<16,16> fpow = UFix<16,16>::fromRaw(pgm_read_dword(&q16n16fp[voct]));

All calculations related to frequencies are performed using 16.16 values. The Mozzi oscillator setFreq function has a version that takes 16.16 values too, making everything actually quite straight forward once you get your head around what its doing.

Other notes on the code:

  • There are two gain values maintained – one for each oscillator. The values used come from another look-up table (that I took from HAGIWO’s original) that allows the CV to pan across from one oscillator to the other. I’m using 7-bit gain values (0..127) so that when the final audio sample is worked out at the end, it should all fit within a 16-bit value give or take.
  • The octave selector changes the octave of both oscillators and is determined by POT 4 and can select from 0V = C3 through to 0V = C6.
  • Oscillator 2 is set to a frequency between 2 octaves below and 1 or 2 octaves above the frequency of oscillator 1 at all times, as determined by POT 2 – quite how to do this was the subject of a bit of experimentation (see below).
  • The frequency of oscillator 1 is given by the setting of POT 1, the V/Oct CV, the mod CV and the octave.

The following code sets up the two frequencies for the oscillators.

UFix<16,16> fpow = UFix<16,16>::fromRaw(pgm_read_dword(&q16n16fp[voct]));

UFix<16,16> q16n16freq1 = q16n16oct * (q16n16c4 + q16n16potfreq + q16n16mod) * fpow;

UFix<16,16> q16n16freq2 = q16n16Mult * q16n16freq1;

aOsc1.setFreq(q16n16freq1);
aOsc2.setFreq(q16n16freq2);

q16n16c4 is the frequency of C4 in fixed point 16.16 format. It is essentially the “BaseFreq” in the original equation. Notice how the base frequency is also affected by POT 1 and the modulation CV. The whole lot is then multiplied by the octave setting, which will be one of 0.5, 1.0, 2.0 or 4.0.

The multiplier used for the second oscillator (q16n16Mult) comes from POT 2. I have included two approaches to using this: discrete values or continuous.

For discrete values, the setting of POT 2 selects one of 8 fixed ratios to use to set the frequency of OSC 2 compared to OSC 1. I’ve chosen the following options (with 0.0 effectively being “off”):

{0.0, 0.25, 0.333333, 0.5, 0.666666, 1.0, 1.333333, 2.0}

For continuous values, I take the raw reading (0..1023) and convert it into a 2.8 fixed point number by shifting left by 8 bits and then treating it as a raw 16.16 value. This works as the number is a 10-bit value, so shifting left 8 bits makes it a 18 bit value – but then when read as a 16.16 bit value, the lowest 16 bits of those 18 are treated as the decimal…

UFix<16,16> q16n16Mult = UFix<16,16>::fromRaw(((uint32_t)mozziAnalogRead(POT2)) << 8);

Note I have to ensure it scales the return value from mozziAnalogRead up to 32-bits first otherwise clipping will occur. This allows me to have fractional octave values for the second oscillator compared to the first.

As the second oscillator starts 2 octaves below the first, this gives a range of multipliers starting from nothing (i.e. “times zero”), to almost two octaves below oscillator 1 (00.01000000 in 2.8 fixed point binary) through to 1 octave below (x0.5 = 00.10000000), to the same as oscillator 1 (x1 = 01.00000000) to 1 octave above (x2 = 0x10.00000000) to almost 2 octaves above (x4 would be 1024, but 1023 is 11.11111111).

The downside of this approach is that the response to the potentiometer setting isn’t linear. Or rather, it is linear, when really I’d like it not to be… I might go back and correct that in software at some point, but it is fine for now.

Note that if POT 2 is set to zero, then oscillator 2 is turned off. One option to always keep it on is to always ensure a minimum POT 2 reading. I’ve included that as an option to have the minimum reading of 64, which when converted to 2.8 format is 00.01000000 or 0.25 in decimal – hence a multiplier that gives “two octaves below”.

The final calculation that is performed for each audio sample is given by:

AudioOutput updateAudio(){
return MonoOutput::from16Bit(bOsc1Gain*aOsc1.next()+bOsc2Gain*aOsc2.next());
}

This combines the audio samples of each of the oscillators, multiplies them by the 7-bit gain value and then tells Mozzi to take this as a 16-bit value to be turned into a Mono output value.

Right at the start, I’ve told Mozzi to use “HiFi” mode, which should give me 10 bits of PWM output range using D9 and D10. I’ve also used a slightly higher MOZZI_CONTROL_RATE to help with scanning the IO.

Find it on GitHub here.

Closing Thoughts

As can be seen from the video, I don’t really anything much to use this with yet, but I’ve driven it from my “Baby8” CV Step Sequencer and the LFO from my Educational DIY Synth Thing and I think it seems to work ok. The video includes the following:

  • Changing basic OSC 1 frequency via POT 1.
  • Changing OSC 2 ratio compared to OSC 1 via POT 2.
  • Chaning the octave via POT 4.
  • Chaning the waveforms via POT 3.
  • Generating a V/Oct CV from the Baby 8.
  • Setting a low sweep of CV1 to control the relative gain of OSC 1 vs OSC 2.
  • Swapping to CV2 to provide additional pitch modulation to the oscillators.

This isn’t quite using the final version of the code, but gives an idea.

Note that the V/Oct input won’t work at true audio frequencies, so it can’t be used for frequency modulation, but otherwise I’m quite pleased with the performance considering it is updating from three CVs and four potentiometers each scan.

It might be possible to up the MOZZI_CONTROL_RATE even more and scan the CVs more frequently than the pots, but for now they are all scanned at the same time using a MOZZI_CONTROL_RATE of 128 (twice the default 64).

The output seems pretty clean to me too, but that is really thanks to HAGIWO’s original PWM output stage.

I’m just waiting for some spray-on adhesive so I can make a simple panel for it now.

Kevin

#arduinoNano #define #HAGIWO #include #mozzi #oscillator #vco

EuroRack 6HP Arduino Mozzi Module

This project uses my EuroRack 6HP MCU Experimenter Module to implement HAGIWO’s Arduino Nano based VCO. This post describes how to put it together and test the basic functionality. Futur…

Simple DIY Electronic Music Projects

6HP Arduino Mozzi Basic 2-Oscillator VCO

https://makertube.net/w/hnocMAhYkajd8nX2vwuR2u

6HP Arduino Mozzi Basic 2-Oscillator VCO

PeerTube

EuroRack 6HP Arduino Mozzi Module

This project uses my EuroRack 6HP MCU Experimenter Module to implement HAGIWO’s Arduino Nano based VCO.

This post describes how to put it together and test the basic functionality. Future posts will look at some code that can run on the module (see the “Sample Applications” section).

Warning! I strongly recommend using old or second hand equipment for your experiments.  I am not responsible for any damage to expensive instruments!

These are the key tutorials for the main concepts used in this project:

If you are new to Arduino, see the Getting Started pages.

Parts list

For the IO board:

  • 1x MCP6232 or equivalent OpAmp.
  • 8x BAT43 Schottky diodes.
  • Normal resistors: 1x 100Ω, 1x 200Ω, 4x 1kΩ, 1x 330kΩ, 2x 100kΩ.
  • Higher accuracy resistors (1% or better): 2x 3.9kΩ, 1x499kΩ.
  • Ceramic Capacitors: 4x 100pF, 1x 4.7nF, 1x 10nF, 3x 68nF, 1x 100nF.
  • Electrolytic Capacitors: 1x 4.7uF.

Note: it is worth measuring a range of 499K and 3.9K resistors and finding the best ones. In my case I only had 500K resistors, so found the closest to 499K I had. I ended up with two 3.88K and one 498K.

For the Pots and Jacks board:

  • 4x 10kΩ or 100kΩ PCB mount potentiometers.
  • 4x “Thonkiconn” jack sockets.
  • Header pins.
  • Jumper wires

The IO Board

Here is how the various sub-circuits of the IO board will be used:

Circuit ElementIO Board ConnectionFunctionR/C 40xCV_IN 1Control Voltage 1R/C 45xCV_IN 2Control Voltage 2R/C 30xGATE_IN 1Potentiometer Input 1R/C 35xGATE_IN 2Potentiometer Input 2R/C 65xOUT 4Potentiometer Input 4R/C 60xOUT 3Potentiometer Input 3R/C 55xOUT 2Not usedR/C 50xOUT 11V/Oct Control VoltageR/C 10xPWM 1Audio outputR/C 20xPWM 2Not used

Notice that the GATE and OUT circuits are being used in “alternative” modes as additional inputs (see the Usage Notes for more details). In particular the transistors on the GATE circuits are not used.

The following shows which components of the PCB will be populated (yellow), which will be changed for other components (blue), which wire links are required (red) and which connectors will be used for linking to the Pots and Jacks board (green) and MCU (purple).

Here is the list of components required for the above:

Resistors:

  • R100: 499K
  • R101, R102: 3.9K
  • R105: 200Ω
  • R300, R350, R400, R450, R600, R650: 1K
  • R401, R451: 100K
  • R500: 100Ω
  • R501: 330K

Capacitors

  • C100: 4.7nF
  • C101: 10nF
  • C102: 4.7uF electrolytic
  • R301, R351, C400, C450, C600, C650: 100pF (yes, two resistor slots are capacitors).
  • C400, C450, C500: 68nF

Other:

  • D100, D101, D400, D401, D450, D451, D500, D501: BAT43 Schottky Diodes
  • MCP6243

The mapping between IO connections and MCU IO pins is as follows (all other IO pins are not used):

MCU Connection PointMCU IO LinkFunctionMCU PWM 1H9Audio OUTMCU PWM 1L10Audio OUTMCU IN CV 2A7CV2MCU IN CV 1A6CV1MCU IN GATE 2A5Pot 2MCU IN GATE 1A4Pot 1MCU OUT 4A3Pot 4MCU OUT 3A2Pot 3MCU OUT 1A01V/Oct CV

Note: the order of the Gate/CV is (from top to bottom): CV 2, CV 1, G2, G1. The ordering of the OUT connections is the same for both sets of pin headers: 1 on the left, through to 4 on the right.

Build Order and Photos

This is the suggested build order:

  • Diodes.
  • Resistors.
  • Small capacitors.
  • Header sockets (assuming PH5 and PH3.5 sockets).
  • Capacitor on the rear of the board.
  • OpAmp.
  • Larger capacitors.
  • MCU board header sockets on rear of the board.
  • Jumper wires.

When installing R501, I’ve opted to make the fix described in the EuroRack 6HP MCU Experimenter Module Usage Notes and swap its position to the other side of R500 as shown below.

Otherwise the build proceeding pretty much as suggested.

Note that the OpAmp’s capacitor must be soldered to the rear of the board prior to fixing the OpAmp.

The install the OpAmp, smaller headers and larger capacitors.

Finally the longer headers for the MCU board can be installed on the rear of the board.

Finally the patch links can be installed as described previously (including the links instead of R104 and the transistors).

The Pots and Jacks Board

These functions will map onto the following potentiometers and jacks (and connections) from the EuroRack 6HP MCU Pots and Jacks PCB:

Pot/JackFunctionConnectionRV1Potentiometer 1GATE 1RV2Potentiometer 2GATE 2RV3Potentiometer 3OUT 3RV4Potentiometer 4OUT 4IN1V/Octave CV INOUT 1IN2CV 1 INCV 1IN3Not usedIN4Not usedOUT1Audio OUTPWM 1OUT2CV 2 INCV 2OUT3Not usedOUT4Not used

The pots and jacks PCB should be wired up to the interconnecting headers as follows:

Optionally, it might be useful to connect from the GND header pin to the panel once fitted.

It is suggested the Jacks and Pots PCB is built in the following order:

  • Small header pins on the underside of the board.
  • Long header pins (if used) on the underside of the board.
  • Jacks.
  • Potentiometers.
  • Link wires.

The Panel

This is the panel design required.

The measurements are all detailed in the EuroRack 6HP MCU Pots and Jacks PCB Build Guide, but crucially the pot holes are M7 and the jack holes are M6. I found they needed a 7.5mm and 6.5mm drill respectively to allow for a bit of flex when fitting the panel.

I’ve used M2 mounting posts, screws and nuts between the boards. In particularly, I found that the spacing required a 6mm spacer with an additional nut added as shown below.

I also had to break off the alignment lugs on the potentiometers to allow the panel to fit snugly.

Once all together, you can see it needs around 45 to 50 mm clearance behind the panel for the whole thing.

Testing and Basic Code

I recommend performing the general tests described here: PCBs.

Then it can be connected to an Arduino Nano MCU board an a basic analogRead test can be performed to check the pots and input jacks.

void setup() {
Serial.begin(9600);
}

void loop() {
for (int i=0; i<8; i++) {
int aval = analogRead(A0+i);
Serial.print(aval);
Serial.print("\t");
}
Serial.print("\n");
delay(100);
}

An external potentiometer can be connected to a mono patch lead (GND and signal) and VCC to test the CV IN jacks (IN1, IN2, OUT2).

The order should be as follows:

A0IN 1 (1V/Oct)A1Not used, floatingA2POT 3A3POT 4A4POT 1A5POT 2A6IN 2 (CV1)A7OUT 2 (CV2)

The (dual) PWM output can be tested using the basic Mozzi “Hi-Fi” sinewave test which can be found in the examples here:

  • Examples -> Mozzi -> 01.Basics -> Sinewave_HIFI

Sample Applications

Here are other posts describing some sample applications for this module.

Closing Thoughts

I have to be honest – working out which parts of the circuits to use, then referring back to them to populate the PCBs, then soldering on the intra-board links and finally fiddling with the panel was actually quite a lot of work.

I don’t know if I’ve saved anything compared to just building the circuit from scratch on a piece of protoboard.

It is also going to be quite likely that any issues might be hard to trace too.

I might find that as I use more of these boards, (assuming I build some more of course), then I get to know the layout and circuits and won’t be referring back to the designs so much. I’ll have to see how it goes.

But for now, if all you want is a single Arduino Nano HAGIWO circuit, then you’re probably better off just making it up on protoboard…

But I think the whole board “sandwich” once complete does look pretty good!

I’ll have to see if I can get a bit of a “production line” going and make up a few more. And now I have to get on with some code…

Kevin

#arduinoNano #EuroRack #HAGIWO #mozzi

Ok, so first module has been put together. This is #Arduino Nano-based and I'll probably set it up as a #Mozzi oscillator.

But tbh, I'm still deciding if this is really worth the effort in the end - it was quite a faff...

But then I've nothing else to compare it with, having not built anything from just protoboard either.

I now need to decide what to do about labelling - it would be nice to get a proper printed label done somehow.

Write-up on its way once I've done some code.

#SynthDIY

ESP32 WROOM Mozzi Experimenter PCB Build Guide

Here are the build notes for my ESP32 WROOM Mozzi Experimenter PCB Design.

Warning! I strongly recommend using old or second hand equipment for your experiments.  I am not responsible for any damage to expensive instruments!

If you are new to electronics and microcontrollers, see the Getting Started pages.

Bill of Materials

  • ESP32 WROOM Mozzi Experimenter PCB (GitHub link below)
  • ESP32 WROOM 32-D DevKit (see photos and PCB for pinout – in particular note position of 3V3 and GND pins)
  • 1x H11L1 optoisolator
  • 1x 1N4148 or 1N914 signal diode
  • 1x 10Ω, 1x 33Ω, 1×220Ω, 1×470Ω, 2x1K, 2x2K resistors
  • 8x 10K potentiometers (PCB mount, see PCB and photos for footprint)
  • 2x 100nF ceramic capacitors
  • 2x 10uF non-polar capacitors (electrolytics probably fine too)
  • 1x 100uF electrolytic capacitor
  • 1x 3.5mm stereo TRS socket (PCB mount – see photos/PCB)
  • Either 2x 180 degree DIN sockets (PCB mount – see photos/PCB)
  • Or 2x 3.5mm stereo TRS sockets
  • 1x 2.1mm barrel jack socket (PCB mount – see photos/PCB)
  • Optional: 2x or 4x 15-pin header sockets
  • Optional: 1x 6 way DIP socket
  • Optional: pin headers
  • Optional: jumpers
  • Optional: SPDT slider switch, 2.54mm pitch connections (see photos/PCB)

Build Steps

Taking a typical “low to high” soldering approach, this is the suggested order of assembly:

  • All resistors and diode.
  • DIP socket (if used) and TRS socket(s).
  • Disc capacitors.
  • Headers.
  • Switch (if used).
  • Barrel jack.
  • Non-polar and electrolytic capacitors.
  • DIN sockets (if used).
  • Potentiometers.

Here are some build photos.

There are several options for headers – there is an additional breakout of all the pins of the ESP32 module and these can be populated with sockets, pins or just left unpopulated as shown below.

And finally adding the potentiometers.

Configuration Options

Two of the potentiometers, RV1 and RV2, have configurable GPIO connections, which are selected by solder jumpers on the rear of the board. The default has them mapped as follows:

RV1GPIO 13RV2GPIO 12

The alternative is configured by cutting the default track between the top solder pads and re-soldering to the bottom pads:

Only one can be changed if required. The alternative configurations are:

RV1GPIO 39RV2GPIO 36

Testing

I recommend performing the general tests described here: PCBs.

Functionality testing is covered by the Sample Applications given below.

PCB Errata

There are the following issues with this PCB:

  • The UART jumper is labelled UART0 and UART1, but in actually, UART1 is almost certainly going to end up being UART2 as UART1 is typically used for onboard flash memory.

Enhancements:

  •  I could add a slightly larger prototyping area, perhaps mirroring the layout of a mini solderless breadboard and still keep within a 100x100mm footprint.

Find it on GitHub here.

Sample Applications

Recall that the GPIO used can be found listed in the ESP32 WROOM Mozzi Experimenter PCB Design.

Potentiometer Analog Read Test

The following code will echo the values from all 8 potentiometers to the serial monitor.

#define NUM_POTS 8
int potpins[NUM_POTS] = {
13, 12, 14, 27, // ADC 2.4, 2.5, 2.6, 2.7
33, 32, 35, 34 // ADC 1.4, 1.5, 1.7, 1.6
};

void setup() {
Serial.begin(115200);
}

void loop() {
for (int i=0; i<NUM_POTS; i++) {
int aval = analogRead(potpins[i]);
Serial.print(aval);
Serial.print("\t");
}
Serial.print("\n");
delay(100);
}

DAC Write Test

The following code will generate two sawtooth waveforms on the two DAC pins, GPIO25 and GPIO26, which are connected to the audio output L and R channels.

GPIO 25 will generate a 440Hz saw tone, and GPIO26 will generate a 880Hz saw tone.

This works, as the code generates a 6-bit (i.e. 0 to 63) value saw wave, updating the value every time through the loop() function. The value is effectively scaled up to 8-bits (0 to 255) by multiplying by 4. The frequency is doubled for pin 26 by multiplying by 8.

In reality, I’m actually taking advantage of the fact that “count” is a uint8_t – i.e. only an 8-bit value – and will automatically wrap around back to zero when the value gets to 255. So in the code, every time the actual “count” variable wraps (0 to 255), the multiplied by 4 version will have wrapped 4 times (i.e. 0 to 63 four times – well, actually it is going 0 to 255, but in steps of 4 at a time, so it will do that 4 times). Similarly the multiplied by 8 version will have wrapped 8 times.

The code has to output these 64 values, 440 times a second, to generate the 440Hz saw tone – so 64 x 440 = 28,160 values a second. That means there is one value required every 35 uS or so. I use the ESP32 microsecond timer to manage this.

uint8_t count;
uint32_t timer;
void setup() {
count = 0;
timer = 0;
}

void loop() {
uint32_t newtime = esp_timer_get_time();
if (newtime >= timer) {
dacWrite(25, count*4); // Auto wraps at 256
dacWrite(26, count*8); // Twice frequency of wrapping...
count++;
timer = newtime + 35; // 35 uS in future of last timer read
}
}

MIDI Test

The ESP32 Simple MIDI Monitor code can be used for a simple MIDI test. The code is configurable for either UART0 or UART1 (in reality mapped onto UART2 in the ESP32) for MIDI.

In use, on reception of any NoteOn message the onboard LED will light up. Also, any MIDI data received over MIDI IN is software-THRU echoed to MIDI OUT.

When using UART1 (UART2) then there will also be a MIDI message dump to the serial monitor.

Closing Thoughts

This board seems to work well. But I have a bit of a problem at the moment. There seems to be a problem with the current (at the time of writing) Mozzi library and the ESP32. There is an incompatibility with the I2S driver used for streaming data out to the DAC.

So at the time of writing, as a Mozzi experimenter board, my options are a little limited. But as soon as Mozzi is updated to the latest ESP32 SDK I2S interfaces, hopefully I’ll be able to properly get going. Watch this space.

Kevin

#dac #esp32 #midi #mozzi #pcb #potentiometer

ESP32 WROOM Mozzi Experimenter PCB Design

Before building my Educational DIY Synth Thing I was playing with the ESP32 WROOM dev boards I’d found and was thinking about doing some Mozzi experiments. This post started to document …

Simple DIY Electronic Music Projects