I was reminding myself of a piece I wrote last year about my favourite camera experiences of 2022 and @mike35 on Mastodon asked after one of the cameras I referred to, the Lomo Sputnik, particularly how I prepared and viewed the images. I thought it might be time to revisit some of the images I had taken with this camera, and was shocked to discover that I had made them in September 2022! I know I’m a bit slow in getting around to blogging about my experiences but that was ridiculous.
The Sputnik is a stereo camera for 120 medium format film made of Bakelite. It was built from 1954 to 1974 by GOMZ in Leningrad (later St. Petersburg), then the name of the company changed to Loomp, and then to Lomo. The Cyrillic name of the camera is ‘Спутник’. My particular model, of course, was from the ‘Not Passed’ category at Kamerastore and was ultra-cheap compared to the normal price for this camera as although it was sound otherwise only the 1/125s shutter speed is actually working.
So far I have only actually put one roll through the Lomo Sputnik, but it was a memorable and enjoyable experience and one soon to be repeated. It’s good that the working shutter speed is fast enough that I can hand hold the Sputnik, although I can mount it onto a tripod if necessary. To measure the exposure for the Lomography Earl Grey 100 ISO black and which film I used a smartphone app called ‘Light Meter’ and selected the closest aperture indicated to 1/125s.
When I got the films back from the lab I wanted to see how they would look in stereo using three methods: side by side, as an anaglyph, and as an animated GIF. Below I will describe how I prepared each format using GuIMP phto editor.
The side by side way of viewing, or the stereograph, has been around since the dawn of stereo photography. Traditionally the two images were pasted onto a piece of card and viewed through a stereo viewer, and both viewers and old stereographs can still be found today. Nowadays, everything is done on smartphones, and it’s quite easy to make an image that can be viewed on a smartphone. There is also a resurgence in stereo viewers for virtual reality applications, from the cheap and cheerful Google Cardboard to vastly expensive VR goggles.
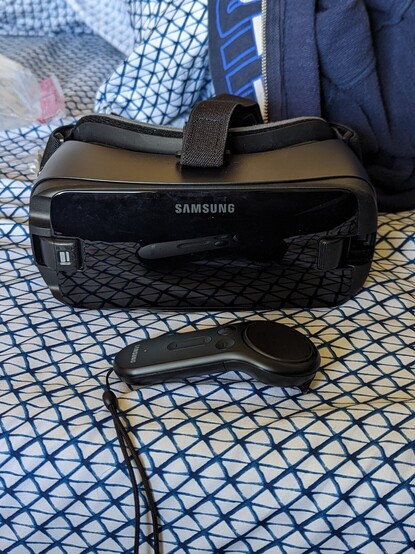
In my case I found a cheap pair of smartphone VR goggles that are ideal for use with my smartphone. Costing just 3€ (used from CEX Portugal, of course), I create a stereograph in GuIMP, save it to the phone and then slide the phone into the front of the goggles. I have a little Bluetooth ‘mouse’ so that I can navigate between images.
The results were mixed, varying from outright failures to see a stereo image to limited success. The best stereo images were found with the little park of remembrance and the view of Oiã railway station, and the Sputnik definitely benefits from objects in layers throughout the image, from the foreground to the background.
The animated GIF is a popular technique for showing stereo images and has the added advantage that anyone can see the effect without any special equipment. Quite simply, using a photo editor two images are overlaid in layers, with the right image on the bottom and the left image on top. Align the frame, but not the contents, scale the image to about 1000 pixels square to keep the file size down and then export as a GIF file. In GuIMP this is easy, the frame rate even defaults to 100ms. You can also use an app such as Giphy to make and share the files.
The last way of creating a stereo image is to make an anaglyph. You’ve probably seen these, it’s an image with objects surrounded by red and cyan lines, but you need a special pair of glasses, with one red and one blue lens, to see the stereo effect properly. I don’t have these glasses so although I have shared the images, I’m not really sure how long they work.
Making an anaglyph is quite straightforward, but a little fiddly. I found my method online, but never bookmarked it and now I can’t find it again. However, this method seems to work. Instructions are given for GuIMP but are similar in PhotoShop, I’m sure.
Load the two stereo images into layers as if you were going to make an animated GIF file. In this case, though the right image should be on the top and the left image underneath. Create a new layer, call it RED and fill it with red FF0000. Set the blending mode to ‘screen’. Duplicate this layer in invert the colour. The image will go white, but ignore this. Call this layer CYAN.
Move the ‘right’ image to above the RED layer and below the CYAN layer. You should now see a pale blue version of your right image. Deselect the bottom two layers (tick in the little eye in the layers to turn it off) then merge the visible layers. Set the blending mode of the merged layer to ‘multiply’. Reselect the RED and left layer, and your anaglyph should appear. Resize the image to about 1000 pixels square and save/export in the file type of choice.
Using the Sputnik was a joy. Yes, it is a heavy camera, but the waist-level viewfinder is really bright for a ‘twin’ lens reflex camera, but cocking and releasing the shutter is hugely satisfying. On my model when the double doors swing open it seems like it’s going to be a real job to load a film, but that was one function I found very straightforward. On the back of the camera on the left hand side is a single red window, and it is important to remember to miss one frame as you wind the film to the next exposure, so you go 1, 3, 5, 7, 9 and 11 for each roll of 120 film. Again, on my camera the red window was quite dark, and as I had chosen to use Lomography Earl Grey film the black paper with white numbers might not have been the best choice.
As usual, I really enjoyed using the Sputnik and certainly have a few more ideas of projects I would like to do with it. All being well, when the weather improves, I’ll be out with it again. This time, though, I’m a little more aware of the type of subjects that will make a good stereo photograph—and those that don’t.
https://keithdevereux.wordpress.com/2023/10/23/five-frames-with-the-lomo-sputnik-stereo-camera-23-october-2023/
#Anaglyph #AnimatedGif #GearVR #Lomo #Lomography #Sputnik #Stereograph #Stereoscopy #VRGlasses