If we can accept that all language is symbolism to describe and summarize material reality, Ai may be doing very well in being trapped at the symbolic level of understanding, totally blind to what the material world behind this symbolism is. It is like being trapped in the illusion of a scenario and unable to escape from the script.

You may know all there is to know about the Black Mamba, down to its dna code, but till it bites you in the ass you will not know the pain.

@WIRED @security-news-WIRED #ai #3dpriniting #cnc #robotics
#dialectical #materialism

"Ohnezahn" aus "Drachen zähmen leicht gemacht"

#3D-Drucker #3dprinter #3dprinted #3D-Druck #3dpriniting

Gemeinsam mit der Tochter haben wir "Albedo" fertiggestellt. Ein Charakter aus dem Anime "Overlord".
Ich hab haben den 3D-Druck erledigt und meine Tochter das bemalen.
Ist meiner Meinung nach richtig gut geworden. (hands for scale)

#3D-Drucker #3dprinter #3dprinted #3D-Druck #3dpriniting #replica #overlord

"Wie Langweilig ist Ihnen?"
"Ja!"
Ich habe Narsil gedruckt.
Kann sich wirklich sehen lassen - Dank auch an die Tochter, die die Drucke Nachbearbeitet und bemalt =)

Ich bin am überlegen die zerbrochene Version auch zu drucken, um sie an die Wand zu hängen, neben dieser kompletten Version des Schwerts =)

Ich könnte natürlich auch nach Mordor laufen, damit das Schwert einen Sinn hat. Aber an meinem freien Tag? - meh.
Bleibt wohl nur die Option "Wand-Deko". ¯\_(ツ)_/¯

#3D-Druck #3D-Drucker #3dpriniting #3dprinted #3dprinter #cosplay #cosplayprop #replica #lotr

Narsil

Narsil war das mächtige Schwert Elendils. Es wurde von Telchar von Nogrod vor oder im Ersten Zeitalter geschmiedet. In der Schlacht des letzten Bündnisses zerbrach die Klinge und als Elendil 3441 Z.Z. im Kampf gegen Sauron fiel, erlosch der Glanz der Klinge, der erst wiederkehrte, nachdem sie neu geschmiedet wurde. Mit der zerbrochenen Klinge schnitt Isildur, Elendils Sohn, den Einen Ring von Saurons Finger. Ohtar brachte, nach dem Tod Isildurs, die Bruchstücke zurück nach Arnor, wo es eins der

Der Herr der Ringe Wiki

Tochter benötigte ein Regal.
Dieses Modell hier - eigentlich eine Trittstufe für Katzen - taugt aber auch super als etwas andere Ablagefläche 😀

#3D-Druck #3D-Drucker #3dpriniting #3dprinted #3dprinter #functional3dprint

Cat paw shaped shelf by jaxxer

My cat likes to sleep on top of the furniture, but getting there and back is a challenge for her. I designed this shelf so that she can use it as intermediate step to reach her sleeping place. Special care was taken to make it strong. I printed with ABS, but should be printable with any other material.Single color per tray. Very little support required for the base.I used heat-set inserts to assemble two parts. Alternative is to use screws or just glue them together.

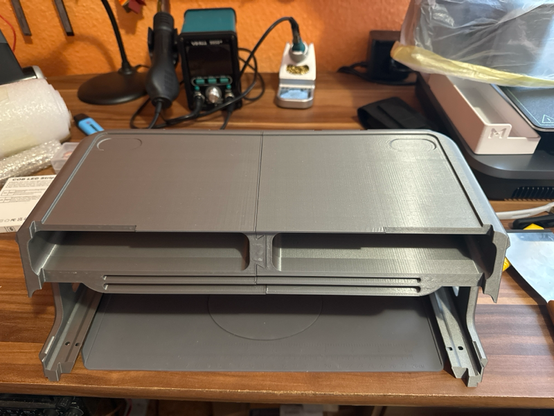
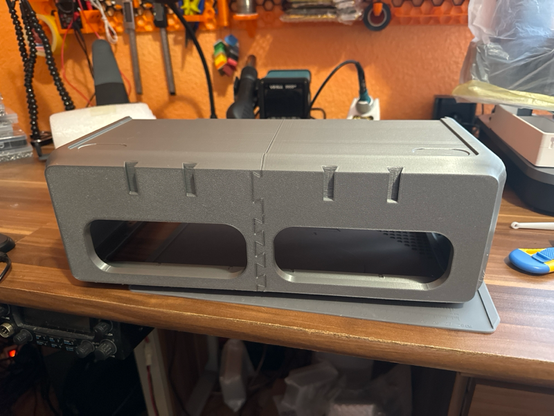
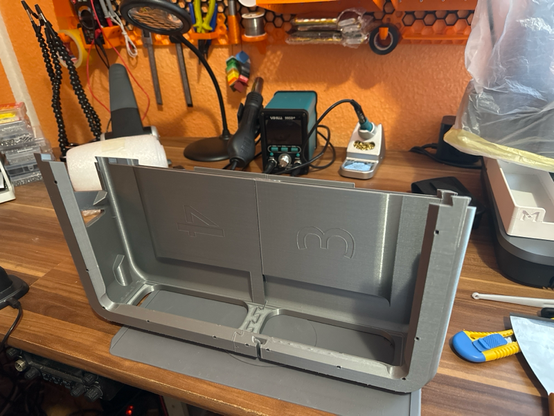
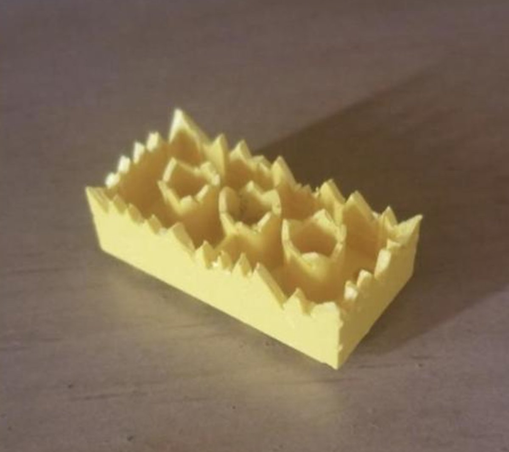
Na das war mal ein Projekt - insgesamt hat es ca. eine Woche mit einigen Fehlschlägen gedauert, diesen AMS-Riser zu drucken.
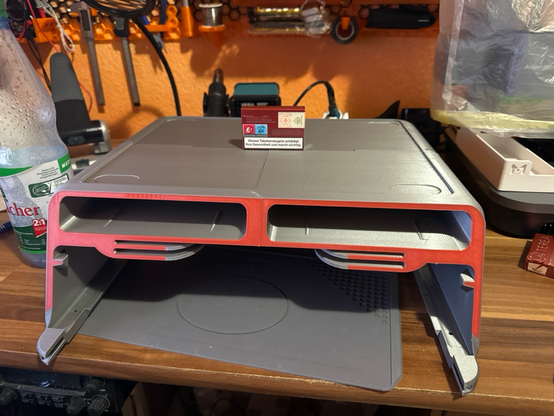
Dieser Druck löst einige kleine Probleme des Bambulab-Druckers:


  • Die Standardbeleuchtung des Bauraums ist mäßig bis schlecht.
  • Man kann die obere Glasabdeckung „auf Kipp“ stellen, wenn es im Bauraum zu warm werden sollte (bspw. Im Sommer).
  • Es gibt praktischen Stauraum direkt am Drucker (2 Schubladen für Gedöns und 2 Einschübe für Druckplatten)
  • Man kann allerlei Zubehör (Filamenthalter, HSW-Wand et.) direkt am AMS-Riser befestigen.
Der Druck besteht komplett aus PETG. PLA war mir zu Grenzwertig aufgrund des Gewichts des AMS und den Temperaturen direkt am Drucker.
PLA ist ab 60° nicht mehr wirklich Formbeständig – das Risiko wollte ich nicht eingehen.

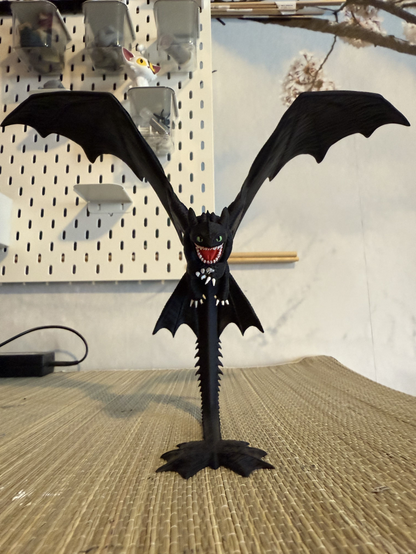
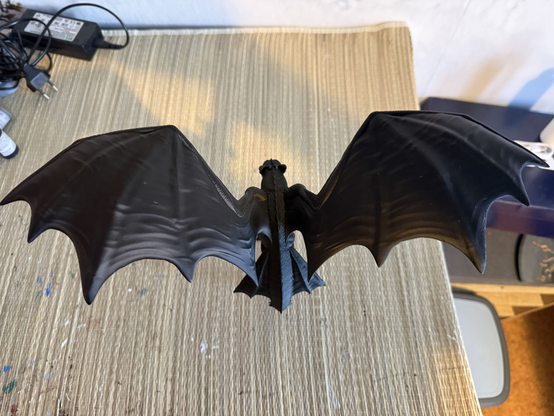
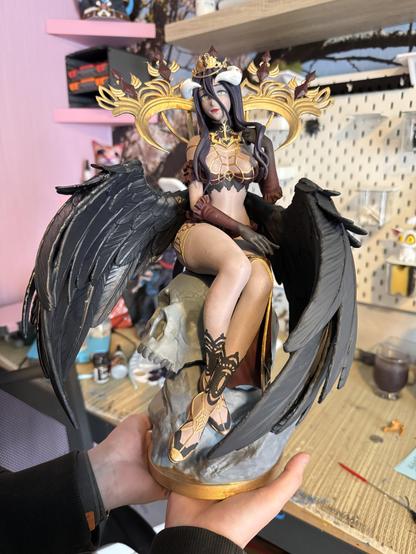
Anbei eine Bilderstrecker der "Reise" bis zum fertigen Objekt:

Wie immer: viel gelernt und es hat Spaß gemacht 😀

#3D-Druck #3D-Drucker #3dpriniting #3dprinted #3dprinter #functional3dprint

AMS Riser V2 Remixed by maCyo42

Addons (There are about 30 remixes that add new functions to the Riser. Here are some listed, including third-party ones.)Boost MePlease boost my models only once; there are so many other nice models that also need a boost! It's done!!! All Parts printed and assembled! I started the Riser V2 early December and changed the last Parts yesterday. There's a lot of work in this design, so many small and big changes. Today i will start to Release the first completed picture of the Riser V2 and the Profiles of the Mainbodies. As you later can see i've seperated some Parts so that you can play around with Step Files for your own Design Fronts. Should I print the Riser V1 or V2? Here are the differences.There are 2 Versions of the V1. The Standard is for 8mm Lightstrips and the 12mm Edition for 12mm Lightstrip and additionaly you can fix the Lightstrip with Cable ties.V2 combines the Features of both V1 Riser in this Case.I received a lot questions: Will 12mm Lightstrips fit? It can but that is not sure. It not depends only on the width. The stiffness is one big issue for the curves. Try it i cannot guarantee! There are different lightstrips on the market.V2 is tuned more for function than design. There are additionaly Connectors for Accessories like Tools.Early December i began to work on V2. My intention was the big change in the Anti Glare Feature and the Connectors.But meanwhile there where some critics on the V1. Some Makers reported a bad fitting of their Top Glas. To much loose in the Spoolholder fitting and so on. So the logical consequence was to rework many things on V2.The Modders. I had so many Mails and Msg… can you please add Hexagons insted of Holes and so on. Because of this i reworked the Covers and seperated them for the Modders. You can now easily create your own designs on the most seen Parts of the Riser.The printability. Puh i don´t know how to begin exactly. Makerworld makes a lot very easy. But a project like this is not easy. It´s big, it can fail as any other Print… it can fail! But you can do a lot that the chance that it will fail is very small. You have to know your printer, your Filament, your Buildplate… The condition is not the same as i have. But it´s quite easy to begin if you have a predefined Profile.But it´s not a Microwave, it´s a 3D-Printer, a popular and wonderfull Printer. It makes a lot easier and it´s the by far best for consumer on the marked… and nevertheless you have to know what you do. Please keep in mind!I reworked a lot to make it even easier. Less Supports (less filament usage is everytime the best optimization!)Tuned Overhangs especially on the back which is on the Print surface while printing Part 3 and 4. and many more changeshappy printingFeatures DescriptionAccessories PortNew second Accessories Connector Port. The Port is redesigned an optimized. Accessories fits tighter. The Spoolholder on V1 was a bit to loose.New seperated Drawer Front Cover and HandleWith the new separated Drawer Front you can create easily your own Designs and Text on it and print it upside down for best looking Surface. (STEP File of the Cover included)The new Handle locks both Parts (Drawer and Cover) together. No Glue needed! Compatible Inserts for the DrawerOriginal Inserts & Dividers by tomtom5893CHT Nozzle Holder by kylecasey4New P1S Front Dash Parts with separated Cover for leave Blank or your own DesignIn the Standard V2 you have a dummy for the Slot where you can mod different things like a light Switch.The Slot for the MicroSD Card is now protected with a Cover. If you press on the lower Part of the Cover it opens. Yes it´s tricky to get the Card out, but how often you want to get it out… i recommend to use a tweezer or something else.The Covers of Part 5 & 6 is now separated too. You can add your own designs and print it upside down. (STEP Files of the Covers included)Light Strip integration and Anti GlareThe Lightstrip integration is fully redesigned and now combines “V1 Standard” and “V1 12mm Edition” in one sleak Design.You now have a lot of cable tie position to safe your Printer from falling Lightstrip!I strongly recommend COB LED Light Strip with 8mm width. Length 2m and cutable.Yes you can also use 10mm or 12mm BUT beware. Most 12mm LED Strip are so stiff that it´s a mess to integrate them.The Anti Glare Feature moved from the Mainbodies to the TPU Gasket Parts because of collisions with the PTFE Tube while printing big Parts.Why more Light? Do i need more Light? YES i think so!The Toolholder ConnectorWith this Connector you can add whatever you want to the Riser. In the First step i added the Connector for my P1S Tools Model (Get it here on Makerworld).The Toolholder Connector is provided as a Step File as well. With this the Modding Community is able to connect whatever they want.There are 6 Connector Ports 4 of this. 2 on the Left Side and 2 on the Right Side. There are 2 more Connector Ports on the Back in a different design. (STEP File of the Toolholder Connector included)You can also attach a Spoolholder. Get my Version with Bearings hereThe “Back Connector” is finally released. Unleash your modding ideas, perhaps for an ESP32 case that can be attached to the back?Use one, two or even all 4 connectors for your modding idea.(STEP File of the Back Connector included)Where to find the "RAW Files" on Makerworld? e.g. Back Connector …So there are 2 Options. One you can see in the folowing picture as provided by the designer you can find the Parts under “Download STL” else Asssembling GuidePush Part 2 on Part 1Push carefully Part 3 on Part 4Then push carefully both Parts 3 & 4 together from the Top to the Bottom in Part 1 & 2tba

That is pure evil, only bested by a BS 1363 plug.
Honestly the BS 1363 plug should just fall under the Convention on the Prohibition of the Use, Stockpiling, Production and Transfer of Anti-Personnel Mines and on their Destruction of 1997.

https://thingiverse.com/thing:4623557
h/t BV3D #3dpriniting #LEGO

Weaponized Building Block Joke by BigMacDaddy73

Someone posted a joke about a weaponized building block being banned by Geneva convention (image included from the joke). Made a quick mock-up in Tinkercad and seemed that there was some demand for the file. Just a joke / gimmick print for your display shelf and I do not recommend ever stepping on this.

#vgt I should have thought of it, before jumping at #3dpriniting

I just passed a laboratory which has some #3DPrinters in it. There’s often something interesting to see in there but this figure of a #lion particularly caught my eye. The #mane was printed as an integral part of the whole. The technician told me that the material is a #starch-based #polymer calle #PLA or #PolylacticAcid.

#MyWork #MyPhoto #CCBYSA #3DPriniting