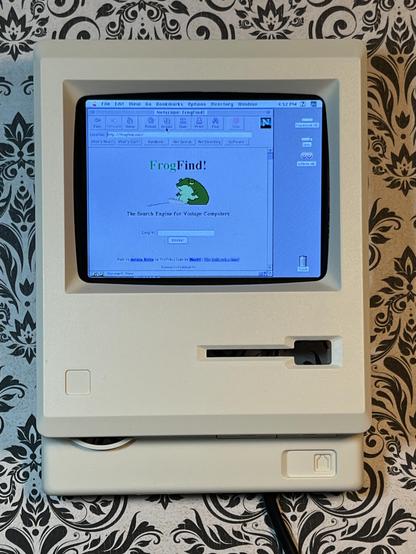
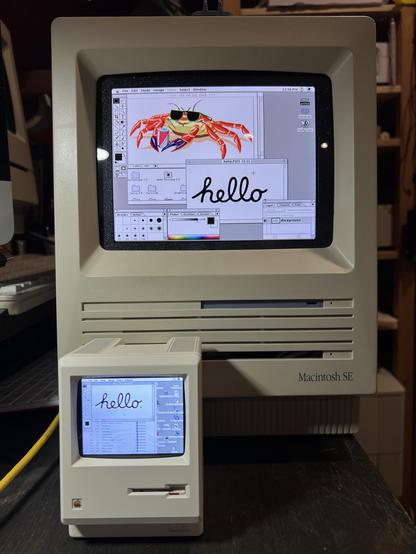
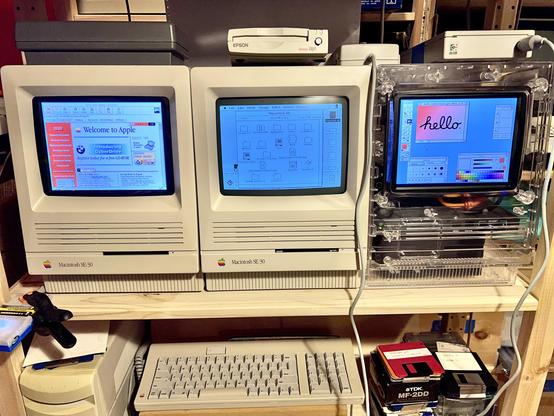
A while back I bought two of those Maclocks with the intention of modding one into a tiny Mac. After seeing the success of @WiteWulf I decided to give it a go.

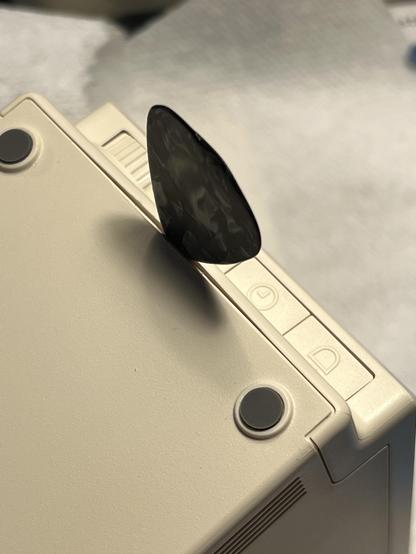
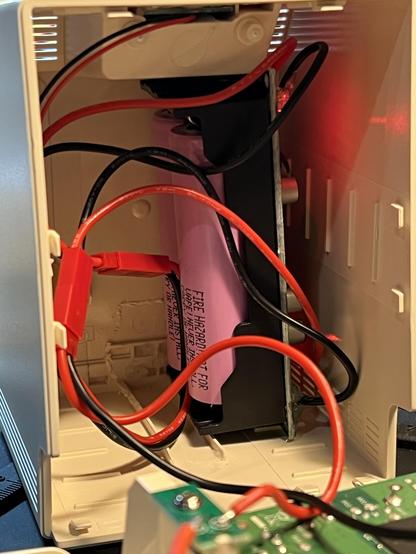
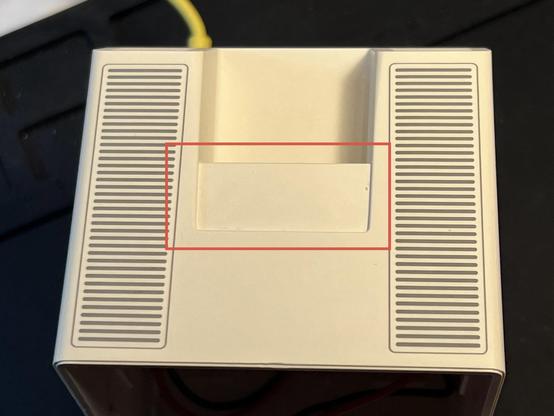
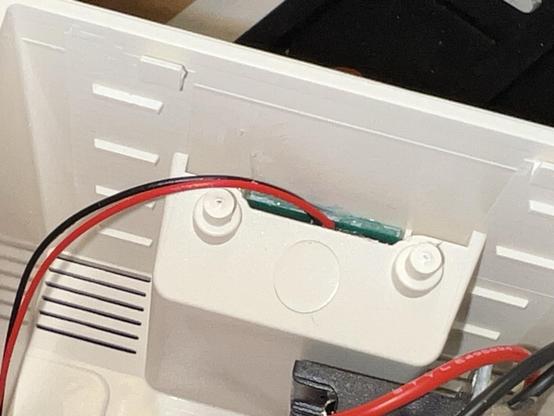
Opening the case is definitely the hardest part. Gary said to use guitar picks to start, so I began on the bottom and opened a gap to get a stronger metal spudger inside to lift up the rear case to release the six clips (circled in third pic) from the front. We're inside!

#VintageApple #VintageMac #RetroComputing #Maclock

To make a Mac, I'm using a Pi Zero 2 W, a Waveshare 2.8" DPI LCD, and the MacintoshPi image which includes Basillisk II and SheepShaver already installed, and they work without X11 running, perfect for the thin-resourced Pi Zero.

https://jm.iq.pl/macintoshpi-mac-os-7-8-9-for-raspberry-pi/

One thing that was missing was AppleTalk support but I solved that by installing sheep_net from these instructions. And works over WiFi!

https://www.ecliptik.com/blog/2025/Live-Laugh-Localtalk-with-Basilisk-II/

#VintageApple #VintageMac #RetroComputing

So sheep_net seems to work great for AppleTalk traffic but struggles with TCP/IP. It'll work for a few seconds then stop.

Curiously, running tcpdump on the machine causes it work, presumably because it puts the interface into promiscuous mode. And enabling promiscuous mode manually also works.

No mention of that on the project page, but that was 10 years ago.

#RetroComputing #VintageApple #VintageMac

https://github.com/cebix/macemu/tree/master/BasiliskII/src/Unix/Linux/NetDriver

Hey maybe the #TinyMac works well enough to be a #GlobalTalk router? Certainly uses a lot less power (avg. about 400mA with screen on).

#VintageApple #VintageMac #RetroComputing

More #TinyMac progress. Wired up some smol speakers to a smol audio amp.

Designed and printed a volume knob in the style of the original to fit the B50K pot. Biggest issue is how to mount it inside (the amp board has no mounting holes).

The amp turns out to be too noisy, I can hear WiFi and BT traffic. Also draws about 300mA even when the volume knob is switched off.

I think I'll leave it out.

#RetroComputing #VintageApple #VintageMac

More #TinyMac:

- Swapped in a Raspberry Pi 3A+ for the Pi Zero 2 W. Slightly faster and has 5GHz WiFi which is so much better.

- Mounted the LCD/Pi to the back of the front case with some hot glue.

- Kept the front floppy switch as a power switch when floppy is inserted.

- Installed a LX-2BUPS (2x18650 UPS) inside for power, exposed a USB-C port on the back for charging.

#RetroComputing #VintageApple #VintageMac

Two tiny Macs, my converted one and an unmodified Maclock.

#VintageApple #VintageMac #RetroComputing #TinyMac

The top of the Maclock includes a touch sensitive area that would turn the backlight on and off, this area marked in red. It doesn’t move, it’s just plastic.

Underneath is a board that is likely difficult to remove, embedded with glue. It has two leads coming off of it.

Without seeing the board, can you theorize how it works and how it could be utilized with a Raspberry Pi GPIO?

#RetroComputing #VintageApple #VintageMac

@paulrickards "Don't talk to me or my son ever again."

@paulrickards I really hoped this was Mac and Massive Mac.

Coming soon?

@anthony All depends on your perspective 😆
@paulrickards the little one was from that clock mac right?
@paulrickards so what’s inside the regular sized Mac, then? Another Pi with a bigger screen?

@WiteWulf Yeah, a Pi 4 with a 8" LCD and curved acrylic front from this store. I got mine a few years ago, looks like the current ones are 1024x768 and right side up (mine is fixed resolution 1536x2048 and rotated 90 CCW).

I have a history of sticking LCDs in side Mac cases like my SE/30 triple display rig 😄

https://www.etsy.com/shop/AustrianMegaTech

@paulrickards wow that’s really cool! Is it possible to buy a tinymac complete?
@thomas_klopf Not that I know of. Just the parts to DIY.
@paulrickards thanks! Yeah no time these days for that, but very cool 😎
@paulrickards Where'd you get that TinyMac? Never seen that before. ​
@starlight Made it! See the top of this thread.
@paulrickards Touch sensitive and "two wires" to me smells like it's literally just a bare capacitive sensor, with all the sensing smarts being on whatever it's connected to. (one wire being GND and the other being 'sense')
@paulrickards Capacitive touch sensor ?
@penguin42 @paulrickards That'd be my guess. Passive tho, so no active components (transistors or IC's) on the board. Possibly just two pads on the board, and bringing your finger near them changes the capacitance. Could run a clocked signal in one side and out the other and measure the difference in skew to tell when something is near it or not?
@penguin42 @paulrickards Given the size of the board, I'd say that there's probably enough latch/debounce logic on that thing that you can take the red and black at face value and just try doing reads off of GPIO pins.
@spacehobo @paulrickards but with only two wires to the board that's tricky if it's anything other than just a pair of pads for a touch sensor.
@penguin42 @paulrickards yeah, and given what was in there before, that's probably exactly what it is.
@penguin42 @paulrickards I mean, I'd hook it up to a scope and play around.
@paulrickards does it just function like a momentary switch, by chance?
@paulrickards if not touch capacitive, could be an IR led & photoresistor in series. The toucher reflects the IR back, reducing the resistance and increasing the circuit's current flow. Not sure if that could be measured over just two wires going to a Pi's GPIO pins. This method of "touch" sensing probably needs more signal processing than capacitive touch, but it's not the worst way to do it 

@paulrickards

Not in color, not on that mac.

(But a color retromod I'd pay decent money for....)

@paulrickards very cute. Almost therapeutic:)
@paulrickards Now you can write a Maclock emulator to run on the emulated one... 😀
@paulrickards oh, using the floppy switch is a nice touch! Does it do clean shutdown when you eject?
@paulrickards love the mounting behind the screen, too. That’s much neater than having it in the case, which I’d been trying to figure out.

@WiteWulf Nothing fancy, it just switches the power to the Pi on and off.

I would love to use the touch sensor on the top of the case for a soft shutdown though! Any ideas what's in the top?

@paulrickards no idea; mine’s held in firmly with hot glue. There are scripts available that trigger a clean shutdown when you put a signal on a GPIO pin. I’m sure you could rig the fdd switch to that.
@paulrickards the power consumption looks quite high. Is there a DC component that is fed to the loudspeakers, by chance?
@davbucci How would I check for that?
@paulrickards try with a multimeter in DC, you should have less than 100mV across the loudspeaker terminals with no sound. Alternatively you can check if the loudspeaker moves and stays in a position different from rest when the circuit is switched on (no sound).
@paulrickards Nice try - shame it didn't work out.
@paulrickards That looks like a great mod. I did a bit of a double-take on the photo as I could see it wasn't an original Mac case, but it took a moment to work out the scale.

@paulrickards oo, good tip on the Macintosh pi image. I’ve been struggling to get my pi and waveshare working with SDL/no X today. It’s always better if someone else has already put the legwork in! 👍

Also: I received a Raspberry Pi 3A+ today. It’s not a commonly used variant, being a hybrid of the 3B+ and the Zero 2W. It fits fine in the Maclock case, but is clocked faster, at 1.5GHz (Zero 2W is 1GHz), and has 3.5mm audio out. I’m going to try and put a small amp and speaker inside mine.

@WiteWulf Oh nice, didn't know about the Pi 3A+. It does solve the missing audio issue I have with the Zero 2 W. Although I did see it's possible to use PWM on GPIO to do audio.

https://learn.adafruit.com/adding-basic-audio-ouput-to-raspberry-pi-zero/pi-zero-pwm-audio

But the Waveshare DPI LCD is probably using the pins I need (or not?) I can't really tell if it's possible or not.

Adding Basic Audio Ouput to Raspberry Pi Zero

To keep the Raspberry Pi Zero as low cost and small as possible, the Pi foundation didn't include a 3.5mm audio jack. There's also no breakout pads for the audio output. This made us a little :( at first but then we thought "hey you know, we can probably figure out how to get audio out with a little hacking!

Adafruit Learning System

@paulrickards here's the pins used by the 2.8" DPI display:
https://www.waveshare.com/wiki/2.8inch_DPI_LCD#Pinout_Definition

Wouldn't bitbanging PWM audio via GPIO be quite CPU intensive, though?

2.8inch DPI LCD - Waveshare Wiki

@WiteWulf Yeah been using that page and bumping it against the PWM pins needed and it looks like they're being used for the display.

As for performance, maybe not? I think it's just using a hardware timer for PWM (but I could be wrong!)

BTW Does touch work on your display? Doesn't seem to work for me, although I doubt I'd ever use it (with the clear plexi being in the way and also way too small).

@paulrickards I downloaded the MacintoshPi image and got no display when it first booted on my Pi Zero 2W or 3A. I expected to see a console? Not sure what I'm doing wrong.

There doesn't seem to be an opportunity to specify what display you're using, and the author isn't using the same small Waveshare display from what I can see.

Did you use the image, or build on a clean Buster install as the git page also suggests?

@WiteWulf I used the pre-installed image on the site. SSH is off on the image 😕 I got a console on HDMI, auto logs in at user pi. Then I installed the overlays and change the /boot/config.txt for the LCD to work. It's a Buster release so follow those install instructions. Except for rotation which was squirrel to get working! In /boot/config.txt comment out the framebuffer_width=960 and framebuffer_height=600 lines and add display_rotate=3 to the top.
@paulrickards yeah, I managed to enable WiFi by editing the config files before it booted it, but having ssh turned off hamstrung me. I don’t have a monitor with HDMI at home (have to take over the TV 😀), so I’ll take it into work with me to configure it tomorrow. It’s good to know that it’s easy enough to configure by adding the display drivers.

@paulrickards when you say "It's a Buster release so follow those install instructions" do you mean these, or something else?
https://www.waveshare.com/wiki/2.8inch_DPI_LCD#For_Raspberry_Pi_OS_Buster_and_Ubuntu_System

I ask ask there's no framebuffer_width/framebuffer_height lines in that config.txt

*edit* ignore me, you were referring to the config.txt on the MacintoshPi image

2.8inch DPI LCD - Waveshare Wiki

@WiteWulf If you have a keyboard, you can boot it up and wait about a minute and carefully type

sudo raspi-config nonint do_ssh 0

That should enable SSH (according to the docs).

https://www.raspberrypi.com/documentation/computers/configuration.html

Configuration - Raspberry Pi Documentation

The official documentation for Raspberry Pi computers and microcontrollers

@paulrickards top tip: don't use the function that allows you to automatically launch a version of macos at boot. It overwrites /boot/config.txt and blows away the settings for the waveshare DPI 🙄

@WiteWulf Ugh.. thanks for the tip, I hadn't done the auto startup thing yet.

I had difficultly actually finding where the Basillisk II config file actually was that it was using (so I could change the ethernet to wlan0 to use sheep_net). Tip, os7 is here:

/usr/share/macintoshpi/macos7/macos7.cfg

Edit: I guess I'll just use /etc/rc.local to start it. Along with loading the sheep_net kernal module and setting permissions.

@WiteWulf Something else that might help you that I use, you can add additional .dsk images to mount on the commandline.

mac os7 /full/path/to/harddisk.dsk

Also, filenames with spaces failed for me (tried quoting and escaping), YMMV.

@paulrickards ah, that's handy. I wonder if there's a way to add them on the fly like you can with drag'n'drop in the GUI version

@WiteWulf Not sure, I've not used Basillisk II a lot.

I couldn't get Open Transport TCP/IP on the included Macintosh Pi OS7 image to work. I used the Network Software Selector to choose Classic networking instead (in the Apple Extras folder).

Another drawback of the Pi Zero 2 W: It only does 2.4GHz WiFi, which where I am is terrible. Have a 3A+ inbound which will do 5GHz WiFi.

@paulrickards ah, didn't realise they only did 2GHz! So, yeah, the 3A+ is a much better alternative.
@paulrickards I need to build one of these, Not sure I got a spare case.. (need to look) if not I know there are some 3d printable classic mac inspired cases out there.

@paulrickards Very nice! I've been keeping an eye out for low cost eInk designs that have enough memory to do a Mac clock. Something like this:

https://docs.m5stack.com/en/core/papers3

m5-docs

The reference docs for M5Stack products. Quick start, get the detailed information or instructions such as IDE,UIFLOW,Arduino. The tutorials for M5Burner, Firmware, Burning, programming. ESP32,M5StickC,StickV, StickT,M5ATOM.