Ok. I'm machine-basting the back together and then I'll machine-baste the zips on and then... Um. I guess I'll have to make the piping.
I'm actually attempting to baste the seat into place. It's extremely gathered so that the seams won't be stressed if someone stands on the chair and all their weight is in the middle.
If I re-webbed the seat of the chair I wouldn't need to do this but that's beyond me at present.
I've placed a zip where the chair-back joins the wing-back and the arm-side, and next I need to sew it in place. But I'm scared I'll ruin it somehow. I guess the answer is Basting Again. It's always Basting Again. #Sewing
This shape is so complicated and the fabric is so heavy that it's EXTREMELY difficult to know what bit I'm attaching to where while I'm actually at the sewing machine.
I'd photograph my progress but it looks like a big pile of crumpled fabric and a headache, so it wouldn't clarify anything.
Fittings are harder on a chair because it can't hold the pins for me while I fix things.
I'm tightening up around the... armscye? where the arms join the body and I will need to figure out how to keep the skirt tugged down firmly.
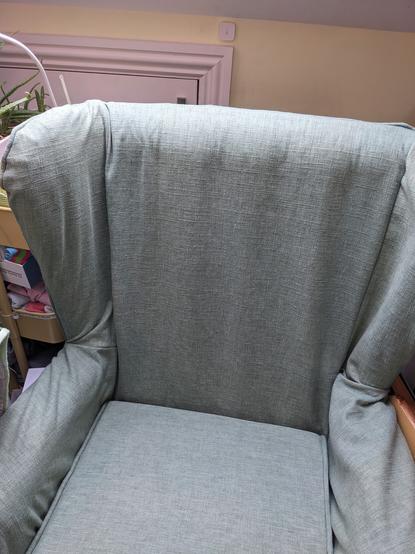
I've fitted one wing. I'll match the other to it tomorrow, and then start finalising the arms. It is INCREDIBLY hard to get the colour in photos. The camera just leaches all the colour away. It's a greyish-green but it's GREEN, definitely. Augh. #Sewing
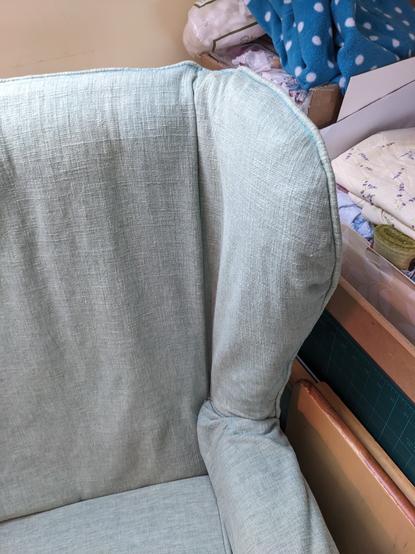
Matching the second ear was so easy! I've also updated the pattern for those pieces so that if I have to do this again I'm starting from a better place.
Next I'll join the arms to the wings in that wrinkly corner, then put the piping and fronts on the arms. And then it's hemming. #Sewing
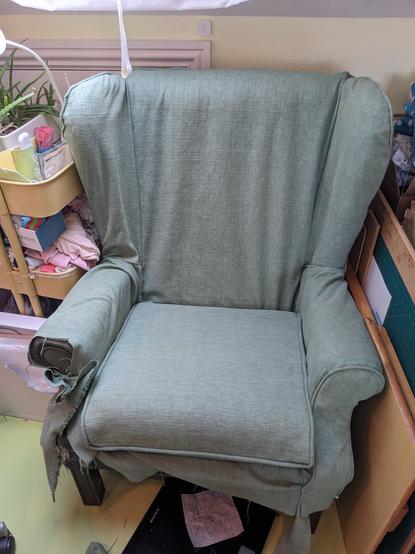
I've put the front on one arm. I haven't trimmed ANY of the seams yet and I'll have to because it's on a lumpy cushion of four layers of its own heavy fabric at the moment, but it's on and the second one will be a million times easier. #Sewing
The world is 86% pins
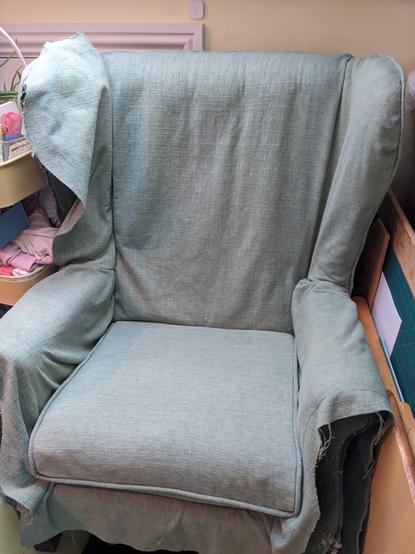
And this thing I'm sewing is technically a "loose" cover but I've just done up its zips and tugged it into place and it's not loose. It's form-fitting. It's a snug cover.
THAT'S IT
no more until September
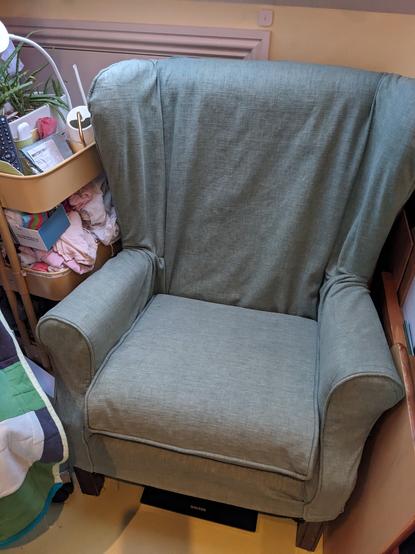
I'm declaring Finishing Amnesty. The chair is covered, the ends are hemmed, I'm going to sit in it like this for at least two weeks before I take it off again. It's EXHAUSTING getting it on and off for fitting. #Sewing
So yesterday I darned a shirt and today I patched a top and sewed a bunch of stitch length samples. The chair cover was such a major project that I'm going to need to recover from the physical effort.
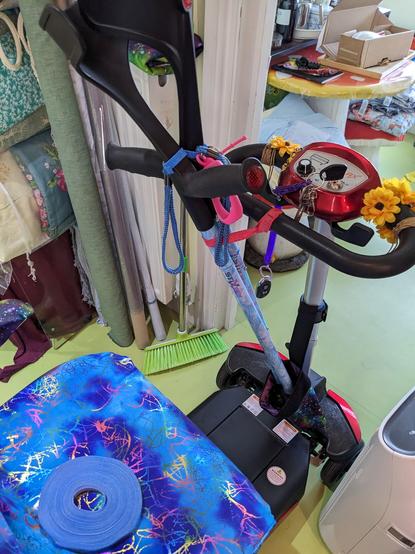
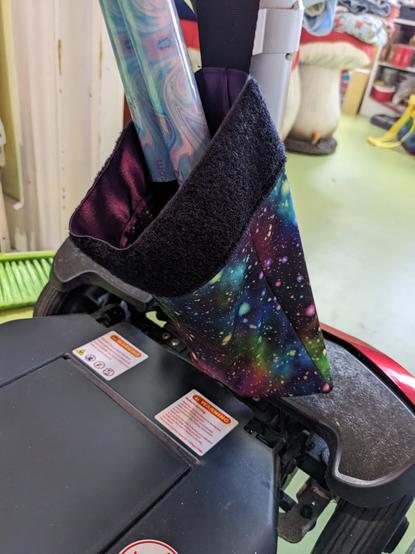
I'm hoping to make a crutches holster for my mobility scooter before I next go out. Having somewhere convenient to stash them makes a big difference.
Ok I have a to do list in order of importance:
Crutches caddy
Underwear
Dungarees
Only the dungarees, which are completely unnecessary, have any progress yet. #Sewing
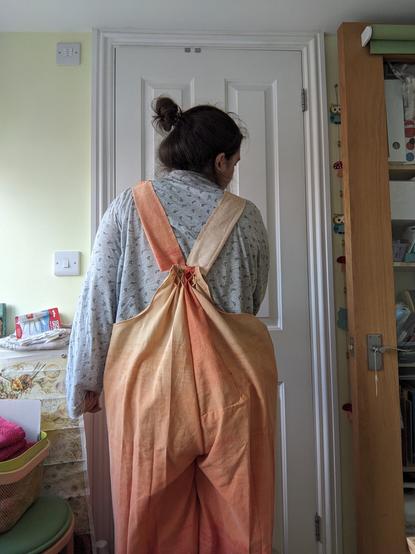
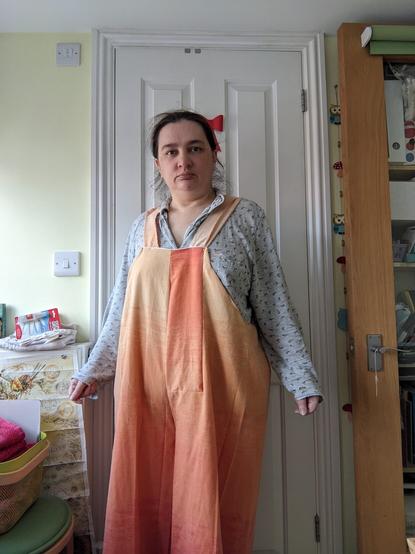
Me in my grey pyjamas trying on my HUGE ORANGE DUNGAREES over the top.
I think I need to do some ironing next to get to the point of attaching the straps. And I think I understand smocking.
Finally made a thingy to stop my crutches jamming into the steering of my scooter when I'm out. And put little sleeves on the arms for amusement.
Underwear fabric and pattern are on the cutting board ready to make tomorrow. I can do this.
Cut out one set of underwear pieces. Need to find more fabric for another.
Today I've started ironing my dungarees. The legs are wider than my ironing board. They are vast and will contain multitudes. I'm taking lots of breaks from standing but ironing is one of those tasks which make a clear and visible difference so it's good for feeling like I'm achieving something. #sewing
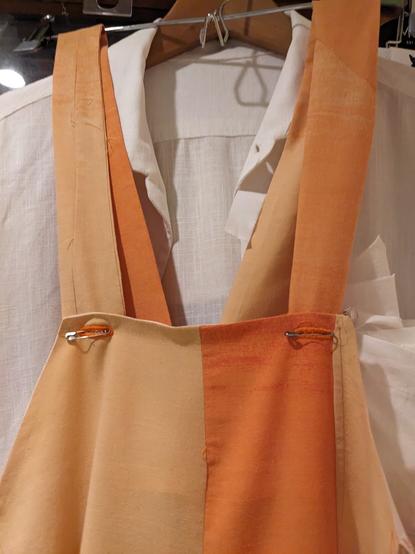
I ironed, finished some of the piecing seams, added the straps, and put in buttonholes with my Greist buttonhole maker. Tomorrow I hope to tidy the stray threads, add buttons, and wear it. #Sewing
I think it wants appliqué.
FINISHED. I will probably do nicer seam finishes inside sometime, and it will probably grow appliqué over time, but I'll be wearing these now! #Sewing #dungarees (Yes, I can just about fit in one leg)


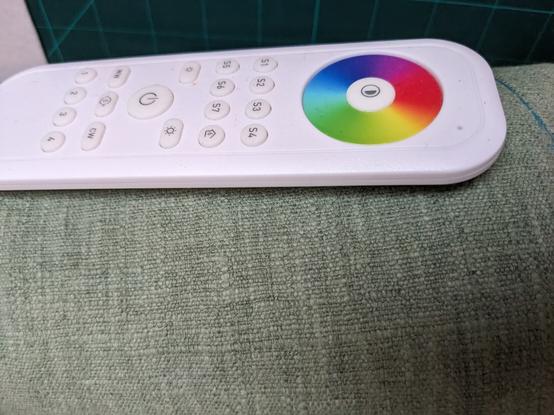
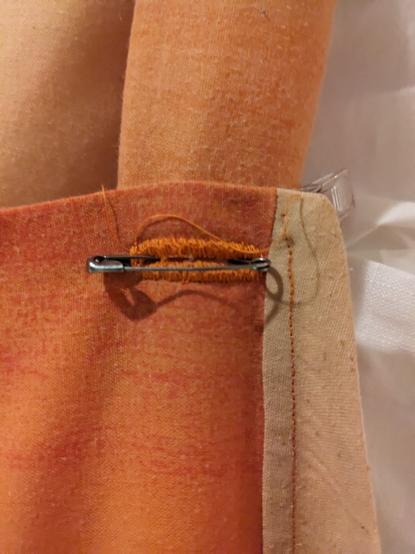
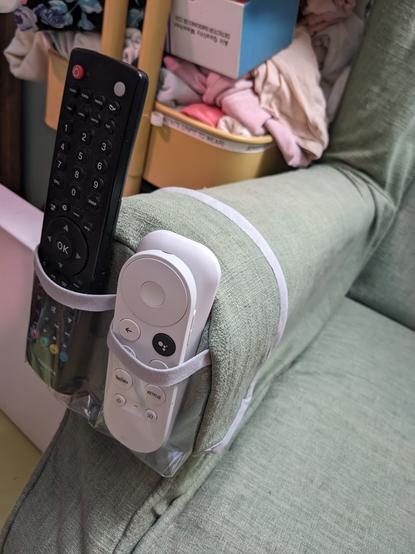
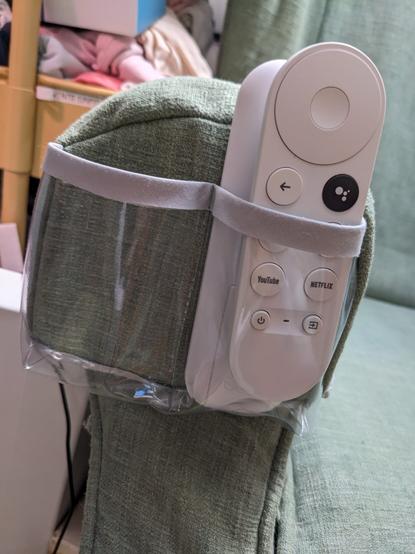
I got so bored I made a remote control holder for my freshly-covered armchair. #Sewing
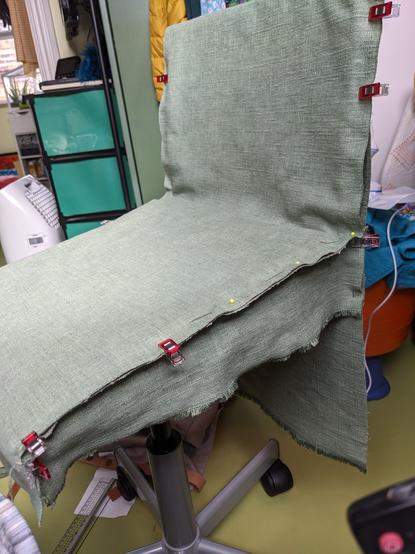
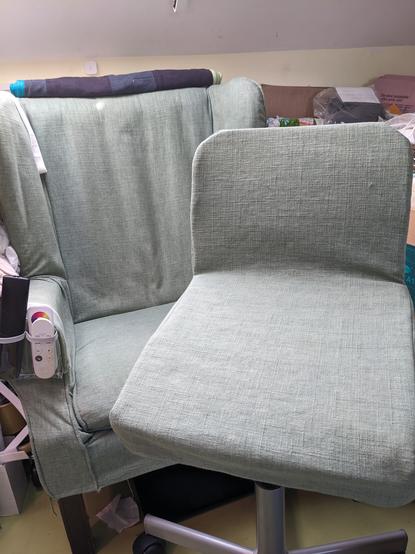
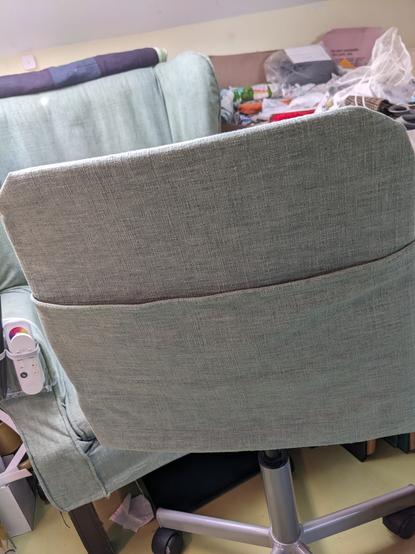
To go with my armchair cover, a desk-chair cover. The red was ok but clashy, and adding the black just made it miserable to look at. So I'm using the last few inches from the roll to make it a matching cover. First pin/clip to get an idea of what shape I'm going to need, then I'll baste, then decide on hems and sew it on the machine. #Sewing
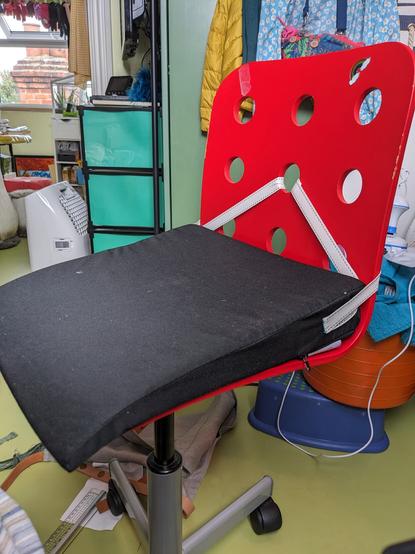
Finished! I don't know why I put in a little pocket, other than that it saved me from having to cut and hem the selvedge? #Sewing
Today's #sewing was ironing. Three metres of cotton shirting in preparation for making another from my McCall's pattern. This one will be longer and have sleeves, but will be of a reasonably civilised fabric, so that's exciting. The first one was made of extreeeeeeeemely slippery linen and was like sewing a teflon-coated octopus.
Today I'm lengthening the shirt pattern - starting with two inches front and back and on each sleeve, and I'll see how that suits my victim.
Cut out the fronts, back, and sleeves. Smaller bits tomorrow. Tired now.
The blue I'm using for this shirt is School Uniform or possibly Nurses Scrubs. But the pleats are in the back and the yoke is on. Attaching the fronts to the shoulders now. #Sewing
I've topstitched the yoke facing into place and it involved more ironing. Next is more basting, then putting away the body of the shirt and starting on the sleeves.
I have read the instructions for the continuous lap next to the cuffs and I strongly suspect them of being very "now draw the rest of the owl."
I'm sewing this at 15 stitches an inch, as a compromise between easy to undo errors and small enough to look ok. I can see myself doing the next one at 20, with 30 for topstitching, if none of this one needs unpicking. #Sewing
Last time I made a shirt, the collar confused me until I had finished it. This time, the sleeve end and cuff are extremely confusing so I hope they'll also become obvious as I plough through.
But I am afraid of the continuous lap. #Sewing
I think I have sewn the continuous lap but I don't understand how it's supposed to look. There's no mitre at the top of the split or anything.
Ohhhh, I *see*!
Today I'm attempting to attach sleeves. I used fabric clips to match notches, then pins to get the pieces lying flat together, then machine-basted, then unpicked puckered bits and rebasted them, and now I'm having a rest before I change the stitch length and nail them on for good. #Sewing
I was sufficiently tired to double double check and *anyway* attach one sleeve inside out. So I'm glad I only basted. I'll unpick today.
Today I have unpicked and rebasted one sleeve, fully stitched both sleeves, and unpicked both sets of basting.
Next is trimming half one side's seam allowance, ironing in the other side's, and stitching all THAT. So I'm not congratulating myself on my lack of puckering just yet.
The only downside to my beautiful sewing machine (see link below) is that using one hand to crank it means I only have one hand to guide the fabric. I'm considering my options. #Sewing https://mastodon.art/@artbyailbhe/110780146951341100

Ailbhe (@[email protected])
Attached: 4 images The case of my 1940 Singer 201K handcranked sewing machine. The way the storage and case works is so, so simple and clever. #SewingMachine #Sewing
Trimmed seam, ironed seam, folded seam, pinned seam, ironed seam, basted seam, ironed seam, stitched seam (swearing elided for brevity).
The inside isn't great but the outside is fine. #Sewing
Today I finished the seams up the sides and along the sleeves. Is there an easy way to handle sewing the seam flat along the arms? I tried two different ways of scrunching the tube up and sewing kind of inside a tunnel/bucket but neither was satisfactory. And wouldn't be possible with a slimmer sleeve, like on one of my own garments. #Sewing
I was really tired when I cut this out and today I discovered that a lot of collar pieces were cut with the folds in the wrong place. Luckily I have enough spare fabric to redo it. Yikes. https://mastodon.art/@artbyailbhe/111093363364440828 #sewing #mecfs
Ailbhe (@[email protected])
Cut out the fronts, back, and sleeves. Smaller bits tomorrow. Tired now.
I've started on the collar and it says to trim seams and turn right side out and baste but I'm pretty sure I have to press it first. I can't imagine how I'll baste it neatly without pressing it. #Sewing
I've been too cold and tired for anything requiring precision but my feet got cold so... #Sewing
I'm still too brain fogged to tackle the collar and cuffs in the shirt, but I did make a cover for my A1 drawing board, various cutting boards, A2 sheet of heavy interfacing, and other things that are big and flat and need to be stored upright because that A1 board on top of a folding table *is* my large horizontal surface and I don't have one for just putting things on.
#sewing #organisation
#sewing #organisation
I'll finish the internal seams one day.
So it's day 35 of making this shirt but yesterday I did iron the collar pieces and pinned the outside and facing to the inside already on the shirt. So I'm making progress. I really do find the collar very confusing, both times I've made it so far, and I need my brain to be unfoggy to attempt it. #Sewing
https://mastodon.art/@artbyailbhe/111053979534985785
https://mastodon.art/@artbyailbhe/111053979534985785
Ailbhe (@[email protected])
Today's #sewing was ironing. Three metres of cotton shirting in preparation for making another from my McCall's pattern. This one will be longer and have sleeves, but will be of a reasonably civilised fabric, so that's exciting. The first one was made of extreeeeeeeemely slippery linen and was like sewing a teflon-coated octopus.
This is the previous attempt, in drapey linen instead of crisp cotton. A new shirt every 2½ months might be excessive but how else am I to learn? https://mastodon.art/@artbyailbhe/110672112282380483

Ailbhe (@[email protected])
Attached: 1 image I finished the shirt. It's a little short so I'll make it longer in future, but it's GREAT. I'm so pleased with it. The linen is much too drapey and soft for the pattern but it's a functional garment and all the internal seams finished nicely so the wearer is almost completely unaware of the clo once clothed. #Sewing
I think I need extra instructions for the collar. I don't know what they are though.
It's the bit where I attach the lapelly parts to the placket facings. That's where I do not know what the instructions intend me to do even after I do it (other confusing bits become clear after I've followed through in bewilderment). #Sewing
I think it's day 42 of making a shirt and today I ironed and hemmed the facings and the, er, hem. So that's something.
All that's left to do is attach the cuffs and do the buttons and buttonholes. I just assembled the cuffs just now. The victim tried the shirt on yesterday and it's a good fit -- I added 2" to the length of the body and the sleeves, and although next time I'll add another 3" to the body this length is fine for most things. I think it will come untucked when cycling uphill. #Sewing
Buttonholes on the Singer 201k with the Greist buttonholer are an absolute doddle. I'm not yet completely accurate with my starting point placement but everything else is just drinking tea and turning the handle.
https://mastodon.art/@artbyailbhe/110820830320708682

Ailbhe (@[email protected])
Attached: 3 images Today my Greist buttonholer arrived. It comes with five templates, a thingy to cover the feed dogs so that only the buttonholer will move the fabric, and a sense of simplicity and elegance. It's like a walking foot: when the shaft for the presser foot is screwed in place, the lever will fit over the screw that holds the needle in place, and the movement of the needle will operate the buttonholer mechanism. If kept oiled and free of rust, it will last forever. #Sewing #SewingMachine #Buttonhole
Ok for neater buttons, marking my spots on the back of the fabric helps a lot. With more practice I'll get better at knowing what I'm doing.
Augh, shirt got finished, worn, and sent for laundry, all without a photo. Today I'm mending winter pyjamas.
I'm making myself a waistcoat for practice at various techniques and I just realised MY PATTERN HAS FAKE POCKETS I'm going to set things on fire #sewing #pockets #PocketsOfSedition
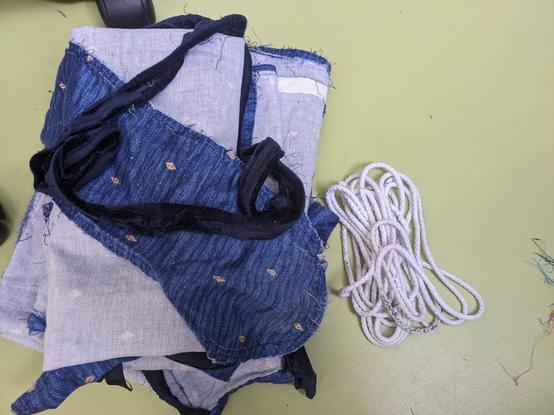
Cut out the two front pieces. They need darts and stuff, and the original denim is stretched thin in some places and patched almost rigid in others, but I think this is going to work. #Sewing #recycling
I'm dismantling more jeans legs for fabric but for some reason I'm unpicking all the stitching and keeping the thread, which is incredibly tedious because overlockers use LIGHTYEARS of thread. But it *will* be useful for basting and buttons so...
@artbyailbhe *raises fists to the air*
WHYYYYYYYYYYYYYYY
@artbyailbhe No jury would convict you.
@artbyailbhe I can help with that, if you get stuck! I suspect though that you will just make them real pockets
@artbyailbhe Since you can sew, this won't stop you, but that is indeed infuriating. All that work for a welt, without a proper pocket !
@just_chill @megueyb I chose this pattern because I've never done a welt pocket and I thought this pattern would do it. BUT NOW.
@artbyailbhe @just_chill I get you! Ok, let me look more closely at your directions, because I think you’re very very close to the real deal.
@artbyailbhe I see the left side side of the directions sheet here, what’s on the right? It looks like the pattern is having you make the welt as a sort of surface treatment? Attached to the outside of the jacket is proper, but do you then cut through the jacket and tuck the welt through?
@megueyb no, no cutting, no pocket bag. Next step is back, darts, side seams. 4 is collar. 5 is optional sleeves. 6 armhole, 7 shoulder pads, 8 sleeve hems. There's extra bits for the waistcoat belt, then the rest is facings.
@artbyailbhe Right. Ok, so you make a pocket bag, higher on the inside, and sew it to the welt.

@artbyailbhe
Regardless of what the instructions say, pressing is always part of the process! These are all of the little details that taking regular sewing classes is teaching me. And going WAY back to Home Ec: Always prewash your fabric!
Regardless of what the instructions say, pressing is always part of the process! These are all of the little details that taking regular sewing classes is teaching me. And going WAY back to Home Ec: Always prewash your fabric!
@EllenInEdmonton yeah, these instructions say press at various points but weirdly omit it here and I'm not confident
@artbyailbhe
Instructions are helpful but they rarely tell the whole story.
Instructions are helpful but they rarely tell the whole story.
@EllenInEdmonton (I wash fabric at 60-90C when I buy it and iron it on the hot setting, before I put it away in my stash)
@artbyailbhe Not that I know of. Another option when you really run out of space in the tube is to do a french seam from the get go. If you are detail oriented and labor intensive friendly, you could then tack down that seam by hand, kind of like the hand stitching on lapels of suits.
@artbyailbhe Were you closing that seam before or after attaching the armscye?
@elfkin the instructions said attach yoke to back, attach fronts to yoke, attach sleeves, finish armscye seam, sew up sides and arms, finish those seams.
@elfkin https://blog.fabrics-store.com/2021/02/11/sewing-glossary-how-to-sew-flat-felled-seams-on-sleeve/
A reply to this says it's a bit easier if you turn the sleeve right side out first, which makes sense to me

Sewing Glossary: How To Sew Flat-Felled Seams on Sleeve - the thread
Don’t you just love it when your garment looks as good on the inside as the outside? There are many terrific sewing techniques that can provide a neat and clean finish to your projects and the flat-felled seams are one of them. A flat-felled seam finish gives sturdy seams and a clean look. Just like
@artbyailbhe I strongly agree with that advice.
Also, so far as I know, the scrunch-a-bunch method is your only option once the sleeve is attached. It’s possible to close the sleeve’s side seam and then attach it after closing the bodice’s side seam, which makes for far less scrunching. However, felling the armscye seam after closing the bodice side seam is its own circle of hell.
@elfkin I wonder if a small embroidery hoop would help my fingertips a bit.
@artbyailbhe Maybe? Can’t hurt to try.