I'm assembling the things I need to trace out a pattern for a dress with a built in bra. A1 drawing board balanced on the edge of my desk and two random table legs, A0 printout of the pattern in all its sizes and variations, previously traced top, so in theory all I need is to match up the skirt.
I ironed tissue paper from packaging and traced skirt patterns onto it. Next to get the bodices on.
I've run out of salvaged tissue paper and ordered a roll of pattern paper from William Gee Haberdashery in Hackney. Also a Fiskars *recycled scissors* which is pretty exciting.

I've prepared my traced pattern pieces ready to lay out on cloth. I've done things to make this durable because I know I'll use the pattern often.

1) After tracing, I put Scotch Magic Tape over all the lines before I cut out, so the edges are reinforced.

2) There's a t-shirt version and a dress version. The skirt pattern piece goes on the bodice piece at a certain point - I drew a line there, covered it in scotch tape, and can tape and remove the skirt from that easily.

I'm well enough to start cutting!

My cutting mat has developed a huge curve. I've laid it flat with things on top of it to even it out. Ho hum.

I've laid the pattern piece out on the fabric and now I'm resting again before cutting. If you look closely you can see the excess fabric spills off the edge of the table, but don't worry, it's supported by another little table you can't see. #sewing
I've cut out all the pattern pieces and now I'm trying to decide how to add pockets at the side seams. What's a good shape for a pocket bag? I'm sure once I decide on one I can use it for everything. #sewing #pockets
I think Eldest has a skirt with perfect pockets, I'll get them to give me the skirt perhaps

I cut out the pocket pieces
I sewed each piece to the correct place on the dress piece
I sewed around the pocket bag

Next I'm going to top(under?)stitch the seam allowance so the opening might be smoother
And finally sew the side seams either side of the pocket opening, possibly adding a bar tack or something.

I hope this is correct, but we shall find out soon.

I had to change the thread on the machine for the next bit of dressmaking so I patched my pyjamas. I made them in early November 2020 from a pattern I took from some shop-bought pyjamas I already had.

The fabric has really, really faded! Wow.

I've finished the dress. I just need to take photos but also note that my easy -thread needles for handsewing are easy-snap. Oops.
I finished the dress but it's too cold today for the recipient to model it! The skirt pockets these are based on can hold a Nintendo Switch. #sewing #pockets
I think my next project is to use up scraps rather than cut into fresh fabric. I don't have any ideas so I'm just going to sort my scraps by size and stitch them into strips of patches, trim the edges straight, and assemble them into a rectangle of some kind. I'll see how big a bit of fabric I can get and whether any patterns or motifs emerge. And then I'll make something from it. #sewing #patchwork
Emptied my bag of woven scraps. Cut strips of tissue paper from bra packaging into rectangles. Used that to guide me in making regular strips of patches.#sewing #recycling #patchwork
Someone keeps their multitool in their back right pocket, so this evening I unpicked the lower third, ironed in a patch, and sewed the patch in place with dark blue thread across and orange thread on the original seam lines. It should take longer to wear a hole big enough to lose the tool now. #mending
Trying to mend headphones. If this works I'll move on to mending a more expensive pair. I can't get the needle from the outside of the donut into the middle so I've run it from the inside out only, so the central part is held only in four points, the edges just sitting between the parts of the headphones, and then stitched around the edge of the outside. It's really tiring. I'm stopping for a bit. #mending #sewing #repair

I'd really like some help describing these images, because I don't think my captions help.

This would be a much neater method for someone with better fine motor control. I'm going to try a slightly different method for the second earpiece, after I've rested.

The second one works better and is simpler. Again I put a single stitch at each compass point on the inside for the inner ring, but this time I just did running stitch around the outside, used pins to hold it in place, pull it tight, tucked in the edges, and wrapped the ends of thread around the circumference and knotted it. Cotton thread broke so I switched to unwaxed linen. #mending #sewing #repair
Sewing machines are so clever. Reversible bucket hat sewn with green thread on the green side and orange thread on the orange side.
I started cutting out another hat and then realised the cotton hadn't been washed, so I stay-stitched the raw edges and put it in the machine at 60C. I'll iron it dry on the linen setting and then consider it sufficiently stress-tested to sew with. #sewing
It's the first time I've stay-stitched before washing, I have great hopes that it will reduce fray. I didn't do the selvedges, obviously. (Self edge, the obvious etymology is the correct one, which is delightful).
Today's hat! Bicycles and leaves. Yesterday's hat is the one with flowers in orange and green.
Today I'm hoping to make myself a blouse using the pattern I used for a test dress a while ago. I'll have to start by tracing the pattern in my size and doing a full bust adjustment. I'm really tired.
https://mastodon.art/@artbyailbhe/109871051932192003
Ailbhe (@[email protected])

This YouTuber has at least two videos on how to do a full bust adjustment on a princess seam and I find them easy to follow. I think I understand how to do this tomorrow. https://youtu.be/pdLLEIb0SDk #sewing

Mastodon.ART
1) set up A1 table ✅
2) find A0 printed pattern ✅
3) measure self to determine size
4) cut out pattern pieces
5) do FBA
6) find fabric for mockup
7) cut out fabric for test garment
8) now draw the rest of the owl
I may not need to do a FBA. m going to try a first mockup without, hoping a minor fitting adjustment will do.
I'm not sure which days I did things on, but I've started the sewing on this mockup, including experimenting with the felling foot for finishing the seams. I can tell that when I get good at using it, it will really help, but the curves around the bust and shoulder blades are fiddly at the moment. I think my smartphone camera is trying to be clever with the gingham because it doesn't understand about photographing what's actually there.
Today I unpicked a bit, hemmed the facings, and understitched the facings to the seam allowances. And did a bit of pressing. I think tomorrow I might get to stitch the side seams? Unsure.
Ngh. There are fit issues I didn't realise until after the extra structure I added by finishing the seams. The photos are terrible but the bust is off -- a bit too high? -- and the waist is much too big. I wonder should I have made a size smaller with a FBA? At least this gingham has 5mm squares so I can figure it out. #sewing
Hm. I think I just wanted a more fitted garment than this pattern did, but I am pretty sure I can adapt it. And then use the new paper pattern to make ANOTHER from scratch mock-up. And then make the actual dress. Fine.
The bust is too wide. The back is a good width but the front is too wide. And the side panels at front and back need to come in at the waist, which I probably want a little higher than the original.
I've found two places in this pattern where they say to finish off a seam *before I've sewn it*. Is this an overlocker thing?

I'm still wrestling the fit of this top. Flat felling the seams changes the drape SO MUCH and I'm hating it. I know that once I have a pattern that works I'll be very pleased but until then I'm CROSS.

I took some time out to patch some long johns at the knees, where the previous patches have given away. Bony things, knees.

I was right, I need to make a size smaller than my measurements and their chart indicates, and do a FBA. https://mastodon.art/@artbyailbhe/110180571636890478
Ailbhe (@[email protected])

Attached: 2 images Ngh. There are fit issues I didn't realise until after the extra structure I added by finishing the seams. The photos are terrible but the bust is off -- a bit too high? -- and the waist is much too big. I wonder should I have made a size smaller with a FBA? At least this gingham has 5mm squares so I can figure it out. #sewing

Mastodon.ART
I do think the instructions that came with this free pattern make me disinclined to buy any patterns from these people, which is sad.
https://mastodon.art/@artbyailbhe/109874367672931136
Ailbhe (@[email protected])

Attached: 1 image Here's my pattern pieces. I'm about to watch the video again with my pencils and scissors.

Mastodon.ART
I'm doing two adjustments to this princess seam bodice. Lowering the bust point and a "full bust" adjustment. It'll be fine. I just ran out of sticky tape.
Copied out the new pattern, pinned it to the disassembled mockup, going to recut and make a new mockup. I'll have to piece a tiny bit on the side seam but I prefer that to wasting new fabric.
Tried again. I needed new fabric for the two front sides but the other pieces of the top came from the larger size pieces. They're pinned ready for sewing now.
Stage one, the bust alteration is good. Next, waist alteration, I think.
I'm altering the waist a tiny bit at a time using brightly coloured thread and fitting it inside out to check. This is where the gingham comes into its own -- the squares make it easy to be sure I'm mirroring changes accurately. I hope it makes it as easy to transfer to the paper pattern.
I think I need to alter the shape of the centre back panel. Ngh.

Very little sewing for two weeks - I did a little mending because of# #MeMadeMay2023 but mainly I've been avoiding the further adjustments I need to make to this top.

So today I've started cutting out another Ellie and Mac sleeveless dress with built-in shelf bra. #Sewing

While I was procrastinating I used a sample of William Morris upholstery fabric to patch my ancient needlecord trousers, and made a phone pouch for a friend to attach to a bag I made ages ago.
Ok I'm going to assemble this dress. If I can find the instructions, though I think I remember how it works without them. It's a purple version of the blue one I made before. #Sewing
The only surface large enough to lay a dress on is the bed, and bending over that to pin and place pockets is absolutely agony on my back.
I've been cutting the main fabric, lining fabric, interfacing, batting, and stabilizer for a bag/art caddy. It's taken days and days. I'm hoping that tomorrow I can start sewing it. But I'm almost certain I'll have to iron things first. I didn't want an ironing hobby. #sewing
Today I ironed the interfacing onto bits and now I have to hand-sew the next part: basting the batting to the fabric and interfacing. I'm taking lots of breaks but it's really painful and I've only done one piece. #SewingWhileDisabled
Basted a further three pieces so far today. Really really need a break now. And a sewing needle with a big grippable end that doesn't make a correspondingly big hole in the fabric. It's probably quantum.
Next I have to do both "Ironing" and "Basting and sewing things in a very specific order so the overlapping pockets work" and I donwanna.
I've done a lot more now and I've decided that their (the pattern writer) finishing isn't up to scratch and next time I'll do nicer hems than instructed and also line ALL the pockets.
... Oh good, I'm going to be unable to proceed until I unpick some seams and fix the issue where the pattern doesn't call for some bits to be lined but I want them lined.
I've unpicked them and chosen the lining fabric so now I need to do some... ironing. In the words of our lord and saviour Radiohead, I do it to myself, I do.
I did it! The pockets will all be nicely lined. It's better this way. I will put the other pockets on lined as a FIRST option and not have to unpick anything.
This project has reached the stage where all instructions resort to "now draw the rest of the owl." I have to sew this into a box but there's no information on how to get the corners into the machine -- each panel is at least three layers, more at the sides where the pockets reach the bottom, and the bottom corners are DENSE.
50% My God, it's full of stars! and 50% I'm sorry Dave, I can't do that. Time for a break.
This is a Learning Experience. (1) I can't cut out with scissors and need to stick to the roller blades. (2) I have two loop turners but for straps with interfacing inside I need to go back to the safety pin method, which I got good at when my mother was sewing scrunchies for her market stalls at various times. #sewing
Aaaaaaand stopping for the day. Turning it right way out shows me where I need to redo some of the MAJOR STRUCTURAL SEAMS because I didn't catch all the layers. *whimpers*
Basting by hand is easier and quicker to remove BUT basting by machine is much less painful and the time saved in sewing is much greater than the time lost in unpicking.

I'm annoyed at the waste in this pattern. For each of the front, back, sides, and base, you cut a piece of outer fabric, interfacing, batting, stabiliser, and lining fabric. And then at the end it says to cut 1 cm from every edge of every piece of stabiliser before inserting it. You could just cut the pieces 2cm shorter and narrower to begin with.

And one of the pockets has interfacing you cut in half and throw half away, because the fabric is folded over the half you use. It seems ridiculous.

So this is for an English teacher and first I thought I'd put three novels in A Handbag and then the whole idea evolved but ALSO it's definitely looking at the stars so really I think I should just be glad I didn't buy any guttering. It's three books in a bag and nobody needs to know it came from Wilde ideas. #Sewing
The pattern is wasteful and I think the lining ought to be smaller, actually, and sewn to the base somehow. It's excessive and baggy and I'm not thrilled with it. Also, topstitching the edge of the box was bad and I didn't do it very neatly. Most of the rest is fine though.

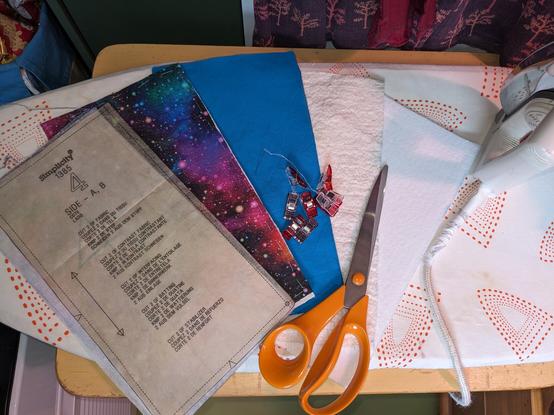
Starting something new today. I've unfolded my big table and extended it by putting an A1 drawing board on top. It's fine as long as I don't lean on the edges. And now I'm cutting the paper pattern and reading the instructions.

So far, it seems really good. Lots of helpful notation for how to cut out and assemble for best results. I expect this to teach me much more than I thought it would about making a shirt. #Sewing

This is the first time I've drawn a thread but the instructions (first image) are very clear so I'm following them. The linen I'm working with is shoddily spun so the thread kept pulling apart, rather than breaking -- like teasing cotton wool apart. But I managed in the end so now I have a straight edge for my fabric. It was extremely wonky before. #Sewing
@artbyailbhe that fabric is amazing!
Ailbhe (@[email protected])

Attached: 4 images @[email protected] the rainbow galaxy print was available in cotton jersey, cotton woven, and thin scuba-type fabric. I accidentally got ALL THE KINDS. First thing I made was a skort with pockets.

Mastodon.ART
@artbyailbhe these fabric colours are *amazing*!
@mattcen the rainbow galaxy print was available in cotton jersey, cotton woven, and thin scuba-type fabric. I accidentally got ALL THE KINDS. First thing I made was a skort with pockets.
@artbyailbhe "accidentally" got all the kinds. 😂 💜 🌈 🌠
@mattcen I bet it could happen to you.
@artbyailbhe Ugh, don't you just hate those "missing pieces" when starting a project? Most dresses have a predictable sequence of steps but the instructions contain critical information like seam allowance. I went from having 3 paper patterns to having a dozen PDF patterns and a 1/2 dozen paper ones, so I had to really work to get all of my pieces sorted out. I tried to store the traditional patterns in ziplock bags with the envelope, pieces, and instructions all together.
@EllenInEdmonton it's a pdf pattern so I found the instructions easily enough. It's one I make in several sizes and variations for various people so I've printed one set of instructions and traced multiple patterns from the matter copy.
@artbyailbhe Well done on making good use of one pattern as well as keeping it organized. Cute fabric!