Between 25 and 22 months ago I made myself eight pairs of pants and now they're all fraying at the waistband. I'm going to make myself some new ones while I continue to mend the old, so that they don't all fail at once.
Because starting the project I intended is too boring, I am instead starting a tank top with built in bra. This photo is me carefully tracing *completely the wrong size* from the multi-size pattern I got printed on A0 paper.
#sewingLuckily the built-in bra needs elastic that's *exactly the size* of some waistband elastic I salvaged from jersey boxers a couple of years ago. It's even already in a loop.
#recyclingI've done a lot of fiddly laying out of pattern pieces and I think the collar and armscye bands will have to be in a contrast fabric.
I managed to find enough fabric in the end, and I'm pinning my fingers to the collar and cuffs.
It's all done except the finishing -- fauxverlocking, top-stitching, hemming, trimming threads. I've obscured the model's grin of delight. Thanks to
@RealKaren for recommending Ellie And Mac "Slow Sunday" pattern.
https://www.ellieandmac.com/products/slow-sunday-top-dress-pattern #sewingSlow Sunday Top & Dress Pattern
I'm going to try to use elements of the pattern to make a sleeved t-shirt with a built in bra. I think joining the neckline will be easy but matching and binding the armscyes is both tricky and a necessary part of making the bra supportive.
First I'm looking at a pattern for a button front dress with princess seams for which I need to do adjustments for a fuller bust as it's not a stretch fabric pattern. I'm sure it'll be fine.
I've printed the pattern, highlighted the size I need to cut, definitely cut the correct size, and now I need to figure out how to do a full bust adjustment on princess seams.
#sewingSearching for YouTube videos on Full Bust Adjustment is to be done very carefully, kids.
This YouTuber has at least two videos on how to do a full bust adjustment on a princess seam and I find them easy to follow. I think I understand how to do this tomorrow.
https://youtu.be/pdLLEIb0SDk#sewing
How To do a FBA on a Princess Seam
Here's my pattern pieces. I'm about to watch the video again with my pencils and scissors.
Partway through a full bust adjustment. I'm increasing twice as much as the tutorial. It'll either work or not.
#sewingOk I've done the full bust adjustment to the centre front and side front panels with princess seams but now I'm looking at the front facing pieces and I realise this is totally different but still needs to be adjusted. They're allegedly flat facings.
Ok.
Ok.
I just used the bust apex measured from armscye on the centre front, and the inserts from the front side, and I think this might work. You can see where I added bits and where I took a bit away. #sewing
But apart from the full bust adjustment, and a length adjustment, and adding sleeves, and probably changing the placket, I'm definitely following the pattern.
Ok I need to shorten this six inches. Which is almost funny. But I've shortened the centre front, side front, side back, and centre back, and checked the notches and hems of each piece against the piece it will be sewn to.
#sewingTest run in gingham, which is graph paper for dresses.
I needed to have bought two yards of fabric but I have a lot of useful bits left over. I wonder if I can insert pockets usefully. The side seams are almost the last bit to add so I probably can.
I'm not sure how best to tell which side of my gingham fabric is the right side. Next time I'll pick one before I fold to cut and scrawl across it in Frixion pen.
Expanding the bust two inches, one on each princess seam, is about the limit this pattern can take I think. It would need to be done differently for larger adjustments. The curves are formidable as it is.
#sewingAnd one of my notches on the adjusted pattern is in the wrong place. Not a crucial one though.
Today has been mostly ironing. "Finish the seams using your preferred method," says the instructions, and I'm pretty sure they mean overlock/serger. But it turns out what I require from a finished seam is raw edges enclosed and no loose tickly bits, so for probably the first time in my life I'm cutting half the seam allowance off one side and doing horribly fiddly ironing. I really must get a tailor's ham. I made one for facemasks but this bust seam needs something rather more serious.
#sewingI think next time I'll just do French seams. They're easier.
Iron a seam, sew a seam. Iron a seam, sew a seam. Iron a...
I got confused about applying the facings and searched for videos of people making the same dress. This is the one that helped: https://youtu.be/CGBJw19A6Ls
#sewing

Button Up Dress SAL - Día 4
I think I still need to unpick a bit but I think I understand what's happening, which is progress. It's also comforting that she sewed this over multiple days. For me so far
Day 1 Cut out pattern and adjust for fuller bust (spilt onto day 2)
Day 2 Cut out fabric
Day 3 stay stitch stretchy bits and assemble large simple seams
Day 4 flat fell long seams (really fiddly on the bust curve)
I think I miscounted my days. I must have napped or something.
All I've done today is unpick the facing attachment I did incorrectly yesterday and pin it ready to sew tomorrow, but I'm too tired to get my compression socks on so I definitely can't sew.
So today I put the facing on correctly and then figured out how to add flutter sleeves. I traced a sleeve head shape, drew a semi circle for the arm, wished on a star, and sewed it all together.
This was the bit where the instructions confused me but then I figured out I needed to be sewing the facing to the armholes with everything on the right side of the garment wrapped up like a burrito, then pull the whole front side of the garment through the shoulder strap to make it right way out again
Here's where I've got to so far. It's the free Peppermint button front dress, with the bust increased two inches, added flutter sleeves, and the skirt six inches shorter.
#sewingI'm tired and in pain today so I'm not doing the difficult, careful, precise finishing on the dress. I've cut myself some pants instead.
All done except the fold-over elastic on the leg holes. Because every time I try my thread tension goes mad. Loopdiloop.
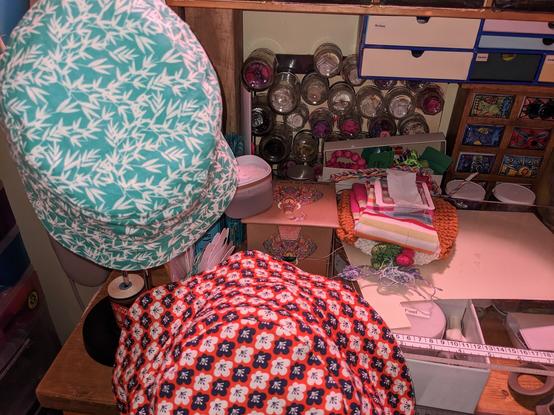
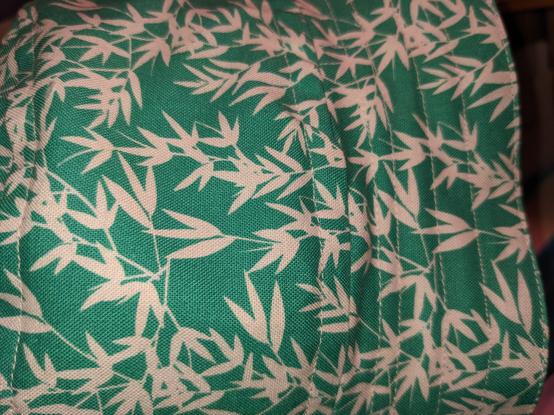
Today my tension is fine so I finished the underwear, patched a pyjama top, added a hanging loop to a towel, and started assembling a bucket hat I cut out ages ago.
It feels so nice to be back sewing again after a few days of being too unwell.
I'm also back to listening to A History of Rock Music in 500 Songs https://500songs.com/ after a long time of being too fatigued to take in new information. I'm on the episodes from last August.
#500SongsPodcast #sewing

A History of Rock Music in 500 Songs
I made a trial vinyl thing, a storage pack for my sewing machine needles. The walking foot helps with vinyl but if I were making anything bigger I'd want to use baking paper I think.
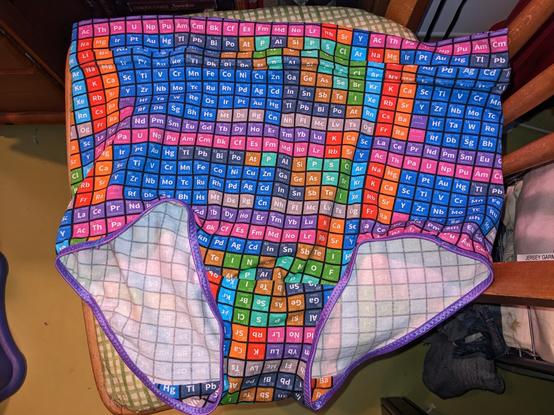
Today I'm really tired. I need to make a pillowcase for a body pillow -- ideally I should make at least two -- but when I unfolded all my salvaged-for-rags bedsheets I found that none of them can give me a piece of fabric 52cm x 150cm, so I'm using the bought-new bedlinen I got for making cloth masks in 2020, and some of the also bought-new decorative cotton I got for their exterior layers. I'm sorry for such a long sentence, I was too tired to write a shorter one.
This pillow is 5cm shorter than I am.
For three days I have practiced embroidery before getting dressed. I don't think I've done any embroidery before but this is a good way for me to avoid perfectionism -- these are my Sewing Practice jeans in a colour I don't like. I'm learning about dealing with thread twist, mainly, so far.
I'm assembling the things I need to trace out a pattern for a dress with a built in bra. A1 drawing board balanced on the edge of my desk and two random table legs, A0 printout of the pattern in all its sizes and variations, previously traced top, so in theory all I need is to match up the skirt.
I ironed tissue paper from packaging and traced skirt patterns onto it. Next to get the bodices on.
I've run out of salvaged tissue paper and ordered a roll of pattern paper from William Gee Haberdashery in Hackney. Also a Fiskars *recycled scissors* which is pretty exciting.
I've prepared my traced pattern pieces ready to lay out on cloth. I've done things to make this durable because I know I'll use the pattern often.
1) After tracing, I put Scotch Magic Tape over all the lines before I cut out, so the edges are reinforced.
2) There's a t-shirt version and a dress version. The skirt pattern piece goes on the bodice piece at a certain point - I drew a line there, covered it in scotch tape, and can tape and remove the skirt from that easily.