SP0256A-AL2 Sings the Twelve Days of Christmas
Partly prompted by a programming challenge by Futzle on Mastodon, I thought it might be interesting to try to get my Arduino and SP0256A-AL2 to sing the Twelve Days of Christmas.
https://makertube.net/w/diBkzrhkh3tekAPBhGzrVj
Warning! I strongly recommend using old or second hand equipment for your experiments. I am not responsible for any damage to expensive instruments!
These are the key Arduino tutorials for the main concepts used in this project:
If you are new to Arduino, see the Getting Started pages.
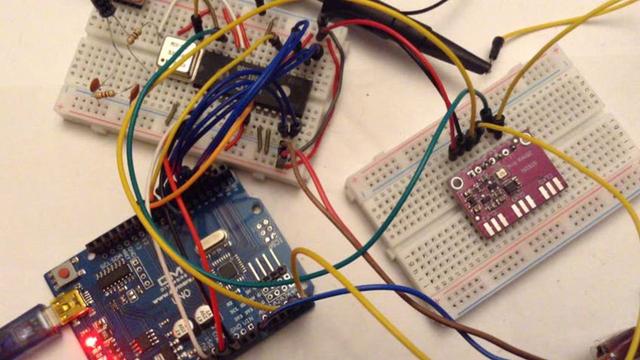
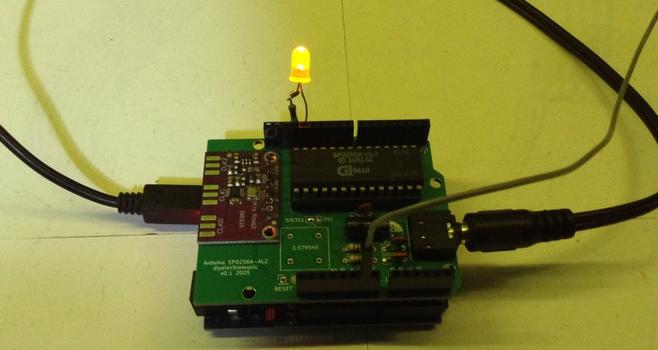
Parts list
The Code
I wasn’t aiming for a clever code solution, as can be seen submitted to the programming competition already, but I was hoping to get the computer to do at least some of the work for me.
The first issue is getting a useful range for the song. My original MIDI SP0256 project managed around an octave and a half. Well it so happens that the 12 Days of Christmas is just over 1 octave, so if I can position that to the top end of the range, I should be ok.
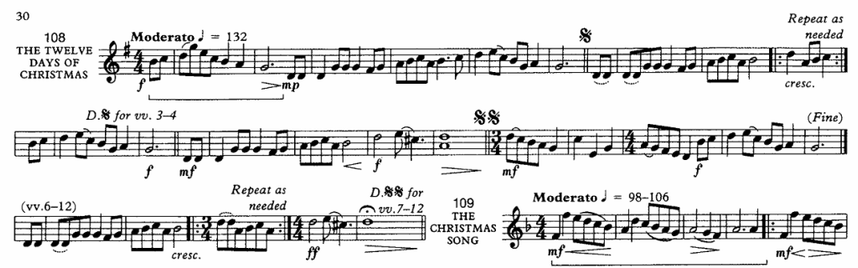
This is the most compact notation of the tune that I know of. This is from the “Christmas Praise” Brass Band carol book, which seems to be one of the most common references for any band out caroling at this time of year.
Ignoring the introduction, I’m going to transpose this into concert Bb (i.e. up a minor third) which gives me a note range from F2 through to G3. This allows me to use a sensible range of the SP0256A without it getting too slow down at the bottom end of things.
The main text/lyric structure will be set up in a series of functions as follows:
intro() - "on the nth day of Christmas my true love gave to me"
nth() - "first", "second", etc.
one() - "a partridge in a pear tree"
two() - "two turtle doves"
...
twelve() - "twelve drummers drumming"
Some variations are required as follows:
- intro() – needs to be able to switch to “and a partridge” for all verses apart from verse 1.
- two(), three(), four() – have a different melody from verse 5 onwards.
- five() – ideally this should get slower and more drawn out with each repetition.
- one() – ideally this would slow down on the last time through.
In order to capture the variations and repeats for each verse, I’ve opted to use an increasing bitmask for each time through to trigger the various phrases. Bit 0 always indicates one() must be called. Bit 1 indicates two(), and so on. It starts with the value 1 but will keep adding another bit as the verses change, so will have the values 1, 3, 7, 15, 31, 63, etc. thus allowing me to build up the verses with one bit per verse.
one() takes bool parameters to indicate first time and last time through. two(), three(), four() take a bool parameter to indicate if it is a “post five gold rings” verse. Using the bitmask this is pretty easy as it just means any of the bits 0x0FF0 will be set for verses 5+.
Here is the main code loop.
uint16_t phrase=1;
for (int verse=1; verse<=12 ; verse++) {
intro(verse);
delay(200);
if (phrase & 0x0800) twelve();
if (phrase & 0x0400) eleven();
if (phrase & 0x0200) ten();
if (phrase & 0x0100) nine();
if (phrase & 0x0080) eight();
if (phrase & 0x0040) seven();
if (phrase & 0x0020) six();
if (phrase & 0x0010) five(verse);
if (phrase & 0x0008) four(phrase & 0x0FF0);
if (phrase & 0x0004) three(phrase & 0x0FF0);
if (phrase & 0x0002) two(phrase & 0x0FF0);
if (phrase & 0x0001) one(phrase == 1, verse == 12);
phrase = (phrase<<1) + 1;
delay(1000);
}
The timings were really quite tricky as I have several variables to work to:
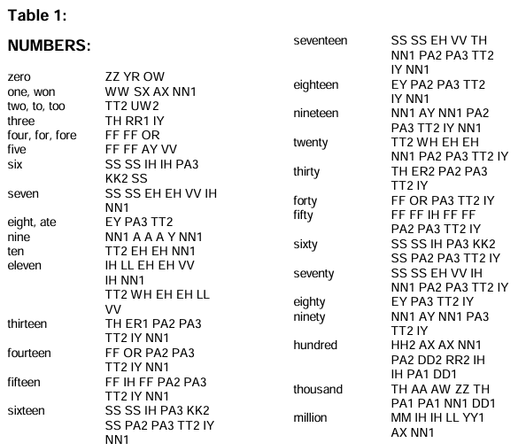
- Each allophone takes a different time to be said.
- Each allophone also has a recommended delay time (this might be to account for the time to say them – I’m not sure).
- When I change the frequency, the time to say any specific allophone also changes, with lower frequencies significantly slower than higher ones.
- I naturally need to account for the musical rhythm changes too.
In principle I could probably work out the slowest interval and work back from there to get some accurate timings, but I just did a bit of trial and error on each phrase until it was close enough. The unevenness remaining was because I didn’t want to slow the whole thing down to the slowest phrases being “sung”. It is slow enough already!
Also, as it doesn’t look much, I’ve added an LED to light up at the start of an allophone and to go off whenever a pause is encountered.
Find it on GitHub here.
Closing Thoughts
I’m actually really pleased with this. It is a good balance of close enough to show the principle without me undertaking complex timing and endless fiddling.
I could probably get a bit cleverer with the code, but that wasn’t really the point for me. I’ve used an algorithm where it mattered to me, and was quite happy to spell out the allophones, frequencies, and timings by hand as I went.
Lastly, let me wish you the compliments of the season, to you and yours.
Kevin
#arduinoUno #sp0256aAl2