This was how WordPress 0.7-gold, the very first version of WordPress, looked!
#WordPress #RedHatLinux #Linux #TechNews #TechUpdates #Retrocomputing #Computers #Laptops #Blog #Blogging #Website
This was how WordPress 0.7-gold, the very first version of WordPress, looked!
#WordPress #RedHatLinux #Linux #TechNews #TechUpdates #Retrocomputing #Computers #Laptops #Blog #Blogging #Website
Running B2 0.6pre2, which came before WordPress 0.7-gold, on Red Hat 9.0 Shrike.
#B2 #WordPress #RedHat #RedHatLinux #Linux #Blog #Blogging #Website #TechNews #TechUpdates
https://officialaptivi.wordpress.com/2026/06/23/b2-0-6pre2-on-red-hat-9-0-shrike-before-wordpress/
Red Hat Linux 9.0 Shrike [2003] on VMware Workstation
#RedHat #RedHatLinux #VMware #RedHat9 #RedHatLinux9 #Linux #TechNews #TechUpdates #Retrocomputing #Computers #Laptops
Red Hat Linux 8.0 Psyche [2002] on VMware Workstation
#RedHat #RedHatLinux #VMware #RedHat8 #RedHatLinux8 #Linux #TechNews #TechUpdates #Retrocomputing #Computers #Laptops
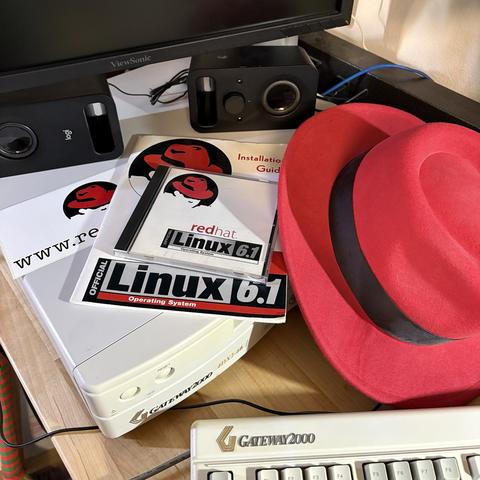
We have tested Red Hat 5.0.5 "Hurricane" with XFree86 on 86Box with Super Socket 7!
#RedHat #RedHatLinux #Retrocomputing #Computers #TechNews #TechUpdates #Linux #Kernel #LinuxKernel
My #linux distributions history:
1995: #slackware, my first linux experience, in my campus lab as a student of information engineering, also install this on my PC using dozens of floppy disk.
2000: #redhatlinux (not #RHEL), mainly used as my cybercafe router and servers. Also try #knoppix on my PC occasionally
2003: Fedora Core Linux (called as #Fedora Linux now) as a continuation of of #redhat linux. Fedora was also the first time linux was used as my primary OS on my PC and laptop.
It seems like common knowledge to say that the "Linux desktop" has come a long way from its beginnings, and that while it used to feature quite a horrendous and complex user experience that was really "only for nerds", it's now - thanks to decades of volunteer improvements - finally on par with the user experience of commercial software.
Nowadays, even non-"computer people" can set up and use a Linux system, while in the past, you couldn't even get through the installation without a PhD in compsci.
That's what people keep saying.
But honestly, after having gone through a Windows XP installation right after a Red Hat Linux 8.1 installation, I am not sure about this at all anymore?
Even with both being systems released around the same time, Red Hat was considerably easier to set up and overall more user friendly.
Both feature graphical installers in plain English, accessibility options, language and locale selections from the very beginning.
Windows however confused me with "workgroups" and "domains", which I didn't know what to do with for a personal PC. Scroll bars were unresponsive. It also took way longer to install.
Red Hat didn't have any of these issues, and even allowed me to choose a bunch of thematically ordered software to pre-install, all in a big menu with icons and explanations, which was nice.
Why did people think back then that Windows was more "normal people friendly" than Linux? It's utter nonsense.
#Linux #RedHat #RedHatLinux #Windows #WindowsXP #RetroComputing #RetroComputers