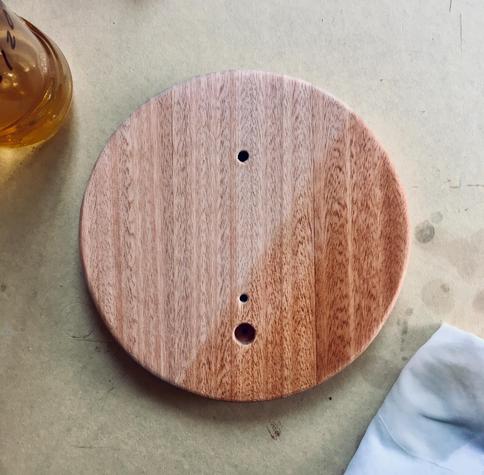
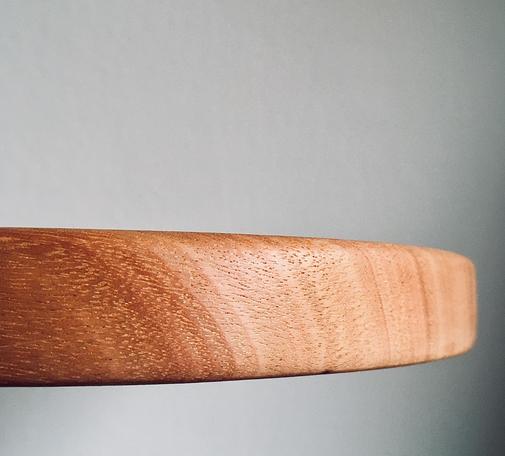
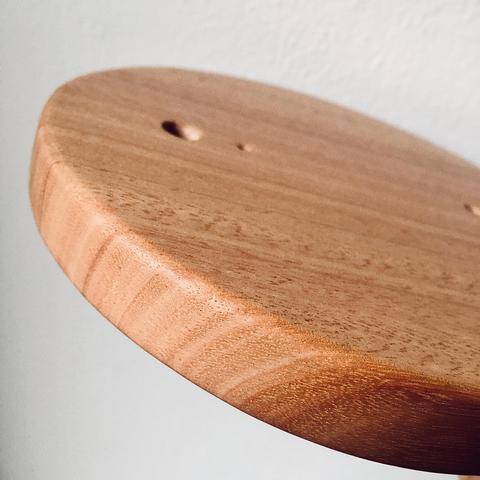
πŸ’‘ New project! An USB powered LED desk lamp made of wood, ceramic, and aluminum. It will be called "Portuaria", which in Spanish means "related to the port", because its shape reminds me of the cranes and sailboats at the port.

🧡 #PortuariaLamp #lamp #prototype #LED #USB #lampdesign #woodenlamp #woodworking #electronics

I wanted the base of the lamp to be a 16 x 2 cm disc, but I only had 7 x 2 cm boards around here, so I ended up glueing a few cuts.

🧡 #PortuariaLamp #lamp #prototype #woodenlamp

Then I cut a circle with the hand router using the guide as a compass, and sanded it with the orbital sander and sanding sponge.

🧡 #PortuariaLamp #lamp #prototype #woodenlamp

Recycling ceramics to build a lampshade. I found that these mini bowls I made to test ceramic glazes roughly fit what I need for the lampshade of the prototype, so I drilled one to accommodate the LED and two screws.

🧡 #PortuariaLamp #lamp #prototype #woodenlamp #LED

The screws pass between the heatsink fins and will attach both the lampshade and heatsink to the wooden rod.

🧡 #PortuariaLamp #lamp #prototype #woodenlamp #LED

First attempt to mount the lamp head on the rod πŸ€”. What seemed easy in the drawing turned out not to be so easy when transferring it to materials.

The difficult thing was making the 3 mm slot in the 10 mm rod, and getting it to align with tolerances of less than 1 mm.

Next time I'm going to try with a router and templates, we'll see how it goes with that.

🧡 #PortuariaLamp #lamp #prototype #woodenlamp #woodworking

Stripping a cable to dress another πŸ€¦β€β™‚οΈ. The cable with a cotton textile sheath that I got is very thick compared to the diameter of the rods. The rods are 10 mm in diameter and the cable is 6.5 mm, so when drilling holes in the rods to pass the cable through there would only be 1.75 mm of wood left on each side.

So, I made a customized cable using the sheath of the original cable and an AWG 24 cable. The new one is 2.5 x 4 mm and fits perfectly in 4 mm holes πŸ‘.

🧡 #PortuariaLamp #lamp #prototype

Assembling the head of the lamp. Despite the chamfered slot, it turned out pretty well. The yellow thing at the tip of the cotton sheath is a heat-shrink with glue, which is then inserted under pressure into the slot. It's the first thing that occurred to me to fix the sheath to the rod so that it can withstand the tension. Perhaps in the next iteration I will replace that with a screw, although the limited space is a challenge.

🧡 #PortuariaLamp #lamp #prototype #woodenlamp #woodworking

The LED I am using for the prototype lamps is one from the Bridgelux's Thrive series, which has a CRI of 98. The CRI is a color rendering index, which says how similar is the color rendering with the light from a LED compared to the rendering with natural light (which has a CRI of 100).

After using CRI 98 LEDs for a while, the CRI 90 ones look depressing, it's a one-way street 😁.

🧡 #PortuariaLamp #lamp #prototype #LED #CRI #lighting

After a lot of experimenting with various models of the height-adjusting disc that holds the cable near the base, I decided that it would be better to make the height fixed instead of adjustable πŸ€·β€β™‚οΈ

The main problem is that it is very difficult to make the adjustment fluid enough to adjust the height without the lamp jumping, which does not look good as a user experience.

🧡 #PortuariaLamp #lamp #prototype #woodenlamp

This is the light spectrum emitted by the Bridgelux Thrive LED series compared to other ones that have a lower CRI.

You can see that the one from Bridgelux does not have the blue peak at about 450 nm that is present in the other LEDs in the chart.

That is why I chose it for this lamp prototype. If you were seeing a greenish tint in your "high" CRI 90 LEDs, now you know why πŸ’‘πŸ‘€.

🧡 #PortuariaLamp #lamp #prototype #LED #CRI #lighting #spectrum #electronics

Carving the lamp base with a router to mount the USB voltage booster, resistors and switch.

The router is not quite tamed yet, doing this I learned that turning it off and on again in the middle of a slot is not a good idea 😬. I finished it with a chisel, slow but more predictable πŸ€·β€β™‚οΈ.

🧡 #PortuariaLamp #lamp #prototype #woodenlamp #woodworking

The holes are for the switch, the cable, and the vertical rod. The one for the rod ended a bit loose; drilling it with a 10 mm bit to fit a 10 mm rod was too optimistic. Next time, I'm going to use a 3/8" drill bit and sand the end of the rod until it fits just right.

🧡 #PortuariaLamp #lamp #prototype #woodenlamp

This is the circuit diagram for the lamp, which will be powered from a USB charger.

The LED is a Bridgelux BXRE-30S0801-D-7X with a CRI of 98 and 3000 K. It is a 6 watt LED, but I'm going to use it at 4.85 watt to extend its lifetime.

The power on the USB port is 5 volts, which is not enough to turn on this LED that needs 17.15 volts. That's why I use a voltage booster (the green board), which converts 5 volts to 18 volts.

🧡 #PortuariaLamp #lamp #prototype #LED #USB #electronics #DIY

The resistors (blue with stripes) are there to limit the current that passes through the LED, because otherwise we can burn it due to excess current. They are two 6-ohm resistors, which when connected in parallel are equivalent to a 3-ohm resistor. With this resistance value the current will be 0.28 amps.

The way to calculate this current is:

(supply_voltage - led_voltage) / resistance = current

(18 volts - 17.15 volts) / 3 ohms = 0.283 amps

🧡 #PortuariaLamp

And the 4.85 watts that the LED will be working at come from this calculation:

led_voltage * current = led_power

17.15 volts * 0.283 amps = 4.85 watts

This way of connecting an LED is fairly simple, but it is not used much because the excess voltage from the supply to the LED is wasted as heat in the resistors. The trick to minimizing this loss of efficiency is to not have the supply voltage be much higher than the voltage to the LED, as in this circuit.

🧡 #PortuariaLamp

The energy wasted as heat in this circuit would be:

(supply_voltage - led_voltage) * current = power_in_the_resistor

(18 volts - 17.15 volts) * 0.283 amps = 0.24 watts

That is, between LED and resistor we have a total of:

4.85 watts + 0.24 watts = 5.09 watts

And of which the energy wasted in the resistor is 0.24 watts / 5.09 watts * 100 = 4.7%, more than acceptable for such a "primitive" circuit πŸ€·β€β™‚οΈ.

🧡 #PortuariaLamp

One issue with this shameless display of the heatsink is that it should at least be left more or less presentable for that. Normally the heatsinks are hidden inside the luminaire because they are considered ugly and not very aesthetic, but that is an idea I do not share, as you can see in my other prototypes 😁.

This is how the heatsink comes from the manufacturer, and sometimes they come worse than that with steps from the sawing.

🧡 #PortuariaLamp #LED #heatsink #lamp #prototype

f it is going to be hidden, it is enough to level only the part where the LED will make contact so that it has good thermal transfer. But here it is part of the visual of the product, so I proposed to leave it as mirrored as possible.

The steps were 220 grit sandpaper, fine sanding sponge, superfine sanding sponge, and rubber abrasive block (I have no idea what grit these last three are).

🧡 #PortuariaLamp #LED #heatsink #lamp #prototype

Putting the heatsink so exposed also has a technical reason; doing that maximizes the air flow through the heatsink, which reduces the working temperature of the LED and extends its useful life.

It would need one more step with some finer grit, because the scratching is still a bit visible, but it turned out pretty mirror-like compared to how it was initially πŸ’ͺ.

🧡 #PortuariaLamp #LED #heatsink #lamp #prototype

Shellac is my favorite finish for wood. Some reasons for this are:

- It is of biological origin, since it is obtained from the secretion of an insect from Southeast Asia.

- It can be diluted in ethyl alcohol, a relatively safe solvent also of biological origin.

- It is not toxic, it is even an authorized food additive under code E904.

- Easy to apply and repair locally if it gets scratched.

- Biodegradable in reasonable times.

🧡 #PortuariaLamp #shellac #woodworking

Shellac is sold in flakes to dissolve or in a ready-made solution with alcohol. In both cases it has a limited storage time of one to two years. In the case of flakes, what happens is that it polymerizes and then no longer dissolves in alcohol.

It already happened to me with a batch of flakes that were left unused for two years. With the next batch I bought, I set out to prevent the same thing from happening to me again.

🧡 #PortuariaLamp #shellac #woodworking

I read that you can extend the shelf life by lowering the temperature and humidity the flakes are exposed to, so the plan was to seal portions with silica gel in vacuum-sealed packs, store the packets in an airtight glass jar, and store the jar in the refrigerator.

Two years have passed and the flakes from that batch still completely dissolve in alcohol in just two hours, as if they were freshly harvested πŸ₯³.

🧡 #PortuariaLamp #shellac #woodworking

The time has come to assemble the base. The idea is to have a printed circuit board with the voltage booster, resistors, and connectors for the LED and the switch, and at the same time to act as a cover for all the wiring.

Sending the printed circuit board to be manufactured in China as usual implies a delay of at least a month in the mail, so I decided to improvise something with a blank board. It didn't turn out so bad 😁.

🧡 #PortuariaLamp #lamp #woodenlamp #electronics

First working prototype of the Portuaria Lamp! πŸ’ͺ

Although it is a desk lamp, I will be using it as a bedside lamp to test the mechanical stability against being hit in the dark.

There are still several things to improve:

- The cotton-covered cable gets very linty and stains very easily.

- The ceramic screen also needs modifications. I can see the screws 😱.

- Making the vertical axis of the lamp perfectly square is hard 🀯.

🧡 #PortuariaLamp #lamp #woodenlamp #woodworking #LED #productdesign

Trying other cable colors. I got some colored polyester cords (plastic 😱) to cover the lamp cable. The idea is to solve two problems that the white cotton cord has: it gets very linty and stains very easily.

Of the four, I chose the orange one because I thought it was the one that best matched the wood of the base. I took the whole lamp apart, reassembled the LED cable with the orange cord, put the orange cable in the lamp... and I didn't like how it turned out πŸ€ͺπŸ€¦β€β™‚οΈ.

🧡 #PortuariaLamp #lamp

What I didn't like is how the contrast between the orange cable and the wood of the rods looks. I had only compared it with the wood of the base before putting it on and it looked good, but the wood of the rods being lighter and with less grain is totally overshadowed by the striking orange cable.

So I took it all apart again and put the grey cord on, which doesn't conflict with the wood of the rods... but now the lamp is very sober and boring! πŸ˜‚.

Keep trying πŸ€·β€β™‚οΈ.

🧡 #PortuariaLamp #lamp

I'm working on a new screen for the prototype. This time custom made instead of recycling what was lying around from previous projects.

🧡 #PortuariaLamp #lamp #prototype #ceramics

The things this new screen design aims to improve are:

- Ease of assembly. Placing the LED in place while tightening the screws was no fun at all 🀯.

- Mounting the LED with connectors instead of soldering it, to make it easier to repair πŸ› .

- Avoiding the cable and screws being visible through the gap between the heatsink and the screen.

- Improving the airflow through the heatsink by creating a chimney effect.

🧡 #PortuariaLamp #lamp #prototype #productdesign #ceramics #lampdesign

This task is kind of delayed because the clay is sabotaging the perfect circularity of my pieces πŸ˜‚.

Because of the unorthodox shape for a ceramic piece, the circle dries unevenly and ends up becoming an ellipse 🀨.

Slow drying over several days didn't work either. So I turned to the wisdom of r/Ceramics on Reddit to see how I could fix it and they threw out a few ideas that I need to try.

To be continued...

🧡 #PortuariaLamp #lamp #prototype #ceramics #lampdesign #productdesign

I made a USB cable that matches the cable I put in the lamp 😎.

It only has two conductors because it will be used to send power and does not need the data pins, if someone wants to use it to transfer data they will be in for a disappointment 😁 (probably the me of the future πŸ€¦β€β™‚οΈ).

The white tubes are heat shrinkable tubes that come coated with glue inside. I have not grey heat-shrink in stock, so I used a white one that was around here πŸ€·β€β™‚οΈ.

🧡 #PortuariaLamp #lamp #prototype #USB

@francc I like both, though would have probably ended up with a yellow cable 🀣
@ScaredyCat I like yellow too 😁 But probably matched with a darker wood to make some contrast as the wood of the rods is already yellowish.
@francc sounds just like sourdough starter πŸ˜‚
@francc I think it’s lovely. You could also have JLCPCB make a CNC custom one with a nice finish (e.g. anodized or bead blasted)
@leafmuncher Interesting πŸ€” That would open more design options for future projects. Thanks for the tip!
@francc they really are great COBs!
@leafmuncher Yes, the only problem I have with them is that I still haven't found a LED holder that fit that size, so I need to use less elegant ways for doing that πŸ€·β€β™‚οΈ
@francc I use some from Darkoo Optics, but there are a number of Chinese companies which makes lenses plus COB holders.

@leafmuncher The problem is this V8 COB is 12.5 x 12.5 mm, and that seems to be very unique. Bridgelux also makes Thrive COBs in 13.5 x 13.5 mm format (V6 HD Thrive), that is a more common format and I already found a holder for it on Digi-Key, so probably the next iteration of this lamp will use a V6 instead of a V8.

#LED #COB

@francc I’m using the Gen 2 9mm ones which are 15.8 mm.