Продолжаю экспериментировать с ИИ для улучшения фото и видео
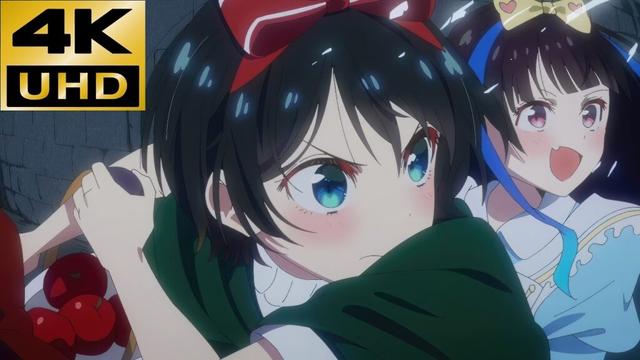
Недавно один автор вдохновил меня своим эдитом — особенно поразило качество видеоряда. Кадры из Ninjago выглядели настолько чисто и детализированно, что я сначала вообще не понял, как это сделано
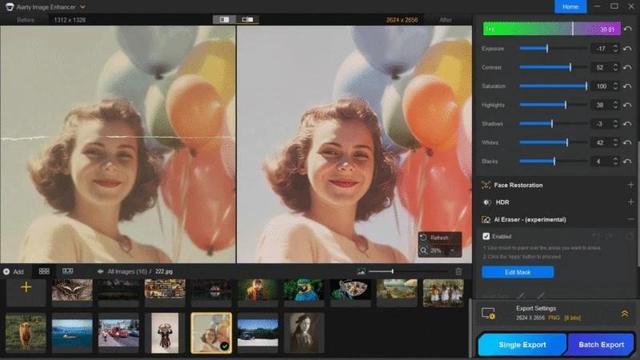
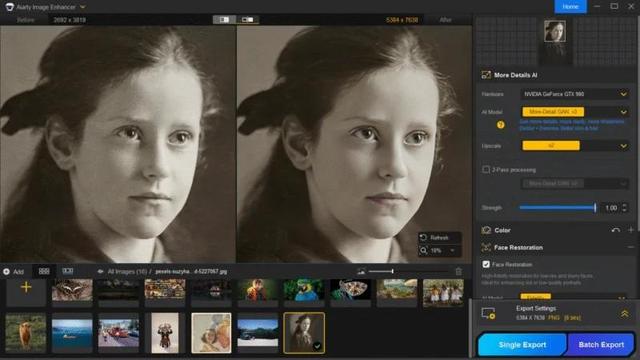
Покопавшись у него на канале, нашёл видео про улучшение через #TopazAI — там даже был гайд с настройками. Конечно, я сразу захотел попробовать сам.
Но всё оказалось не так просто:
— модель из видео оказалась очень требовательной к GPU (модель Rhea)
— моя GTX 1060 6GB не справилась
— RX580 8GB (ещё и после майнинга) выдала ужасный результат
— рендер 30 секунд видео в 1080p 60fps занимал ~4 часа
В какой-то момент я просто забросил эту идею…
Но через несколько дней решил дать второй шанс:
— выбрал менее требовательную модель (proteus)
— снизил FPS до 24
— оставил похожие настройки
И вот тут уже пошёл результат:
— GTX 1060 справилась
— рендер занял всего ~8 минут (≈1.5 fps)
Качество стало заметно лучше, но всё ещё не идеал. Тогда пошёл дальше:
сделал апскейл до 4K
→ +3 минуты к рендеру
затем прогнал ещё раз без апскейла уже улучшенный вариант в 4K
→ уже ~30 минут (≈0.4 fps)
И вот тут наконец получил тот результат, к которому стремился
Картинка выглядит настолько хорошо, что местами сложно поверить, что это сделано моделью rhea.
В целом — эксперимент оказался очень интересным, и результатом я доволен. Делаем выводы, что автору нужно купить RTX 3060 для подобных эксперементов
Результат в посте
#AI #VideoEditing #Upscale #Ninjago #log #ninjagodragonrasing