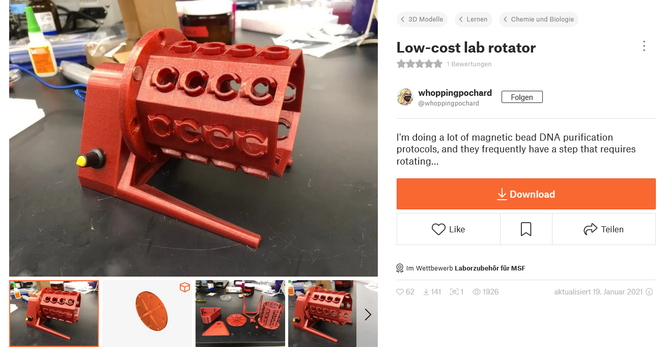
Tube and Culture Rotator by HeitLab
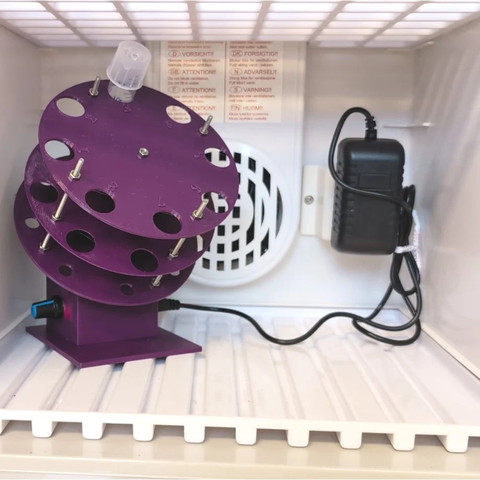
This is a small, easy to build, and cheap (under $30) culture/tube rotator that can be used to keep bacterial/fungal cultures in suspension, mix chemicals, keep items in suspension, and generally mix things. It holds 8 x 14 mL bacterial culture tubes, and is angled at 45 degrees to increase the surface area for oxygen absorption. The speed controller allows this to turn at speeds of ~2 RPM to 14 RPM. It is small enough to fit into a small bacterial incubator, or in a small corner of your lab.A short video of it running can be found here: https://www.threads.net/@bryanheit/post/C8MojELp9Z7=================================PARTS:-1 each of the 3D printed components. All can be printed flat on the bead, other than the body which should be printed inverted, with organic/tree supports.-5 x 80 mm M3 threaded rods-29 M3 nuts-1 x 12 volt wall adaptor, 2A DC, with a 5.5 x 2.1 mm plug-1 x 5.5 x 2.1mm female DC Power Jack Socket Connector: https://www.aliexpress.com/w/wholesale-5.5-x-2.1mm-DC-Power-Jack-Socket-Connector.html1 x Mini 5A 90W PWM 12V DC Motor Speed Controller: https://www.aliexpress.com/w/wholesale-Mini-5A-90W-PWM-12V-DC-Motor-Speed-Controller-.html1x S30K Electric Brushless Motor, 12 V DC:https://www.aliexpress.com/w/wholesale-S30K-Electric-Brushless-Motor.html-Cyanoacrylate glue-20-30 cm of electrical wire appropriate for 12VDC-optional: 2 x 10 mm M3 bolts and nuts===================================ASSEMBLY:Solder short (~10 cm) leads onto the DC power jack.With the motor hole in the body facing you, install the jack on the right side of the body.Attach the wires from the power jack to the V+/V- terminals of the motor speed controller. Make sure to connect the + lead from the jack to the V+ terminal, and the plug ground to the V- terminal.Drop the leads for the motor through the motor hole in the body and attach to the M+/M- terminals of the speed controller.Plug-in the power jack and make sure the motor turns and responds to the speed controller. If it doesn't, you most likely need to swap the leads on the V+/V- terminals.Install the speed controller into the left-side hole in the body.Perform a final run test, and if the m otor turns, glue the motor in place, and glue the body to the base. Optional: the motor can be attached using short M3 bolts and nuts instead of glue, although this is difficult due to the limited space inside the body.Screw one of the 80 mm M3 threaded rods into the motor, then push the bottom plate onto the motor. The bottom plate is indexed to match the kerf on the motors axel, so you may need to rotate it to get it to seat properly.Screw an M3 nut onto the threaded rod and tighten it such that the bottom plate is locked to the motor and does not move.Install the other 4 M3 x 80 mm threaded rods, using M3 nuts on either side to hold them onto the baseplate. Add a nut ~1/2 way down each of the 5 M3 threaded rods, and then slide on the middle plate. Adjust the nuts until the middle plate is even, then add a second nut to each rod, locking the middle plate into position.Repeat step 12 with the top plate, but placing the plate as close to the end of the middle threaded rod as possible.Its ready to run!