** WARNING **
The following post contains images of neglect.
Those of a nervous disposition should read no further.
Bits and Pieces Used.
Raspberry Pi 3.
Pac-Man imagery by @Wheelhorse from this mega-thread and vinyl printed by a local printer.
Illuminated buttons and joystick ball.
Probably ordered too many buttons…
Picade loom (Edit: no longer stocked).
The sturdier wiring on the new loom is a lot less fragile than the original KickStarter loom.
On/Off Shim.
A couple of reasons to add one of these nifty boards, more details further down.
Momentary Push Switch.
I needed one to fit a pre-drilled hole in the rear of the cabinet.
Shiny Trim (Edit: no longer stocked).
For bling !
6mm and 12mm cable tidy.
Wire and crimps for wiring harnesses.
Patience.
Take One, Dusty, Neglected Picade.
Looking a little forlorn !
A Dusty Front View
Not exactly a good advertisement for my dusting skills.
A Dusty Rear View
Oh look, a Pi1 in an original Pimoroni Pibow.
Another Dusty Rear View
I’m sure there were creatures living in there.
A Dusty Inside View
You can see the ghostly outlines of long dead cables.
(And a possible dead creature carcass next to the middle screw terminal on the left.)
Another Dusty Inside View
First Ablutions.
Shiny, you can almost see your reflection in there.
Clean Inside View
I even took the Pibow apart and cleaned that.
Clean Rear View
At this point everything still worked.
Screen was lit.
Pi was booting.
But there was still that strange buzzing sound.
So I decided to reflash RetroPie.
Still no joy, still buzzing.
Decided to update and flash firmware, MacGyver style.
Raspi Rats Nest
Oops.
Of course I borked the firmware.
So, time to disassemble, clean, and give my Picade a fresh coat of LED and vinyl love.
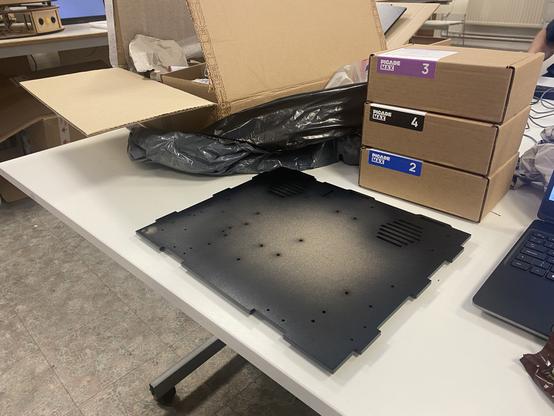
Second Ablutions.
After much sugar-soap and WD40 the MDF was looking in better shape.
Clean MDF Parts
Cutting Vinyl.
Cutting all of the pieces by hand was a chore.
Pac-Man Vinyl Side View
I can’t emphasise enough how much of a chore this was.
Vinyl Pac-Man Bezel and Controls
If I ever do this again, I’d opt for contour cutting to save a few hours.
Vinyl & MDF Pac-Man Side View
Reassembly.
The carcass went together without a hitch.
Not sure about cutting out the crenels though.
I’m undecided whether I like this look or not.
Starting Cabinet Reassembly
The marquee looking good (more about this later).
Starting Marquee Reassembly
I even managed to not break the screen whilst disassembling, cleaning and reassembling.
Reassembled Cabinet
Adding An ‘On/Off Shim’.
There are a couple of reasons I added an ‘On/Off Shim’:
- A neat button that performs a clean shutdown.
- A way of running the 5V power and ground looms to the LED buttons.
On/Off Shim
‘Hot Glue’ is related to ‘WD40’ and ‘GafferTape’, right?
On/Off Shim in Place
Button Wiring – Part 1.
Wiring up the LED power and ground looms first.
Good job the anode was painted or else I’d never have figured out how to wire the four terminals up.
For reference:
This is a ‘Picade Maxi’, so has 8 buttons on top.
- 6 x Blue buttons for the arcade controls.
- 2 x red buttons for the volume controls.
Tidy Button Wiring
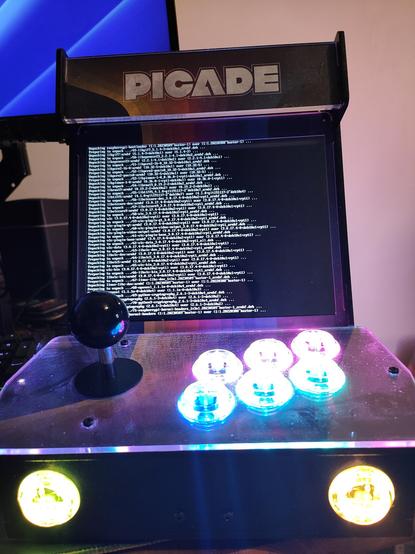
First Boot !
Not doing any more wiring unless the damn thing boots !
First Boot !
Button Wiring Part 2.
Connecting up the buttons to the Picade control board.
Button Wiring Close Up
The cable tidy proved to be a mixed blessing.
Whilst it kept everything tidy it also introduced a slight amount of resistance to the bound wires.
That meant that I had to take a bit of care when affixing the console to the cabinet to ensure that the tidied bundles of wires were positioned correctly and not pressing on the underside of the illuminated buttons as this inhibited the button action.
Console Wiring
Testing the buttons.
Those wires hanging over the top of the cabinet are where the +/-5V from the ‘On/Off Shim’ has been broken out into three separate strands.
- One strand is for the the eight buttons on the top of the console.
- One strand is for the side and front buttons if they are ever swapped for LED buttons.
- The third strand is to potentially power an illuminated marquee if I ever get around to that.
Button Test
The broken out power strands.
(Before being wired up and squished into the cabinet.)
On/Off Shim In Rear Door
Everything Works, So Change It.
All booting and working.
So, time to tinker.
Boot With Buttons Lit
I swapped out the yellow buttons for LED ones.
(Actually, I broke one of the yellow lugs that hold the button in place.)
So, all I needed to do was make a positive daisy-chain and a ground daisy-chain.
Then wire those to the already broken out +/-5V from the ‘On/Off Shim’.
You can just about make out the daisy-chain, covered in cable-tidy before it heads off under the screen to the Shim.
Changing To Yellow Lit Buttons
Rear Wiring.
Lots of tidy cables here.
Wiring View From The Rear
I just about manage to fit all of that extra plastic in.
Even though it looks pretty, I wouldn’t do it again because:
- It was time consuming.
- It added unnecessary resistance to the loops of wires.
Another Wiring View From The Rear
Finishing Up.
I went through updating the firmware; without breaking anything this time.
I managed to sort out the sound.
And that was pretty much it, everything else worked straight away, out of the box.
Completed Cabinet – Unlit Buttons.
Looks good now that it’s all finished and the trim is in place.
Not sure how long the trim will stay stuck for though, it doesn’t seem super sticky.
(Edit: I had to eventually superglue the trim in place as it lifted over time.)
Completed Unlit Front View
It was a conscious decision to leave the black buttons in place.
They just look right next to the yellow vinyl.
Completed Unlit Side View
I do love the ‘Space Invader’ detail on the rear.
Completed Unlit Rear View
It looks good from the back with the ‘Invader’ lit.
Completed Lit Rear View
The button stickers are lifting slightly.
I know these buttons are a few millimetres less in diameter than the originals.
They are also slightly more convex.
Etching, instead of stickers may be in order.
Completed Unlit Console View
The lifting stickers are not too noticeable once the power is on.
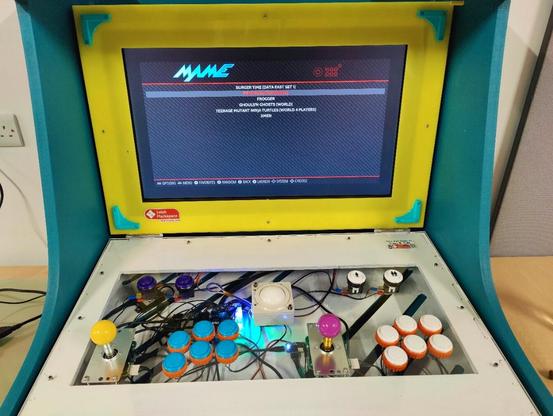
Completed Lit Console View
The yellow illuminated buttons next to the graphics by @Wheelhorse look fantastic.
Completed Lit Console Front View
Still unsure about those cutaways.
Completed Lit Side View
All work was overseen by Professor Screwed.
Completed Lit Front View
Another shot of the front.
Another Completed Lit Front View
And another…
Yet Another Completed Lit Front View
It is a bit of a transformation.
It actually works properly now !
Completed Lit Side View
Next Steps.
Load it full of games.
Play more than ‘Pac-Man’ on it !!!
Things I’d Do Differently.
- Cough up the extra cash and get the vinyl contour cut next time.
(My poor knife skills are not too noticeable, but I know the mistakes are there.)
-
Completed Bad Knife Skills
The image needs to extend to the end of the marquee.
(My mistake, but not a biggie and if I add lights up there It’ll need to be opaque anyway.)
Future Mods.
Because nothing is every truly finished.
Illuminated Marquee.
- I’ll probably run the remaining +/-5V from the Shim to a set of lights behind the marquee.
Mote.
- I will find a use for those Mote strips I have in a box somewhere.
Etched buttons.
- The stickers will come off, probably sooner rather than later, so I think I’m going to etch them.
I thinks that’s all !
Thanks for reading,
Simon.
An earlier version of this post can be found on the Pimoroni Forum.
#maker #picade #raspberry-pi #retrogaming
https://consummatetinkerer.net/refurbishing-an-old-kickstarter-picade-a-long-read-with-lots-of-pictures/