Installing Linux Mint 2.0, 2.1, and 2.2 (KDE) on VMware Workstation
Linux Mint is a Linux distribution that derives from Ubuntu, notable for its ease of use and appeal to desktop users. It comes with a selection of free open-source applications that help increase your productivity.
As Linux Mint is nearly approaching its 20th anniversary, in this article, we’ll be installing the following three ancient Linux Mint versions to separate VMware virtual machines:
- Linux Mint 2.0 (Barbara): November 13th, 2006 (download)
- Linux Mint 2.1 (Béa): December 20th, 2006 (download)
- Linux Mint 2.2 (Bianca) KDE: April 20th, 2007 (download)
Linux Mint 2.0 (Barbara)
This version of Linux Mint was released on November 2006 with Ubuntu as the primary codebase. It was released back when Linux Mint wasn’t very well known. This came after the beta version of Linux Mint, which was v1.0 Ada, was released with Kubuntu as the codebase.
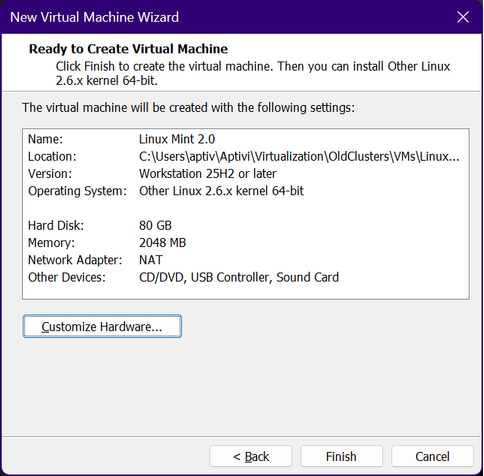
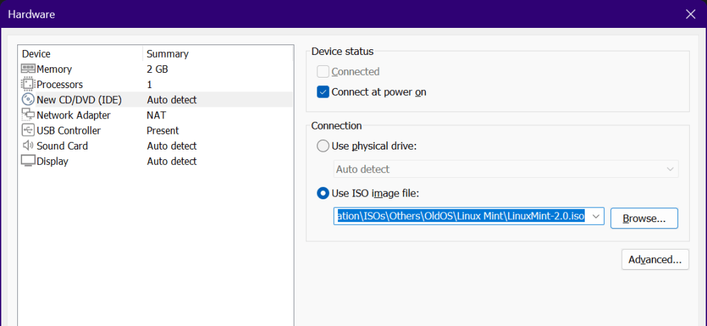
First, let’s configure the virtual machine like this:
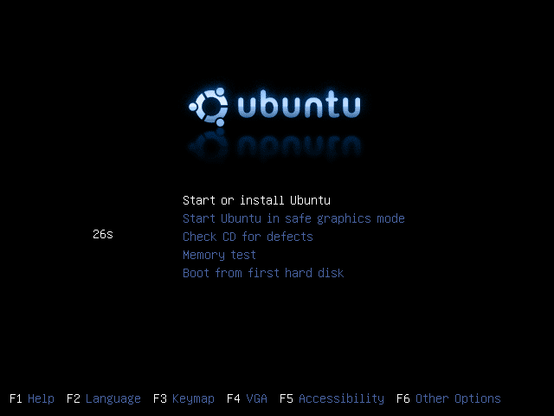
After the configuration, we’ve launched the virtual machine with the Linux Mint 2.0 ISO file. We’re greeted with the boot menu that looks similar to Ubuntu 6.06’s boot menu, but with colors changed to blue instead of the original orange color. This represents early work of Linux Mint, back when all parts of the system used to be called Ubuntu.
We’ll let Linux Mint 2.0 boot up. Interestingly, the boot splash of Ubuntu has remained unchanged; it’s using the original Ubuntu colors and logo.
It took about a minute before the GNOME desktop environment loaded.
Let’s go ahead into installing Linux Mint 2.0 to the virtual machine.
We’ve selected the language. The time zone selection comes next. This comes in the form of clicking on a small clip across different parts of the map.
After that, the keyboard layout selection comes.
After this step is complete, the user creation step comes next. You’ll have to choose a user name, a full name, and a password. You can optionally edit the host name.
Next, the disk partitioning comes. You can select either the guided partitioning options, such as erasing a whole disk, or you can manually edit the partition table.
After that, a summary screen comes. It tells you about your chosen language and time zone settings, as well as the name and the partition table changes.
As soon as you click on “Install”, the whole process begins.
As soon as the installation completes, it will ask you if you want to reboot the system or to continue using the live session.
During the restart process, you’ll be asked to eject the CD-ROM and to press ENTER to restart the machine. Since the virtual machine has automatically ejected the CD-ROM, we just had to press ENTER.
Afterwards, Linux Mint 2.0 starts up from the hard disk into the login screen.
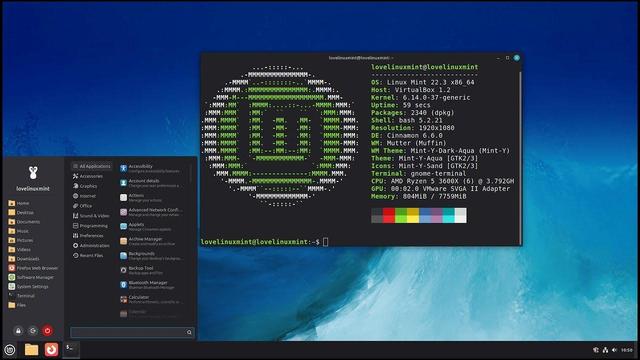
Now, let’s log in to our account. We can verify that this version of Linux Mint is using Linux v2.6.17.
Additionally, we can verify that some applications, such as Firefox and OpenOffice.org Writer, work.
Linux Mint 2.1 (Béa)
After more than a month of the release of Linux Mint 2.0, a new version was released, which was version 2.1 (Béa). Since the installation steps are obviously the same as explained above, we will just show you the pictures of the installation process.
This is the stage when Linux Mint started to be a bit mature, with the prototype Linux Mint branding instead of Ubuntu.
Virtual machine creation:
Booting up the Live CD:
As you can see here, references to “Linux Mint” began appearing. Tomboy Notes automatically starts as soon as the boot-up process finishes.
Installation process:
The installation steps are pretty much the same as Linux Mint 2.0.
Login screen:
Notice that the login screen has finally changed to represent Linux Mint’s identity.
Desktop and demo:
Linux Mint 2.2 KDE (Bianca)
We have chosen the KDE edition of Linux Mint 2.2 on purpose so that we can add some diversity and that we can show our readers how the KDE version looked like.
Virtual machine creation:
Booting up the Live CD:
Here’s when the identity of Linux Mint was finalized. The green color represents the color of the mint, such as spearmint. Older versions used to have the blue color as the accent color. The wallpaper was also changed.
Installation process:
Login screen:
Note that the KDE edition actually uses KDE’s login manager instead of GDM.
Desktop and demo:
#Linux #LinuxMint2 #LinuxMint20 #LinuxMint22 #LinuxMintBarbara #LinuxMintBea #LinuxMintBianca #LinuxMintKDE #news #Tech #Technology #update