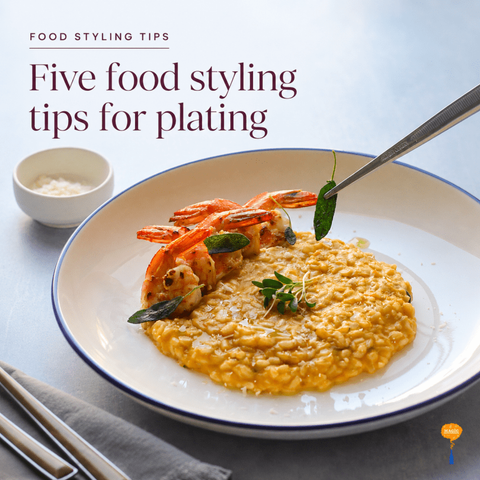
5 Fine Dining Plating Tips for Stunning Food Presentation

Fine dining plating is about creating a plate that feels thoughtful, elegant, and balanced. It is not always about using expensive ingredients or complicated techniques. Sometimes, the difference between a regular plate and a restaurant-style plate is how the food is arranged, how much space is left around it, how the sauce is placed, and how the garnish completes the story.

As a food stylist, I look at plating not only from the point of view of taste, but also from the point of view of the camera. A plate may look beautiful in real life, but once it is photographed, every detail becomes more visible. The sauce, the texture, the colour, the height, and even the space on the plate all matter.

Whether you are styling food for a restaurant shoot, creating content for social media, or plating a special meal at home, these five fine dining plating tips can help you make your dish look more elegant and camera-ready.
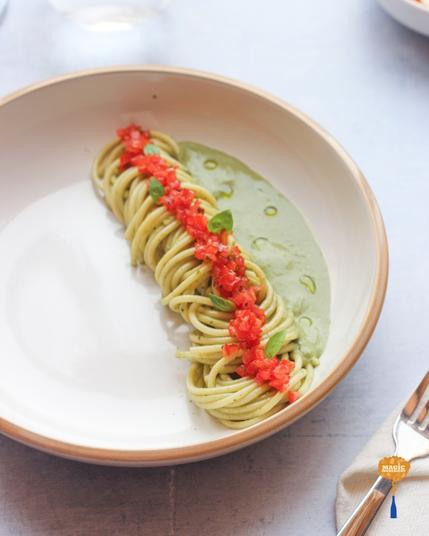
pesto spaghetti with cherry tomatoes

1. Start with Negative Space

One of the most important fine dining plating tips is to leave enough space on the plate. This space is often called negative space. It gives the food room to breathe and makes the plate look more refined.

When a plate is too full, the eye does not know where to look first. The dish can start to look heavy, crowded, or casual. In fine dining plating, the main element needs to stand out clearly. That could be a piece of fish, a lamb chop, an eggplant steak, a dessert, or even a beautifully shaped salad.

Negative space helps create focus. It makes the food look intentional.
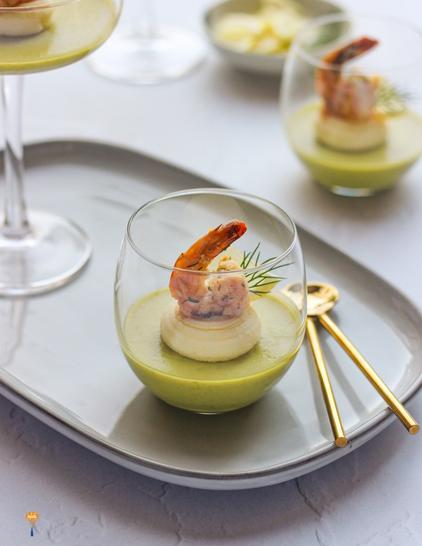
Savory Pannacotta with shrimps

2. Create Height, But Keep It Controlled

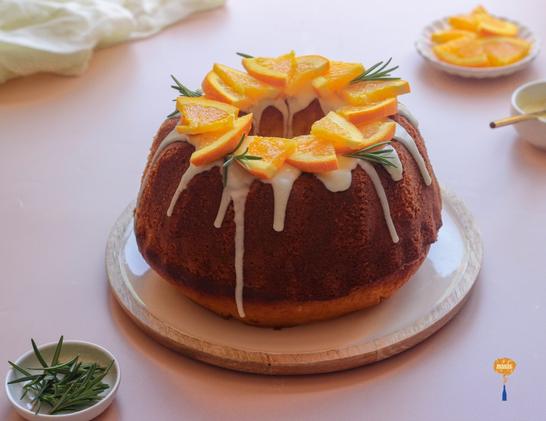
Height is one of the easiest ways to make a plate look more elegant. A flat plate can sometimes look ordinary, even when the food tastes delicious. Adding height gives the dish structure and makes it more visually interesting.

But height should always feel controlled. If the food looks unstable, messy, or forced, the plate loses its elegance.

There are many simple ways to create height in food styling. You can lean a protein against a puree, stack vegetables gently, pipe mashed potatoes, fold cucumber ribbons, place herbs upright, or arrange crispy elements on top. Even a small lift can make the dish look more professional.
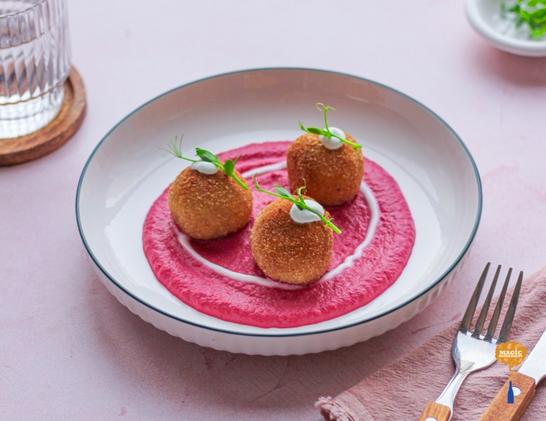
Paneer Pakora with Beetroot Gravy

3. Use Sauce with Purpose

Sauce can completely change the look of a plate. It can make a dish look rich, elegant, colourful, and restaurant-style. But too much sauce can also make the plate look messy.

In fine dining plating, sauce should guide the eye. It should not flood the plate.

There are many ways to use sauce beautifully. You can create a smooth base with a spoon, make small dots with a squeeze bottle, brush a sauce across the plate, or drizzle it carefully around the main ingredient. The style depends on the dish and the story you want to create.

Chicken Roulade

4. Balance Colour and Texture

A beautiful plate needs contrast. This is one of the most important aspects of both food styling and fine-dining plating.

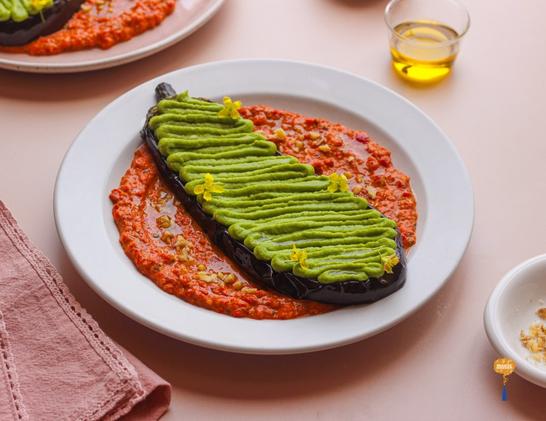
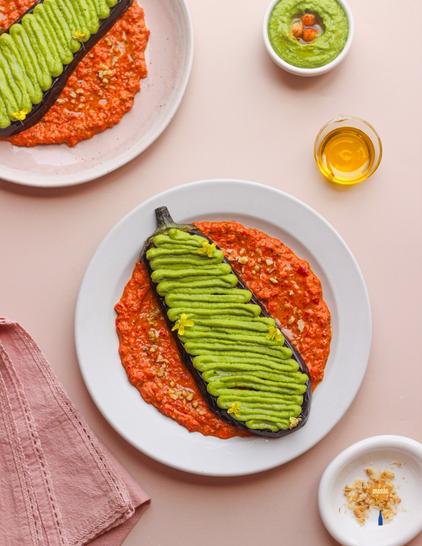
Think about colour first. If everything on the plate is brown or beige, the food may taste wonderful, but look flat in a photograph. Adding a small amount of green, red, yellow, purple, or white can bring life to the plate.

This does not mean adding random colours. The colours should still belong to the dish. For example, green hummus works beautifully with roasted eggplant. 

Spaghetti in cauliflower and sage garlic butter sauce

5. Garnish a dish like It Belongs

Garnish is often where plating goes wrong. A garnish should never feel like an afterthought. It should add beauty, flavour, texture, or meaning to the dish.

In fine dining plating, every garnish should look like it belongs there.

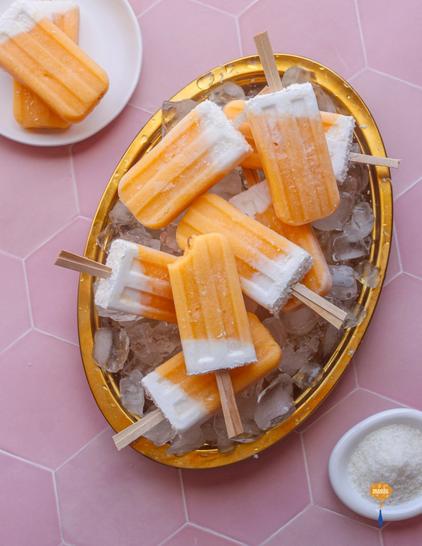
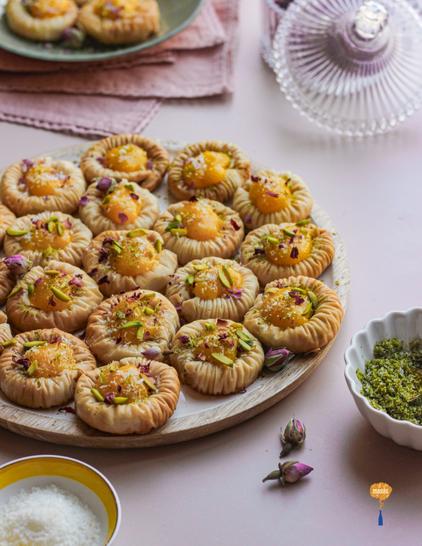
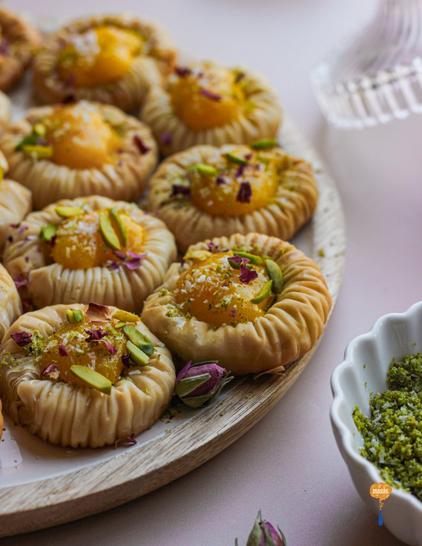
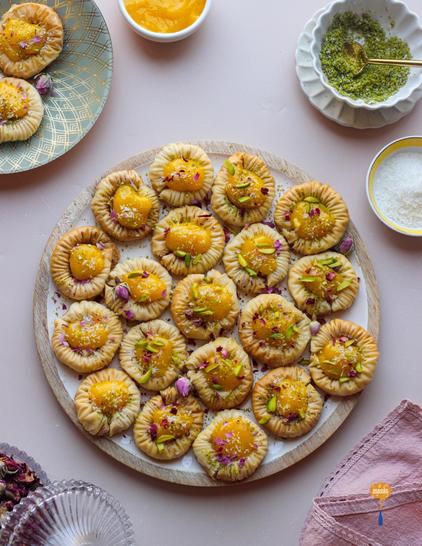
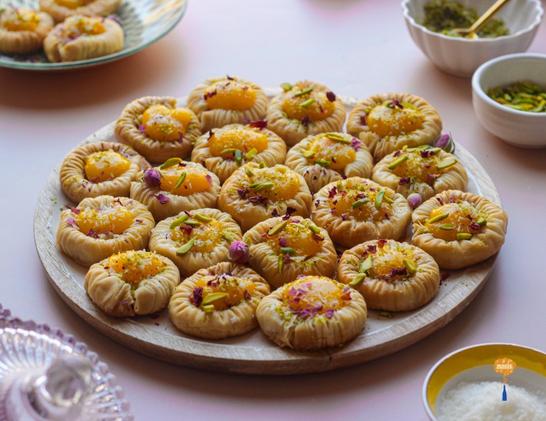
Fresh herbs, edible flowers, microgreens, citrus zest, toasted nuts, seeds, spice dust, herb oil, and dried petals can all be beautiful. But they need to connect with the flavour and mood of the dish. For example, dried rose blooms work beautifully with rose milkshakes, Middle Eastern desserts, and floral drinks.

Roasted Beetroot carpaccio with labneh

Final Thoughts

Fine dining plating is about control, balance, and intention. You do not need to make the plate complicated. You need to make every element feel like it has a reason to be there.

Start with negative space. Build a controlled height. Use the sauce with purpose. Balance colour and texture. Choose garnishes that belong to the dish.

These small food styling decisions can make a simple plate look elegant, premium, and camera-ready.

As a food stylist in the UAE, I often work with dishes that need to look beautiful for photography, social media, menus, campaigns, and special occasions. Every plate tells a story, and styling helps that story become clear before the first bite.

Whether you are a home cook, content creator, chef, or restaurant brand, thoughtful plating can transform how your food is perceived.

Save these plating tips for your next shoot, dinner setup, or special occasion plate.

#featured #featuredImage #foodstylistUae #foodstylistdubai #platingTips #uaefoodstylist

Delicious Curried Spinach Feta Filo Parcels Recipe

As foodstylist based in the UAE, working with Turkish restaurants and home kitchens in this region, where filo is often used as either the main element or an important supporting ingredient in many dishes and products, has greatly expanded my knowledge and experience with it. From delicate layered pastries to savoury parcels and baked filo dishes, each project has taught me something new about texture, timing, moisture control, and presentation.

Curried spinach feta filo parcels

Filo pastry has always been one of those ingredients that feels delicate, dramatic, and slightly unpredictable. It dries quickly, tears easily, and needs a little patience, but the texture it creates is always worth the effort. As a food stylist working with filo pastry creations, both sweet and savoury, I have learned to appreciate the beauty of its flaky layers, golden edges, and light, crisp finish.

That love for texture inspires these curried spinach feta filo parcels. The filling is simple but flavourful, made with spinach, feta, mild curry spices, and a hint of creaminess. Wrapped in thin sheets of filo and baked until golden, they make a beautiful snack, starter, or tea-time savoury pastry.

Styling these parcels was a challenge because filo pastry does not always behave perfectly. Some edges brown faster, some layers crack, and the parcels can look too flat if not handled carefully. But that is also what makes filo so visually interesting. The flaky folds, uneven golden corners, and crisp texture give the dish a handmade elegance that I love recreating at home.

Curried spinach feta filo parcels

Preparation time: 20-25 minutes
Baking time:18-22 minutes
Serves: 5-6

Ingredients

For the filling

  • Fresh spinach, chopped 2 cups
  • Onion, finely chopped 1 small
  • Garlic, minced 2 cloves
  • Olive oil 1 tablespoon
  • Cumin powder ½ teaspoon
  • Curry powder ½ teaspoon
  • Black pepper ¼ teaspoon
  • Salt, as needed
  • Feta cheese, crumbled 100 g
  • Cream cheese or thick yogurt, optional 1 tablespoon
  • Chopped coriander or parsley, optional 1 tablespoon

For the filo parcels

  • Pastry sheets, thawed 6 to 8
  • Melted butter or olive oil, 3 to 4 tablespoons
  • Sesame seeds or nigella seeds, optional

Curried spinach feta filo parcels

Method

  • Heat olive oil in a pan and sauté the chopped onion until soft and lightly golden. Add the garlic and cook for a few seconds until fragrant.
  • Add the chopped spinach, cumin, curry powder, black pepper, and salt. Cook until the spinach wilts and the moisture reduces.
  • This step is important because too much water in the filling can make the filo pastry soggy. Remove from heat and allow the mixture to cool slightly. Add the crumbled feta cheese and mix gently.
  • If you want a creamier filling, add a spoonful of cream cheese or thick yogurt. Finish with chopped coriander or parsley if using.
  • Place the thawed filo sheets on a clean surface and cover them with a slightly damp kitchen towel.
  • Filo dries out very quickly, so keep the sheets covered while working. Take one sheet of filo and brush lightly with melted butter or olive oil.
  • Fold the sheet along the shorter side. Cut the layered sheet into two equal strips, place one on top of the other like a cross, and press it inside the muffin hole of a muffin pan.
  • Place a spoonful of the spinach feta filling, fold the corners over the filling to cover the parcels, then continue with the rest of the sheets.
  • Brush the tops of the filo parcels with melted butter or olive oil. Sprinkle sesame seeds or nigella seeds on top if desired. Bake in a preheated oven at 180°C for 18 to 22 minutes, or until the parcels are crisp and golden brown.
  • Allow them to rest for a few minutes before serving.
  • Curried spinach feta filo parcels

    Tips for Working with Filo Pastry

    Keep the filo sheets covered while working so they do not dry out.

    Do not overfill the parcels, as this can make folding difficult and may cause the pastry to tear.

    Make sure the spinach filling is not watery. A dry filling helps the parcels stay crisp.

    Brush each layer lightly with butter or oil. Too much can make the pastry heavy, while too little can make it dry.

    Bake until deeply golden, as the colour is what makes filo parcels look especially appealing in photographs.

    #CurriedSpinachFetaFiloParcels #dubaifoodstylist #featured #featuredImage #foodstylistdubai #uaefoodstylist

    Muskmelon Coconut Popsicles: Styling Tips with Real Ice

    Muskmelon is one of those fruits that feels made for summer. It is soft, fragrant, naturally sweet, and beautiful in colour. Recently, I made a simple smoothie at home using muskmelon and coconut milk, and the combination was so light and refreshing that I knew it had to become a frozen dessert.

    muskmelon and coconut popsicles

    These muskmelon coconut popsicles are creamy, fruity, and perfect for warm days. The coconut milk gives them a smooth texture, while the melon keeps the flavour fresh and delicate. As a food stylist in the UAE, I love working with frozen desserts because they teach patience, timing, and preparation. Popsicles, ice creams, and ice lollies look effortless on camera, but behind the scenes, they need planning. Real ice melts fast, frozen desserts soften quickly, and every minute matters.

    If fake ice is not available, there are still simple ways to create a beautiful frozen dessert setup at home.

    Ingredients

    Makes around 6-8 popsicles, depending on the mould size.

    For the Muskmelon Coconut Popsicles

    • Ripe muskmelon, peeled and chopped 2 cups
    • Coconut milk 1 cup
    • Coconut cream ½ cup
    • Sugar, honey, or maple syrup, adjust to taste, 2–3 tablespoons
    • Pistachio powder 1 teaspoon

    Method

  • Add the chopped muskmelon to a blender.
  • Pour in the coconut milk.
  • Add sugar or honey, and a small pinch of salt.
  • Blend until smooth and creamy.
  • Taste the mixture. Since freezing slightly reduces sweetness, the mixture should taste a little sweeter than a regular smoothie.
  • Pour the mixture into popsicle moulds.
  • Insert sticks and freeze for at least 6–8 hours, or overnight. Tilt them at an angle to get a slanted layer. After 4 hours, pour the coconut cream slightly sweetened with honey or sugar. Sprinkle desiccated coconut and let it freeze overnight.
  • To unmould, dip the mould briefly in room-temperature water for a few seconds. Gently pull out the popsicles.
  • Place the unmoulded popsicles on a lined tray and freeze again for a few minutes before serving or shooting.
  • muskmelon and coconut popsicles

    Food Styling Tip: How to Shoot Popsicles with Real Ice

    Shooting frozen desserts at home can feel difficult, especially when fake ice is not available. Real ice melts quickly under lights, near windows, or even in an air-conditioned room. The trick is to prepare everything in layers and freeze as much as possible before the final shot.

    One of my favourite tips for getting ice shards rather than cubes is to freeze a large block of ice in a brownie tin. 

    Simple Real Ice Styling Workflow

  • Freeze a large block of ice in a brownie tin.
  • Break the ice into natural-looking chunks.
  • Arrange the ice on your chosen tray or plate.
  • Freeze the arranged ice again.
  • Unmould the popsicles separately.
  • Freeze the popsicles again after unmoulding.
  • Place the popsicles over the ice and freeze briefly once more.
  • Set up your camera, background, garnish, and lighting first.
  • Bring the frozen setup out only when ready to shoot.
  • muskmelon and coconut popsicles

    Why Food Styling Matters for Frozen Desserts

    Frozen desserts require more than a good recipe. They need timing, surface preparation, temperature control, and a clear visual plan. Commercial ice cream and frozen dessert shoots often involve more advanced styling techniques, substitutions, and longer preparation times. But even at home, small planning steps can make a big difference.

    A food stylist can make life easier for the chef, photographer, and client by understanding how food behaves on set. With frozen desserts, that knowledge becomes even more important. Knowing when to freeze, when to unmould, how to arrange, and how to manage melting can save time and protect the final image.

    In my upcoming tutorials, I’ll be sharing more tips on creating fake ice, styling ice creams, and working with frozen desserts for more professional-looking food photography. Stay tuned.

    #bestfoodstylistdubai #featured #featuredImage #foodstylistdubai #indianfoodstytlistdubai #muskmelonAndCoconutPopsicles #uaefoodstylist

    Mango Baklava: A Delightful Eid Dessert

    As a food stylist based in the UAE, one of my constant efforts is to show the world how beautiful, delicate, and deeply expressive our desserts can be — from the ingredients that are available to the way they are presented on a table. This year, I chose baklava and tried to use a fruit very close to my heart, Indian mangoes.

    Mango-stuffed filo pastry bracelets

    Mango season and Eid have arrived together this year, and honestly, that felt like enough reason to make mango the star of the table. For a small Eid gathering with a friend and his family from university, I wanted to make something that felt festive, light, and a little nostalgic. The evening became less about a grand menu and more about catching up on life after university, sharing memories, and serving something beautiful with ingredients that feel very much in season.

    These mango-stuffed filo pastry shells are crisp, buttery, lightly sweet, and filled with a silky mango puree scented with saffron. The shells are finished with desiccated coconut, chopped pistachios, and tiny rose blooms, giving them a delicate, festive look without making the dessert too heavy.

    Mango-stuffed filo pastry bracelets

    The best part is that they look far more complicated than they actually are. Once the filo is rolled, scrunched, and shaped into small hollow shells, they bake into crisp golden cups that can hold the mango filling beautifully.

    Preparation time: 25-30 minutes
    Baking time:12-15 minutes
    Serves: 6-7

    Ingredients

    For the filo pastry shells

    • Filo pastry, defrosted 1 packet
    • Melted butter, for brushing
    • Baking paper, for lining the tray

    For the mango saffron puree

    • Pulp of 2 ripe mangoes
    • Sugar, or adjust to taste, 2 tbsp
    • A few strands of saffron
    • Warm milk or warm water, to bloom the saffron 1–2 tbsp

    For the sugar syrup

    • Sugar ½ cup
    • Water ½ cup
    • A few drops of lemon juice
    • Optional: a few saffron strands or a little rose water

    For topping

    • Desiccated coconut
    • Chopped pistachios
    • Dried or fresh edible rose blooms
    • Optional: extra saffron strands

    Method

  • Soak the saffron strands in 1–2 tablespoons of warm milk or warm water for a few minutes. Blend the mango pulp with sugar and the bloomed saffron until smooth.
  • Taste and adjust the sweetness if needed. Since mangoes are naturally sweet, I used only 2 tablespoons of sugar for the pulp of 2 mangoes. Keep the puree chilled until the filo shells are ready to fill.
  • Add sugar and water to a small saucepan and bring it to a gentle boil. Let it simmer for a few minutes until slightly sticky but still pourable. Add a few drops of lemon juice to prevent crystallization.
  • You can also add a little rose water or saffron for a more festive flavour. Keep the syrup hot, as it will be poured over the baked filo shells.
  • Defrost the filo pastry according to the packet instructions. Work carefully, as filo dries out quickly. Keep the sheets covered with a slightly damp towel while shaping.
  • Cut each filo sheet into rectangles. Each sheet should give 4 rectangles, approximately 8 cm by 10 cm.
  • Take one rectangle and place it with the narrower side facing you. Using a chopstick, start rolling the filo from one side. Stop rolling about half an inch before the edge. Now gently scrunch the filo from both sides while it is still on the chopstick. Slowly slide the chopstick out. Twist the two ends towards each other to create a hollow shell shape. Push the extra filo slightly towards the base so the shell can sit properly on the tray. Repeat with the remaining filo rectangles.
  • Arrange the shaped filo shells on a lined baking tray. Brush them generously with melted butter. Bake in a preheated oven at 180°C for about 12–15 minutes, or until golden, crisp, and lightly browned.
  • As soon as they come out of the oven, pour or brush the hot sugar syrup over the shells. Let them cool completely before filling.
  • Once the shells have cooled, spoon or pipe the mango saffron puree into the hollow centre of each shell. Top with desiccated coconut, chopped pistachios, and rose blooms.
  • The coconut adds softness, the pistachios bring colour and texture, and the rose blooms make the dessert feel instantly festive. Serve soon after assembling so the filo stays crisp.
  • Mango-stuffed filo pastry bracelets #dubaifoodstylist #featured #featuredImage #food #mangoBaklava #MangoStuffedFiloPastryBracelets #nutrition #pastryWithMango #recipe #recipes #uaefoodstylist

    Roasted Eggplant Steak with Muhammara and Hummus Recipe

    Some vegetables quietly become the star of the plate when treated with a little attention, and eggplant is definitely one of them. The eggplants currently in the market are tender, glossy, and just the right size for cutting into thick, beautiful steaks. When roasted well, they become golden, soft, almost creamy inside, and strong enough to hold their shape on a styled plate.

    This eggplant steak with muhammara and green hummus is a dish that feels rich, colourful, and elegant without being complicated. The base is a smoky-sweet muhammara, the roasted eggplant brings warmth and depth, and the piped green hummus adds freshness, creaminess, and a beautiful visual contrast. Finished with olive oil, crushed walnuts, and edible flowers, it becomes the kind of vegetarian plate that can easily sit on a restaurant-style table.

    Eggplant steak with muhammara

    Why This Eggplant Steak Works So Well

    Eggplant has a wonderful ability to absorb flavour, especially when it is scored properly. For this recipe, the steaks are given light criss-cross marks before roasting. These cuts help the turmeric, paprika, olive oil, salt, and pepper settle into the flesh of the eggplant, giving it both colour and flavour.

    The muhammara adds a deep red base with roasted pepper and walnut notes, while the green hummus brings a creamy, herby finish. As a food stylist, I love this kind of dish because it gives you layers to work with: a bold smear of sauce, a golden roasted steak, a piped element for texture, and small garnishes that make the plate feel fresh and finished.

    Eggplant steak with muhammara

    Eggplant Steak with Muhammara and Green Hummus Recipe

    Serves

    2–3 people as a starter or side dish
    2 people as a light vegetarian main

    Ingredients

    For the Eggplant Steaks

    Eggplants 2 medium
    Olive oil  2 tablespoons
    Turmeric powder  1/2 teaspoon
    Paprika 1 teaspoon
    Salt, to taste
    Black pepper, to taste

    For the Muhammara

    Roasted red bell pepper 1 large
    Walnuts 1/2 cup
    Garlic clove 1 small
    Breadcrumbs 1 tablespoon
    Olive oil 1 tablespoon
    Lemon juice 1 teaspoon
    Paprika  1/2 teaspoon
    Cumin powder  1/2 teaspoon
    Pomegranate molasses, optional but recommended, 1 teaspoon
    Salt, to taste

    For the Green Hummus

    Cooked chickpeas 1 cup
    Garlic clove 1 small
    Tahini 2 tablespoons
    Lemon juice 1 tablespoon
    Olive oil 2 tablespoons
    A small handful of fresh coriander or parsley
    Cold water, as needed, 1–2 tablespoons
    Salt, to taste

    For Garnish

    Olive oil, for drizzling
    Crushed walnuts
    Edible flowers
    Fresh herbs, optional

    Method

  • Preheat the oven to 200°C. Slice the eggplants lengthwise into thick steaks.
  • Try to keep them even in thickness so they roast at the same time.
  • Using a sharp knife, gently score the surface of each eggplant steak in a criss-cross pattern. Do not cut all the way through.
  • The marks should be deep enough to help the seasoning settle into the flesh. In a small bowl, mix olive oil, turmeric, paprika, salt, and black pepper. Brush this spice rub generously over the eggplant steaks, making sure it gets into the scored lines.
  • Place the eggplant steaks on a lined baking tray and roast for 25–35 minutes, or until golden brown and tender.
  • The edges should look slightly caramelized, and the inside should feel soft when pressed. Add the roasted red pepper, walnuts, garlic, breadcrumbs, olive oil, lemon juice, paprika, cumin, pomegranate molasses, and salt to a blender or food processor.
  • Blend until smooth but still slightly textured. Muhammara does not need to be completely silky; a little texture from the walnuts makes it more interesting. Taste and adjust the salt, lemon juice, or pomegranate molasses if needed.
  • Add the chickpeas, garlic, tahini, lemon juice, olive oil, fresh coriander or parsley, and salt to a blender. Blend until creamy.
  • Add cold water little by little until the hummus becomes smooth enough to pipe but still holds its shape. Transfer the green hummus to a piping bag fitted with a simple round or star nozzle. Spoon the muhammara onto the plate and spread it into a soft base.
  • Place one roasted eggplant steak over the muhammara. Pipe the green hummus over the eggplant in small dots, waves, or lines. The green hummus adds height, texture, and a lovely colour contrast against the golden eggplant and red muhammara.
  • Finish with a drizzle of olive oil, crushed walnuts, edible flowers, and a few fresh herbs if using. Serve warm or at room temperature.
  • Eggplant steak with muhammara #dubaiFoodstylist #featured #featuredImage #foodstylistUae #roastedEggplantSteak

    Elegant Bundt Cake Styling Tips

    Cakes and baked items are a huge part of the food culture in the UAE, from café displays and dessert tables to family gatherings and luxury events. As a food stylist, I always feel that I have to be prepared to style anything that comes to the table, and a simple bundt cake is a beautiful reminder of how small details can completely change the way a dessert is presented.

    As a food stylist, I often look beyond the recipe at cakes. Sometimes a cake is part of a larger table setting, surrounded by other dishes, drinks, flowers, linens, and props. In that case, the cake should look elegant without feeling too heavy or overdecorated.
    Here are a few tips for styling a basic bundt cake.

    Orange bundt cake

    Right Glaze Consistency

    The thickness of the glaze is the most important part. If the glaze is too thin, it will run quickly and disappear into the cake. If it is too thick, it will sit heavily on top and look clumpy.

    For a bundt cake, the glaze should be thick but still pourable. It should slowly fall from the spoon in a ribbon. This gives enough control to create soft drips while still allowing the beautiful shape of the bundt cake to show. The idea is to start with as little liquid as possible.

    Control the Drip

    Instead of pouring all the glaze at once, work slowly. Use a spoon and start from the top ridge of the cake. Let the glaze fall naturally over the curves.

    If you want longer drips, gently push a little more glaze towards the edge. If you want a cleaner look, use less glaze and allow only a few soft drips to fall down the sides.

    The beauty of a bundt cake is in its shape, so I prefer not to cover it completely. A controlled glaze keeps the cake looking elegant while still showing off its structure.

    Let the Cake Cool Completely

    This step is simple but important. If the cake is still warm, the glaze will melt and become too thin. It may run too fast and pool at the bottom.

    Let the cake cool completely before glazing. This helps the glaze sit beautifully on the surface and gives you more control over the final look.

    Using Store-Bought Frosting for Styling

    If you are styling a cake in a hurry, store-bought frosting can be very useful. It saves time, provides a smooth base, and can be adjusted depending on the look you want. You can use a small amount of food colour to get the right shade for the frosting. Add the colour little by little, because it is easier to deepen the shade than to fix a colour that has become too strong.

    Use Fresh Ingredients for Decoration

    Fresh ingredients instantly make a cake look more refined. For an orange bundt cake, thin orange slices, orange zest curls, edible flowers, mint, rosemary, or small citrus segments can work beautifully.

    The idea is not to overcrowd the cake. A few carefully placed ingredients can make it look fresh and elegant. Orange slices add colour, zest adds texture, and herbs bring a soft natural contrast.

    Fresh garnishes also help connect the decoration to the flavour of the cake. When someone sees orange slices or zest on top, they immediately understand the flavour story.

    #featured #featuredImage #foodstylistDubai #orangeBundtCake #stylingBundtCake #uaefoodstylist

    FocalPlane's #FeaturedImage was acquired by Aswathy G Krishnan and shows a neural rosette of a cerebral organoid derived from hiPSCs.

    In this post, we learn more about the image and Aswathy’s research:

    https://focalplane.biologists.com/2025/10/10/featured-image-with-aswathy-g-krishnan/

    #Microscopy #Imaging #Microscope #CellBiology #Cells #FluorescenceFriday

    Why is the Featured Image Disappearing in My Newspaper Theme After Server Migration?
    Newspaper theme featured image issue after server migration from EC2 to Bluehost? Troubleshooting WordPress, FeaturedImage, ServerMigration, EC2, Bluehost. Check theme config, plugins, and database for fixes. #WordPress #FeaturedImage #ServerMigration #EC2 #Bluehost #Troubleshooting
    https://tech-champion.com/application-support/why-is-the-featured-image-disappearing-in-my-newspaper-theme-after-server-migra...

    Why is the Featured Image Disappearing in My Newspaper Theme After Server Migration?

    Fix disappearing featured images in your Newspaper WordPress theme after migrating to a new server. Learn about common causes and solutions for this Newspaper theme featured image issue.

    TECH CHAMPION
    Why is the Featured Image Disappearing in My Newspaper Theme After Server Migration?
    Newspaper theme featured image issue after server migration from EC2 to Bluehost? Troubleshooting WordPress, FeaturedImage, ServerMigration, EC2, Bluehost. Check theme config, plugins, and database for fixes. #WordPress #FeaturedImage #ServerMigration #EC2 #Bluehost #Troubleshooting
    https://tech-champion.com/application-support/why-is-the-featured-image-disappearing-in-my-newspaper-theme-after-server-migra...