Replacement endcap for King's Rack shelves - Free 3D Print Model - MakerWorld
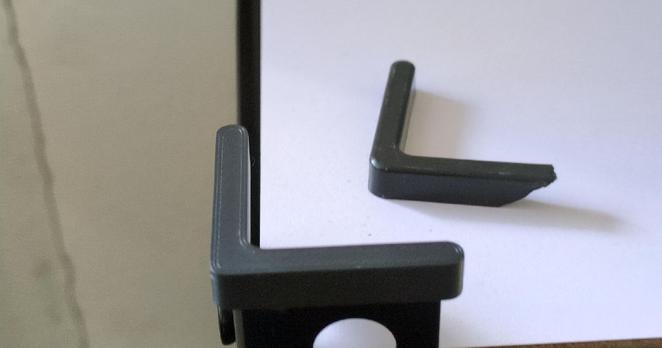
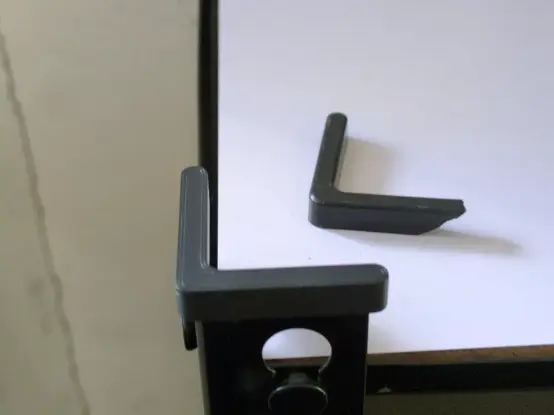
Download this free 3D print file designed by Tai. BackgroundI was helping a friend assemble some of these shelves from King's Rack when I accidentally broke one of endcaps, used to cover the sharp edges of the vertical beams at the top for safety protection, while using a rubber mallet (improperly, which I realized in hindsight) to assemble the shelf. It was partially damaged, but then I nearly lost that endcap. (Somehow, my friend luckily found it before I left for the day.) I realized that designing the endcap on my own would be relatively straightforward. So, I used Onshape to design the endcap.I have uploaded the 3D model as an STL file, a STEP file, and as a public document on Onshape for:Version A, which as the correct fillet value; andVersion B, which has as the original fillet value.Notes for Versions A and B:Version A has the correct fillet of 1mm radius along the side opposite that attaches into the metal bar (which is a 2mm diameter fillet, and fits the OEM's designer's MO of using measurements relating or equal to the number 2).On the other hand, Version B has an exaggerated fillet of 2mm radius (which is a 4mm diameter fillet, and breaks away from the established OEM designer's MO).While the final model is not an exact match,it is sufficiently close enough for the recipient of the endcaps, who I have named the Taskmaster.Build instructions/purposeNone for the model itself. You simply put this onto your King's Rack shelf, in case you either lost/broke the included OEM endcaps; or if you would like some extra endcaps to put on the bottom feet. It fits relatively loosely, but that might be a good characteristic to have, as these endcaps tend to fall off anyways when moving them around. Also, many of these shelves are placed in basements with "unfinished" floors and similar indoor areas, so it may be best to simply have them fit looser than the OEM caps for easier removal for such times for increased convenience. (I am also not sure how much this is due to the Bambu Lab A1 mini causing printed models to shrink slightly, on the order of 0.1mm, in rather unpredictable manners that I still have not yet figured out.) (This is not mentioned in the included OEM instructions. The OEM packaging includes only 8 endcaps, and they are all originally intended to be place on the top-facing ends of the vertical beams. Only all 8 are used if you build the shelf in the "horizontal" configuration; otherwise, only 4 are supposed to be used if you build the shelf "vertically". However, you may use the remaining 4 endcaps for the bottom feet when the shelf is assembled in the vertical arrangement.)Print tipsSolid infill (even though this might not be totally necessary)Print Plate: Bambu Lab PEI Smooth Plate (High Temperature)Filament: Bambu Lab PLA BasicI might suggest a stiffer/harder TPU filament, if you want the endcaps to not scratch floor surfaces that are more presentable.Otherwise, ABS could improve strength.Nozzle size: 0.4mmLayer height: 0.2mmQuality preset in Bambu Studio: "Standard"If you are interested in a tighter fit, then I would suggest using a smaller tolerance, but do not exceed shrinking the interior dimensions beyond 0.1-0.2mm.Thanks and fun factThanks to the Taskmaster (no, not the Marvel/MCU one) for this opportunity. There are now an over-abundance of extra King's Rack endcaps in your domicile. BTW, I finished this on time for New Year 2026, but I did not get to test this properly due to two blizzards in January and February 2026.