Like I spent literal hours today trying to pick out a heatsink.
Digikey has literally one hundred *thousand* heatsink SKUs from one vendor, and they're all permutations of solution space for the same basic design.
Neither digikey parametric search nor the manufacturer website narrowed things down very well. Even after several different dead ends to figure out what I actually wanted, I basically had to manually decipher the under-documented way this mfg was assigning model numbers.
At long last I am getting to the "finishing touches" stage of this design.
Mechanical CAD is already done.
Btw: plasma toroid is still being very actively worked on! I did a circuit/board integration test "off-camera" because the prototype is very nearly identical to what the final version will be, but lacking in just a bit of ✨ sparkle  that I want to publish fully-formed.
Currently waiting on another round of overseas PCB fab which I expect to take a couple weeks.
Feature added since my last update: overheat indicator light
(plus it runs cooler in general.)
So I said last update that I was gonna be doing a li'l something special for the final version of the plasma toroid board.
Here's the something special ✨
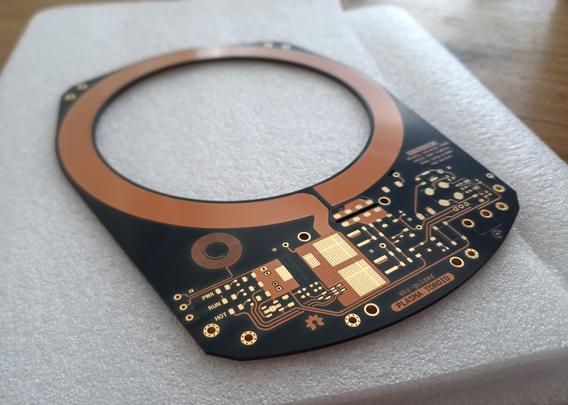
This is a board with dyed-black FR4 fiberglass and transparent soldermask (the layer that's traditionally green).
Not necessarily a *reasonable* expenditure but, woah.
Roadmap for Done is basically:
- assemble
- take good photos (Friend With a Macro Lens is out of town rn...)
- shoot a project video (probably a yak stack in its own right)
- so much writeup
- edit video...
Plasma toroid writeup updated
https://hackaday.io/project/194683-plasma-toroid-sky-guided-pcb-edition/log/230046
"#8: A Unified Board"

#8: A Unified Board | Details | Hackaday.io
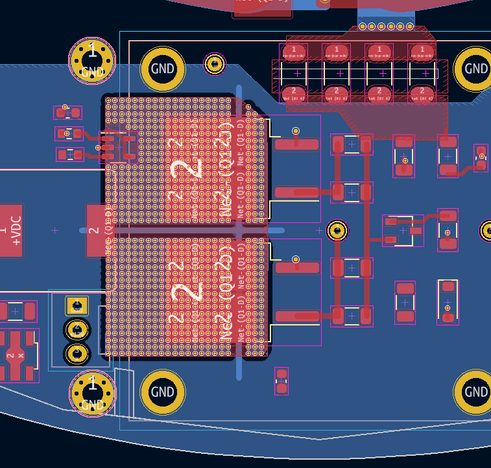
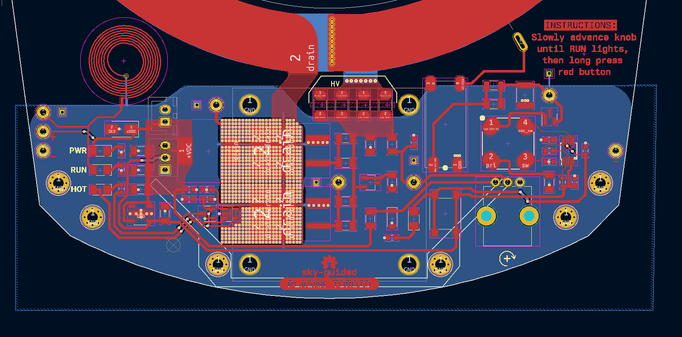
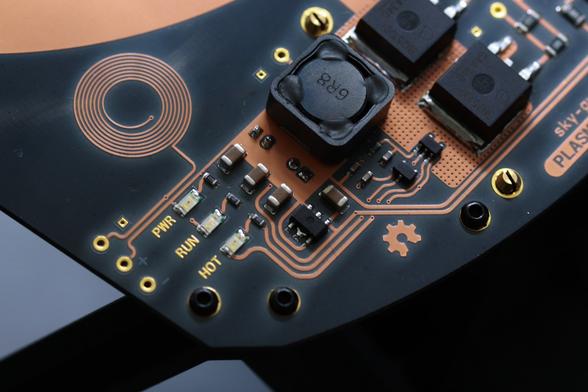
<p>It's been a busy couple of months behind the scenes -- this project is basically finished! I'll be breaking the final few updates into a couple posts, while I wrangle loans of camera equipment for the beauty shots. </p> <h1>Circuit Unification</h1> <p>Taking the different prototyped modules and banging them together:</p> <figure><img class="lazy" data-src="https://cdn.hackaday.io/images/4564281716833141406.png"></figure> <p><em>(you might have to click to embiggen)</em><br>I've paralled the mosfets for better heat dissipation. This doesn't help quite as much as one would like (since a lot of the losses are switching and not resistive), but it does help. The mosfet gate resistors are also paralled since they get <em>quite</em> hot before the arc is struck. I'm not sure why that behavior is occurring -- if you know, drop me a line!<br><br>The 4.3V zener diode (D5) for regulating gate bias is a carefully chosen value for this particular mosfet and circuit. Cranking the knob full-clockwise guarantees oscillations start, but doesn't set the bias so high as to cause excessive power draw and heating. The use of full knob range also makes adjustments more precise and controllable.</p> <p>A bank of four 33pF capacitors is a balance between heat distribution and board space. While the board itself has plenty of room (see below), I ran into
Plasma toroid writeup updated, with something a bit different:
an in-depth look at black-core FR4 and transparent soldermask PCB stackup, sponsored by PCBWay
https://hackaday.io/project/194683-plasma-toroid-sky-guided-pcb-edition/log/230233
#9: Black FR-4 and transparent soldermask, by PCBWay | Details | Hackaday.io
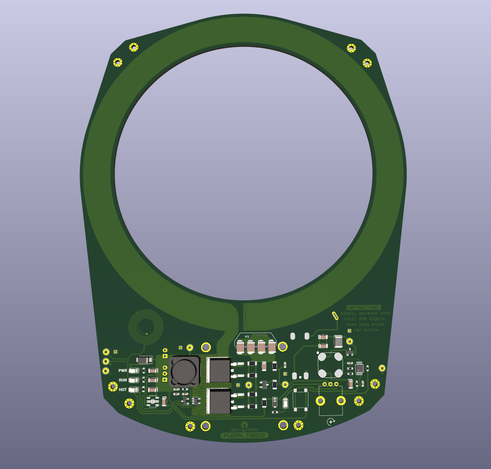
<p>For the final build of this project, I wanted something special.</p> <figure><img class="lazy" data-src="https://cdn.hackaday.io/images/1192521717273710046.jpg"></figure> <p>Typical PCBs use a olive-green fiberglass core, layers of copper, and a (traditionally green) soldermask layer to protect the copper and define areas where solder/component pads should stick. This board instead has a dyed-black fiberglass core and a transparent soldermask layer. This means that all traces are visible as their natural copper color, which is delightfully high-contrast against the black substrate. Component pads and other areas left uncovered by the transparent mask are plated (ENIG) gold. <br><br>This order of circuitboards was <em><strong>(partially) </strong><strong></strong></em><strong>Sponsored by <a href="https://www.pcbway.com/" target="_blank">PCBWay</a>! </strong>They covered about 60% of the cost of these boards, and I paid the remainder out-of-pocket. <br><br>There's <em></em>very few photos out there of real PCBs made using this stackup, so I'm taking the time to write out a review. <br><br>(Transparency: being partially sponsored will likely bias my opinions, but I did also pay enough to feel like I have skin in the game. I have not given PCBWay any editorial control and they will not have seen this review prior to publication. Photos have been lightly post-processed and are broadly representative of how things look irl under good lighting. An order number [visible on the unpopulated
UPDATE:
I've finally released KiCAD source files for the plasma toroid driver.
still need to flesh out documentation.

video status is: still need to shoot one more bit of pick-up footage, do a bit of polish on graphics, finalize the edit, sound cleanup, color grade.
So coming a lot closer to done, at last.
AND IT IS DONE
"A plasma toroid for the modern era."
https://www.youtube.com/watch?v=Bl3zHuih_CY

A plasma toroid for the modern era.
Added a proper BoM to the plasma toroid project files
https://hackaday.io/project/194683-plasma-toroid-sky-guided-pcb-edition/files
I also wrote up a quick post to consolidate the "stuff I know I could have done better" thoughts into a single place :)
https://hackaday.io/project/194683-plasma-toroid-sky-guided-pcb-edition/log/232417

#11: Design deficiencies, and what you can improve | Details | Hackaday.io
<p>I'm considering this project Completed, at least for the time being. I'm <strong><em>incredibly</em> </strong>proud of what I've created -- every design goal was achieved, and it looks even better than I'd dared to hope. <br><br>However, this is far, far from perfect. If I were to continue this project, I have a real hit-list of what could be improved.</p><h1>Overall System</h1><p>The biggest issue is that controlling drive intensity by adjusting mosfet feedback bias voltage is janky and unstable. A proper system would leave a bias voltage set with a trimmer, and use high-side limiting on the primary input current for primary drive control. I realized this kinda late in the design process, and wanted to reach "done" rather than do another round of prototyping.<br><br>Also, having a breakout board for the USB-PD trigger module is pretty inelegant. Having a trigger module on-board would be better, but when I started this project I was having trouble finding a suitable IC with decent availability in the US. Several folks have since suggested good candidate ICs. </p><h1>MOSFET and driving</h1><p>A straightforward error is that the gate-drive resistors have been undersized. The design shown in the video uses two 10-ohm 1206-size resistors in parallel (per mosfet), and they get incineratingly hot if
Someone ordered and built one of my boards, and I'm getting some great feedback highlighting differences between "works good on the bench" and "is robust enough for production."
-- they had a short-to-ground through the heatsink, which I find odd given the thermal interface is spec'd as highly insulative.
-- Some of my clearances on the xenon striker were too low and they got arcing under the trigger transformer. I issued a quick board revision to hopefully improve that for anyone else.
[continued]
What has me a bit stumped is that when they added a 330uF capacitor at the power input, one of the switching mosfets (Q1/Q2) will consistently and immediately fail short when the toroid forms.
I'm not sure why that'd happen and I'm very interested to hear y'all's thoughts. Best guess is that without the cap I'd been getting some manner of protective voltage sag at turn-on?
If any of y'all have insight I'm all ears.
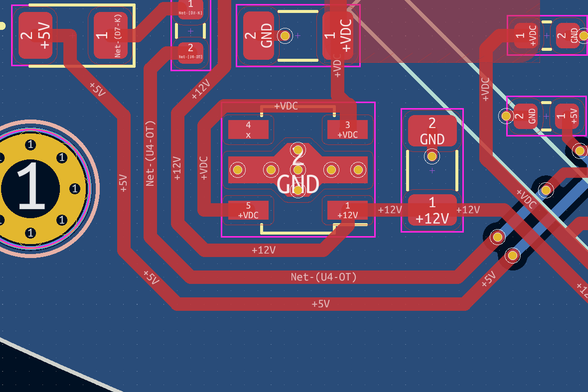
re-posting the diagram for reference -- in my build I'd had a total of 30uF X7R bulk capacitance. The physical board is fairly compact, for the switching speeds in question.


Genuinely love PCB layout. Deeply satisfying to start with a tangled mess of components and ending with a board that's both functional (🤞) and nice-looking.
Not architected by any grand plan either, just a bunch of micro-iterative improvements over the course of a couple hours.
Trying to give wantonly generous spacings for inevitable bodge and re-work shennanigans.
New arc start module, bench test.
Not bad for a caveman-simple flyback. ~9mm arc. That's absolutely plenty.
Haven't 'scoped it yet (because bedtime) but should be very roughly 60khz.

Adjustable current-limiting buck converter module: successful.
TI's "simple switcher" family integrated circuit is a little expensive ($2.33USD each) but y'know what that really was simple.

also I spent about an hour trying to figure out why the IC was instantly overheating
gals, turns out I fried the first chip because it was soldered on backwards.
Writeup on the new adjustable current limit for the plasma toroid:
#12: v2, current control | Details | Hackaday.io
<p>After a year away, I'm returning to this project. It's time to come back and fix the deficiencies of Version 1.<br><br></p> <h1>The Problem</h1> <p>Version 1 of the plasma toroid controlled drive intensity with a potentiometer that adjusted oscillator mosfet bias voltage, which in turn changed the switching duty cycle. This isn't a great method of control. Changing the duty cycle introduces a variable phase delay which is harder to tune for. Also, since the drive is a sine wave running a low duty cycle leaves the mosfet in an intermediate half-switched state for longer, which isn't great for efficiency. Finally, low duty cycles would often result in loss of oscillation if the plasma was extinguished for any reason.<br><br>The better method is a dynamic high-side current limit. </p> <p>I'm accomplishing this with a buck converter based on TI's "Simple Switcher" line of ICs, specifically LMR14030SDDAR. This chip is a monolithic buck converter with integrated mosfet, and it really is simple to implement. It's also capable of running at up to 97% duty cycle which is perfect for a low minimum dropout. Here's the reference circuit from their datasheet:</p> <figure><img class="lazy" data-src="https://cdn.hackaday.io/images/6500541758392745491.png"></figure> <p>This is a perfectly normal buck converter topology. Most buck converters are designed to hold a fixed
Also added writeup on the new arc start module!
#13: v2, pushbutton arc start that isn't terrible | Details | Hackaday.io
<p>The <a href="https://hackaday.io/project/194683-plasma-toroid-sky-guided-pcb-edition/log/228419-7-how-to-ionize-xenon-the-arc-start-module">pushbutton arc start in version 1</a> was cool, but also kinda trash. First, it was super inconsistent with starting ionization on a cold xenon globe, and often took several seconds of button-pressing to do so. Secondly, the subcircuit had a bill of materials that was way<em></em> too expensive and was over-reliant on specialty components. The photoflash IC in particular both cost >6USD each (at quantity ten) and is an out-of-production last-time-buy part. The arc start module also needed two different specialty transformers and a particular model of gas discharge tube. Ridiculous. </p> <h1>Design for Production</h1> <p>What the arc start module <em>actually needs to do</em> is produce several kilovolts. A pulse of DC is fine, a few milliseconds of HV AC is fine, whatever.</p> <p>It took me a weirdly convoluted series of steps, but the end solution is easy: a donkey-simple flyback converter using one of the same xenon trigger transformers as the last design. </p> <figure><img class="lazy" data-src="https://cdn.hackaday.io/images/7232371758401906734.png"></figure> <p> MIC1551 (U1) is a spinoff from the classic 555 timer but reconfigured to generate a 50% duty square wave with only two external components. The values shown here run at ~43kHz which was chosen as an arbitrary ultrasonic frequency. This hasn't been optimized at all, and doesn't really