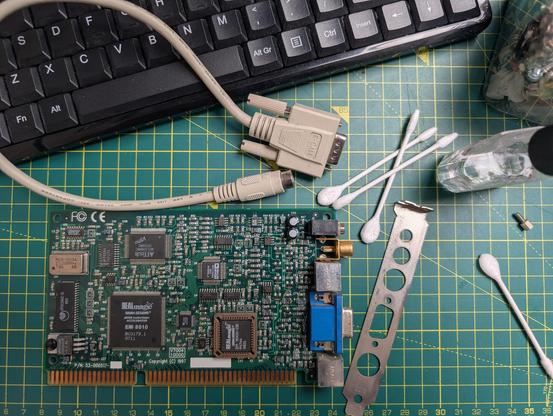
I found this ISA RealMagic EM8010 mpeg decoder card and randomly I stumbled upon the correct cable! 👍👍
I've just got to give it a quick clean and also sort out the bracket.
Good to go!
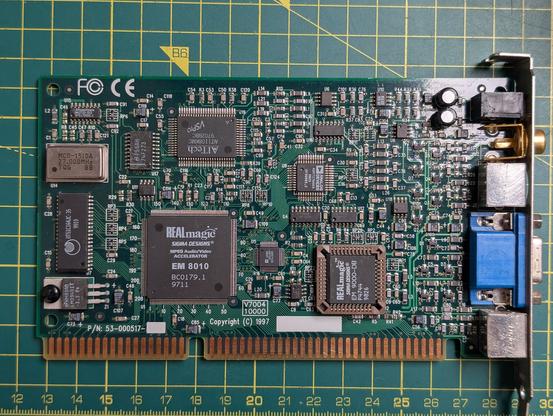
REALmagic EM8010 ISA MPEG Audio/Video Accelerator - Net stream 1 (53-000517)
REALmagic EM8010 ISA MPEG Audio/Video Accelerator - Net stream 1 (53-000517)
Although this card is a little too old for this system, more suited to a 486 or older, I want to test it out and maybe use it on another older machine (like my favourite 386). Hopefully it works ok.
I've recorded a 12 minute update video, I can't upload it here as it's too big, so here's the link:
>Gateway 2000 Refurb / Rescue Update - Soundblaster 128 PCI in MS-DOS and next steps<
https://youtu.be/Xfpwz9k3cMo?si=h1vbypYcaCSFscLq
>Gateway 2000 Refurb / Rescue Update - Soundblaster 128 PCI in MS-DOS and next steps<
https://youtu.be/Xfpwz9k3cMo?si=h1vbypYcaCSFscLq

Gateway 2000 Refurb / Rescue Update - Soundblaster 128 PCI in MS-DOS and next steps
Good evening folks, if you haven't wanted my update video, reverting the BIOS did the trick!
I've now got a Soundblaster 128 PCI fully working in MS-DOS.
Here's the Windows 98 startup sound to celebrate 🎊
I've now got a Soundblaster 128 PCI fully working in MS-DOS.
Here's the Windows 98 startup sound to celebrate 🎊
One of my all-time favourites:
Descent II, can't wait to properly play this, like I did back in the day! 🤘
Descent II, can't wait to properly play this, like I did back in the day! 🤘
Heretic sound test in MS-DOS:
SFX: Soundblaster
Music: General Midi
SFX: Soundblaster
Music: General Midi
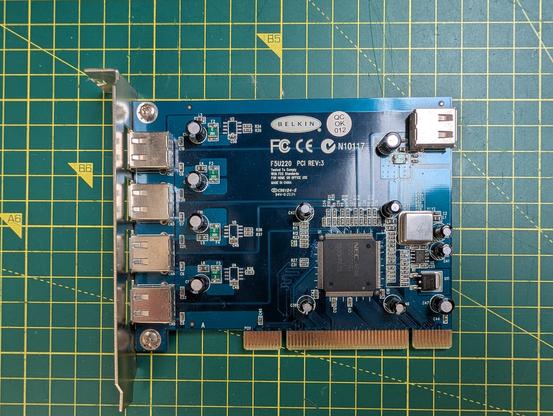
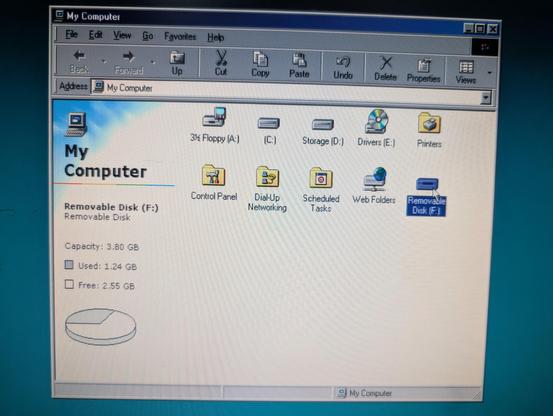
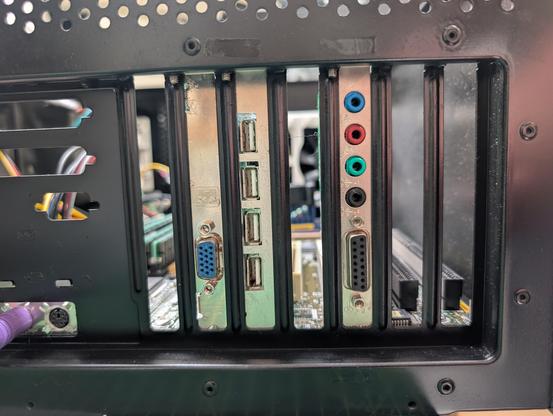
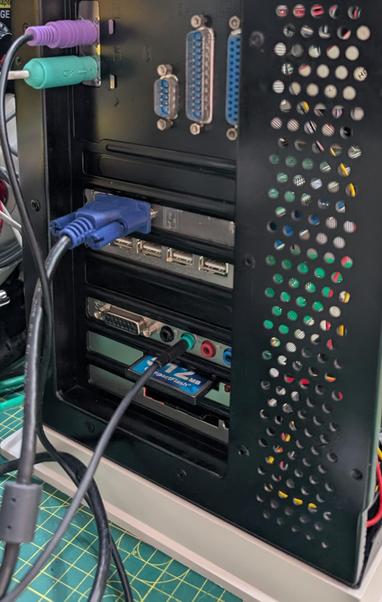
The USB 2.0 card is working in Windows 98! 👍
Excellent result, oh and the sound is still working in MS-DOS too. W00t
Excellent result, oh and the sound is still working in MS-DOS too. W00t

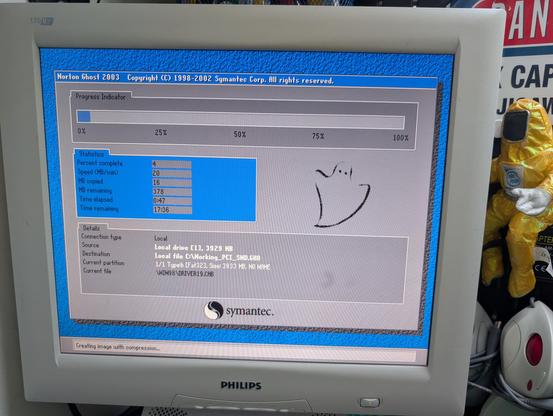
I have a full backup image of the system with everything working, using Ghost....


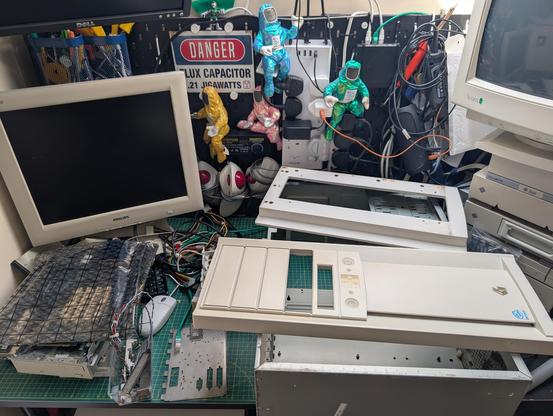
That's it, everything that can be removed (not riveted) is out, ready for a full deep clean.

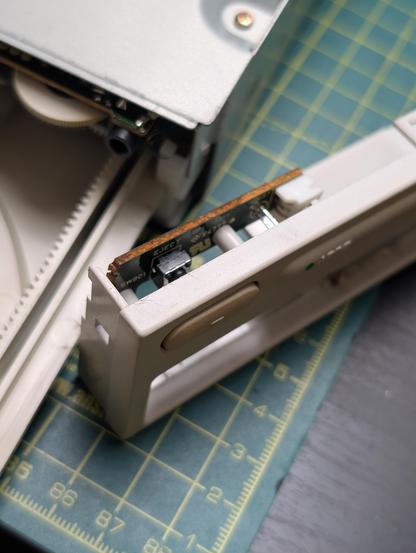
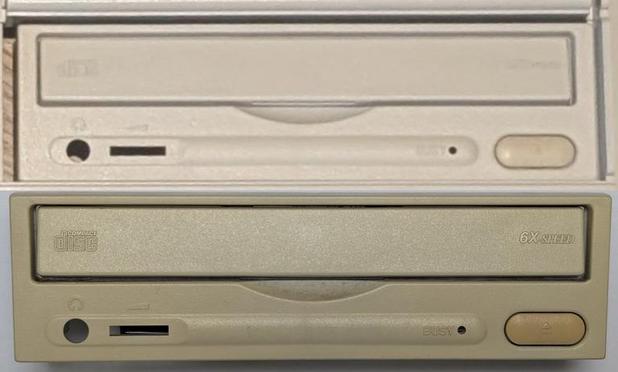
I've decided to keep the original 6x CD-ROM, it's going to need some TLC inside, grease, laser clean etc. but it works.
It shows it's early, before they kind of standardised the front bezel design, there's a small PCB mounted to the front. It doesn't even have a manual eject hole
It shows it's early, before they kind of standardised the front bezel design, there's a small PCB mounted to the front. It doesn't even have a manual eject hole
Before cleaning shot, a piece of A4 behind, so we can see the original colour:
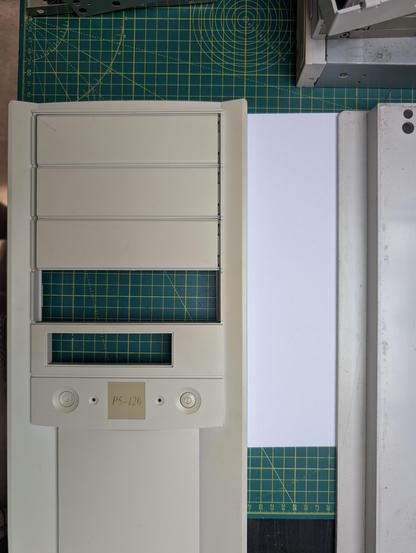
As we're having a heatwave in the UK and this bezel being huge, I'm going to Retrobright using Sunlight, this method is supposed to be longer lasting than using Hydrogen Peroxide and I have days of sun to use, so why not! ☀️ 😎
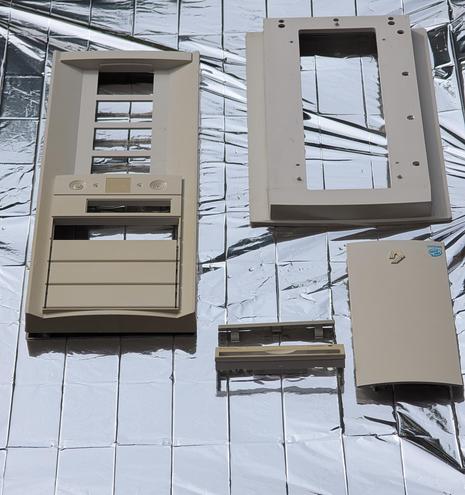
I've laid out silver foil to maximise coverage.
I've laid out silver foil to maximise coverage.
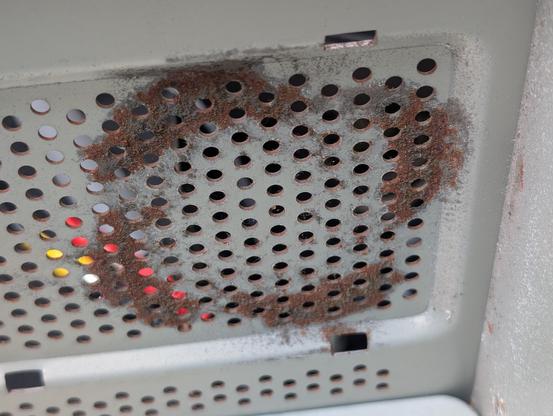
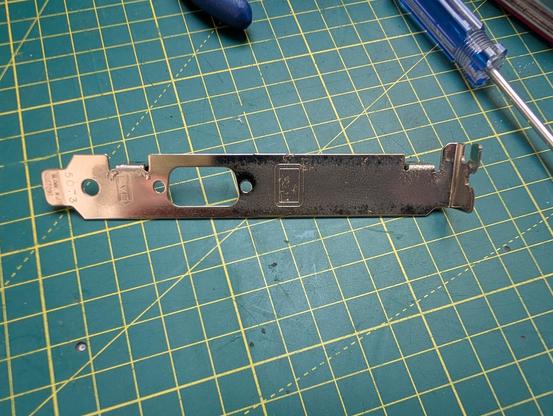
Decided to test out some rust removal gel on this I/O plate, worth a go first.
The top was after a few coats and about 5 hours, not exactly spectacular results, quite underwhelming, but it did remove a bit.
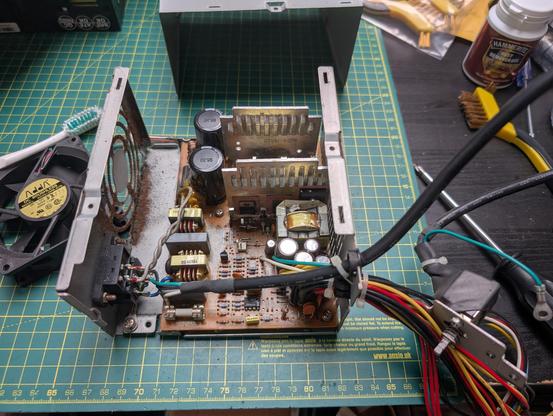
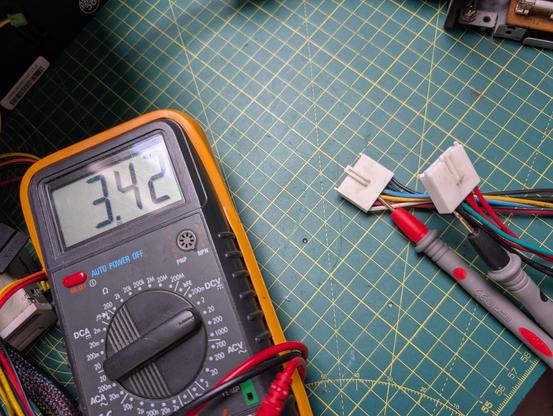
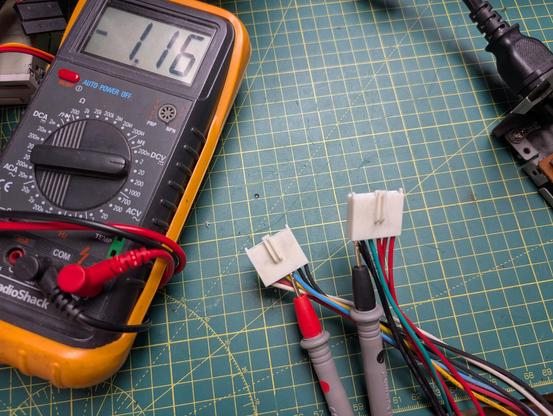
I'm so glad I never attempted to use the original PSU, the voltages are all over the place:
+12v is 3.5v
-12v is -1.2v
+5v fluctuates between +3v and +9.1v 😬
I have an ATX PSU with the wires cut off, that actually does -5v, so I'll solder in the AT cables, plus the power switch.
+12v is 3.5v
-12v is -1.2v
+5v fluctuates between +3v and +9.1v 😬
I have an ATX PSU with the wires cut off, that actually does -5v, so I'll solder in the AT cables, plus the power switch.
So after being in the 30°C sun today, I can see quite a big difference, I'm actually shocked how well this worked.
After
/
Before
After
/
Before
Looking good, the top half was a different colour previously, it seems to have all equalled out and it certainly looks better 👍

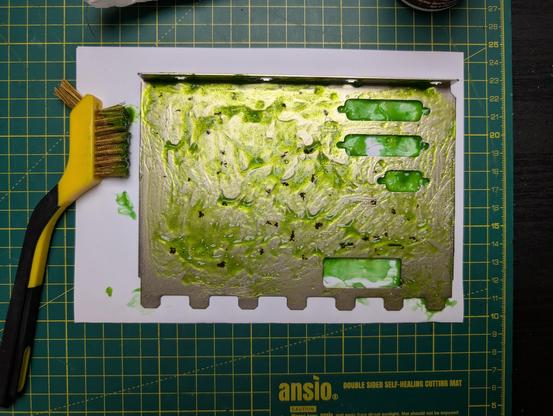
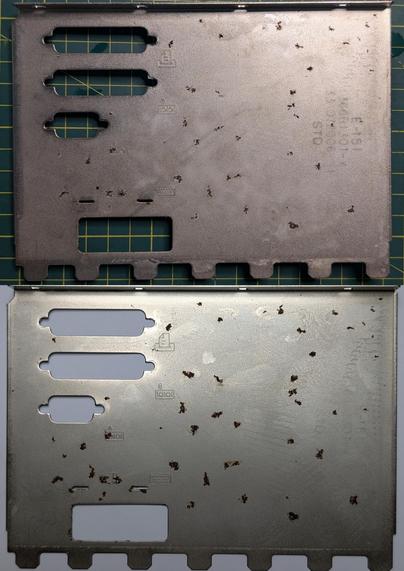
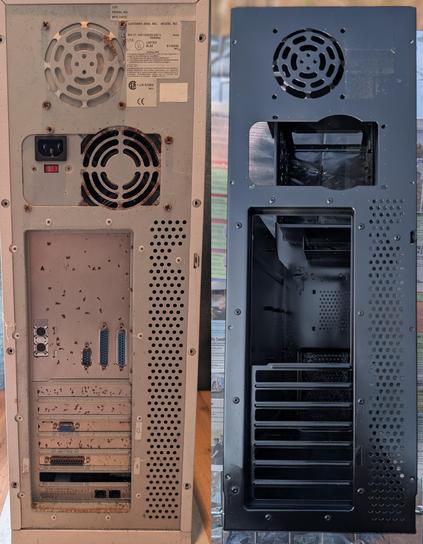
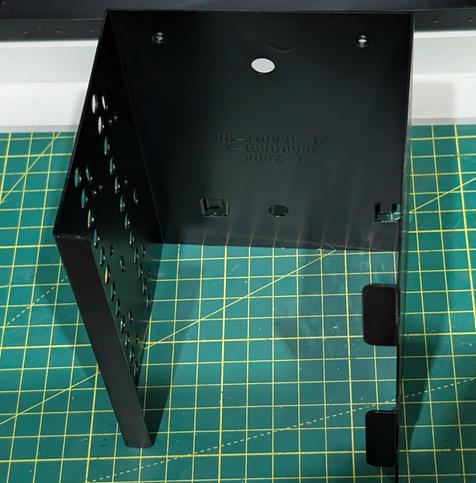
I decided to go nuclear on the internal frame, the only bit you will see is the rear, but there's rust everywhere.
I've used Direct to Rust Metal Spray Paint, it should have a nice and clean look after.
I've used Direct to Rust Metal Spray Paint, it should have a nice and clean look after.
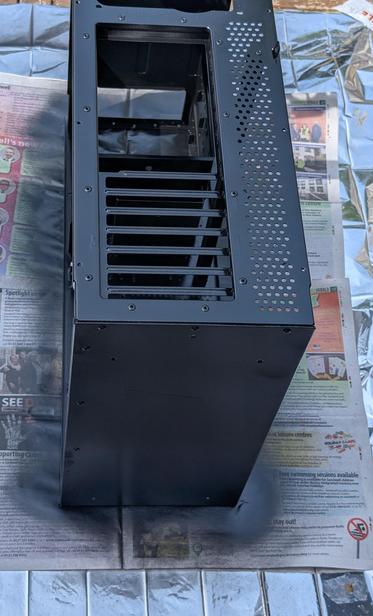
I masked the original Gateway labels off before painting, as I thought it would be nice to keep them.
It's still got a while to dry, but this is what it will be like with the cover on:
Before
/
After 👇
It's still got a while to dry, but this is what it will be like with the cover on:
Before
/
After 👇
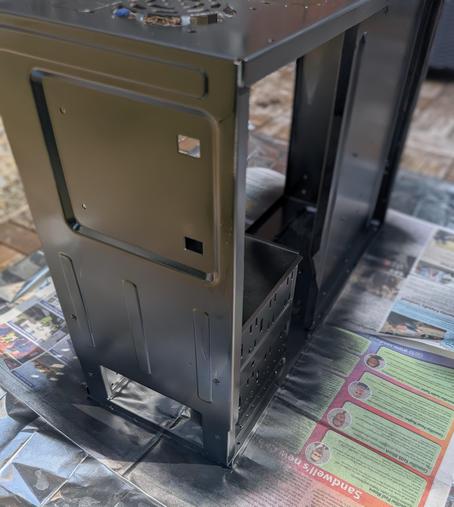
There's not really an easy way to photo black paint in direct sunlight because of shadows and reflections, but here's the inside. 👍

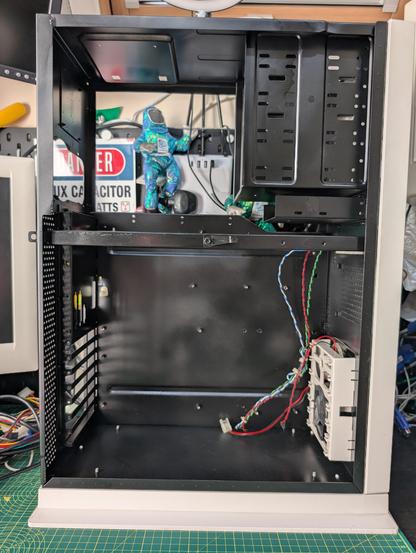
I like the contrast the black frame / beige outer shell gives it, not that you'll see it when the cover is back on! 😀
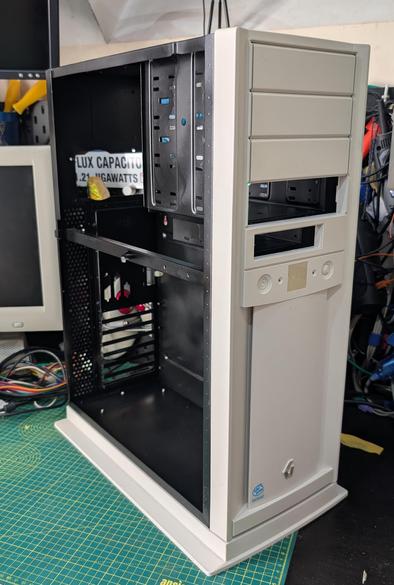
I mean, it's not perfect, but at least it didn't peel loads of paint off when I took the masking off.

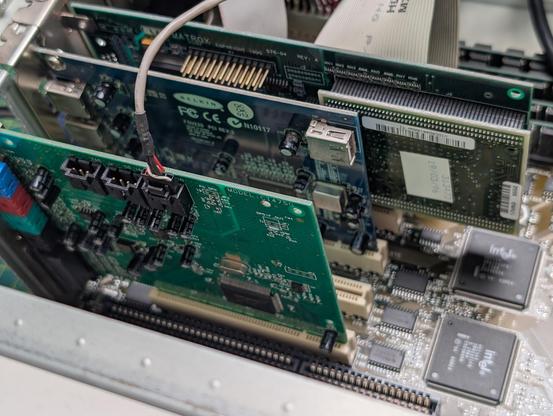
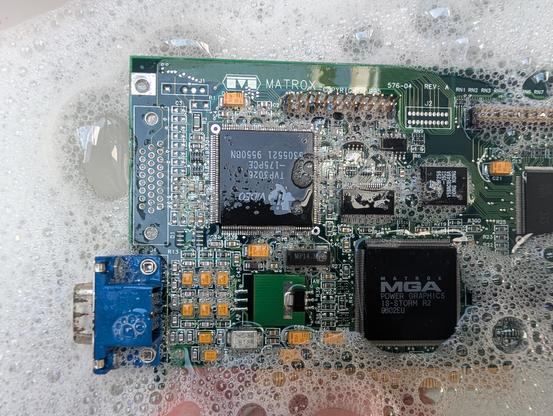
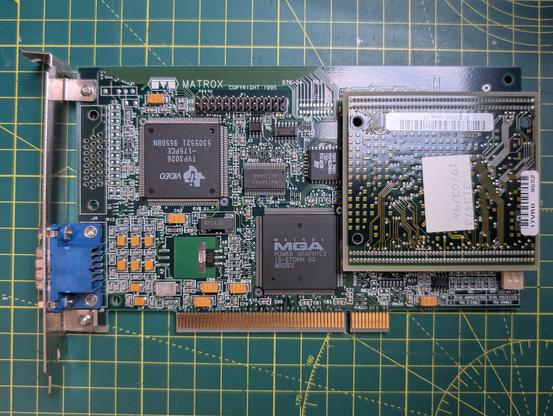
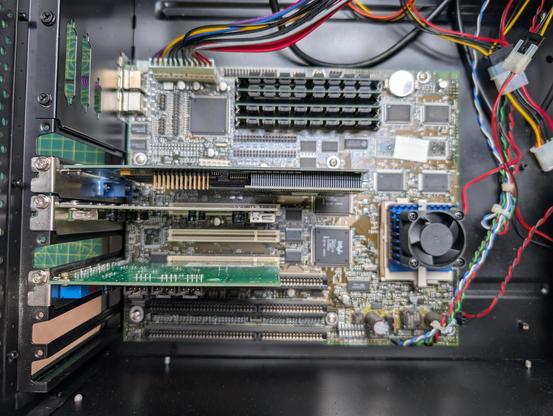
I need to clean up the Matrox card and try to remove as much rust as I can!
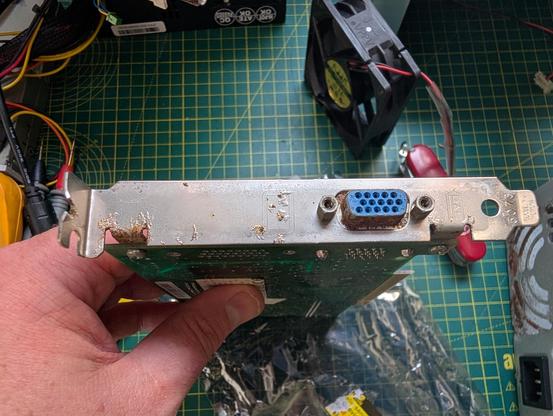
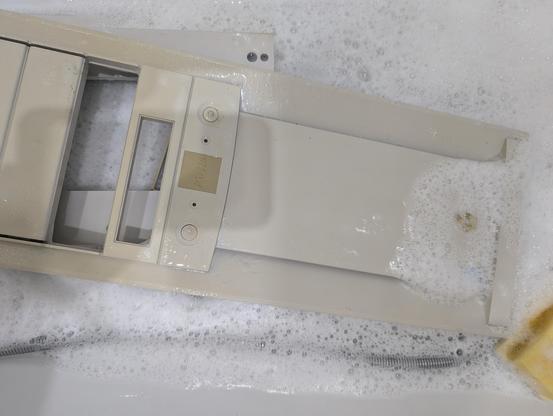
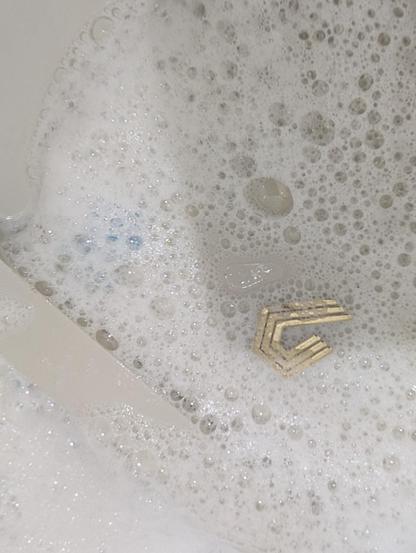
Only one thing for this card, is to deep clean it. The memory module had some corrosion on the connectors, so it all needed a really good bath, scrub and polish 🫧 🪥
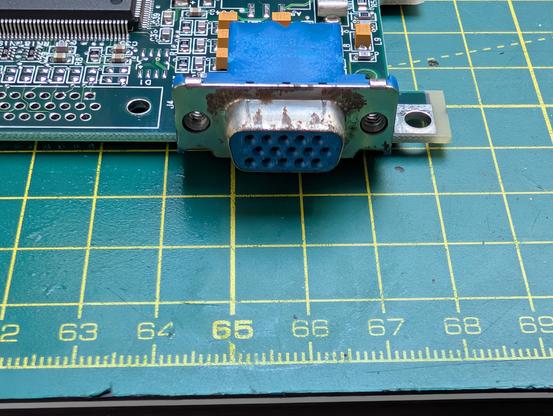
That connector is looking so much better now!
This will be left to dry out for a few days or so, then we're good to go!
This will be left to dry out for a few days or so, then we're good to go!
So, I forgot to spray the HDD bay, quickly did it and now it's dried. I'm starting to run out of black screws though 😳
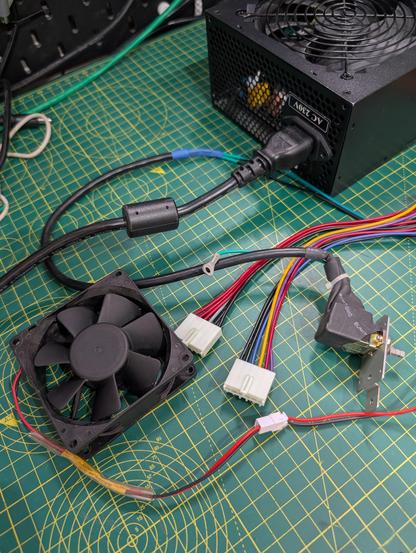
I've connected the main power switch to the new PSU and also, as I'm not using the SATA power connectors modified one to connect up an additional case fan, that can be unclipped if needed.
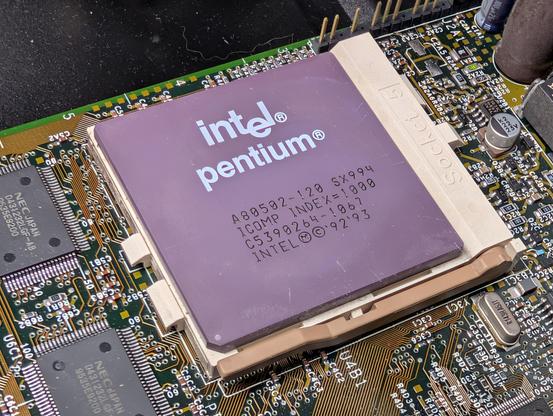
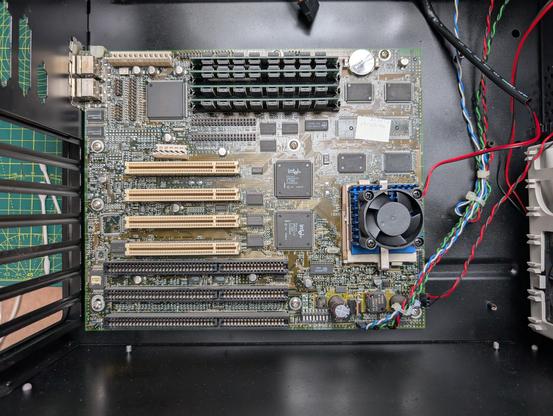
I've taken the heatsink off to apply some new paste.
Pentium 120Mhz in all its glory:
Pentium 120Mhz in all its glory:
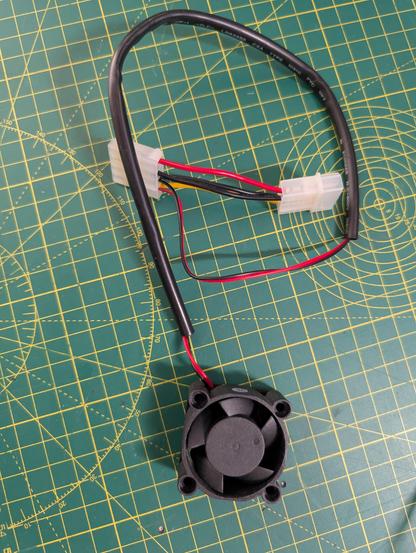
I wanted to cool the CPU more directly, so I've knocked up a small fan and molex connector:
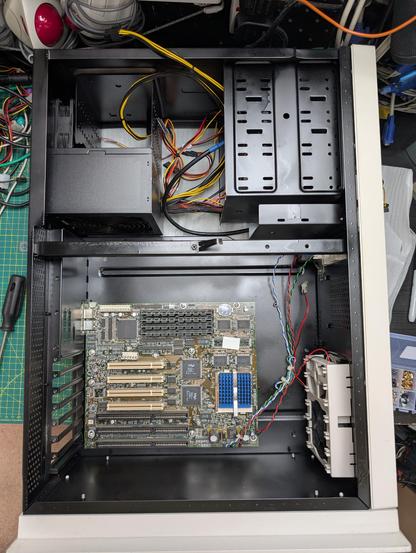
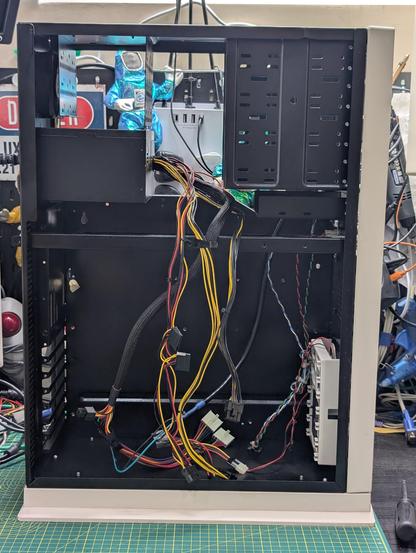
Getting a bit OCD about the cabling, like the case has a transparent side or something 😀
I now need to decide on the optical and floppy drives, and then do cabling tidy.
Honestly I've loved this refurb, so much fun so far. Thanks for following along, nearly there now!
I now need to decide on the optical and floppy drives, and then do cabling tidy.
Honestly I've loved this refurb, so much fun so far. Thanks for following along, nearly there now!
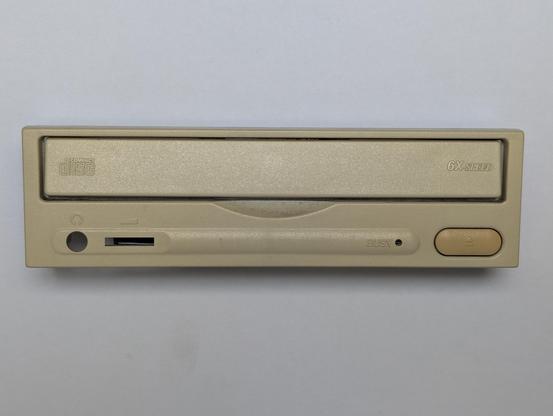
I've attempted to get the original CD-ROM working, but it appears the laser has packed in. I've decided on this nice Sony one as a replacement which seems to be a nice fit for the case.
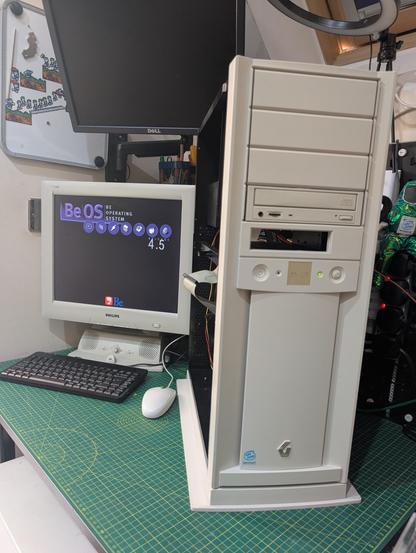
I test it by booting BeOS 4.5 and it's flawless
I test it by booting BeOS 4.5 and it's flawless
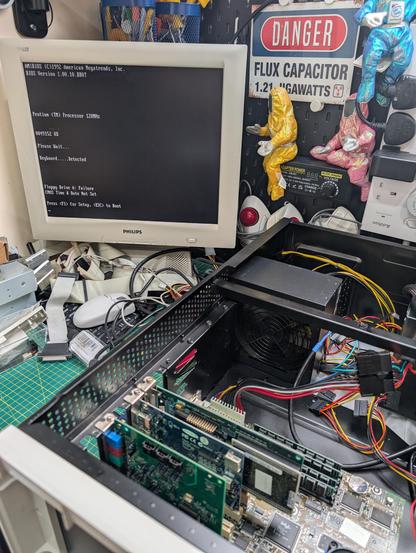
Been waiting on these to finish off this refurb, needed an extension on one IDE channel to finish up.
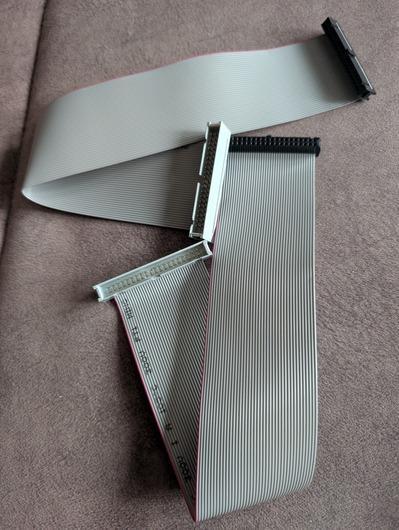
IDE extension cable is installed and I've sprayed a couple of banking plates to match the frame.
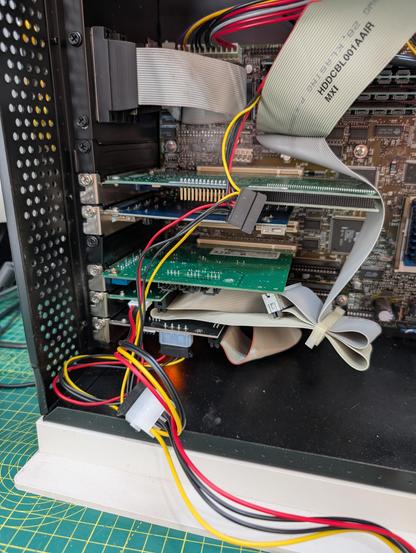
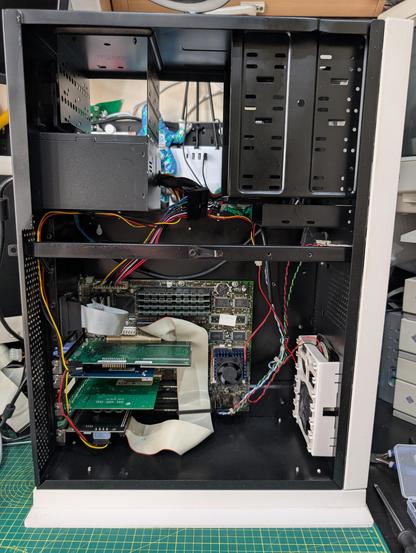
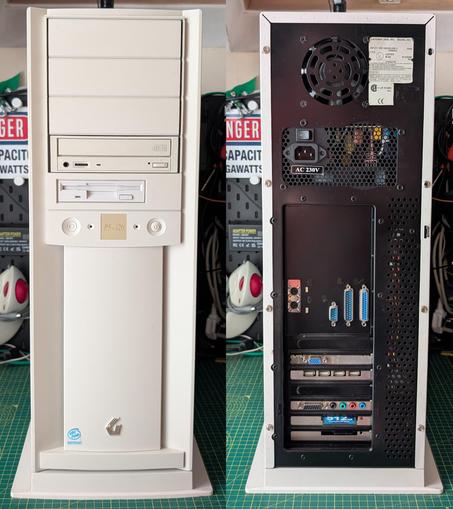
Everything is in and blanking plates installed, looking all shiny and fresh.
It's a shame to put the cover on, but at least I know it's all fresh, clean and rust free. 👍

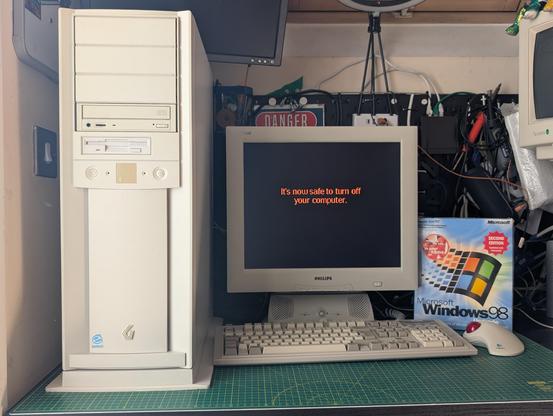
There we go, I'm happy with the final result, it should last for at least a few more decades now the rust has been dealt with. What a fun retro project 😍
A full video of it booting up:


@Gammitin
My computer doesn't have a halo, and probably should have horns and a forked tail.
My computer doesn't have a halo, and probably should have horns and a forked tail.
@Gammitin BeOS 4.5 brings memories. :D
I remember when I got a scsi ribbon crimping tool and was able to "neatly" cable up my 5 scsi drives.
Getting the right cable length and the nice 90 degree ribbon folds is a thing of beauty.
NICE!
@Gammitin This is making me want to get a K6-2 machine in dire need of a recap out of the basement and on to the operating table. I really don’t have the time for that…

@Gammitin My first x86 PC had a P120. 😊

@Gammitin my first computer, a Pentium 120Mhz, 16MB of RAM
@Gammitin Pretty common thing to overclock those to 133MHz back in the day… if you had a dodgy computer supplier, that's exactly what they'd do.