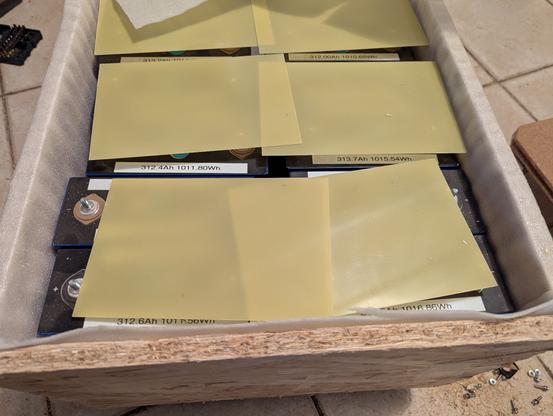
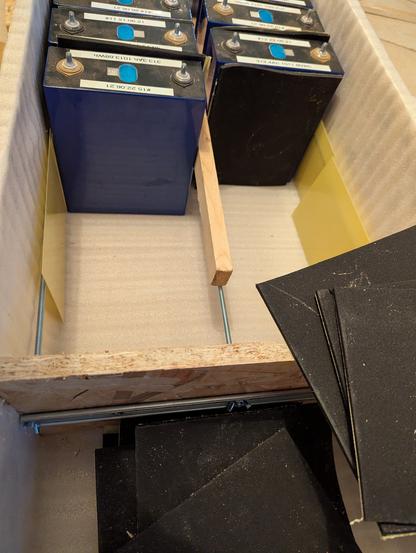
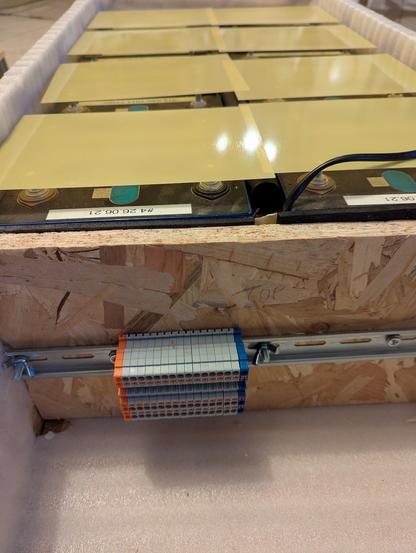
Current status of the battery boxes below.
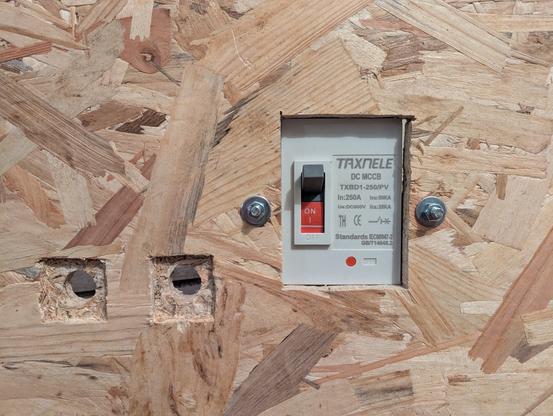
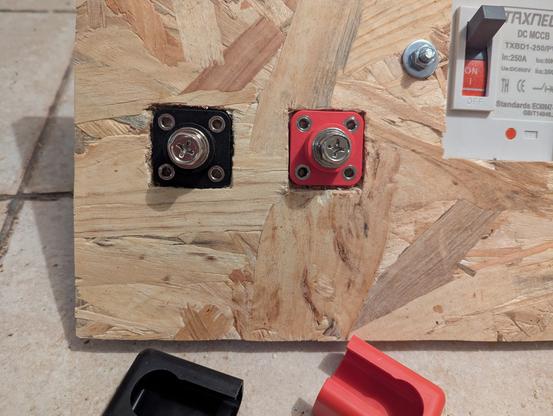
Next steps: use dowels and screws to fix the walls on, insulate the interior, add the circuit breaker and terminals to the front panel (with 95mm2 wires), add the heating pad, charge the batteries a bit, put them in (tapping 3mm holes to the busbars first for active balancing and BMS monitoring), connect them to the circuit breaker then set up the central DC stuff with the shunt etc and connect to the inverters*.
* Will also require doing the new earth, finishing some cabling, getting the ATS working and fixing some wonky consumer units.
Those 4 cells took 2.44kWh for a top up.
First battery box is slowly taking shape...
Slowly making progress on my two 16kWh LiFePO4 batteries.
Any advice for better fixing the mahoosive circuit breaker would be gratefully received.
Got the cell compartment sorted with compression rods and a DIN rail to strengthen the compression and add connectivity for the BMS and active balancer. Also added the 20W heating element.
Next up is to tap M3 threads on each busbar for the BMS wires, and further compressing the battery compartment before torquing down the busbars and adding the massive 95mm2 cabling and adding the front panel. Also need to add the active balancer and set it up.
Started doing the M3 thread tapping.
First one worked fine, second one broke the drill bit. Piece of bloody junk.
I'll just use M6 ring lugs instead on the cell terminals.
Edit: No, I'll do it properly. Just bought a couple of 2.5mm drill bits and two M3 thread tappers instead of the useless all in one jobbie. I guess it'll give me time to assemble the other battery box.
Well that was a right royal pain in the bum, but all the busbars are in place with the monitoring/balancing cables all correctly connected to the distribution doodahs.
Can't find my velcro to tidy up the cabling for now.
Bugger. Just watched a video on the REC BMS (the one I bought to control the batteries) and apparently any circuit breaker at the battery must be +ve only. There's a shunt for measuring current after where the -ve cables meet and there has to be nothing between it and the battery -ve. I don't mind redoing the front panel but I'm wondering if one of these would suffice as I've got a few of them https://www.amazon.fr/gp/aw/d/B09GG7XRGH
Or do I need to actually have something that would trip? The BMS should switch off if things get abnormal anyway. Ideas?
I've gone for two of these 125A unipolar MCCB circuit breakers. They're a bit undersized if I want to switch one battery off, but I'll just be careful not to pull more than 6kW while performing maintenance.
Ok, so couldn't carry on with the front panel so thought I'd test the NEEY active balancer. It's got that weird thing going on where two cables need to connect to the 8 +ve (on 16s) but the writing was too tiny to see properly. Anyway, a couple are showing 0V and I think I need to strip back the wires a bit more. That can wait for tomorrow... I'll need to check the connections to the busbars are ok too.
Edit: just noticed that the extra wire needs to go to the main positive, which should fix it.
Set the chemistry to LFP and to start balancing at 3.42V. I'll only be charging to 3.55V rather than 3.65 as one of the paralleled batteries will only have an active balancer and no BMS, so I want to minimise the risk of a runaway cell getting damaged.
Actually finished one of the two 16kWh batteries and somehow managed to lug the 100+kg into the garage. Just need to torque everything down when it's in place.
Photos to come when my back recovers...
My 3D awareness let me down a couple of times when attaching lugs to the cable so wasted some cable and lugs, and I initially had the one coming out of the bottom of the circuit breaker straight, but the cable wouldn't bend enough when I attached the front plate (meaning it was below floor level) so I had to do a 90° one instead.
I'll shorten the ones to the battery when I'm sure I've got enough lugs to change them out.
When I do that I'll add some shrink insulation too. The shrink wrap I've got now is either too small or too big for these cables (the latter being for Li-ion drone batteries).
Making progress on battery #2. No photos until it's done, because it's basically the same...
More breaking news as it comes in...