Let's make an #ebike out of garbage. You will need.

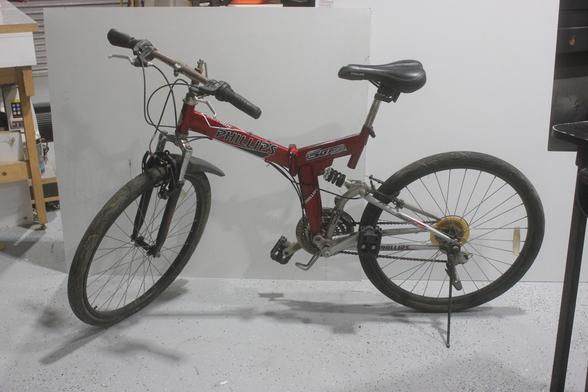
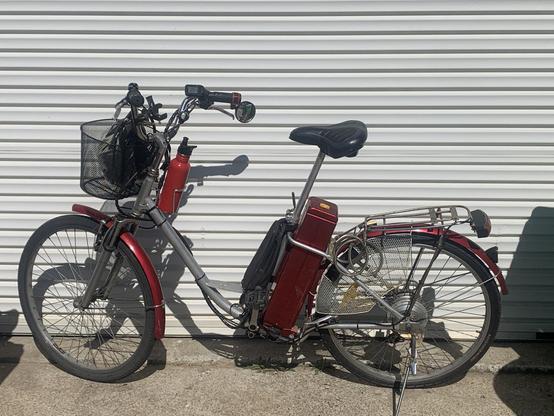
* One dumpster bike (free)
* One cargo rack (free)
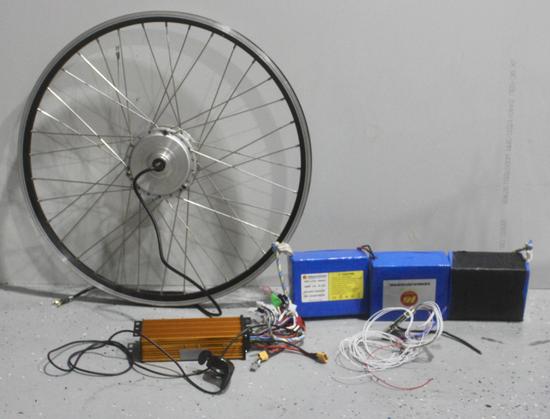
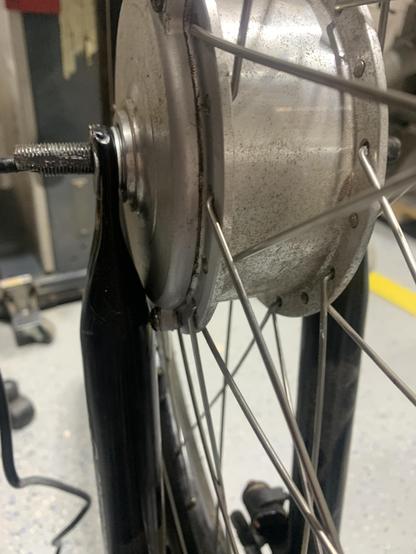
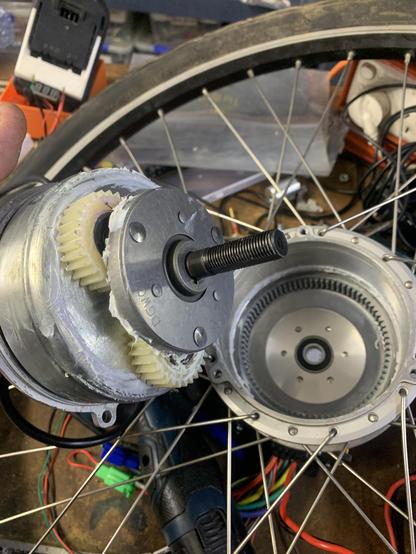
* One hub motor (dumpster dived, but about $200 new)
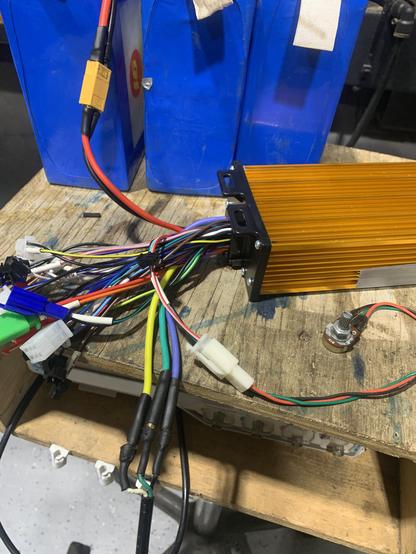
* One motor controller (about $20-$50 new)
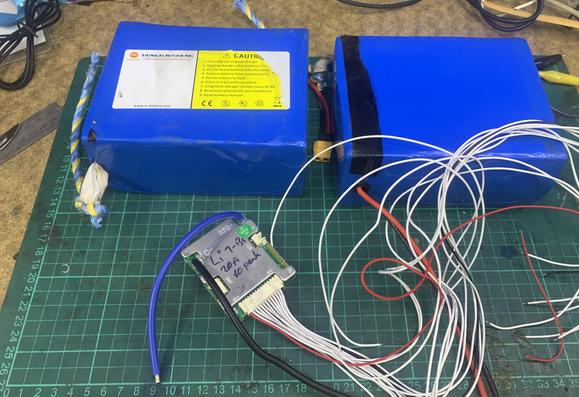
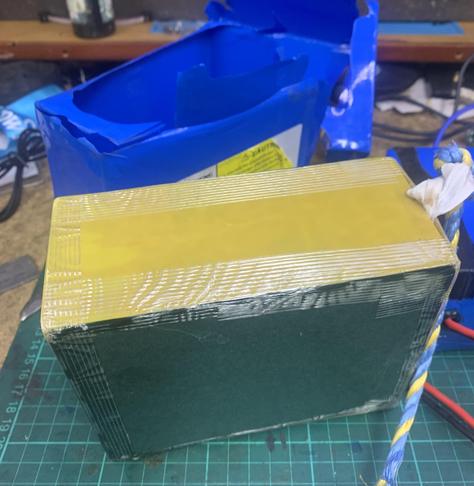
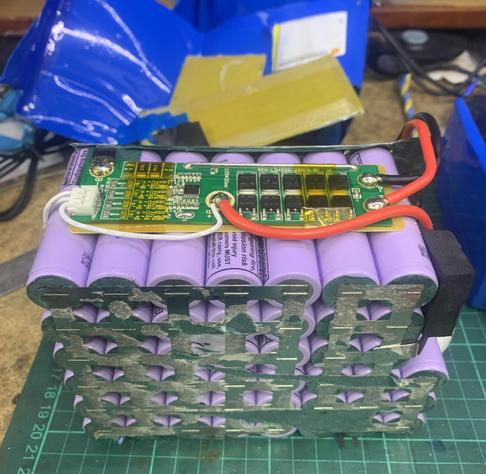
* A battery (recycled, but about $100 new)

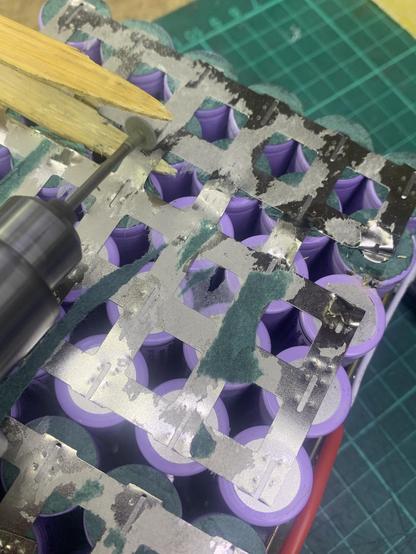
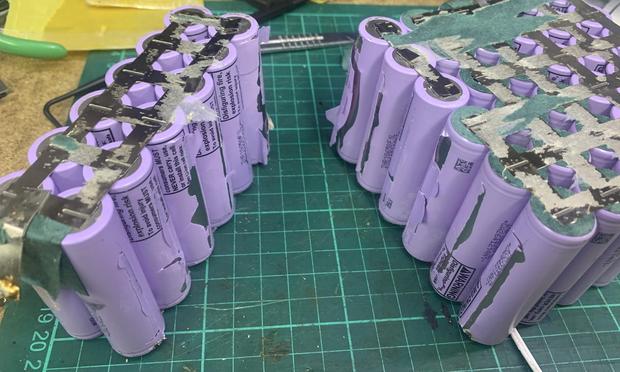
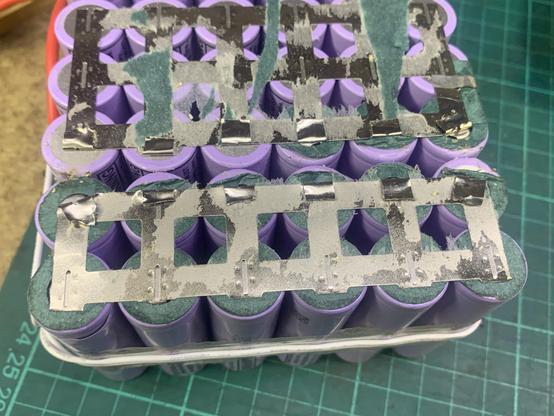
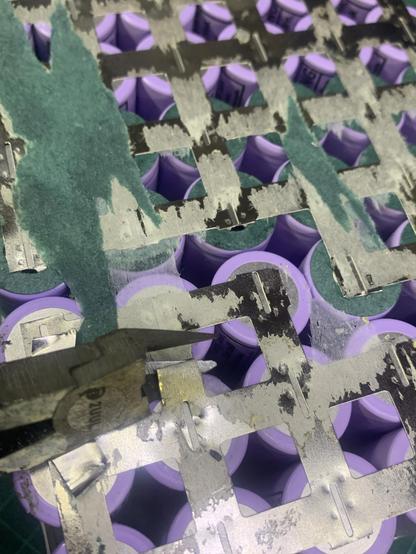
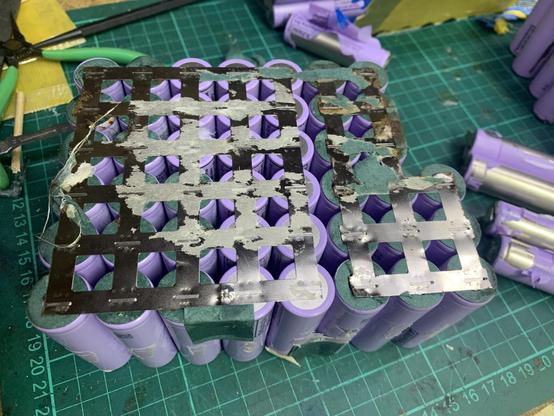
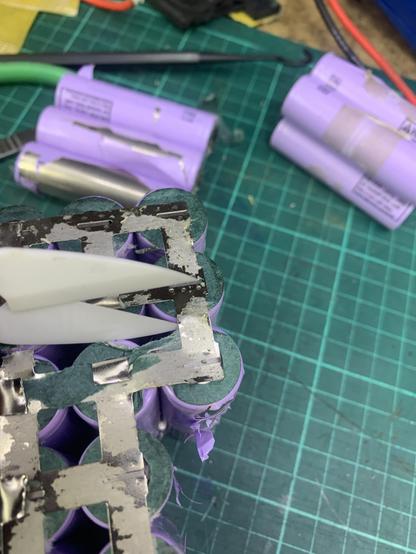
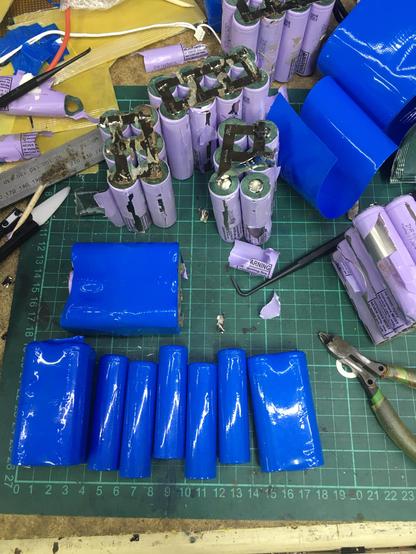
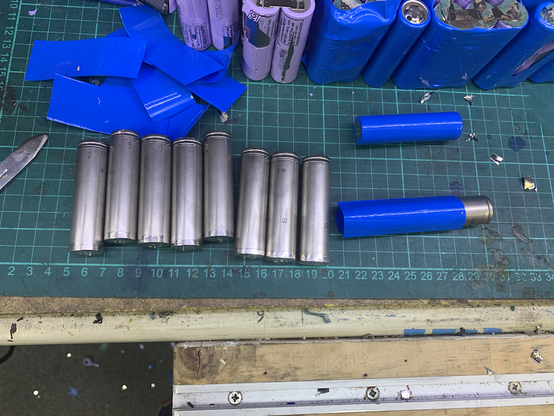
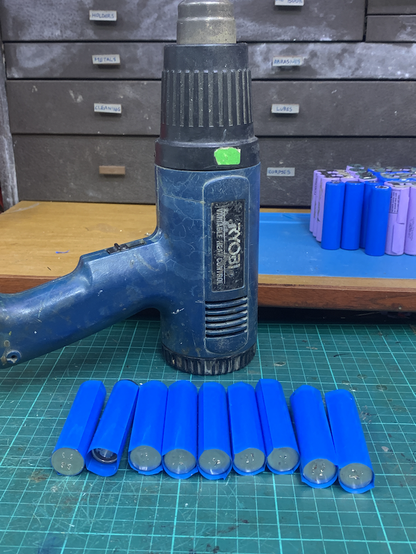
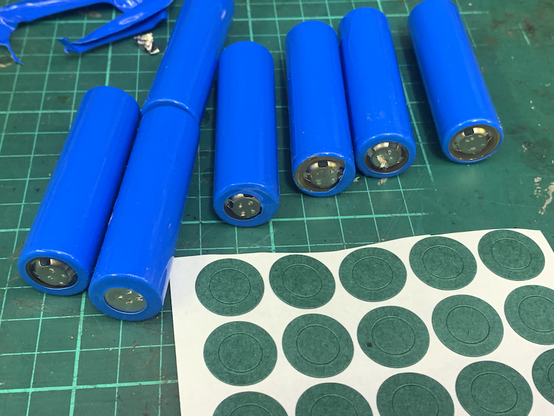
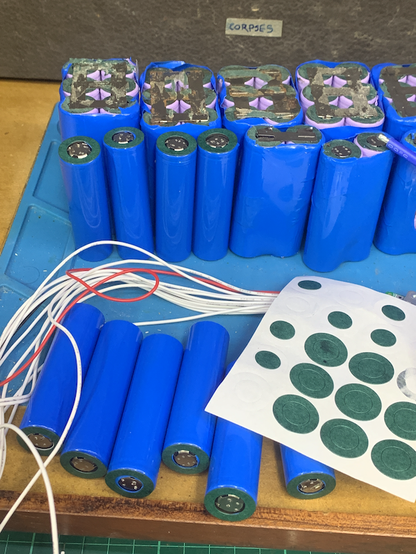
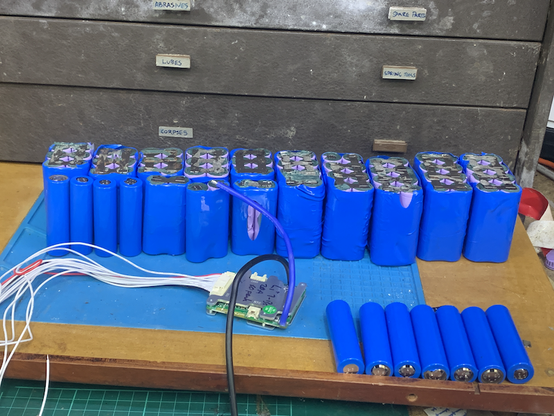
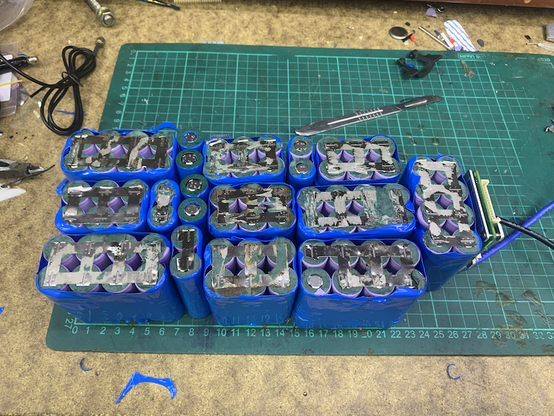
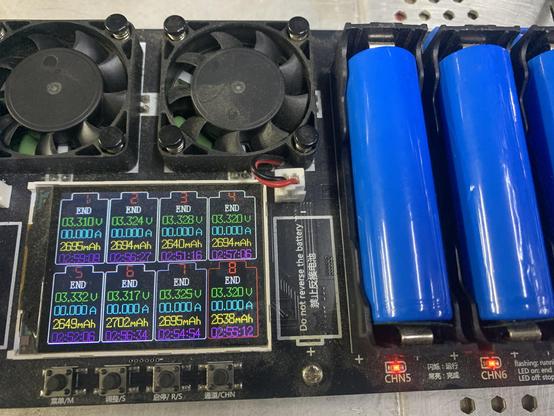
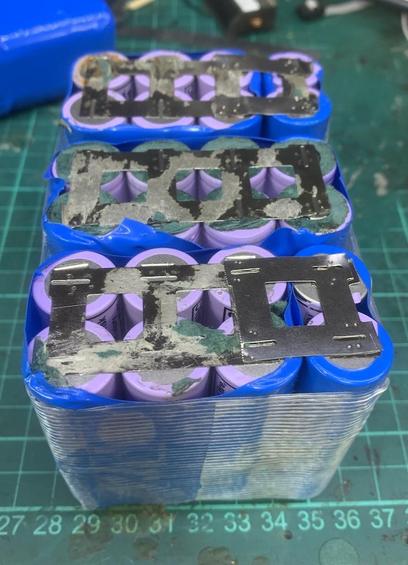
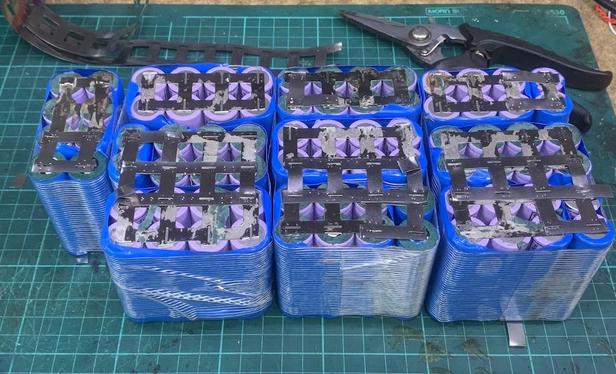
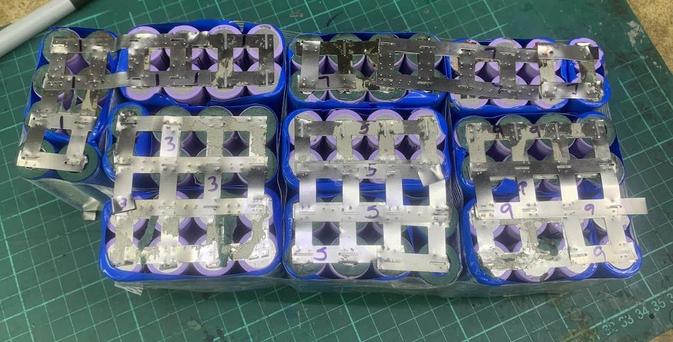
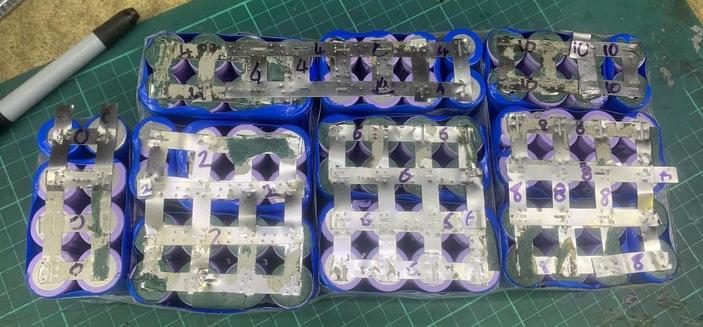
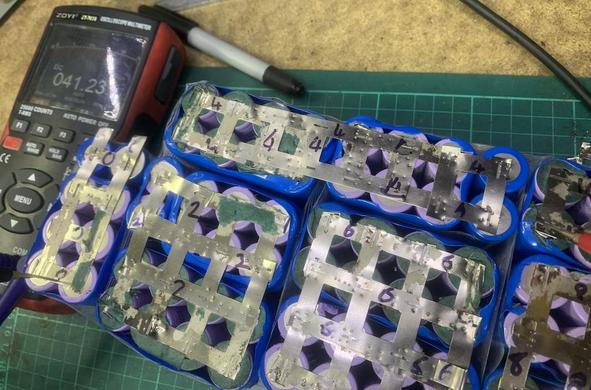
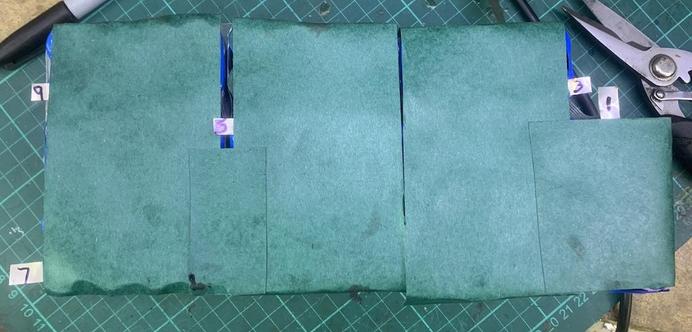
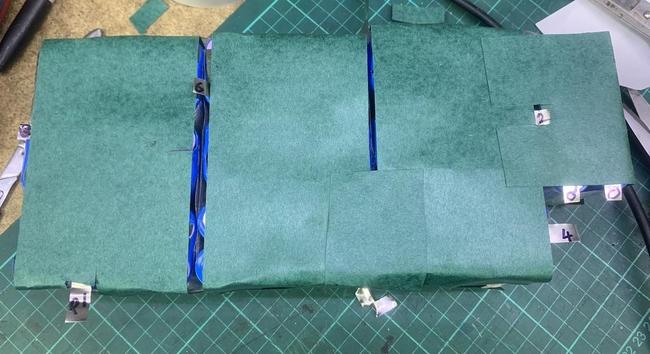
I'm going to rewire some used 12v lithium batteries to make a 36v battery with a smart battery management system (monitor charge from your phone).

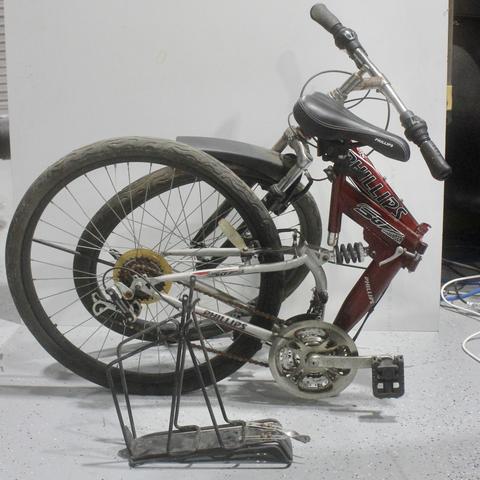
I started by installing the front wheel, installing the cargo rack, mocking up where I'll mount the battery, controller and throttle.

Next I'll wire the key components, get the wheel turning, then look at which of the other wires need to be connected. (Some brake cutoffs, pedal sensor, maybe a key lock to see if a wild @alice appears).

This happens to be a folding bike, because that's what was at the front of the bike pile.

Ookay, part 2 of "dumpster e-bike", getting the motor running.

First, make sure you have the wheel the right way around. That's probably power cable on the right hand side. A hub motor has a clutch inside and only motorises one way.

Invert the bike, then hook up the three motor wires to the motor, connect the 5-wire hall sensor plug if you have one, and then join the "self learning" wire. Connect the battery and the wheel should turn slowly. Give it ten seconds or so, then power down.

Disconnect the "self learn" wires, and add a throttle. Reconnect the battery. Give the throttle a gentle turn (I've used a potentiometer for initial testing as then I don't have to fight against a spring). The motor should turn.

Spin your pedals and observe the back wheel. If the front wheel is turning the wrong way, swap any two of the motor wires and it should go the other way. Try another two wires if not.

Arguably, your bike is now rideable. But don't.

Things left to do are

* Mount the battery securely
* Mount the motor controller securely in a weatherproof cover (you can buy zip-up pouches for this purpose)
* Fit some brake cut-out switches
* Look through all the other wires on the motor controller and see if any of them look like fun.
* Maybe fit a speedometer.

Here's the motor running. Super quiet, the ventilation fan in the roof is louder.

This is my "daily driver" e-bike. Purchased for $200 as "battery does not charge", the battery was fine, but the controller was blown. The bike is so old it was clearly designed for lead batteries, the the lithium battery only fills one third of the otherwise empty battery. box. I ripped off all the plastic fairings, and sourced a new controller and throttle as a set. I fitted an anti-theft handlebar basket (should be a pink one for maximum effectiveness) and it just goes.

Electronics: https://s.click.aliexpress.com/e/_c2QulvH3 or https://www.aliexpress.com/item/1005008500641642.html
Waterproof cover for electronics: https://www.aliexpress.com/item/1005005475025309.html

Junkyard e-bike build part three: I have dozens of these 12-volt lithium batteries which were previously lightly used in solar lighting installations. I used three of them to test-run the 36 volt e-bike motor yesterday. Two of them fit nicely on the cargo rack, but that would only be 24 volt. So I am going to cut up two of these 12v 50Ah¹ 3S15P batteries (three banks of cells, each bank 15 cells in parallel), and use the 90 individual cells to make a 10S8P battery (36 volt, 25 Ah) that fits the rack space neatly and also has a modern smart battery management system with bluetooth connectivity.

The existing battery management boards in these batteries appear to be simple "overcurrent protection and rebalancing" modules, I'll be discarding those.

¹ All labeled battery capacity figures are lies unless proven otherwise.

Junkyard e-Bike build part 4: Reconfiguring a salvaged battery. Lithium batteries can be scary. The "negative" terminal is the flat end, and the entire outside of the case. The positive terminal is the small circle on the top. DO NOT USE METAL PRY TOOLS. It is easy to pierce the thin shrink-wrap coating of the cells and connect positive to negative. Do this and you will get sparks and/or fire. Explosion is unlikely due to the nature of cylindrical cells. Use a plastic or wooden spudger to open up space between the battery and any nickel bus-strips you need to cut.

Here I am using bamboo tweezers to allow me to safely (ish) cut the nickel strip.

The shrink wrap cracked during separation (again done with a non-conductive spudger) so these cells will need to be re-wrapped. At this point I am thinking that recycling these batteries is too much work for someone who doesn't already have all the safety wrapping materials to hand.

You can buy new or refurbished cells with intact safety coatings; for example from recyclers like Substation 33 in brisbane, and various local e-bay sellers.

For recycled cells, the welded nickel strip can be removed by grasping the loose end with some needle-nose jewelers pliers and winding the strip around the pliers.

Junkyard e-bike build part 5: switched to ceramic scissors for cutting the nickel. Used a heat gun to soften the adhesive on the barley paper to remove it. Inspected the cells, removed strip from any that are not well attached, started replacing missing insulation.

Junkyard e-bike build part 6 (this one will be across several smaller posts)

Now that our donor batteries have been cut up, lets re-wrap the cells and group them into 10 banks of eight cells each.

The donor battery was three banks of 15, so I preserved groups of eight, six and two
where I could, and ended up with over a dozen single cells where the wrapping or nickel strip was too degraded.

I pre-cut a number of 70mm lengths of single-cell shrinkwrap, to renew the naked cells. The entire metal case is the negative (cathode) terminal, except for the anode nipple on top. The critical thing to remember is to prevent any contact between the positive and negative wiring.

(Junkyard ebike part six, post two)

The key thing to avoid with lithium cells is shorting the anode (the nipple on top) to any part of the rest of the cell casing (which is all the cathode). A plastic cover and a paper washer are part of the protection regime.

(Junkyard ebike part six, post three)

For shrink-wrapping lithium-ion cells, I use a variable-temperature and variable-speed heat gun. You want the air JUST hot enough to shrink the wrap, and you want to minimise time in the air flow. It's not such a problem with single cells, but when wrapping large items the wrap can split if overheated.

(Junkyard ebike, part six, post four)

The knack to heat-shrinking batteries is to get the item nicely centered in the wrap and then briefly wave it into a stream of hot air. You want the air just hot enough to shrink the plastic, and avoid over-heating as the wrap may split.

(Junkyard e-bike, part six post five)

Once your cells are wrapped, a thick paper washer is added to the positive end. The goal of all this covering is to avoid the positive "nipple" being short circuited to the negative casing.

(Junkyard e-bike part six post five)

With all the cells re-wrapped we can start thinking about how to put the battery together.

Our battery will consist of ten banks in series, each of eight cells in parallel (10S8P).

Why are there ten banks? Well a lithium-ion cell is "nominally" 3.7 volts, so the usual "12 volt" arrangement of three banks is actually only 11.1 volts. Using ten banks gives us a nominal voltage of 37 volts, which will actually be 42 volts when fully charged, and around 33 volts when flat.

One complication of working with lithium batteries is that they have a wider gap between "full voltage" and "minimum voltage" than many other kinds of batteries.

Since I had ten single cells left over, I loaded 8 of them into my capacity tester to see what actual capacity these cells have. Around 2000mAh per cell is typical, but budget batteries can often be low-capacity factory-seconds being sold with ludicrously inflated capacity labeling.

(end of part six)

OOOH HEY, these reclaimed cells are GOOD. 2700mAh capacity is more than I expected! This will give me an eight hundred watt-hour battery pack with a theoretical three hours ride time at full power.

Junkyard eBike build Part 7: Pack Assembly.

In our last build session we turned our recycled lithium cells into 10 banks each of eight cells in parallel. Today I've wired those 10 banks in series to achieve 40-odd volts of sparky goodness.

If you have the kind¹ of battery spot-welder with handheld electrodes, you can lay out the battery on your bench and weld the whole thing together in one pass (well two passes, you'll need to flip it over).

I don't have that, I have a benchtop² welder, which is a plus because it is very powerful and will weld all day without pause, but it means you have to bring the battery to it, which gets harder the bigger the battery gets.

So my build process is to make sub-assemblies and then join them together. I begin by joining three of my 8-cell banks together, making three 24-cell units, plus one 8-cell remainder, then joining those.

I wrap the components I want to weld in fibreglass tape, then take them to the welder. I pre-cut some double-row nickel strip to make the joins between banks, overlapping one row onto each adjacent bank.

The power will snake through the battery in a S-shape so remember to make your second bank the other way around.

¹ Handheld welder, commission link: https://s.click.aliexpress.com/e/_c3vBdXIl direct link https://www.aliexpress.com/item/1005008220521401.html

² Benchtop welder, commision link: https://s.click.aliexpress.com/e/_c4mTcxvx Direct link: https://www.aliexpress.com/item/1005009066552677.html

Junkyard ebike build part 7.2:

With all 10 banks placed side by side, I make sure that the junction between each bank has a tab where I can attach the "balancing wire" which the battery management system uses to shuffle charge around to make sure that each bank holds the same voltage (minor discrepancies are inevitable due to individual cells having minor differences in practical capacity).

At this point I number the contact points, starting with Zero at the negative terminal and ending with 10 at the positive terminal.

When I'm triply sure that all the cells are in the right place, I encircle the whole battery with a loop of tape, to allow me to pick it up and hold it under the welder.

To join the 24-cell modules I again use a 4-cell strip of 2-row nickel, meaning that four points from each bank participate in the joint.

With all 10 banks joined together I can measure the voltage across the whole battery. A shade under 42 volts (it's partially discharged).

Junkyard eBike build part 7.3:

With the electrons lined up into a big snake, and all the junction points identified, we want to protect the ends of the cells and the exposed nickel strip from being involved in a short circuit. Adhesive paper tape is used to cover over the cell ends leaving only the marked junction points visible.

In the next session we'll wire up the battery management system and build a sturdy box to hold the completed battery.

A reminder: you probably do not want to do this yourself, it is much more convenient and econommical to buy a pre-assembled battery, but now you know what's inside the box!

Junkyard e-bike build part 7.4 (coda): Remember to clean the bloodstains off the battery or you may get rust. Freshly cut nickel strip is heckin' sharp.
@Unixbigot this series of posts is kinda giving me the courage to learn how to work on batteries 
@felipe yay! punk all the solars!
@Unixbigot
Belated advice to wear gloves and eye protection.
@Unixbigot 1 and 3 being so close is giving me the heebie jeebies
@jpm “safety guard removed for photographic clarity” as the Americans lie.
@Unixbigot @jpm You start making things “safe” in Queensland and that’s how the cassowaries getcha.
@Unixbigot pro tip: a sliding square rack will make very short work of packing cells into a nice neat square or rectangle, eg https://www.aliexpress.com/item/1005008556838771.html
Einstellbare Lithium-Batterie-Schweißvorrichtung 6 x 6 6 x 13 18650 Akku-Rahmen universelle Punktschweißvorrichtung 21700 - AliExpress 1420

Smarter Shopping, Better Living! Aliexpress.com

aliexpress.
@jpm nice. I usually use a 3D printed form but these recycled banks were never gonna be pretty. <3
@Unixbigot The benchtop welder doesn't seem to be available anymore.
@HolgerPieta search for “787a welder” there are a number of sellers
@Unixbigot This is all incredibly informative. Thanks for posting this.
@Unixbigot That tester is really nice, where did you get it?

@astraleureka This¹² is the gadget I use to bulk charge/discharge/test lithium cells. It has sockets for 18650 cells plus screw terminals for other kinds of cell.

¹ referral link that will earn me a few bucks if you buy https://s.click.aliexpress.com/e/_mqpPQTP

² direct link: https://www.aliexpress.com/item/1005006756029574.html

18650 Lithium-Batterie-Kapazitätstester, DC-Anschluss, 2,4-Zoll-Farbbildschirm, digitales Batterieleistungsdetektormodul, DC5 V, 10 A, automatisch, C - AliExpress 1420

Smarter Shopping, Better Living! Aliexpress.com

aliexpress.

@Unixbigot @astraleureka Ah, hm, interesting. We're looking for something to safely discharge honking big cells (like 150 Ah or even larger), while not taking forever. Do you know the maximum discharge current of that thing? The technical specs on AliExpress are AI translated to German and just don't make sense.

(Safely discharge means discharge until lower cutoff voltage, which needs to be configurable.)

@HolgerPieta @astraleureka i’ll check, but what i think you want for your needs is a digital load. i have one model that is nominally 150w but has a variant firmware that, if you fit an improved heatsink, can dissipate 1kw. the one i’ll recommend has bluetooth and can be remote controlled/monitored.
DIY 1000 W 25 A 4-Draht DC Elektronische Last Kit Lithium 18650 Batterie Kapazität Analysator Tester mit Entladung Monitor PCB Board - AliExpress 1420

Smarter Shopping, Better Living! Aliexpress.com

aliexpress.
@Unixbigot Oh, thanks, that looks interesting. 150 W would be about 40 A at 4 V. That's more than we need. No need for additional hackery.
@HolgerPieta that device maxes out at 20A it’s not perfectly fungible
@Unixbigot Oh, right, it actually says so on the can. But that's still enough, discharge overnight is fine.
@HolgerPieta here’s one thats rated to 25A with the cooling already fitted https://s.click.aliexpress.com/e/_mqnda0v
150 W 25 A Batteriekapazität 4-Draht-Tester DC USB-Tester Elektronische Last Lithium-Entladung Monitor Netzteil Checker mit PC APP - AliExpress 1420

Smarter Shopping, Better Living! Aliexpress.com

aliexpress.

@Unixbigot there's something about lithium cells that I'm really curious about; what does the full capacity curve look like? Does it flatten out over time or does it just drop to zero?

I tried asking the search engines but only got corpo slop trying to sell me a battery system.

@beaumains i’m not sure i understand your question. If you mean “how does the measured capacity of a lithium battery change as it ages across many cycles”, by my measurements it’s a gradual decline, i have cells that now only measure half their original capacity but still deliver useful cycles
@Unixbigot so like, with PVs my understanding is that their output decreases significantly after a short period of use, however after a little while the rate of decrease slows and almost flattens out.
@beaumains I’m still not sure if you mean the discharge curve during a single discharge session, or the change in the curve across multiple sessions over hundreds of cycles. I can show you a real chart of the former easily. I don’t have data for the latter.
@Unixbigot the former, over the lifetime of the cell.
@Unixbigot 2000 mAh? That's very nearly 2Ah. Indeed, so close that you might as well call it 2Ah.
@MikeH ah but more zeroes means bigger number!
@Unixbigot Heavier, certainly.
@Unixbigot A 'Corpses' drawer Kit? What are you up to...?
@downbeatdan ahahaha that toolbox holds my jewelers tools; the bottom drawer is for items awaiting repair.
@downbeatdan wider shot that in no way eases your concerns:
@Unixbigot Nice, was thinking they must be pretty small bodies to fit in there...
@Unixbigot Jeebuz! The mind boggles....
@downbeatdan here’s a picture from when i first restored this vintage machinist’s toolbox to hold a CNC watchmakers lathe and other related tools https://aus.social/@Unixbigot/114951469805351026
Kit Bashir (@[email protected])

Attached: 1 image @[email protected] @[email protected] I’ve just finished loading my watchmaking and phone repair tools into this Machinist’s toolbox.

Aus.Social
@Unixbigot @downbeatdan Looks exactly like the box I had when I started my apprenticeship at Stelco Hilton Works in the mid-70s