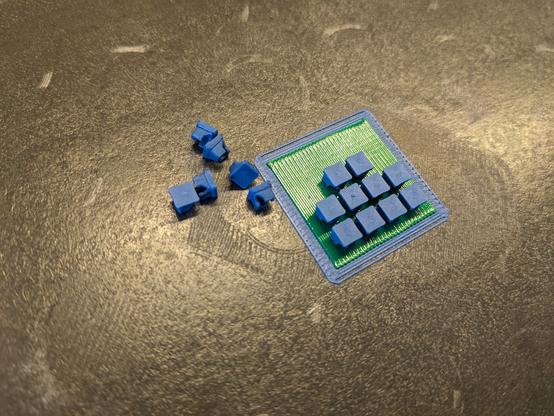
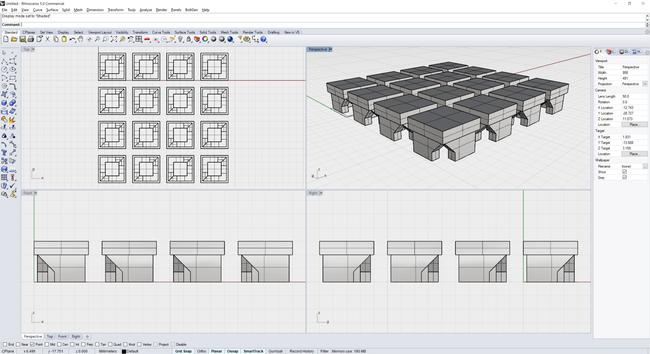
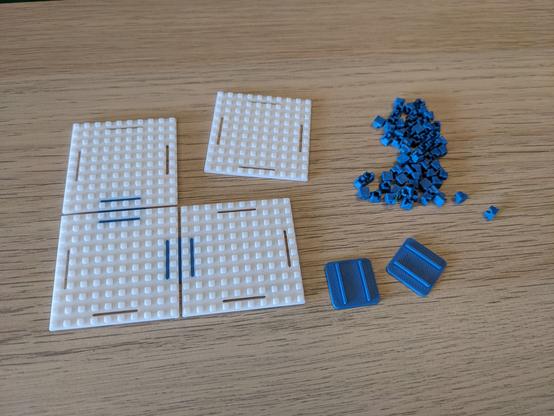
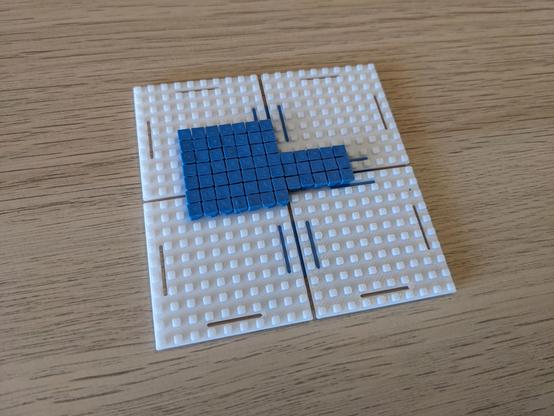
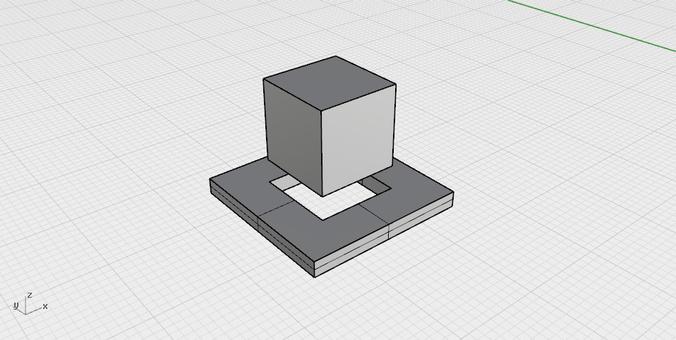
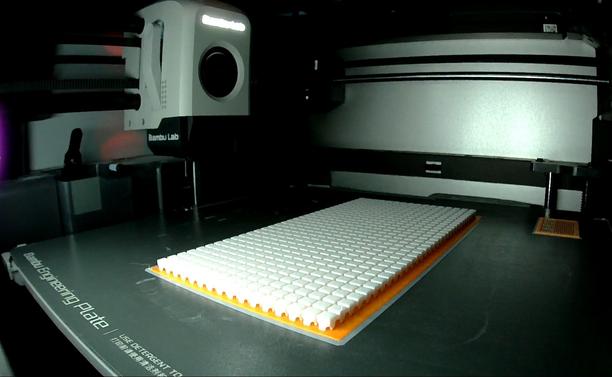
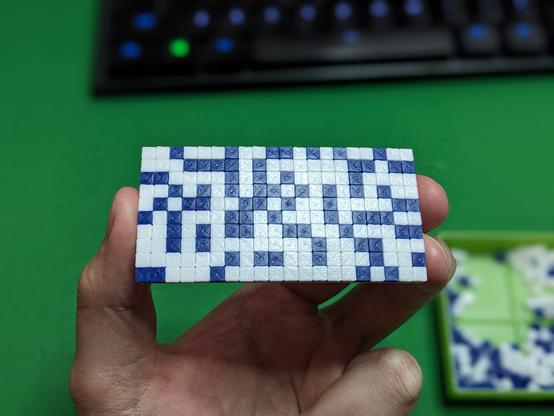
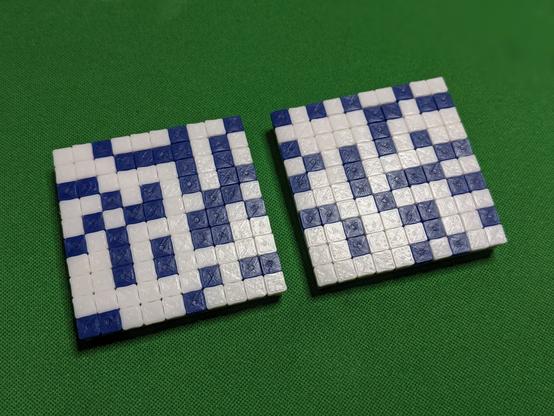
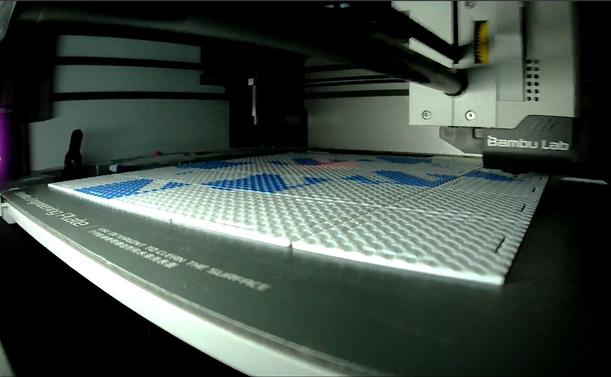
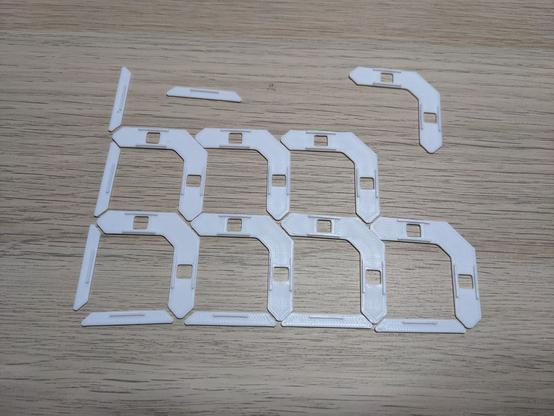
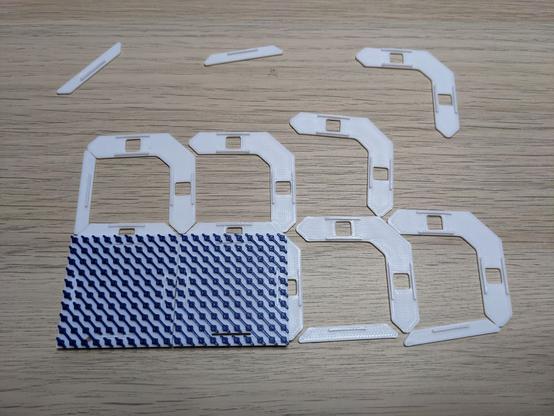
Finally catching a bit of free time for hobby stuff, so I'm testing some ideas I had for #Thrixels V2.

I'm still very proud of my original work, but it had very complicated geometry, was slow and difficult to print, and its limitations meant that any time I wanted to start a big project with them, it just went straight into the too-hard basket.

Here I'm shrinking and stabilising parts while increasing footprint area for reliability, and testing a fix for large projects warping. #3Dprinting

Okay, but like... this just worked? Why didn't I do this to start with? These just clicked together perfectly and the basic dimensions are already locked in ???

To be fair, I have the benefit of hindsight of months of developing the original version of these, and that to me is what being a #maker is all about - collecting knowledge and experience so that what takes you two hours the first time becomes five minutes the next. #3DPrinting

This was always my vision for #Thrixels - modular bases that clip together in a way that allows the tiles on top to just seamlessly... tile... to form a pattern. The tiles are very easy to locate and snap in, there's enough room in there for bigger patterns to not collide and warp apart, not a single individual tile popped off in repeated drop tests, and while a ton of dimensional tweaking obviously remains, all the core functionality is suddenly there.

This has been a good day.

#3DPrinting

One thing that's missing from V1 is the ability to stick a tiny screwdriver in through the bottom and pop individual tiles out. I'm giving up on that as a feature because it makes the bases take way longer to print, and with a reliable enough base-joining system, you'll never get too far into a single part of the mosaic that reworking any of it is too much of a chore. Plus I've learned certain techniques that can work to minimise the numbers of mistakes you make in the first place.

This might be where I pause for today. Base spacing is correct, but I need to extend the joiners/edge supports to the corners, otherwise they bend when you press tiles onto them (and if I've found myself doing that others will too).

I'm also not happy with how tiles are ending up rotated in place slightly - I'm happy with registration and spacing, but alignment I'll have to think about.

PLA is very easy to print and tweak, but it also wears quickly, so that's another challenge.

#3DPrinting

I think the diagonal orientation lines are probably the best option here. The tiles don't look *terrible* if they're slightly rotated... until you put them next to a set of tiles that *are* perfectly straight, and suddenly it's night and day.

I don't love introducing chirality into the design of the tiles, but they are surprisingly easy to manipulate in hand and spin around to the right direction. I'll go with it and see if it ends up being more annoying than beneficial.

256 tiny (4x4x4mm!) individual PLA parts successfully printed on one PETG raft, with 100% successful yield. I've switched back to a generic orange PETG from the official #BambuLab green PETG which oozed terribly and seemed to have worse raft adhesion, which I wasn't expecting to be the case at all.

Today I'm tweaking some baseplate dimensions - the alignment diagonals could do with some embiggening, and I'm still tweaking the slots for the joiner/support pads underneath. #3DPrinting

A quick peek behind the scenes - this is what I'm actually looking at when I'm modelling stuff. I like to use magenta to indicate parts that will get subtracted in the end (the slots for the joiners, and the border to shrink the overall board size by 0.25mm on each side) and cyan to represent parts that need more complex processing (some get subtracted, some get joined). I keep a copy of the "before" set of objects on hand in case I want to go back and easily change something. #3DPrinting #CAD

Here's how the baseplates have turned out. Changing colours mid-print to highlight the direction of the diagonals is trivial, and the joiners and supports are working perfectly too.

This has made me realise I could do the same colour-swap trick with the tiles themselves - white for the underside, then the intended colour for the top. That would give me all the visual contrast I need to quickly orient and plug in each individual tile.

And here's what this version of the board looks like with some tiles on it. I made sure to assemble these separately, to simulate doing 10x10 boards on their own so tiles from neighbouring boards can't help with orientation, and....... I can't tell without looking at the base pieces where the seam between them actually is.

There is some bowing in the middle, but that's because the joiners are a couple of layers thick and are quite flexible - it wouldn't be visible in a completed, framed work.

I don't know if I'll make anything else this perfect in my life again. #3DPrinting
From "perfect" to "baffling". I've made the joining pieces *half a millimetre thicker* so they'd be stiffer and hold the base pieces straighter, but in doing that I've somehow made them much weaker in holding to the base bits and they just loosely drop back out instead of snapping in snugly. There's 0.1mm of clearance on either side in the model, the same as the clearance between the tiles and the bases, and somehow that's too much now - maybe the flex was holding them in tension with the bases?

So, clearance is a fun thing to get right in #3DPrinting. If you have a 10mm cube, and a 10mm hole for it to go into, it won't fit - 3D printing is just too variable a process for things to work like that. You'd need to build some clearance in - probably 0.25mm on each side, so you'd end up with a 9.5mm cube; my #Thrixels have a 0.1mm gap between the tiles and the part of the baseplate they grip to.

But stuff gets weird when you go small - like single digit multiples of your nozzle width small.

Here's the "sliced" view of the parts that join my little tile bases together. Each little 'tube' here represents the path of the printer's nozzle - that's a line of filament being laid down. And you can see the part that sticks into the slots in the bases is only two lines wide - that's a 0.8mm wide rectangle in the model, but in reality, when printed with a 0.4mm nozzle, it becomes two lines of filament side by side.

My problem the other day was that I'd made the slots in my base parts 1mm wide - which was fine - but the same width for the tabs on these joiners, which was not fine, because it was trying to fill a 1mm gap with 0.8mm of material, and there just wasn't enough there to keep a good grip in that width.

But squishing a 0.8mm tab into a 0.8mm slot will work - there's little enough material there that it's still malleable, yet enough that it fills enough of the space to get an interference fit.

It's a weird and tough problem to solve, and I'm not totally convinced I've worked out all the kinks, but this is a good enough system to move on with - which means the next step is to print hundreds of Thrixels two-point-oh, stick them on these bases, and see how they line up.

Time to attempt to print 512 parts in one go. YOLO, right?

I regret to announce I have invented voxel teeth.

In better news: That's 512 v2.0 #Thrixels successfully printed at once - not the most individual parts I've ever printed together, but not far off it, either.

These are at a 0.16mm layer height, while the originals needed to be at 0.12 to work reliably, so that + the simplified geometry makes for a much faster print. Four hours for ~30g of parts sounds slow, but that's still under 30 seconds per individual part!

Not only does this look like there is no seam at all, when you insist to your brain that there definitely is one, its best guess is a row or two away from where it actually is.

The sense of satisfaction I'm getting from this is on par with building a complicated gaming PC from scratch, and doing all the cable-tying before pressing the power button and finding it boots and works perfectly the first go. I am ridiculously happy with how this project is unfolding. #3Dprinting #Thrixels

Well, that's the 2x2 test done - totally seamless, but there is significant bowing, a lot more than I was expecting. I saw this effect with the Dopefish mosaic, and cutting down to 10x10 boards was intended to minimise it.

I think I can counter this by making the tiles narrower in the middle and taller, and only widening to the full 4.0mm wide on the topmost layer or two. There might also be another strategy I can take with the parts that join and support the boards from underneath.

Today's test: A modified thrixel that is taller, continues the hollow tower further up, and only has a couple of layers at full width. This should make them easier to grip and manipulate (the originals were 6mm tall for this reason), mitigate some extra printing time from the extra volume, and reduce the force they exert on neighbouring tiles. These should look just as good, print just as easily, and reduce, if not eliminate, the bowing. #3DPrinting

And just like that, the bowing is gone - there might be a fraction of a millimetre or two in it, but that should be invisible in a finished piece.

These taller thrixels with the ridge around the top is 100% the way to go, they're so much easier to handle. I also had the idea to switch filament part way to make it easier to see each piece's orientation, same as I've done with the bases.

Next steps: More of the same, to retry validating being flat and seamless in a 2x2 grid. #3DPrinting

There's also plenty of room again for tweaking those top couple of layers, and filling in the gaps between the tops of the tiles without re-introducing bowing. That'll take a few iterations to figure out, but will mostly be an aesthetics-tuning exercise, so I'll leave that for now. The next major dot point I need to focus on is scaling up to larger mosaics, which means figuring out what to do with the base connectors, and precisely gluing or screwing them to a plywood sheet or something.
There's maybe 1mm of bowing in the very middle, across 8cm of parts. That should be basically invisible when the joiners on the underside are actually fixed to a surface, and not free-floating with the rest of the parts. You can also kinda spot the seam here, but only because the tiles need tweaking to fill out the space a tiny bit more, and they aren't currently pushing into the seam.
The good thing about a project like this - high detail and precision, low overall volume - is that when, an hour into a huge print, you suddenly realise you've neglected your surface adhesion strategy (read: haven't re-applied my trusty Bostik Glu Stik in a hot minute), and need to cancel the print because all your parts are warping up off the bed, it's only cost you like eight grams of filament. #3DPrinting
Ah, that's better. It's gotten enough layers in that it's up to switching to a different colour for the top layers, and it's making an interesting pattern. This is two hours into a four hour print, and by the end of it I should have 25 new #Thrixels bases to play with.

Success. That's some serious bowing of the build plate, considering these are 1mm tall, 4cm square plates; I think if I have another print failure of 25, I'll drop the number to 16 and just commit to collecting bases off the printer every three hours instead of four - no point doing more at once if there's a significantly higher chance of failure. The bed warping when off the printer is alarming, too.

Also - this pile of them was exactly as satisfying to pop off the bed as you're imagining.

I find this project is just making me want moiré.
I've modeled these little widgets to cut a 3mm round fillet into the bottom corner edges of the base pieces while keeping as much flat surface area on top as possible. The fillet will reduce the risk of warping, retaining the surface area on top will maximise support for already-vulnerable corner tiles, and the sharpest overhang angle involved is only 51 degrees, which won't affect the quality of the printed part. #3DPrinting #CAD

It's not a big difference, really, but surely it's better than none. Keeping surface area on top and not just filleting every corner through the height of the thing was crucial because the tiles that go on the very corners are the most likely to lean and work loose, and the more support they have, the better.

Time to test out a bigger plate of this new version!

So what's the big idea? Here's the big idea - these boomerang pieces get glued to a final surface, ideally a pre-cut wooden sheet, and aligned using a set of base pieces, whether completed with #Thrixels or not. I need to find a bit of scrap wood and do a test assembly.

I also need to go back to the drawing board on the base pieces and the slots those tabs fit into, because for some reason they're back to not fitting correctly. Two steps forward, one step back. #3DPrinting