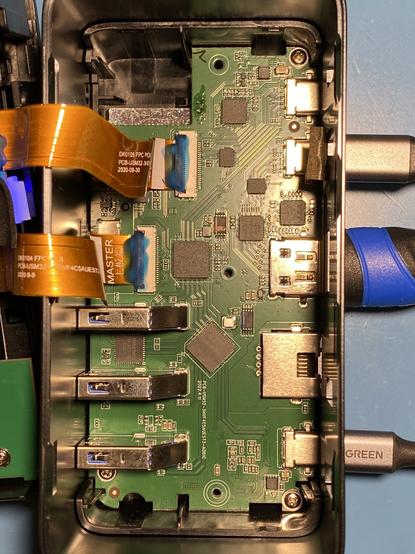
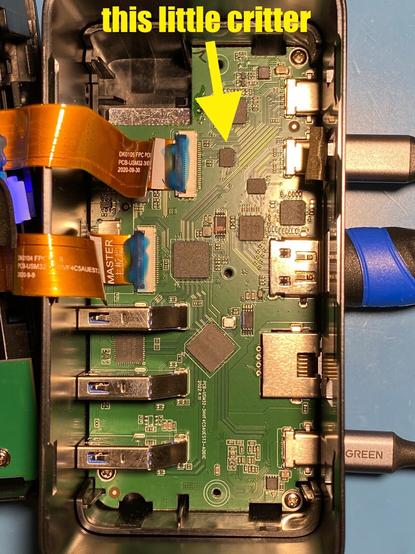
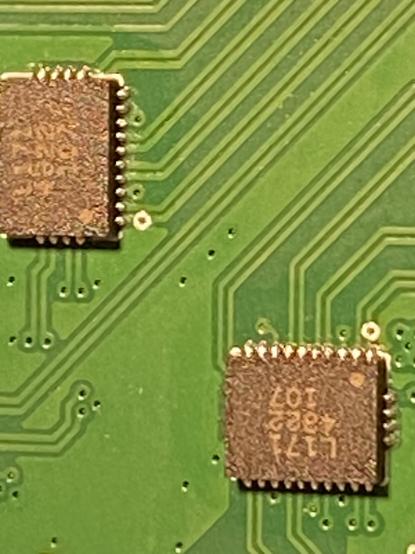
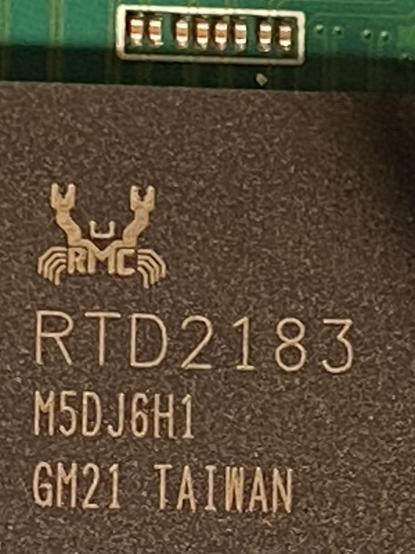
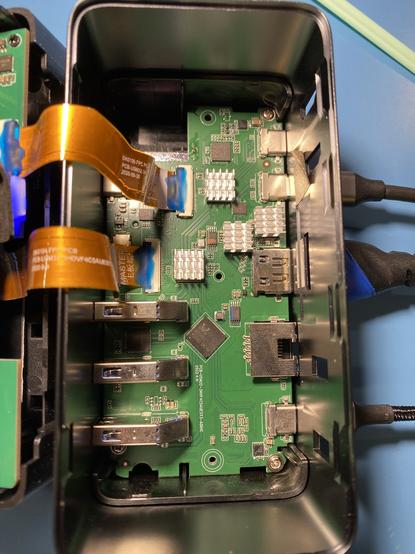
so if you’ve wondered what’s inside of one of those 16-interface USB3 breakout interfaces boxes - this one being a zmuipng which is popular somehow - here are photos.

to open it you remove the two long rubber feet then remove the two revealed screws, then spudger the top off starting on the short sides. lever them up alternately and it’ll come clear without too much of a fight. But be careful about the headphone jack! It's fragile. I damaged this one taking it out.

#electronics #diy #zmuipng

Anyway, the reason I'm taking it apart is that is has an intermittent fault (best kind) that makes it start blanking all the displays hooked up to it, turning them on and off. This is generally after it's been running for a while so I suspect one of these chips is getting real hot.

And there is. It's this one. It's not anything that I think of as out of temperature yet, but it's a good 10°C hotter than everything else and it's only been running a few minutes.

So I've got a box of tiny heatsinks so I'm gonna hit a few of these. The third chip down from that also isn't showing up as very hot on my laser thermometer but _is_ clearing IPA off itself _really quick_ so I'll that one too and a couple of others.

I dunno yet whether I want to drill some vent holes in the side but I'm certainly thinking about it.

here are various chip numbers if anybody wants to look ‘em up - bottom board first
top board’s only big chip, and it’s the crab logo again, i like it
missed one: bottom board, another VLI VL103R-Q4
I think my laser thermometer is getting confused by the HDMI shield because I can feel way more heat off the fast-evaporation chip just with my fingers than off the little one that measures hot

WILL IT DISPERSE?

well yeah i can feel it but what i don’t know is if this actually fixes anything xD

going with "no" on drilling out some vent holes for the moment

BUT FOR FUTURE REFERENCE

the safe drilling band at front-to-back centre of sides starts 30mm from the top and ends 42mm from the top. so centre a drill bit at 36mm down and use 8mm drill bit for a safety margin. and use a drill stop of 5mm depth to avoid hitting the case screw support columns.

OH I GET IT

the safe way to take this apart without worrying about the headphone jack is to spudger the BOTTOM off. then you unscrew the daughterboard. that's how they got the headphone socket in without crunching it.

eta: holy fuck it's way harder to spudger off did they glue this fucking thing or what

eta2: oh yeah they totally glued the bottom

you fuckers

the bottom isn't coming off

GLUE WHY YOU HAVE SCREWS ALREADY WHAT THE FUCK

ah well let's see if it works better now

i mean

we'll never actually know because it's intermittent and its functionality has been replaced so this was arguably kinda pointless xD

but at least it didn't cost anything I didn't already have on hand? and now other people can find out how to open the stupid thing ^_^

oh hey I just realised this was one of the projects on the project shelf when I took that new photo of my project storage system's home unit :D

https://solarbird.net/blog/2023/03/10/its-more-than-a-better-photo/

there's only two actual projects on it now, one of which I can't even do until I get more parts. xD

it's more than a better photo

I made a more... complete? resolved? realised! Better realised. That's what I'm looking for. I made a better realised version of a large project storage poin

@moira
Just sharing a past trouble shoot. I found a cracked trace under a memory chip in an Amiga 1000 once. Symptoms were, it booted fine, became intermittent after a few minutes and then returned to stable operation if left running after about 15 minutes. Different expansion rates for the chip, copper and fiberglass board by my guess. Found it by measuring end to end resistance of the traces.
Wasn't the first thing I thought of. 🤓

@GaryGough good job!

this thing is way too fine-pitched for that tho' - if it's something similar, it's done.

@moira
Yeah. It was easier when you had a row of largely parallel connected chips, and could just jumper between two to fix the problem. I'm hardly steady enough anymore too, but that's another issue. I've also caught cold solder joints with a heat lamp and freon spray ( you can guess how long ago from the material used ) compressed air might serve as well.

@GaryGough YIKES freon

nice ozone layer y'got there

shame if somethin' were t'happen to it xD

@moira
Yep. We used to use that stuff as head cleaning fluid on video tape drives too.
Carbon tet, PCBs, lots of stuff I used to work with that is deservedly out of circulation.
Trivia, the door handles on model T fords weren't chrome plated, that was cadmium.

@GaryGough CARBON TET

that's a name I haven't heard in a long time

a loooong time

( xD )