Have this van building thread on other site that i send to people when they ask me how i built our van… im gonna recreate it here so i dont send traffic to that place any more… as soon as i figure out how threads work…
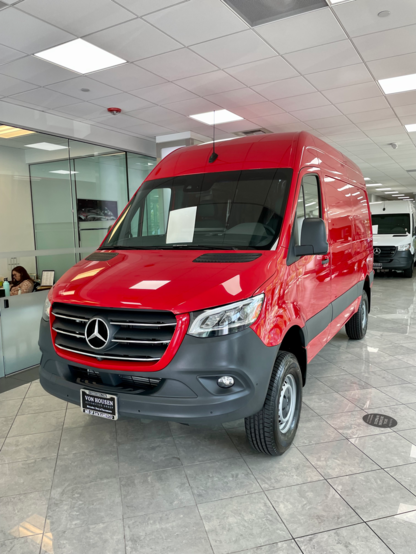
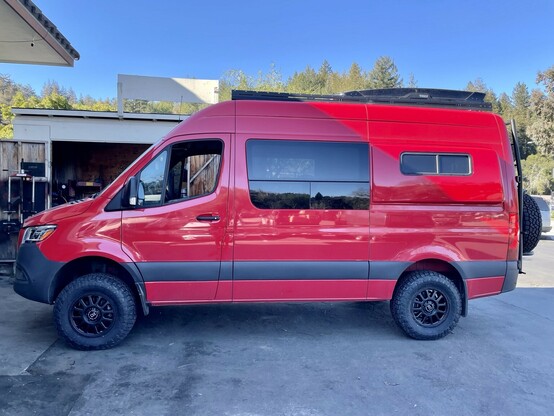
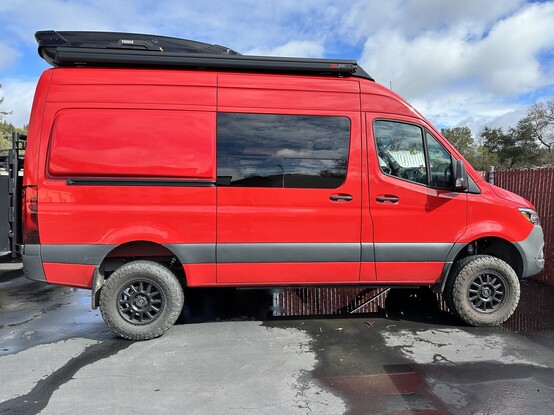
@kviksilver so sometimes in August last year, after 10 months of wait i finally got a call from a dealer to come and pick up a van… plan was to pick her up in Sacramento, drive to Portland to grab adventure wagon kit and drive back home… first thoughts? Omg this thing is red, huge, amazing 🥰😍🙀
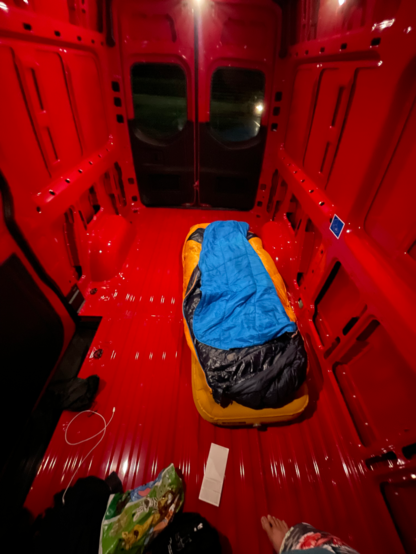
Adventure wagon (https://adventurewagon.com/) makes this amazing kit with all basic paneling, sound+heat insulation and electrical wiring that saves a ton of time compared to full diy and money if you give your van to a shop to do it for you. Id highly recommend this route if you have any diy capabilities and i would (will :-) ) do it again on another van.. they are based in Portland OR, so it was a full day drive from sacramento, first night in a van (🎉), and a drive back to Santa Cruz.
Van Conversion - Modular Conversion Kits - Portland, Oregon
Adventure Wagon specializes in modular and configurable interior systems for vans. Because our interior systems are configurable, you'll be able to quickly swap them to meet your daily needs. Multiple configurations means greater usability. Find your adventure today with Adventure Wagon!
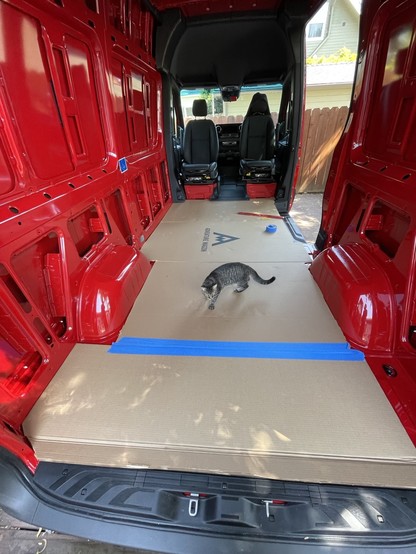
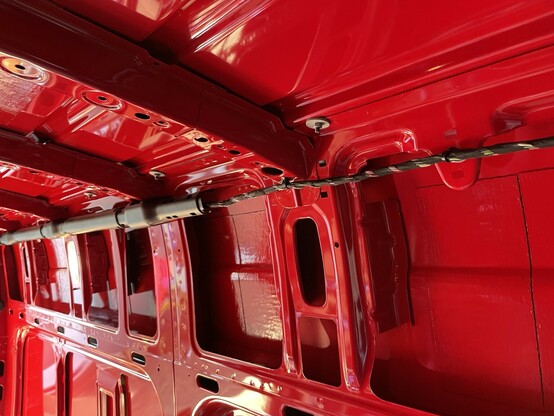
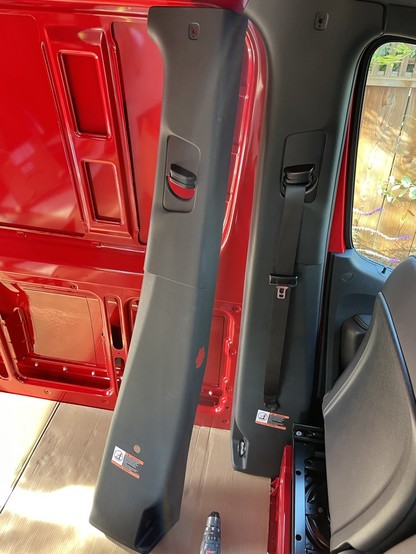
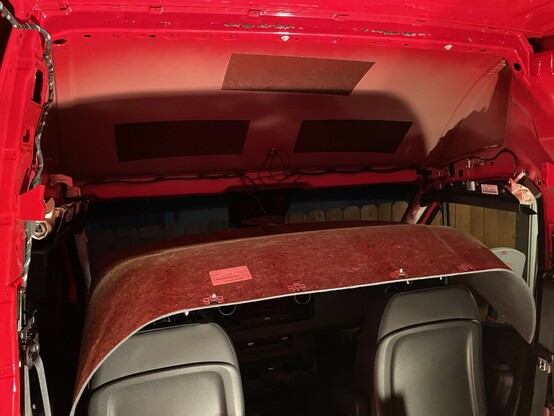
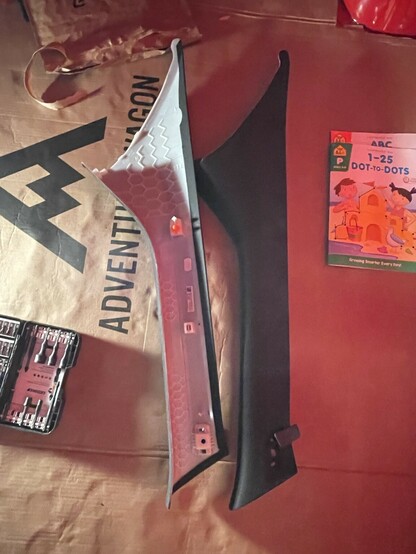
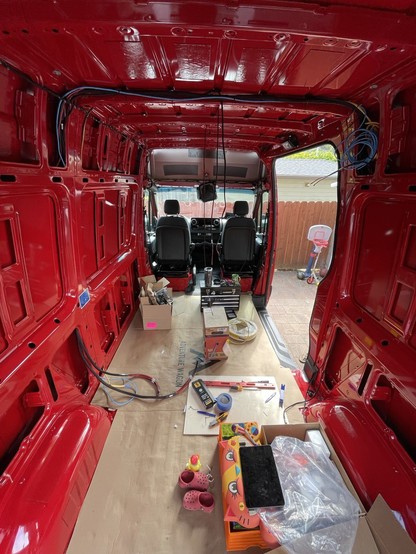
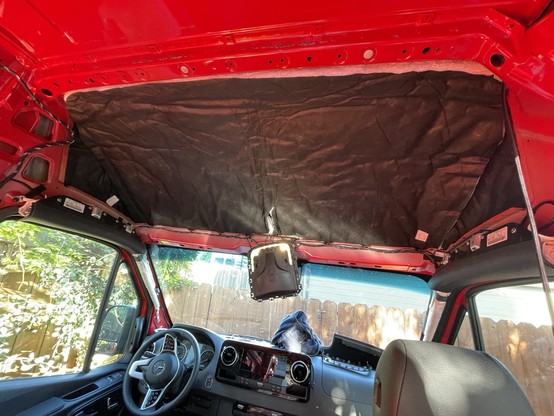
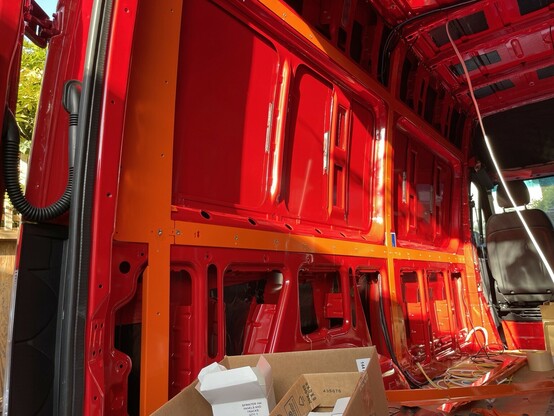
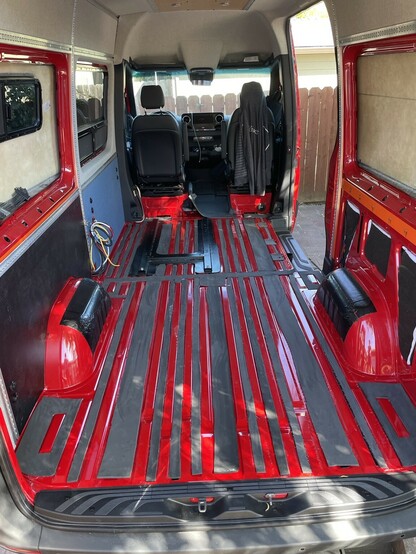
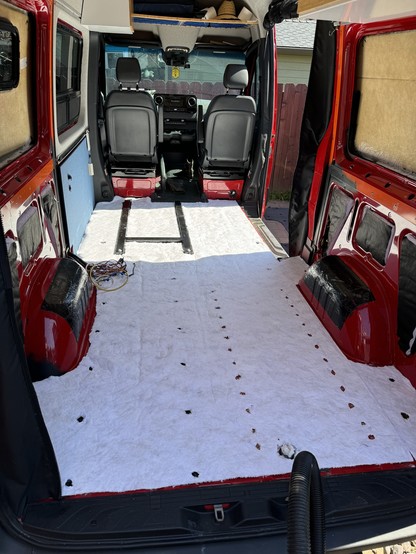
Time to protect the flooring and start taking big red thing apart… pull out all unnecessary foamy protections in all the corners where mercedes decided to put them in, take of the headliner (its getting upholstered to match the rest of the interior) pull down all the paneling from the doors and pillars, strip interior cargo space lights, basically have to make sure i have a naked shell to start working with.
At this point some folks will decide to do something like spray on ceramic insulation, thing called lizard skin or similar, or spray truck bed liner on the floor. Former made little sense to me and was expensive, bed liner i thought about a lot, but realized given this will be a beach car its probably gonna rust from outside a lot faster than from inside so i gave up.
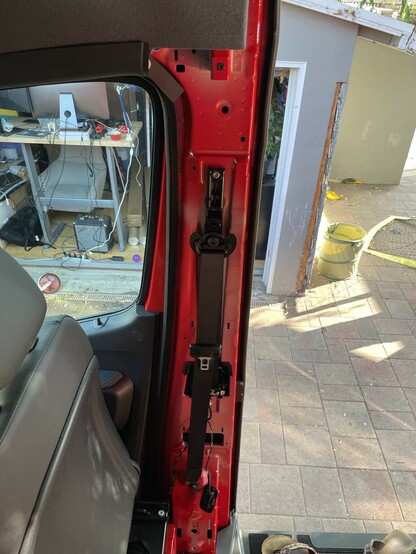
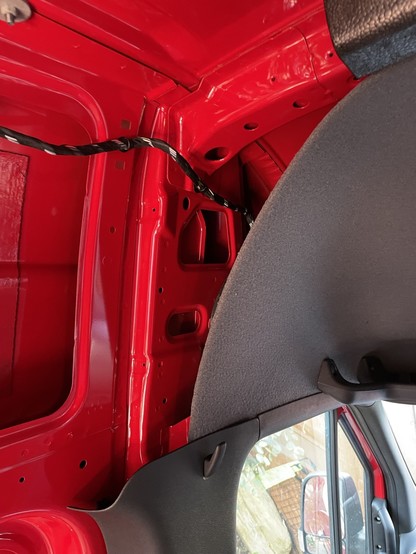
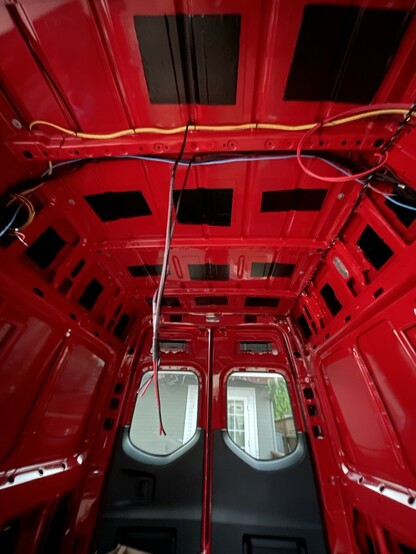
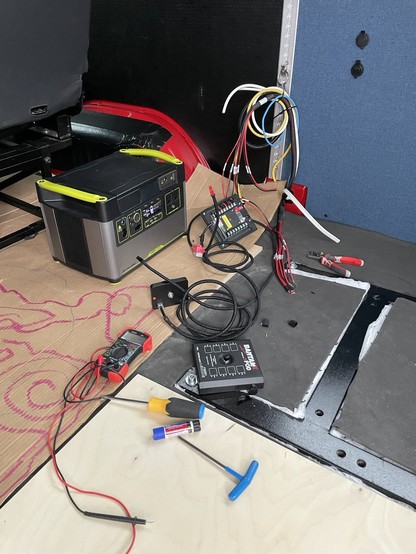
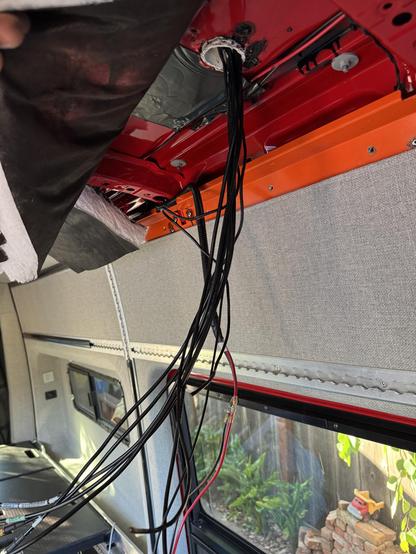
Electrical wiring next: adv wagon makes this easy because they give you harness for lights and plugs with wires of exact length and gauge, but i decided to place my battery in a different location, next to c pillar on drivers side (they prep for connecting to car battery under drivers seat) so that required some measuring and math. I also pulled one 110V cable and une cat5 across the van from c to c pillar and one really big cable to connect to alternator for battery charging.
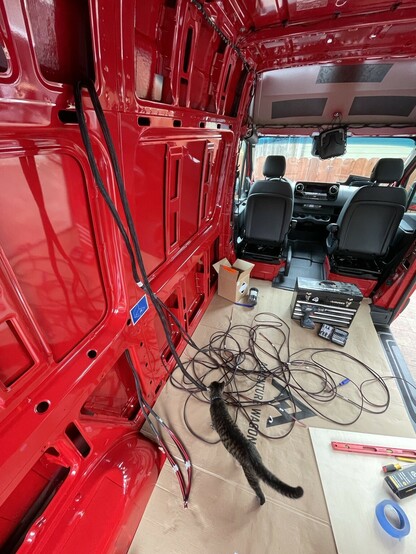
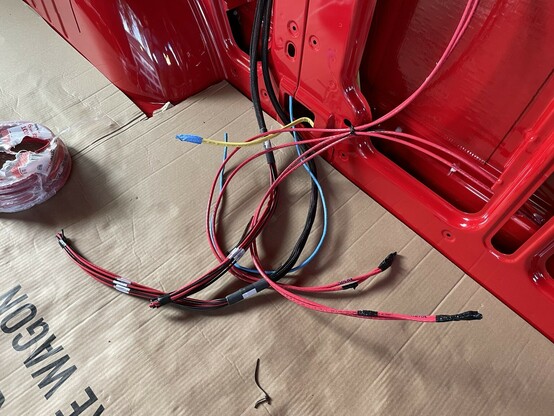
There was also a cable that goes to the roof for solar to connect that exited next to c pillar on driver side. All of these were tucked nicely behind pillars, all the plug locations were decided by adv kit (you can order it without predrilled plug holes if youd like too)
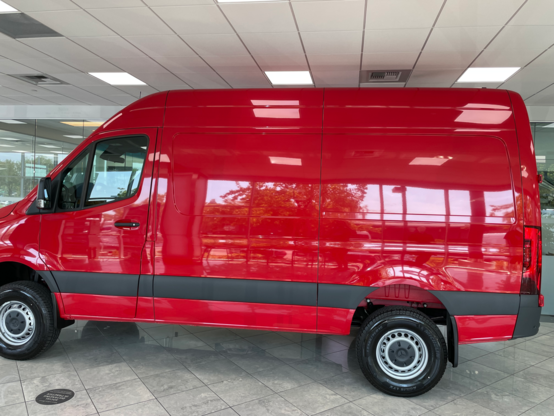
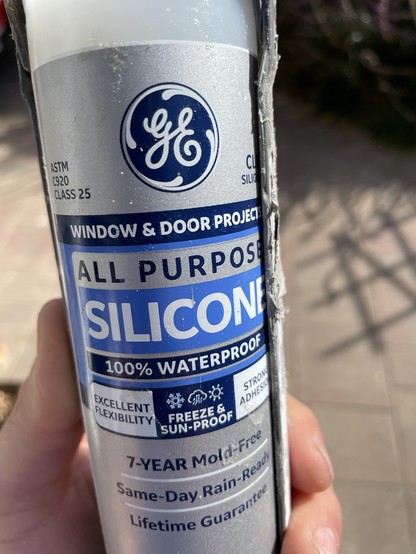
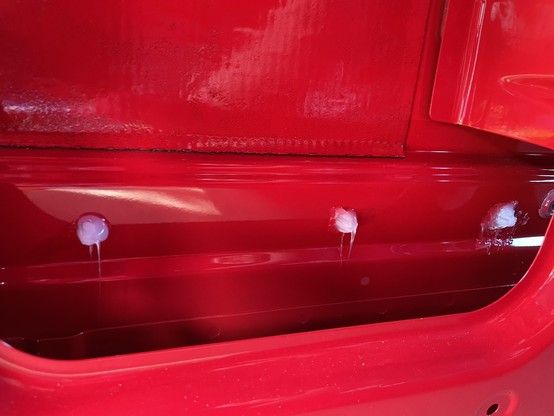
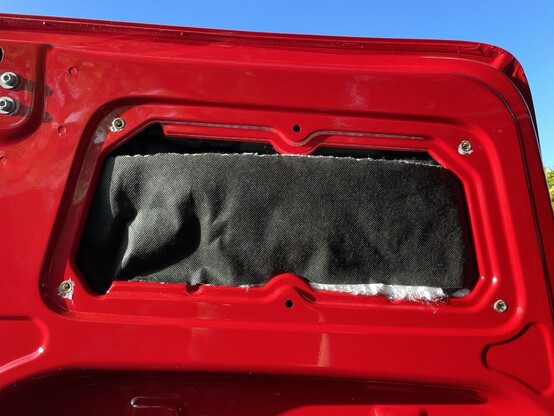
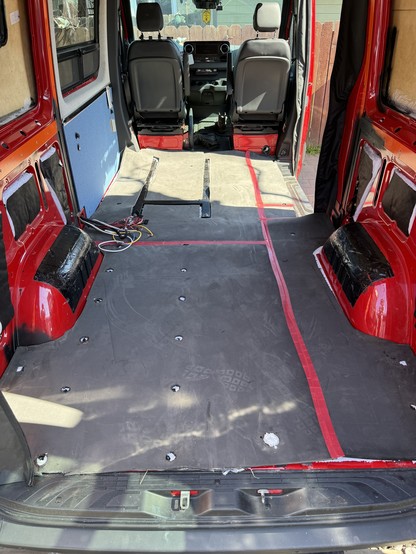
Sprinters have this black plastic trim on the side thats attached to the car with plastic pins. Thats where water will enter your sprinter, but idea is that it will also exit easily because panels have drain holes… unless you stuff that empty space with so ething that will soak water, like insulation… so i wanted to close those holes… just silicone smudge on every pin, ill probably be in trouble if i ever have to remove this trim.
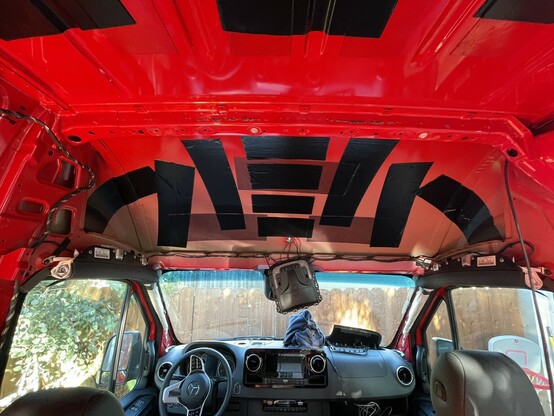
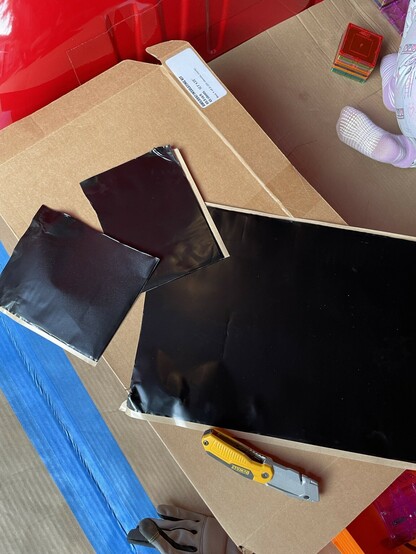
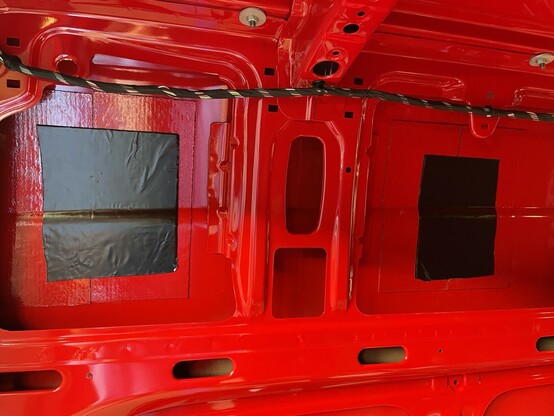
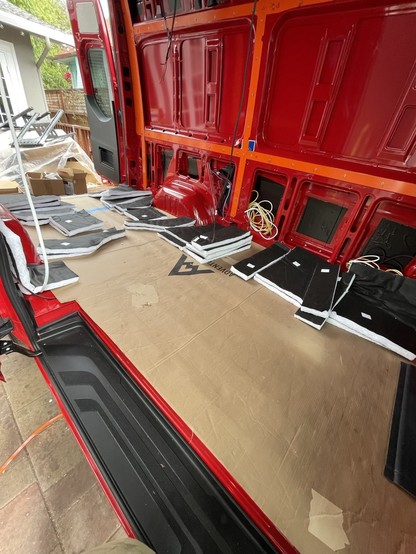
Sound deadening: hushmat is this heavy sticker that you glue to a panel on your car that makes panel vibrate less, sprinter already has some installed, but not all over. Should not cover whole panel, but only 25-50% of it… this thing is really heavy, so less is better, but also you need weight to stop panel from ringing. At this point, after installing hushmat driving in a van actually wont give you permanent hearing damage (trip to portland and back was borderline painful)
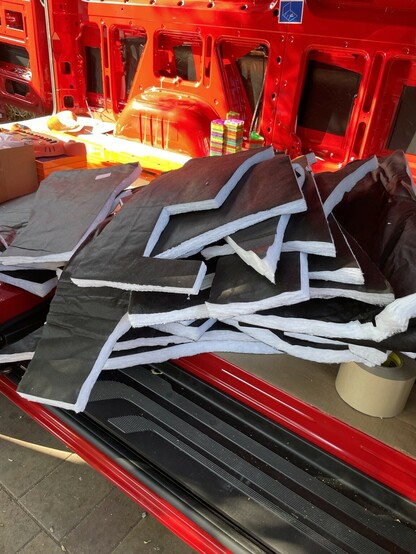
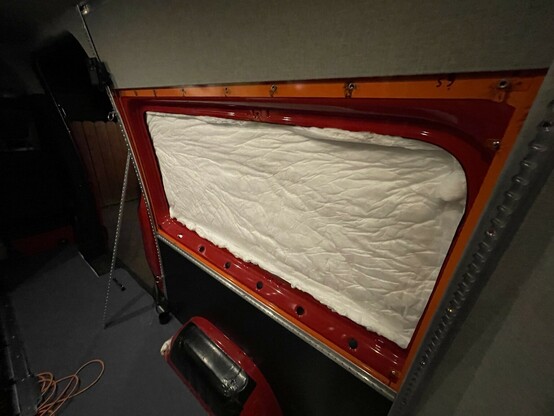
Thermal insulation: thinsulate is what your winter jacket has inside. Every panel has to be covered, every crevice filled, adv wagon kit comes with precut thinsulate. I. Doing some different stuff so ill have some extra and some panels require cutting.
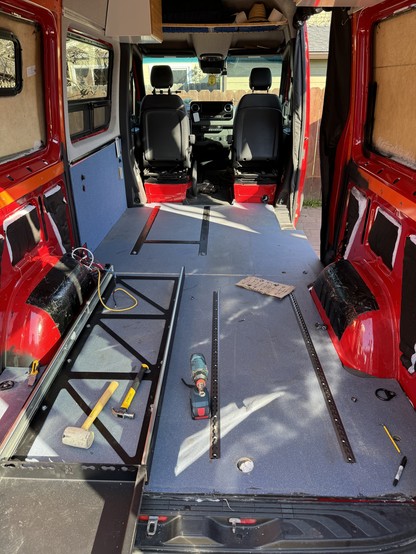
This is what adw wagon kit is all about: panel frame is steel construction you bolt onto your can, then you bolt ltrack to that and ltrack holds your panels, its pretty ingenious. This required drilling some hundred holes into a brand new $70k car and was pretty nerve wracking at the beginning.

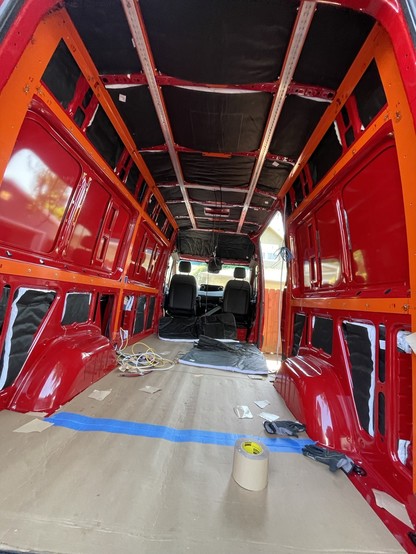
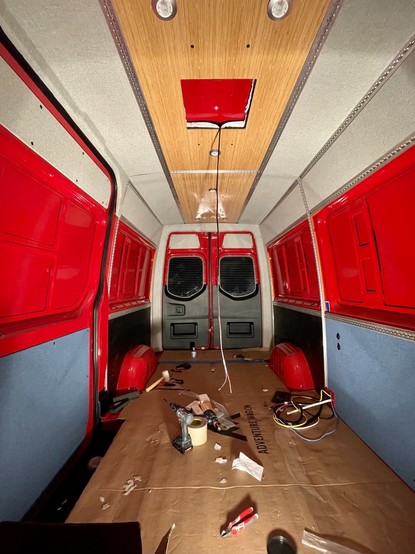
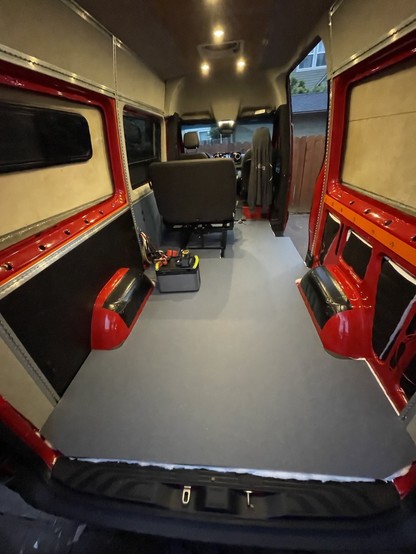
At this point, the panels can go in and its actually looking like something youd want to sleep in. Ltrack is this silver aluminium track that holds panel in place, bolts on to aw skeleton and allows me to attach stuff to the van. Some folks dont like aw kit because it shows a lot of ltrack, but we dont mind. We opted for bamboo center, light upper panels, blue panels at the front and black hex ply in the garage area. Panels have ligths and plugs that you wanna connect now.
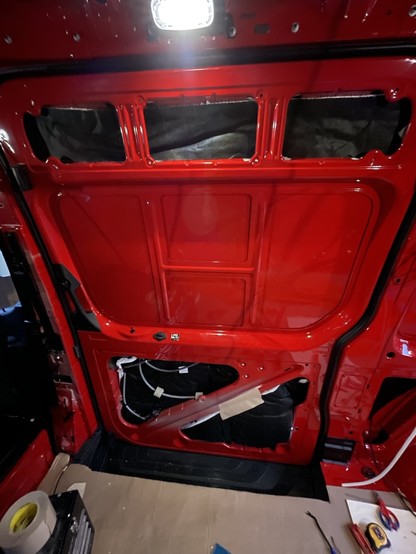
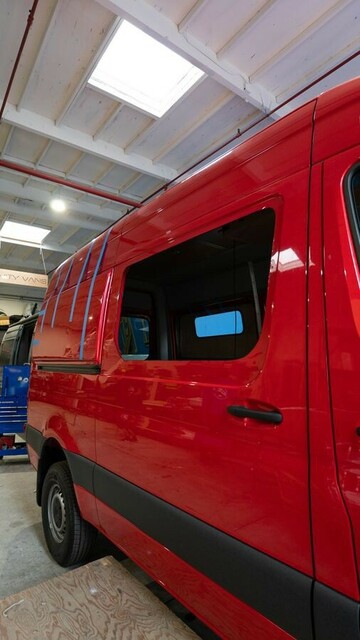
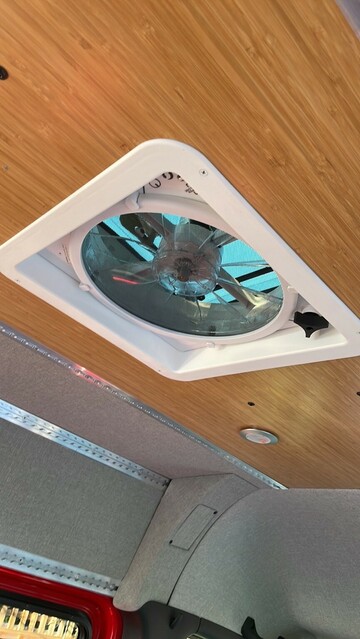
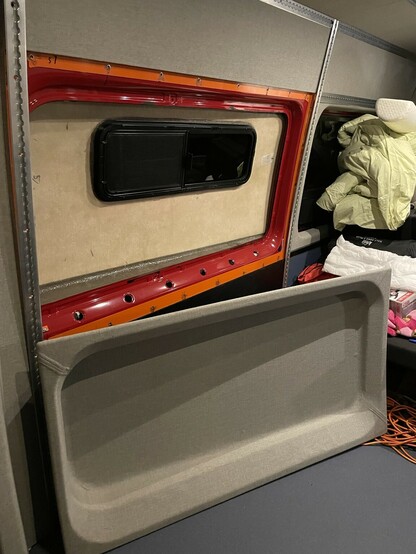
There is a hole in the roof for a fan and all 4 eye height panels are left uninsulated and uncovered because they are getting cut out. Front ones are getting cr laurence windows (https://www.crlaurence.com) and rear ones are getting flarespace flares (https://flarespace.com). Flares stick out and allow sideway sleeping. Provides 20ish cm extra space inside because bed does not have to be that long.
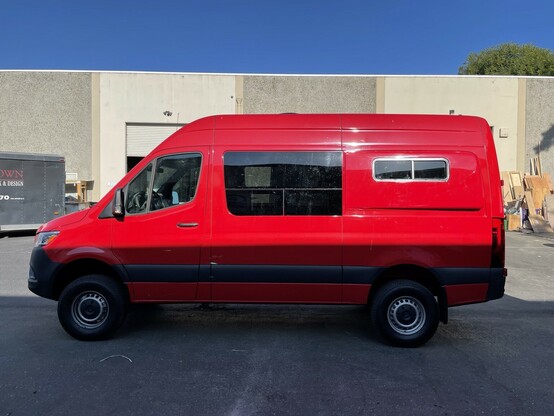
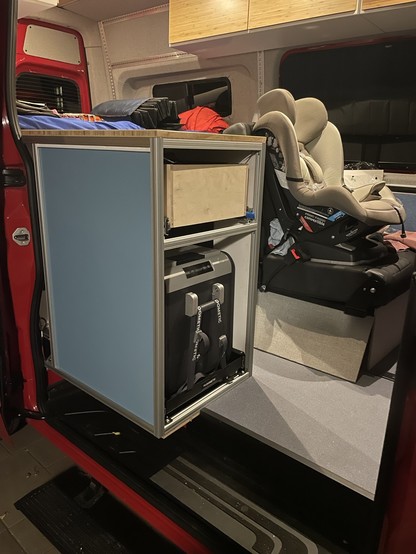
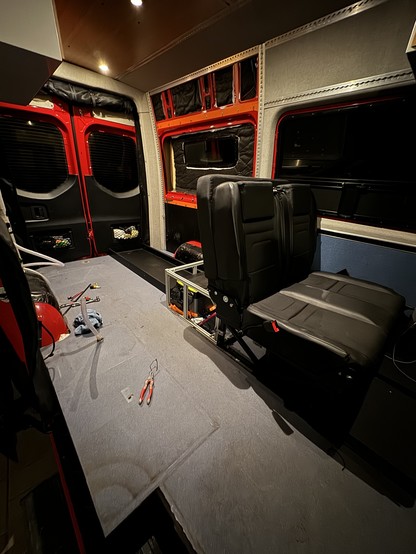
Flares are fiberglass, they come unpainted so you have to find a paint shop to do it for you, also instalation is pita because van has to stay inside and in dry for 24 hours. They are so worth it because on short wheelbase sprinter those 20cm have amazing value. We also installed 2 seat bench (https://scopema.com/en/seats/ ) that turns into twin size bed. Now our house can sleep 3 and drive 4.
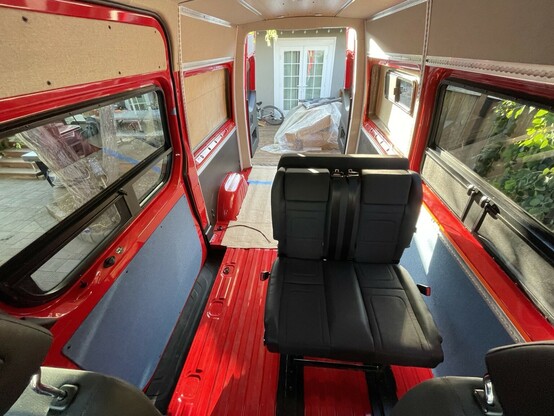
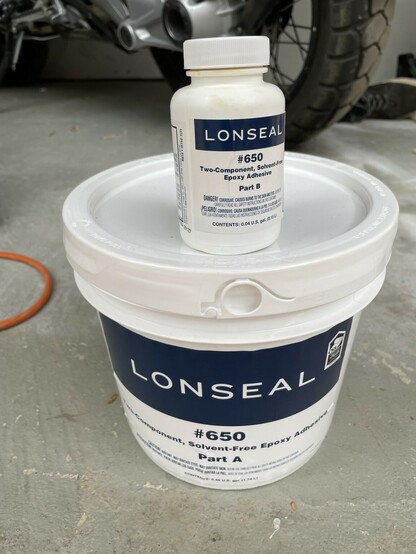
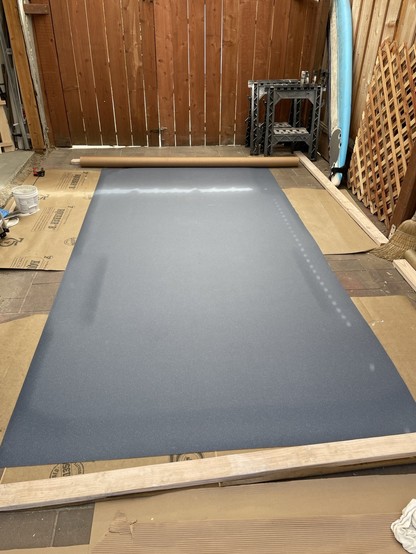
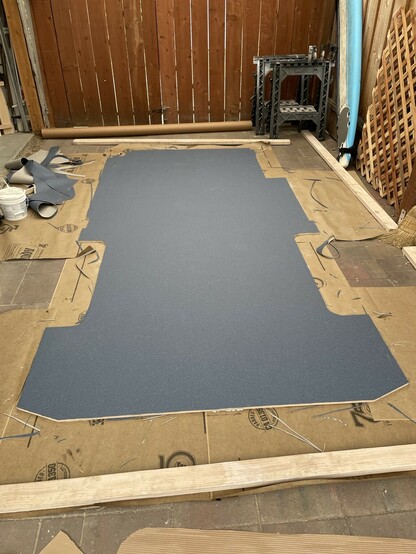
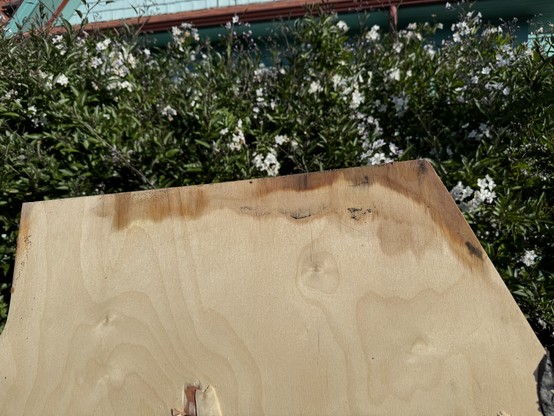
Floor was done from 3 pieces of 12mm baltic birch ply with lonseal flooring on top. Under the floor there is hushmat and heat insulation. Floor is not bolted at all, im hoping bolting kitchen, seat and garage cabinets will hold it in place.
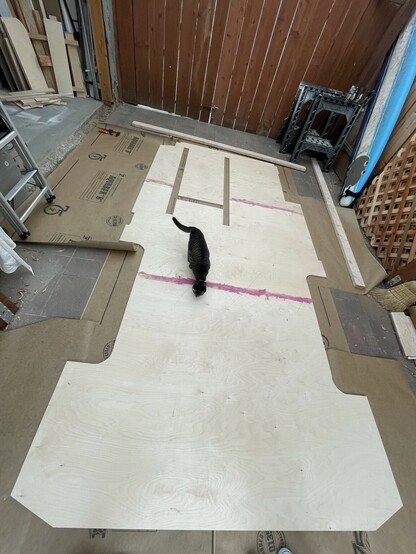
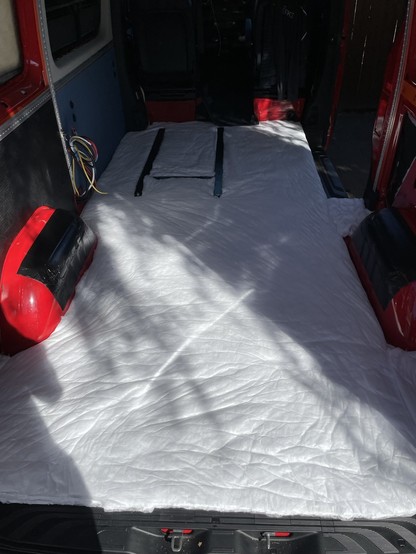
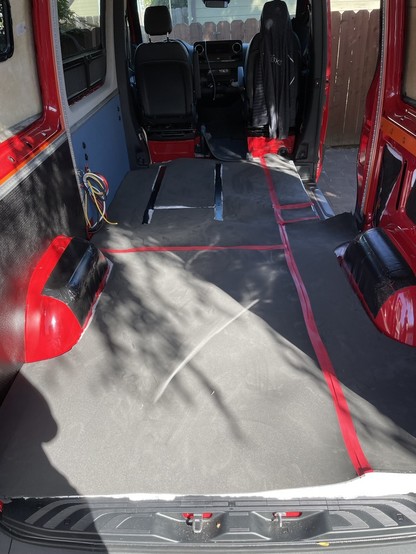
More under floor insulation, first hushmat, then minicell in floor grooves, then thinsulate on top, then another layer of minicel, then actual floor… some folks do radiant heating under it, but it was pretty expensive so i skipped it.
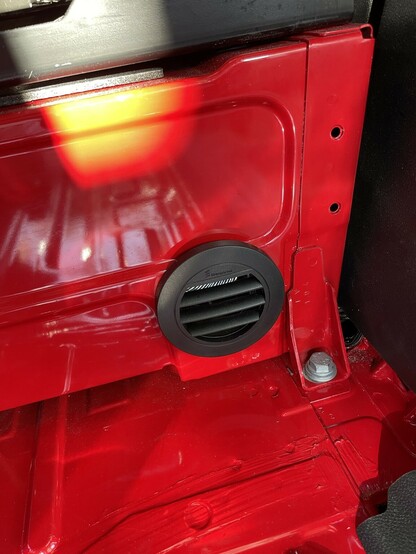
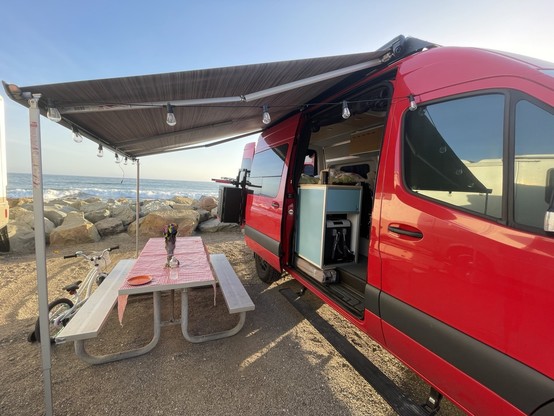
For heating we installed espar diesel heater under passenger seat. This thing hooks on diesel tank and burns it to heat up the living area. I routed exhaust behind sliding doors, but in retrospect that might have been a mistake and better option would be somewhere on driver side. When we are sitting outside and heating the van, exhaust is usually right where our outside table is.
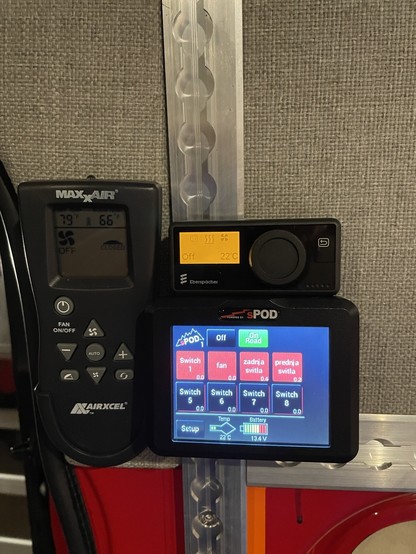
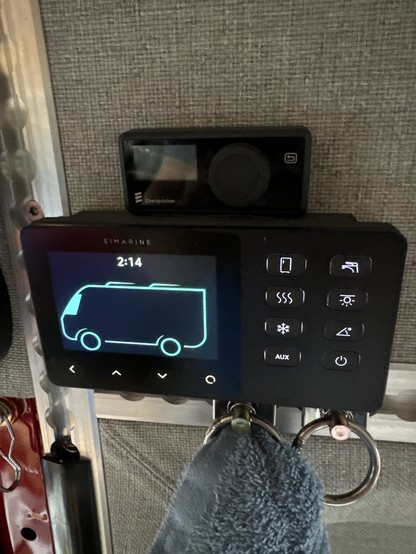
We control the electrical with spod (https://www.4x4spod.com), its control touch screen is mounted on passenger c pillar with fan remote and heater control. House battery is under rear seat and is geal zero yeti 1500 https://www.goalzero.com
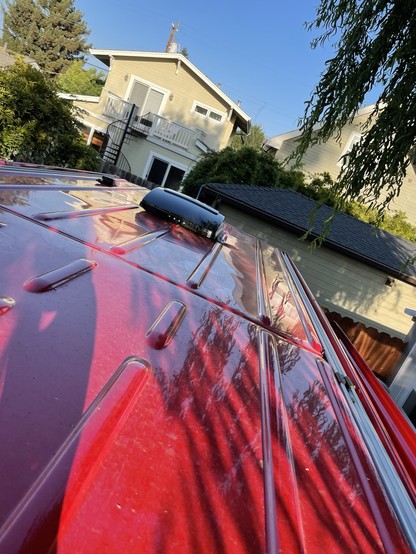
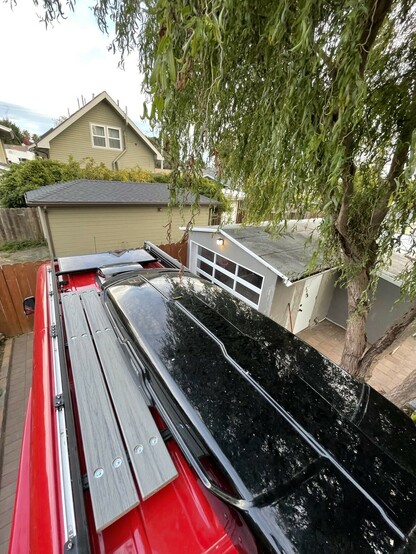
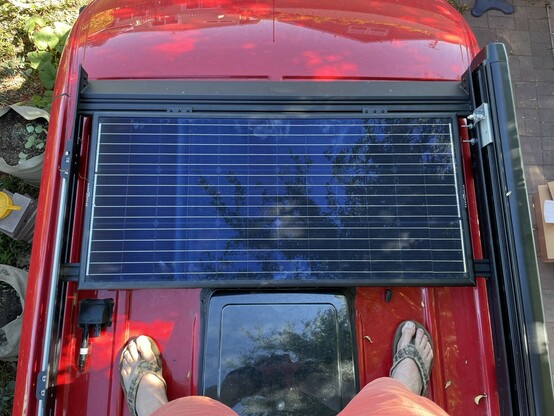
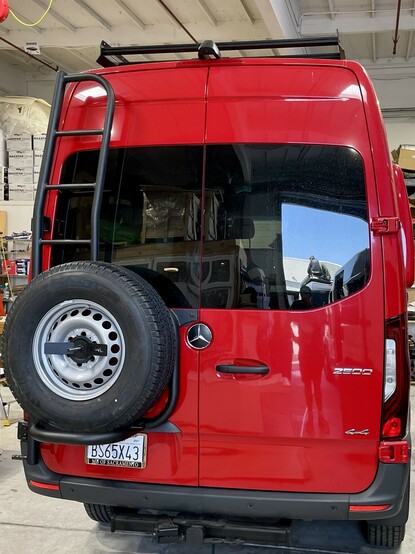
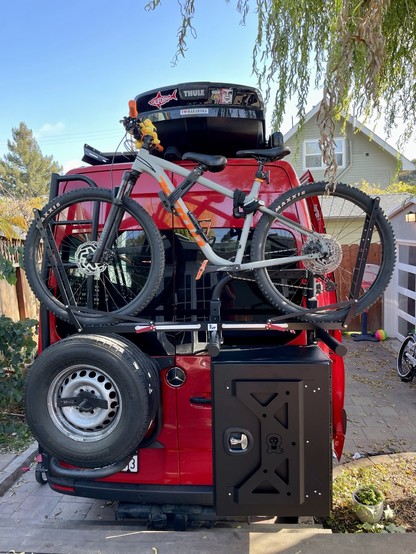
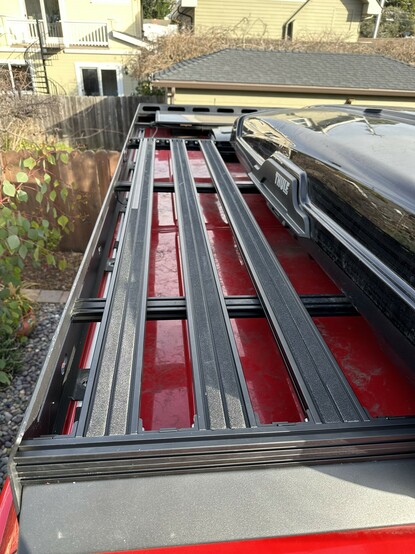
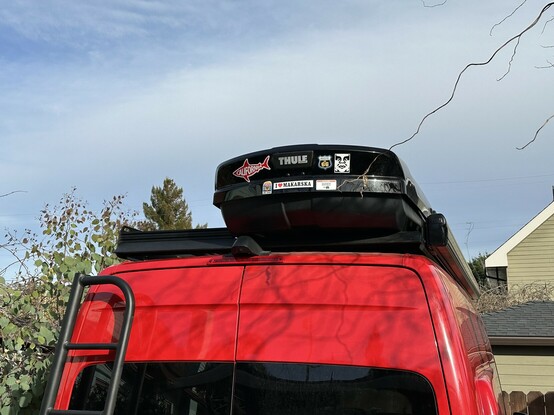
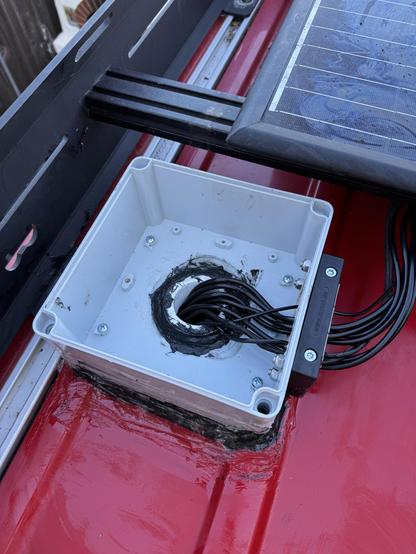
So roof got a rack from https://flatlinevanco.com rear doors got ladder from https://owlvans.com awning from https://www.fiammaonline.com/fiamma-awnings/ and roof rack got solar panel, a box and small deck.

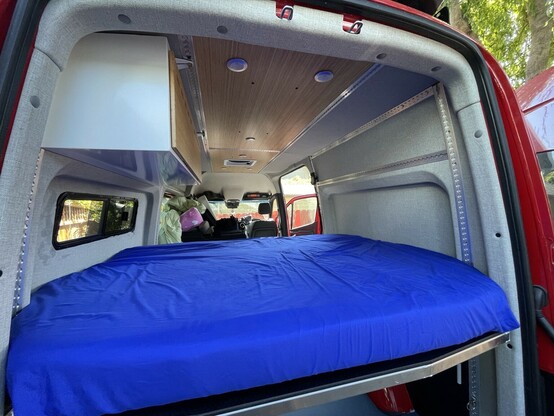
We threw in a bed and a fridge and took a van for first long trip… 9 days to san diego and back…

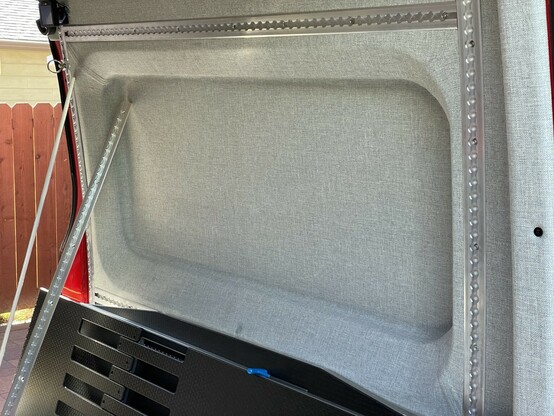
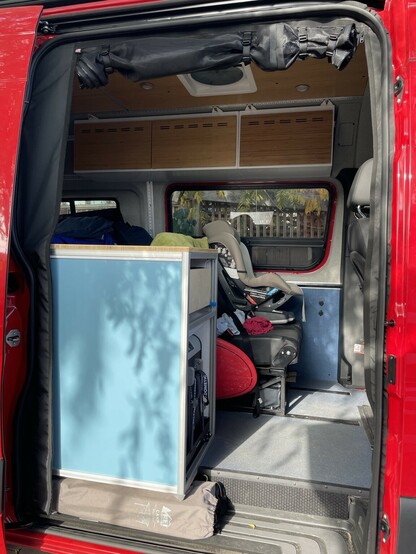
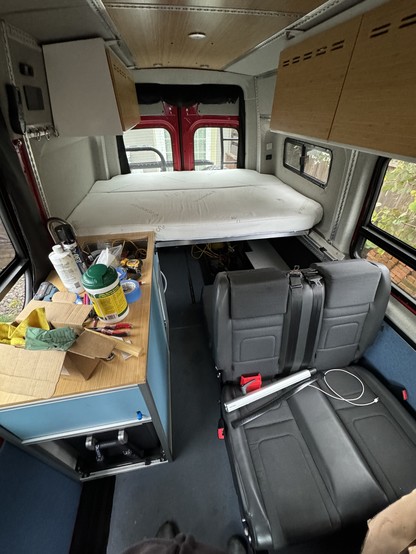
Bed is made by same folks that built adv wagon kit, its on the rails that move up and down and is completely removable, so if you need your cargo space back you can have it. On top of it is flarespace mattress. Queen size bed in a car… pretty comfy… adv wagon shipped their panels for flares (these were not available when I started the build) so I had to insulate and install them
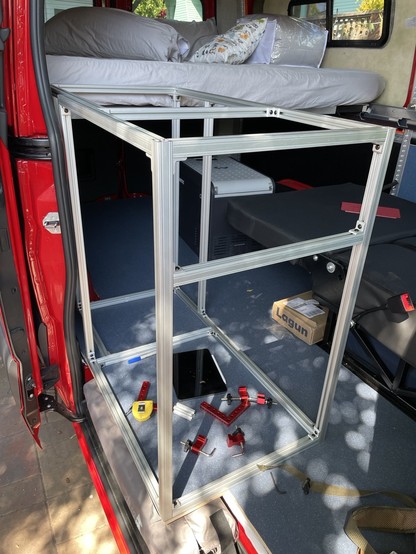
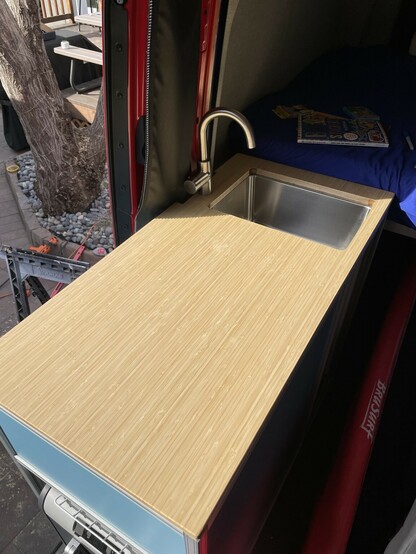
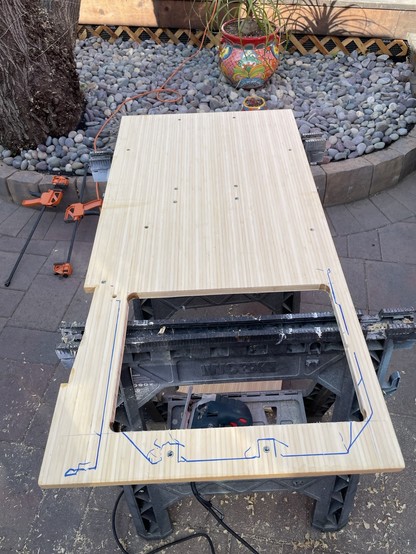
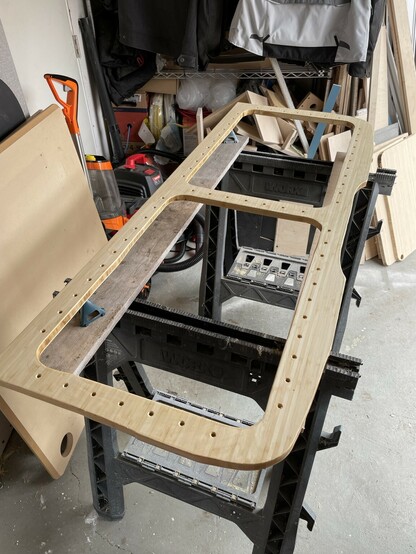
Kitchen was tough… 8020 frame with 6mm ply panels and bamboo countertop. Bolted to cargo tiedown holes under the floor. 8020. Drawer is lined with minicell to minimize rattling. Ue to size of the slide out fridge, kitchen is a bit wide and there is not a lot of space between rear seat and kitchen, but it will have to do…

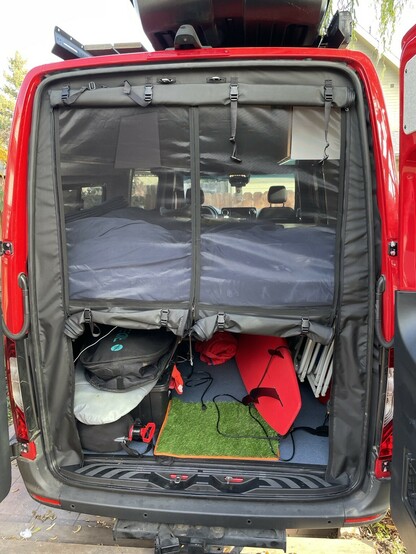
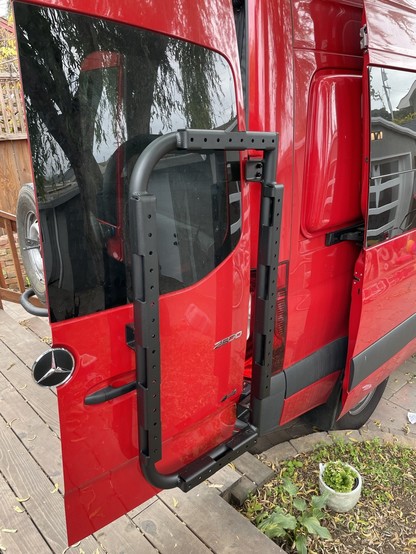
Bug nets on rear doors and slide doors came from https://www.thebugwall.com/ and bike carrier + box on rear doors came from https://owlvans.com


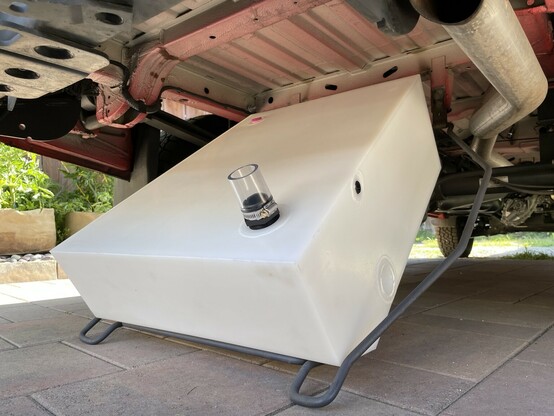
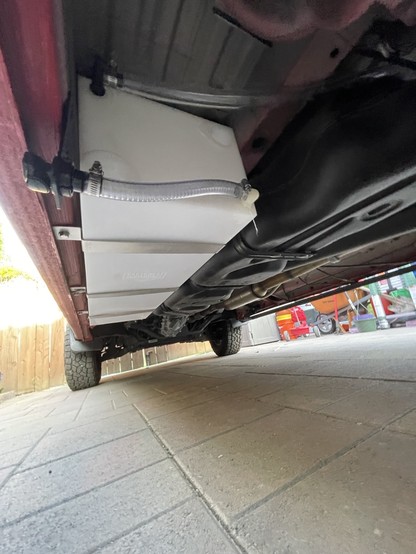
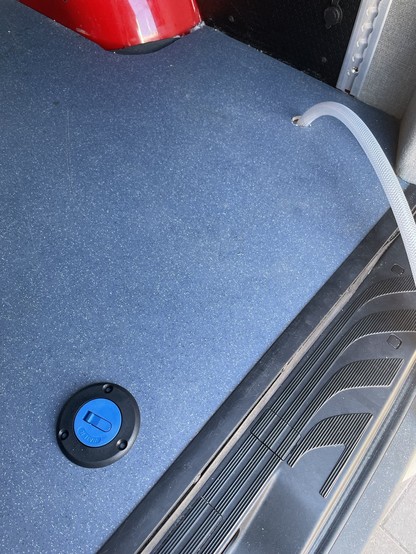
Got some water tanks from https://agileoffroad.com fresh one goes where spare tire was, with fill hole drilled trough the floor, gray tank lives under the car on drivers side. Pump is in the garage on passenger side.
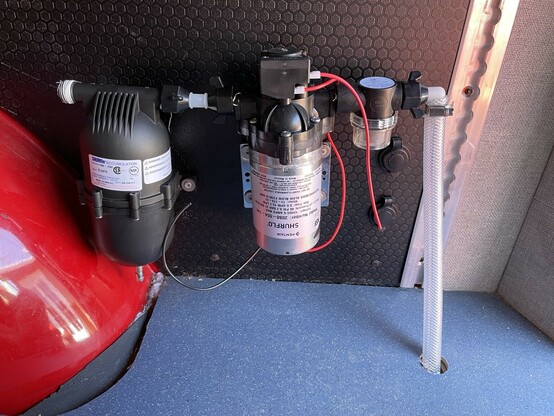

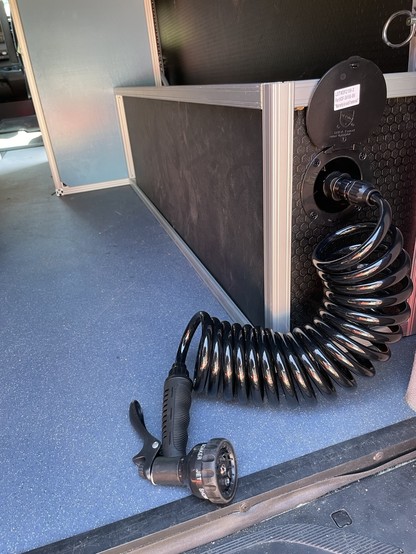
Undermount sink and a faucet from https://www.ruvati.com/ in the kitchen and a little shower in the back right next to the pump. I did not install hot water because it complicates build immensely and we dont really need hot water for our needs.

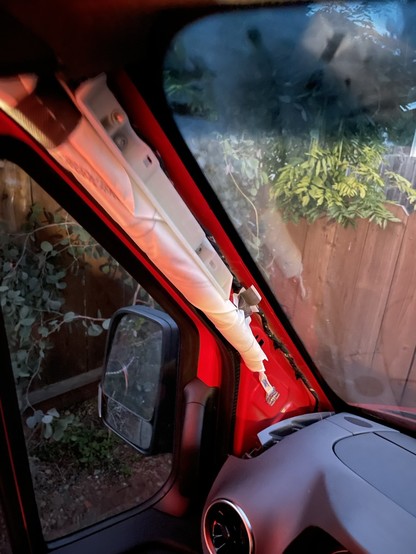
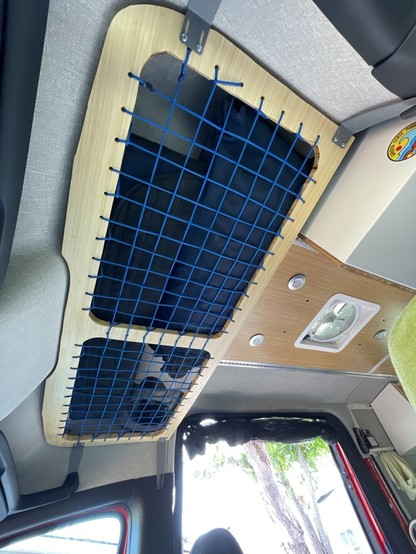
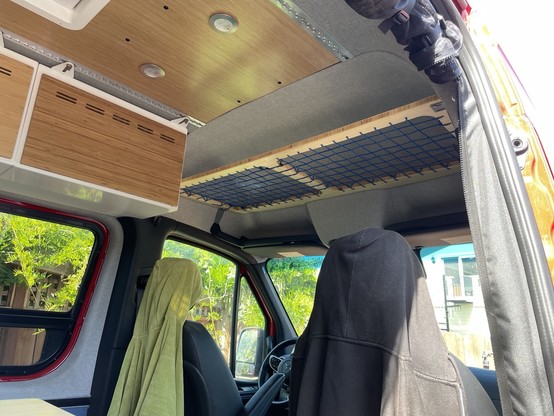
Got some window covers from https://strawfoothandmade.com and built above the head shelf to store them when not in use.

[email protected]
Insulated window covers for Sprinter, Transit and Promaster vans.
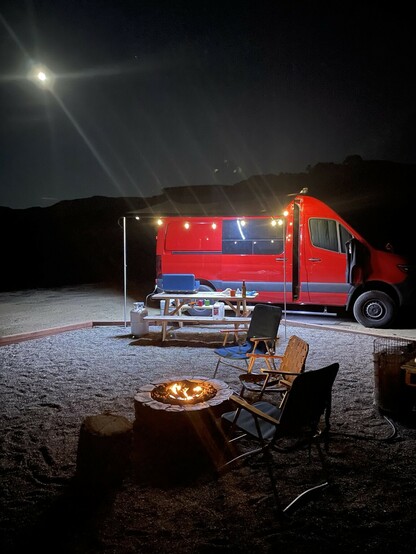
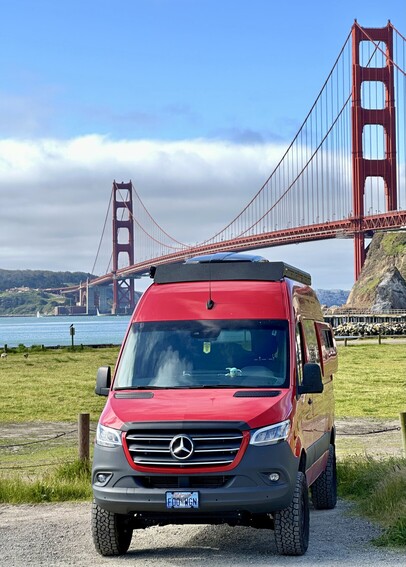
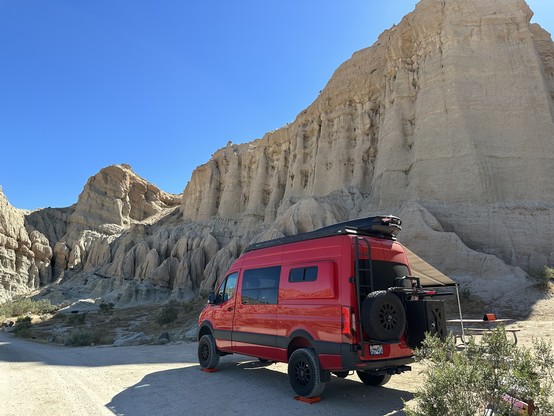
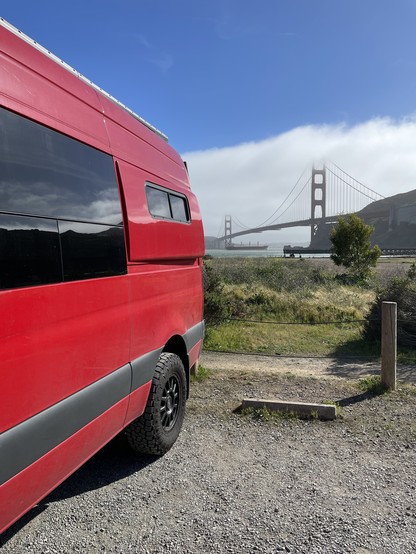
This gets the build to its current state… its not done, i dont think it ever will be, i will update the thread with more stuff as we do them… some glamor shots:


FAQ:
1. Wow, red sprinter, why?
Monochrome cars suck, we need more color in our lives
2. How much did this cost?
For my mental health i stopped keeping track after $110k
3. Whats the mileage?
16l/100km of diesel… do conversion to medieval measures yourself
4. Do you take it offroad?
Gravel roads and beach, no rock crawling
5. Do you live in it?
No
6. Longest trip?
9 days
7. What do you use it for?
Longer trips, beach and camping
8. Do you need second car?
It could work, but we have small car
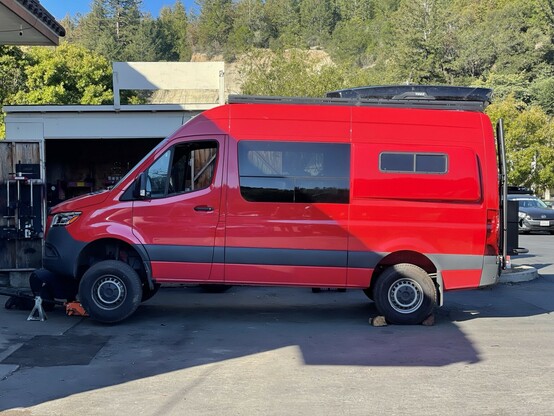
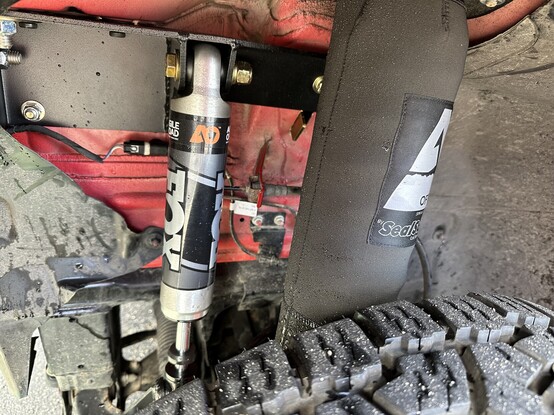
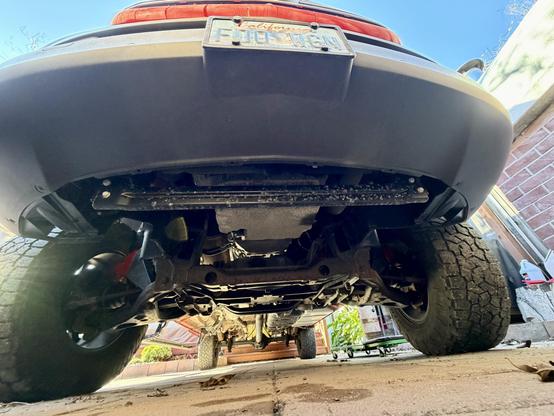
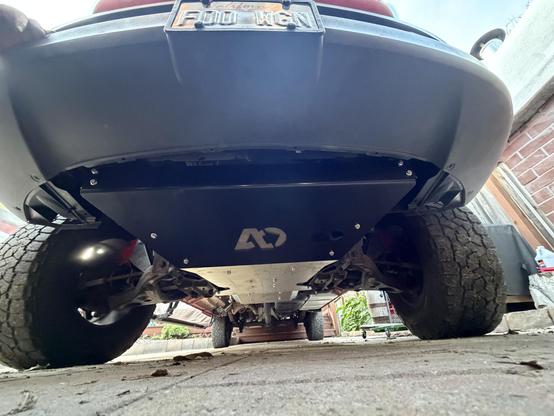
New suspension happened today…. When you do van conversion, you load your box on wheels with a lot of stuff (in our case almost 1.5T) this causes factory suspension which is tuned for empty van to sag and results in bumpy and swaying ride. Fix is to weigh your van and get suspension bits for specific weight.
More here https://agileoffroad.com/product/agile-rip-sprinter-2500-4x4/
This is in no means required thing to do, but after one day with it, I have 0 regrets…

It’s been a while since there was an update on FOO… mostly because almost nothing new happened, and we have used it a lot… she took us to Disneyland, legoland, skiing in June, Las Vegas, Grand Canyon and Zion, various other smaller camping trips around Santa Cruz, had a big expensive 2 year service. Good year…
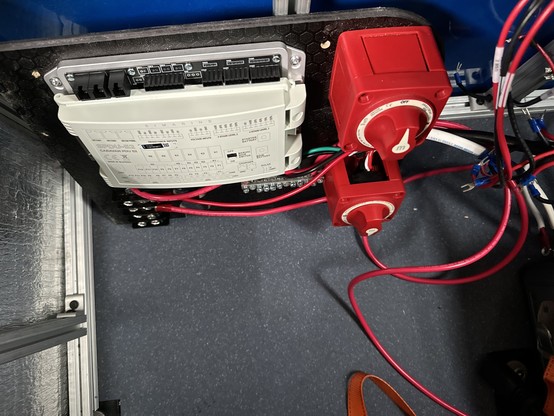
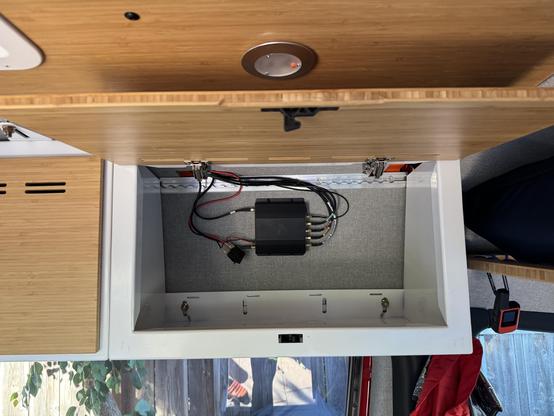
Then two weeks ago I started itching for a change and I decided to do few things… first I replaced my touch screen electrical panel with Simarine VIA system that has mechanical switches and can display sensor information on big screen…
I still have to hook up temperature and tank level sensors but power stuff works as expected
I still have to hook up temperature and tank level sensors but power stuff works as expected
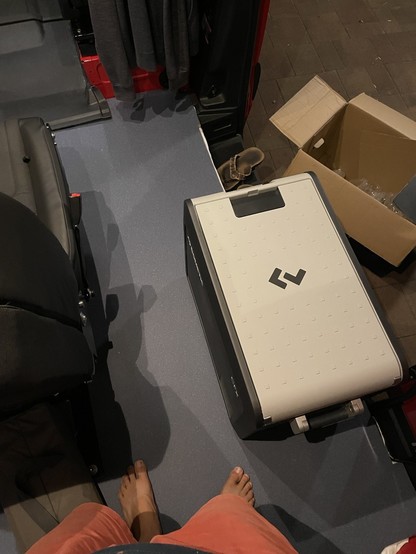
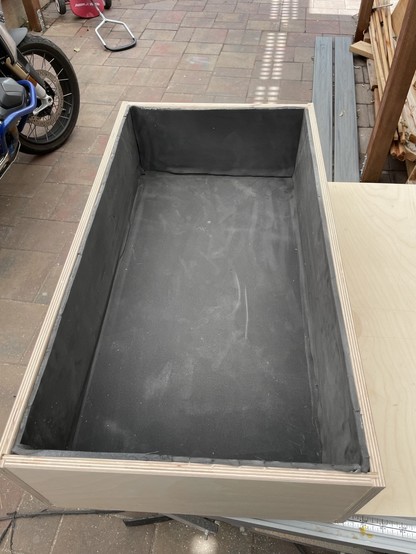
And I added garage slide out for easier loading and unloading cargo… will probably come in handy when cooking from tail too…
And I found out that one of the flares is leaking badly (this explains puddle of water we found on the floor multiple times in last few months) unsure what will be solution here, but it doesn’t make me feel happy…
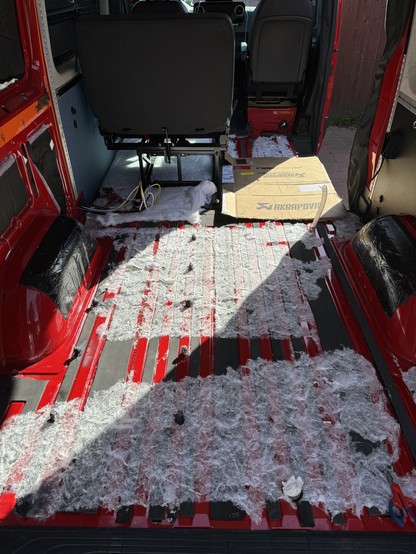
Turns out water finds the way… I did not have taking van apart in my new years bingo, but here I am…
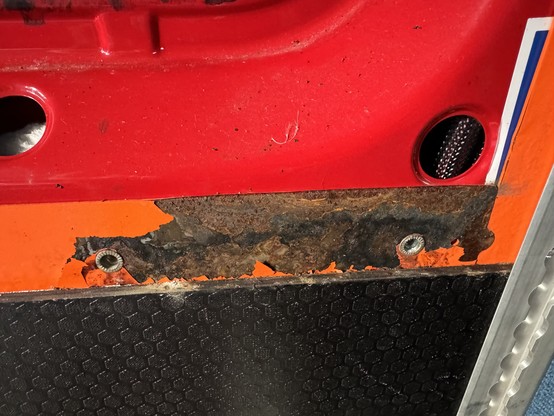

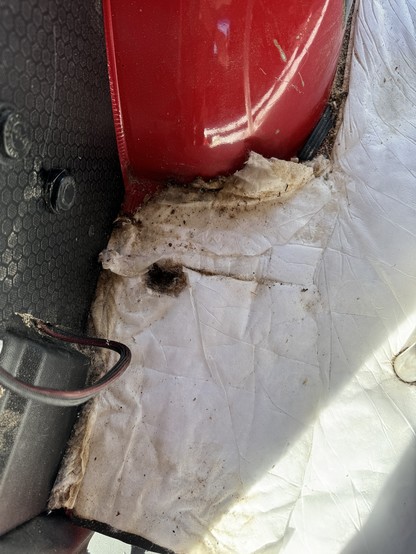
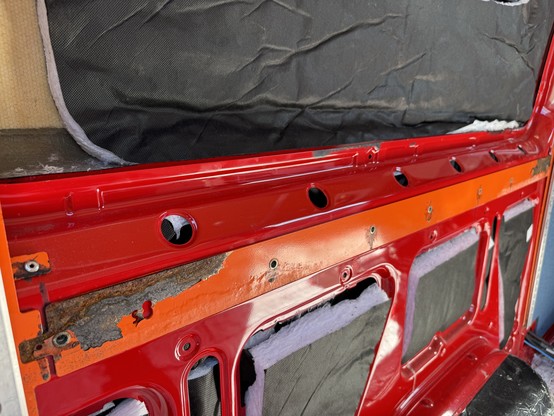
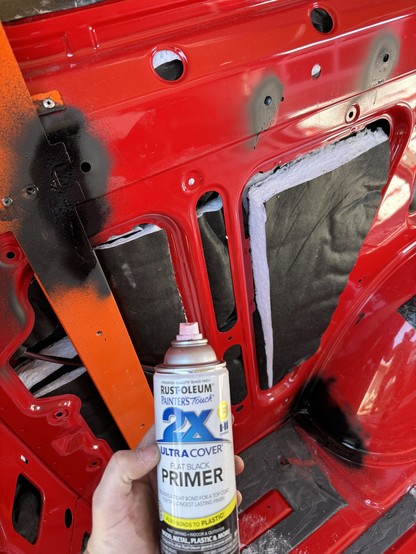
Looks like water saturated whole subfloor insulation (hydrophobic is just a word when you have so much water I guess), but good news is that there is no structural rust… only two small spots that are easily treatable…
Folks that really stepped up with all this mess and they didn’t have to are adventure wagon ( https://adventurewagon.com/ ) they overnite sent me part of a-frame that rusted for free as soon as I contacted them to ask about fixing part that’s toast on the van… 🥰
Van Conversion - Modular Conversion Kits - Portland, Oregon
Adventure Wagon specializes in modular and configurable interior systems for vans. Because our interior systems are configurable, you'll be able to quickly swap them to meet your daily needs. Multiple configurations means greater usability. Find your adventure today with Adventure Wagon!
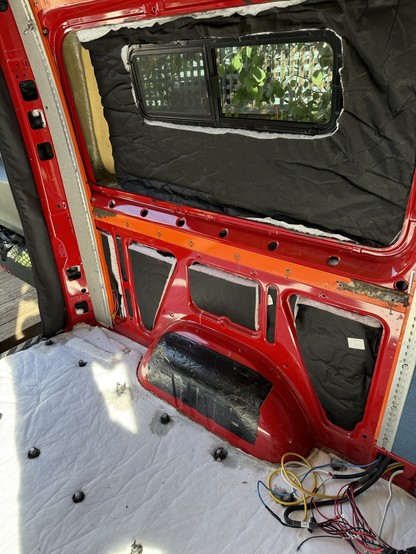
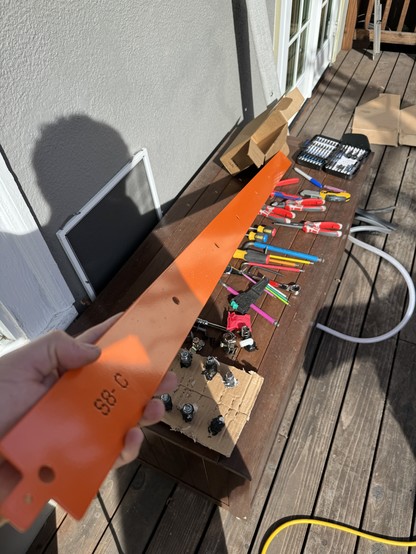
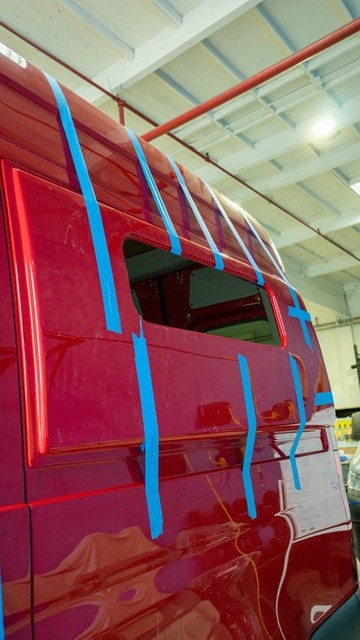
Updates: FOO was in Sacramento, shop took down the flares, cleaned and fixed them again. turns out original installers didn’t use enough glue… I got her back yesterday and now I have to put her back together… with some upgrades… she is getting same layers of insulation as before, but garage now gets to have that slide and two rails of l-track for tying down stuff to the floor…
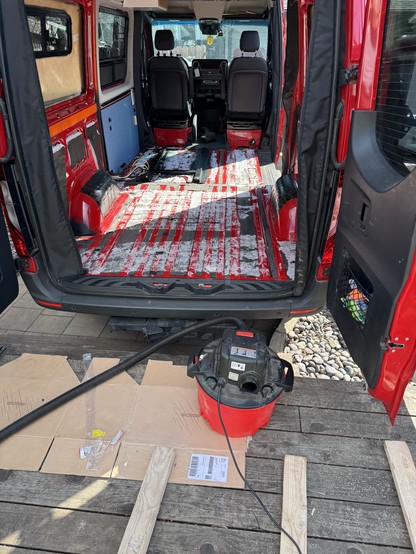
We are almost back to full service, few more things to do, but it doesn’t look like a ruin any more… I did take it for a ride yesterday and it sounds like a brass band, I guess I have two weeks of finding and silencing all the squeaks and rattles in front of me…

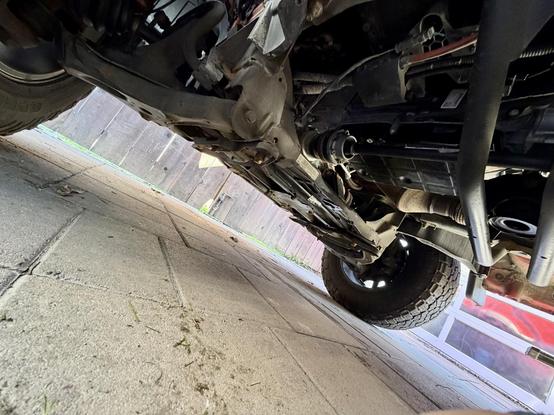

@kviksilver It’s called a bushing.
@kviksilver jazz or more marching?
@grork jazz on highway, marching band on gravel… 😄
@kviksilver what are the bumps for?
@woolie bumps?
@kviksilver the parts that are leaking. I think you called them bumps or bump outs.
@woolie ah, flares… sorry… if you are bigger than 160ish cm you can’t sleep perpendicular in normal sized van, and sleeping perpendicular saves you some 20 cm of space… so if you really need that space, option is to cut the panel between c and d pillars and install a flare, or a bump that gives you that extra width. Flare is glued to the body of the van… this is first time I’m hearing it’s leaking, and it had to be me 🤣
@kviksilver I just scrolled back in your timeline and holy shit. That is quite the dedication to a hobby. Very impressive.
Thanks for the “flares” explanation. Interesting.
@woolie thanks, its been pretty fun ride till now… this is really my first big problem… I’m a bit worried what’s gonna happen once I pull floor out, who knows for how long that has been leaking, and I can see rust already… 😳😱
@kviksilver @woolie Makes you wonder if it was rusting before you got it.
@TPOHolmes @woolie orange part on the photo I installed, so probably not, but I’m sure there are parts somewhere in there quietly rotting always since seconds off the production line…

@kviksilver wow, dobru si ti to "FAP Masinu" tu slozija. Ajme, svaka cast ❤️ 😃