1870s-type waist overalls.
Sewing the outseam with a double row of stitches. To avoid having to go "through the tunnel" multiple times, the outseams are done before the inseam, which is the opposite of the usual order on most jeans.

#selfmadevintage #outseam #eurekajeans #forover30years #justahobby #notforsale
1970s Lee 200Z and Copper King 99Z comparison
Apart from the "half selvedge" on the Lee, the construction of the outseams is identical, sewn with a double row of chainstitches right next to each other.
Pic 1 left and pic 2: Lee 200Z
Pic 1 right and pic 3: Copper King 99Z

#vintagejeans #vintagedenim #realvintage #lee #copperking #chainstitch #outseam
1940s Lee Riders (5)
Today I'll look more closely at the top stitching on the side seams next to the front pockets. Besides being quite sloppily sewn, these top stitches are interesting in that they are sewn with two rows of chain stitches, just like the outseams I wrote about in my previous post. In later Lee Riders models the top stitching on the side seams was changed to a single lock stitch.
The top stitching on the side seams was done using the same type of double-needle machine as that used for the outseams. In my previous post I wrote that one needle must have been positioned about 1/4 inch (6 mm) behind the other, and here is the evidence for that; in pics 3, 4 and 5 you can see that one row starts a couple of stitches or about 1/4 inch after the other row, which must be due to the spacing of the needles. This is the starting point, by the way, not the ending point. Due to the nature of their structure, chain stitches easily unravel from the end, but not from the beginning. These side seams were therefore sewn towards the waist belt on both sides, so that the end is safely caught inside the waist belt to prevent unraveling.
Another interesting detail is how the overlocking is just long enough to cover the pocket bags, leaving some of the seam without selvedge unfinished. It's a mystery why they wouldn't have gone one or two inches further, but it appears to have been quite common in Lee Riders from this period. The overlocking is done through all layers of the front panel and the back panel together, by the way. In later Lee Riders models the front panel and the back panel were overlocked separately. Which makes me wonder whether the overlocking was done before or after the outseams were closed ... If the overlocking was done first, it may well be that the top stitching on the side seam was done right after closing the outseam by the same operator. Quite a puzzle!

#vintagedenim #vintagejeans #realvintage #outseam #topstitch #chainstitch #lee #leeriders
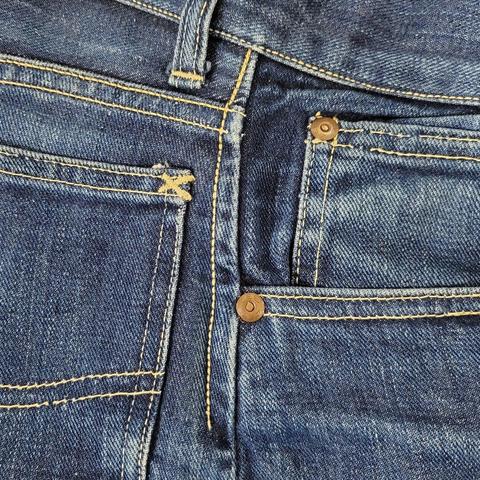
1940s Lee Riders (4)
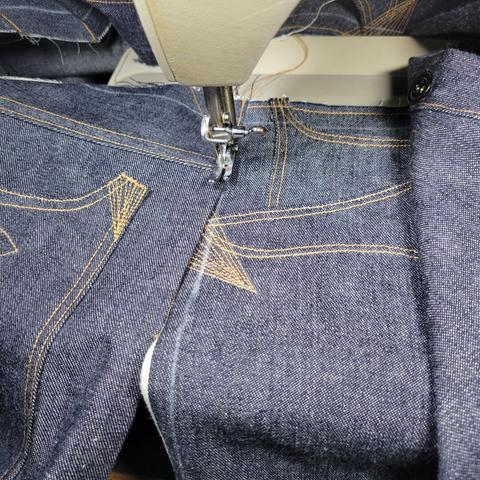
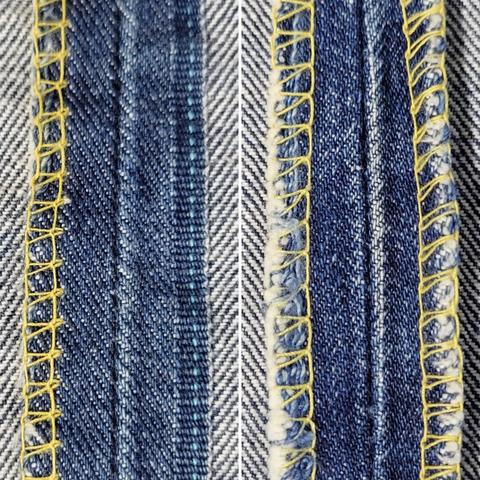
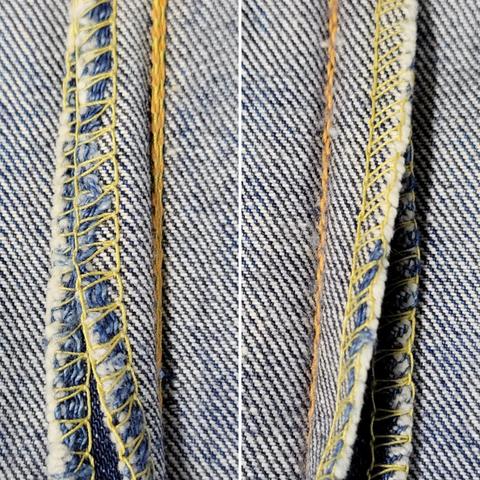
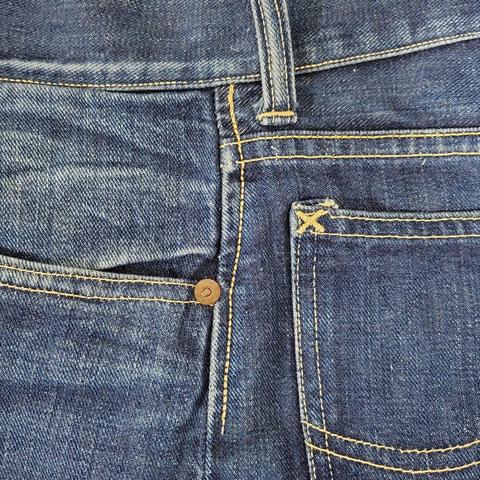
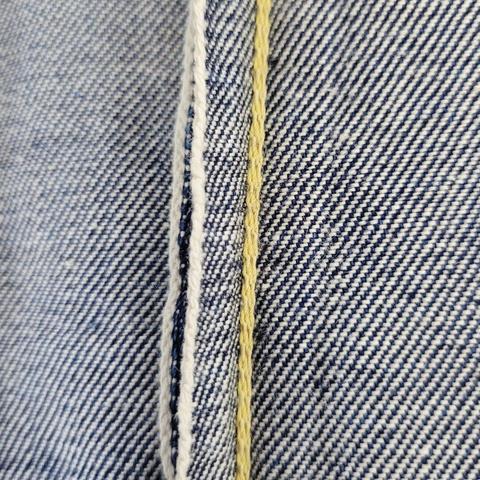
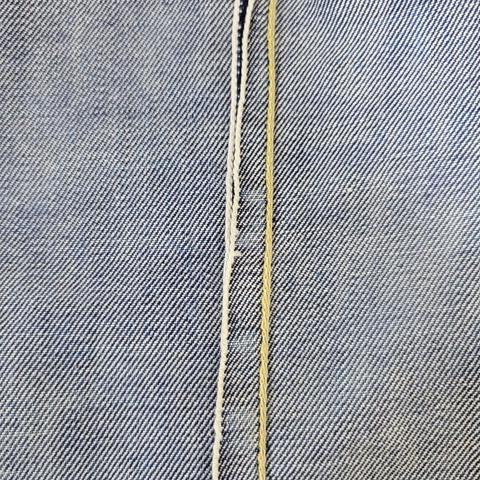
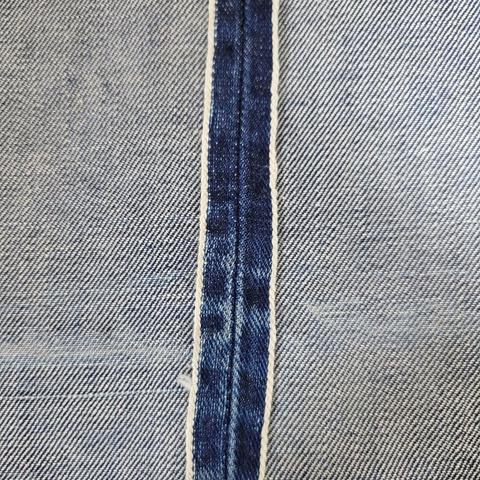
Next we'll take a look at the outseams. It wouldn't be Lee if these weren't also a bit different from most other brands. The distinguishing feature is the double chain stitch used for the plain seam. If you look closely you'll see that there are two rows of stitches right next to each other.
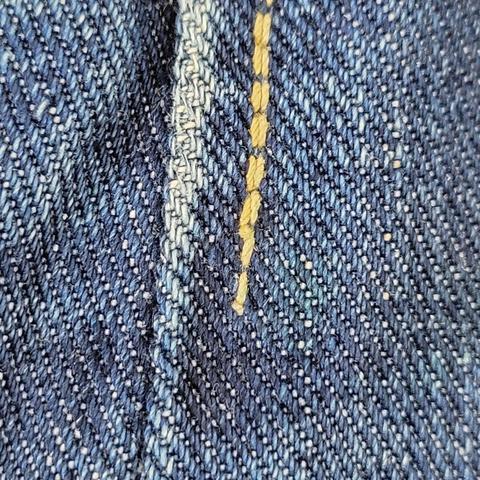
Were these seams sewn in two passes on a single-needle machine, or in one pass on a double-needle machine?
My theory is that they were done in one pass on a double-needle machine with one needle about 1/4 inch (about 6 mm) behind the other, ever so slightly offset as to result in two rows right next to each other.
My reasoning for this is twofold:
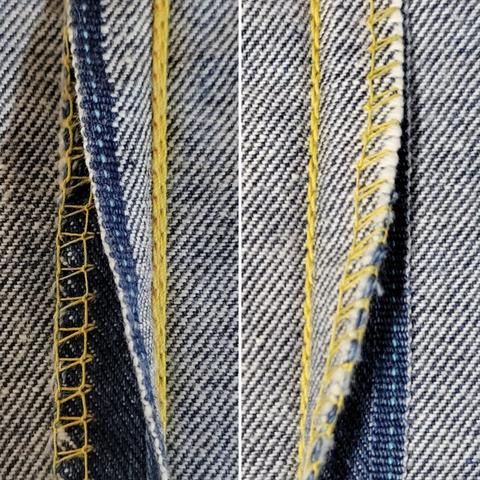
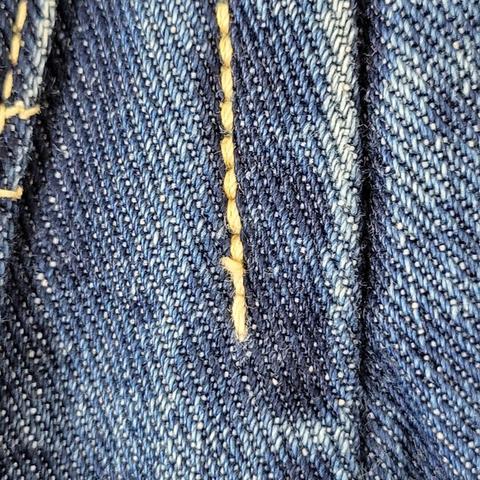
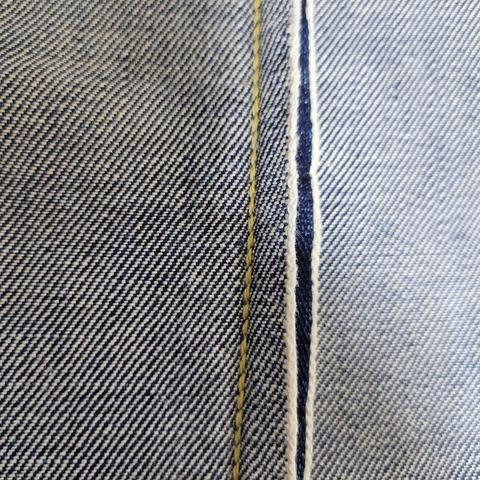
1. The overall sewing in other areas is fairly "sloppy", so if these two rows were done in two passes I would expect them to be unevenly spaced or overlap here and there, but they don't -- they are perfectly parallel along the length of the seams.
2. The top stitching on the side seams next to the front pockets holds concrete evidence, but I'll write about that in my next post.
This double chain stitch is one detail that most better quality repros usually get right, which is good because the bulk of the double chain stitch affects the fading on the outside.

#vintagedenim #vintagejeans #realvintage #outseam #chainstitch #lee #leeriders #eurekajeans