Did a small #38c3 project site entry about the #PDBrick.
https://events.ccc.de/congress/2024/hub/de/so/project/pdbrick-public-usb-c-charger/
Come find it at the #Unterland assembly (https://38c3.c3nav.de/l/c:0:109.41:153.84/ )
Did a small #38c3 project site entry about the #PDBrick.
https://events.ccc.de/congress/2024/hub/de/so/project/pdbrick-public-usb-c-charger/
Come find it at the #Unterland assembly (https://38c3.c3nav.de/l/c:0:109.41:153.84/ )

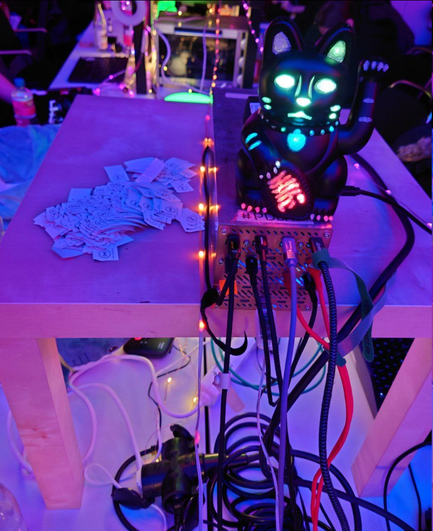
Attached: 4 images Now introducing: #PDBrick! 1.7 kW worth of raw USB-C PD power. 24x USB-C ports. 4x 100W, 20x 65W. (4x USB A, but we don't talk about those :P) I never did a post of the project that @techbeard and I did last-minute before #CCCamp23, so here you go. Build log in the thread below. #usbC #usbPD
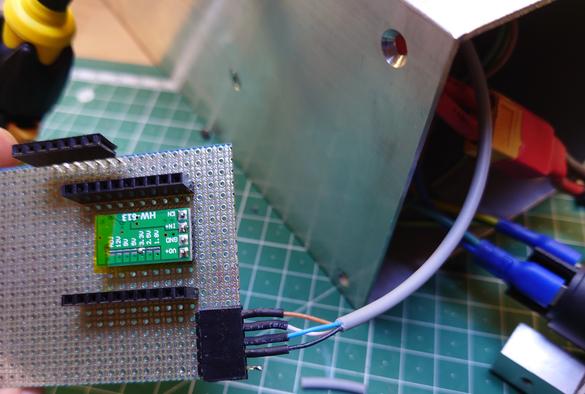
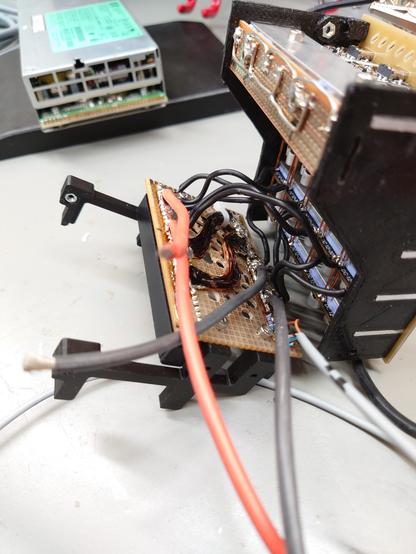
As the server PSUs feature #SMBus connectivity, we planned to display some metadata on an OLED.
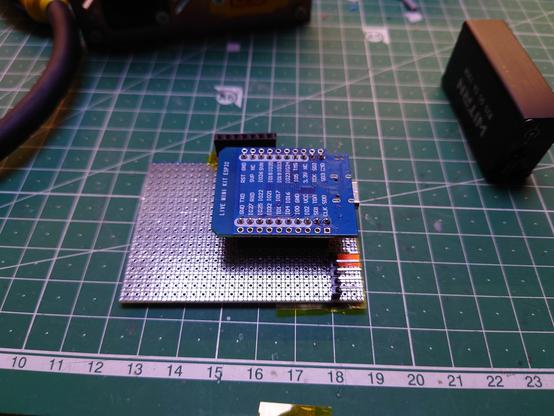
I soldered up a small perfboard with a buck converter, #ESP32 and a few connectors.
The ESP32 only communicates with the low-side PSU, as I didn't want to implement isolated I²C.
But I noticed that the values coming from the PSU were pretty hit & miss anyways. Especially during light loads.
So I simply used the values that matched the actual values closest and doubled them.
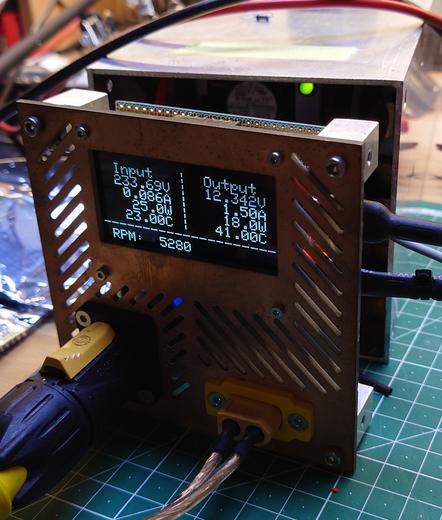
Once it was used for a longer period, we noticed the aluminum extrusion being pretty warm to the touch (~40°C).
Apparently, the server PSUs use around 40W during idle. But when drawing that amount from the output, the power usage doesn't go up that much, so they seem to be burning it internally when having (almost) no load?
Also, maybe the aluminum could be a few degrees colder when painted? Because bare aluminum doesn't seem to radiate much heat.
Or we'll install additional fans.
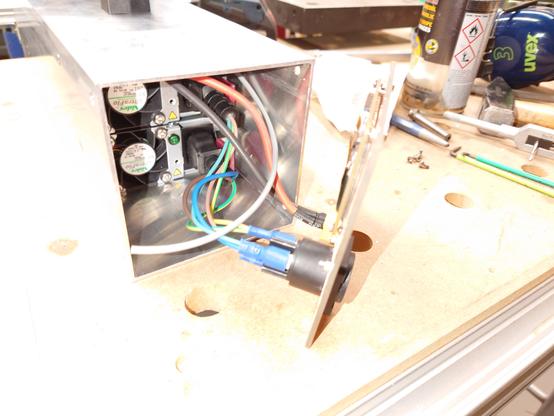
The 230V wiring consists of a #powerCON #TRUE1 socket to two IEC plugs. We had to remove the jacket, because it would've been too tight otherwise.
The aluminum casing is grounded via the good connection between PSU casing and aluminum. (see above)
You might also notice the #XT60 plug. It's a generic 24V output for connecting external devices like LiPo chargers etc.
The main reason for its existance is still having "left-over" power budget from the power supplies (~600W) :D
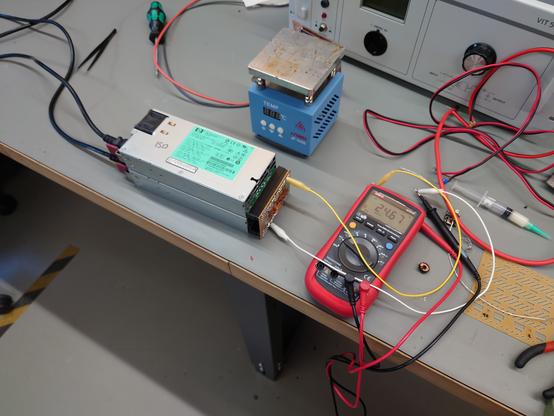
After a final test of the electronics, everything can be put together.
@techbeard drilled and countersunk the necessary holes in the aluminum extrusion and fabricated some corner pieces, so the back plate can be screwed to the extrusion.
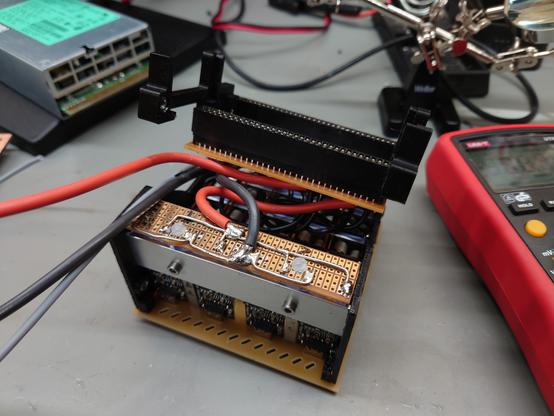
We mounted the rails, backplane and #usbPD module array inside the extrusion. Now the PSUs can be slotted in, which is quite satisfying.
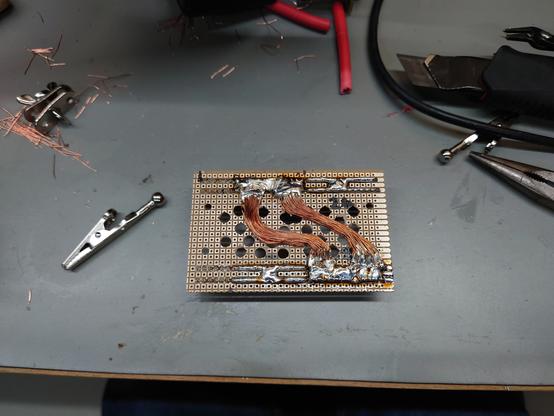
As time began to run out, I quickly threw together the backplane PCB using perfboard, thick copper wire strands and lots of solder. It has to potentially handle up to 100A.
And yes, the wonky speed holes are necessary for improved airflow :P
With the added resistors and bridges, the PSUs turn on and everything works.
Wiring the backplane to the modules was a bit frustrating, because of the thick diameters, thermal mass and tight spacing, but worked out fine.
To connect two server power supplies in series, the PE reference of the secondary has to be severed for the high-side PSU.
On those HP DPS units, that's pretty easy. You have to open it, file down two metal spacers a bit, put insulating washers between PCB and case and replace the metal with nylon screws.
This only removes the connection between output GND and PE. The metal case remains grounded and the floating output is still referenced to PE through the low-side PSU.