Lens-Artists Challenge #332: Shoot From Above

This week Ritva is hosting the Challenge, and her instruction for the week is to ‘Shoot From Above‘. ‘Let’s Shoot From Above this week!’ she says. ‘Let’s get creative with a top-down perspective. Let’s have fun.’ Well, I’m certainly eager to have a bit of fun with the Challenge, so here we go.

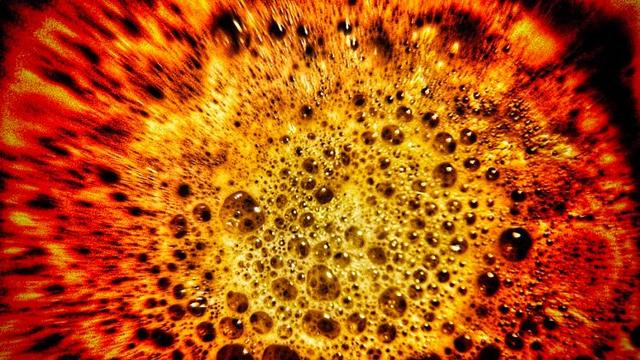
A couple of years ago, I went through a patch where I would take a lot of photos from above. In fact if you search ‘coffee’ on my site you might find dozens of entries, many more than I thought. I can’t remember how it all started, but I became fascinated by the abstract patterns that appeared in the surface of a cup of coffee after it came out of the machine. For the record, I’m talking real coffee here, espresso, not that black thin stuff in big polystyrene cups that you see in the movies. That can’t be real, right?

Anyhow, I would pop a capsule in the machine, watch the coffee come out, and then quickly snap the pattern of bubbles and currents that would appear on the surface of the espresso with my smartphone. Incidentally, the patterns that appear when you make coffee with real ground coffee are altogether different, but we don’t have one of those machines, so I can’t do that. After I’d snapped an image I would take it into SnapSeed photo editor and edit it into an abstract, with pop effects, accentuate, desaturate, the works (I even created a couple of sequences called ‘coffee’ to process them automatically). 

So there was my plan for the week, to take a quick snap of the surface of my daily coffee with the smartphone, and edit it accordingly. And then John made a comment on my last entry to the Challenge; ‘I always love your creative take on photography and your use of tools that are out of the ordinary.’ Oh darn, I thought. My daily coffee sounds far too pedestrian now, I’m going to have to do something different. But what? I wanted to keep it simple, and the weather is awful so I’ll have to photograph the entries around the house.

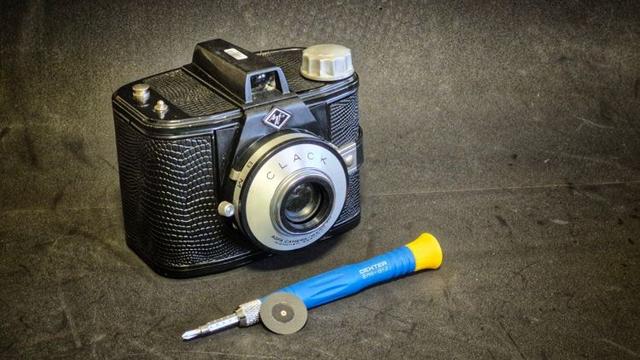
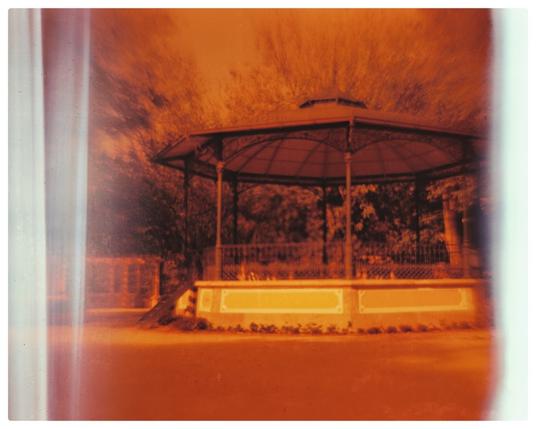
And then it hit me: the Deakinizer. Back in 2007, cinematographer Roger Deakins created a lens that would fit on a film camera to produce an almost ’tilt/shift’ image, with a sharp centre and blur around the edges. This became known as the Deakinizer effect and has been used a lot in films ever since. You can recreate this effect in PhotoShop, but where’s the fun in that? I had read somewhere that a cheap way to make a Deakinizer is to hold a reversed wide-angle converter in front of a camera lens, and I have an old Panavision wide-angle converter just for this purpose. And so my entry to this week’s Challenge was reborn.

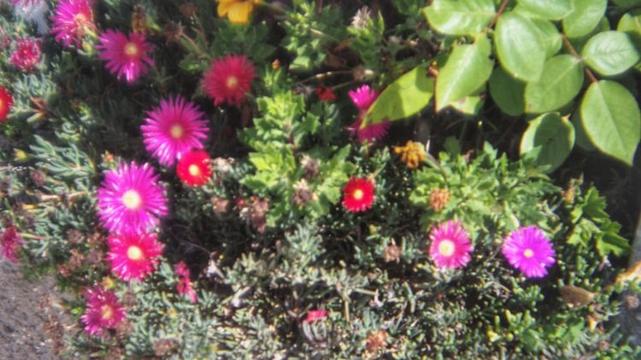
During the week I wandered around the house, smartphone in one hand and the ‘Deakinizer’ in the other, looking down and taking close-ups of things that appealed to me. Images were edited in SnapSeed, as before, and the featured image of the top of a galão (what the Portuguese call café con laite) with the Deakinizer is a loose homage to my original project.

Next week, Egídio from Seeing the World Through Brazilian Eyes will host the Challenge, so hope that you can join us. Themes for the Lens-Artists Challenge are posted each Saturday at 12:00 noon EST (which is 4pm, GMT) and anyone who wants to take part can post their images during the week. If you want to know more about the Challenge, details can be found here, and entries can be found on the WordPress reader using the tag ‘Lens-Artists’.

If you are on Mastodon, you can now follow this blog directly. Just go to Mastodon and follow the ‘Snapshot’ WordPress account at @keithdevereux.wordpress.com. All new posts will be automatically updated to your timeline.

#Abstract #Blurry #Challenge #Deakinizer #Glitch #Lens #LensArtists #LensFlip #LensMod #Photography #ReverseLens #ShootFromAbove #LensArtists

Lens-artists challenge #332 – Shoot From Above

Let’s Shoot From Above this week! Let’s get creative with a top-down perspective. Let’s have fun. One cool idea for this challenge is to explore the world of flat lays. …

Ritva Sillanmäki Photography

Yet another Agfa Clack? This time we’re going to try a pinhole conversion.

My experiments with pinhole photography have never been really satisfactory. Firstly there was the pinhole option on the Diana F+, and then I discovered digital pinhole photography and the worst lens in the world, the Thingyfy Pinhole Pro. Yes, I could have bought myself a dedicated pinhole camera, like the Ondu or similar, but I really wanted to make my own.

A pinhole photograph taken with th Diana F+ using Lomography Redscale film.

Actually, I’ve had a home-made wine box pinhole camera on the go since, I don’t know when, but I’m not sure that’s never going to be finished. Which brings me to the Agfa Clack. To date I have three Agfa Clacks. There’s my ‘original’ Clack, the one I bought first and used for the Frugal Film Project in 2023. The second was bought to flip the lens, but the film wind-on knob was broken and I’ve never used it, and the third I added to replace the second one and flip the lens, which worked beautifully.

Back in the woods with my favourite old tree and a flipped lens Agfa Clack.

But now I’ve added a fourth to my collection and one might wonder, what on earth for? Well this time I would like to convert the venerable Clack to a pinhole camera, quite a common thing to do, so far as I can tell. Of course this one was in the ‘Not Passed’ category of the Kamerastore website, and is described as having ‘a significant amount of dust inside the optics that will affect image quality, but it is otherwise functional.’ Well, a little bit of dust will be no obstacle, seeing as I intend to rip out its innards anyhow (carefully, of course) before reassembling it with a pinhole behind the shutter mechanism. 

The Clack is a simple 120 roll film box camera introduced by Agfa in 1954. It will produce eight 6x9cm images per roll of film and has a fixed shutter speed of 1/30s (plus bulb) and two aperture settings, for sunny or cloudy weather (approximately f16 and f11, respectively.) It also features a ‘close-up’ lens or a yellow filter depending on the model. The early models were made of metal and the later versions of moulded plastic.

Taking apart a Clack is the easiest camera conversion ever. First remove the silver ring by unscrewing the single screw underneath the lens turret. Then twist the cover and it should pop off, revealing the lens above the shutter and aperture mechanism. 

The lens is held in place with a couple of pins and a single screw. Undo this screw and lift off the lens. Below is the aperture and shutter fixed to a plastic plate with two screws. Undo these and prise off the plate. You won’t be able to lift it much, though, since the two wires that power the flash are soldered to contacts under the plate. These wires need to be cut to fully remove the plate. 

Underneath the plate is a hole which opens to the camera body. The pinhole needs to be fixed here. It is possible, apparently, to just place this centrally over the hole and screw the plate back in place, but my pinhole kept on moving and I ended up glueing it in place. Just make sure that the pinhole is centred in the hole. Once the pinhole is in place, the camera can be reassembled. 

And that’s it. Except that for me it wasn’t quite. Although the lens is normally removed, I read somewhere that replacing the lens can give a bit extra sharpness, so I thought I would give that a try. However, what I did was take the lens, remove it from the holder and then flip it. Hopefully, this will give a slightly sharper pinhole image with distortion around the edges: the Deakinizer effect.

The distance of the pinhole to the focal plane (the focal length) of the Clack is about 72mm, and the pinhole aperture was 0.3mm, so by dividing the the focal length by the diameter of the pinhole we get an f-number of f240. I’ll use this measurement to determine the exposure time depending on the speed (ISO) of the film that I’ll be using.

Hopefully I’ll be able to get the flipped lens pinhole Agfa Clack out before the current Shitty Camera Challenge ends in January, but I’ve got a fair few things to do before then. If you are on Mastodon, you can now follow this blog directly. Just go to Mastodon and follow the ‘Snapshot’ WordPress account at @keithdevereux.wordpress.com. All new posts will be automatically updated to your timeline.

#Agfa #AgfaClack #Blurry #Camera #Clack #Dreamy #LensFlip #LensReverse #Pinhole

If you go to Google and search for ‘make disposable lens for camera’ you’ll get thousands of posts, videos and adverts for just that: making or buying a body cap lens from bits of a disposable camera. Like most people, I suspect, I first came across this idea from a YouTube video by @MathieuStern, who took apart a Kodak disposable camera, harvested the lens then cut a hole in a spare body cap, and fitted the lens inside. And it worked! Quite nicely, in fact.

So of course, I was quite taken with this idea and wanted to give it a try. Naturally, being me I was too mean to fork out €15 or more for a Kodak disposable camera so took a slightly different course. It was during the first Frugal Film Project, and I was really enjoying playing with an Agfa Clack. But what I really wanted to do with the Clack was flip the lens. I couldn’t bring myself to destroy my original Clack, so I bought another one just to take out tge lens and flip it. At the same time I picked up a Keystone Le Clic Fun Shooter FS40, a 35mm point and shoot, with the express intention of taking out the lens and flipping that, too.

Did I mention this was in September 2023? I didn’t? So, what happened? Well, I flipped the lens of the Agfa Clack quite successfully, and had (and continue to have) hours of fun with that. But although I removed the lens from the Le Clic, and drilled a (not quite central) hole in a spare body cap that I had knocking around, no matter how I tried I couldn’t get the flipped lens to focus properly. Then I got sidetracked with something else, and the lens and the body cap were temporarily put aside for later. And ‘later’ never came, I forgot all about the little plastic lens.

Wind forward a year and it’s July 2024. I’m tidying out a camera bag to pack some cameras and lenses to take on holiday. Unzipping one pocket I find a little filter box, which rattles, and inside is the lens cap and plastic lens from the Le Clic. Well, I couldn’t do anything then, but now it’s September and we’re back from holiday so it’s time to make that little plastic lens into something I can use with my mirrorless cameras.

One of the problems I had was getting the lens to focus properly (or at all) when flipped so I abandoned that idea and decided to just mount it onto the body cap. I also discovered that the lens focuses much better with an aperture hole (some have used the aperture from the camera, but in the Le Clic it was all moulded plastic and impossible to get out). I found a nice rubber washer in the toolbox which was thick enough to get a nice focus with the body cap and had a centre hole that was about the same as the Le Clic. 

First of all I mocked up the lens with black insulating tape, and it worked really well. So I brought out the heavy duty adhesive and glued all of the pieces together. Once dry, which doesn’t take long with the two-part adhesive, I fixed the body cap lens to an Olympus Pen E-PM2. Setting the camera to aperture priority, where it selects the appropriate shutter speed, I set out ‘around the block’ for some exploration. The images were a little ‘soft’, of course,  but we’re using a plastic lens so I wasn’t expecting pin sharp images — and would have been really disappointed if they had been. 

Of course, there’s no way that this lens will replace my Olympus Body Cap Lens, but it was certainly a fun exercise. I would add that the sweet spot focus-wise for this lens seems to be roughly 3m away, so I’m going to have to be picky with what subjects I choose to use this lens.

If you are on Mastodon, you can now follow this blog directly. Just go to Mastodon and follow the ‘Snapshot’ WordPress account at @keithdevereux.wordpress.com. All new posts will be automatically updated to your timeline.

https://keithdevereux.wordpress.com/2024/09/23/making-a-lens-for-a-mirrorless-camera-from-an-old-35mm-point-and-shoot/

#Blurry #Camera #DisposableCamera #Dreamy #Experimental #LeClic #LensFlip #Mirrorless #PointAndShoot

- YouTube

Enjoy the videos and music you love, upload original content, and share it all with friends, family, and the world on YouTube.

I'm taking part in the Frugal Film Project this year, but finally have the images back from last year's December roll. Here's a trichrome image of a tree taken with the flipped lens Agfa Clack. #FrugalFilmProject, #LensFlip, #TrichromeEverything,
From a couple of weeks ago. I wanted to test an Agfa Clack for 'fat' rolls with something that wasn't Fomapan Retro so I loaded the flipped lens Agfa Clack with Lomography Redscale. It was still a fat roll, and the light leaks on the first frame were staggering. Don't forget this is a 6x9 frame. #FirstOnTheRoll, #FatRolls, #LensFlip, #Redscale,