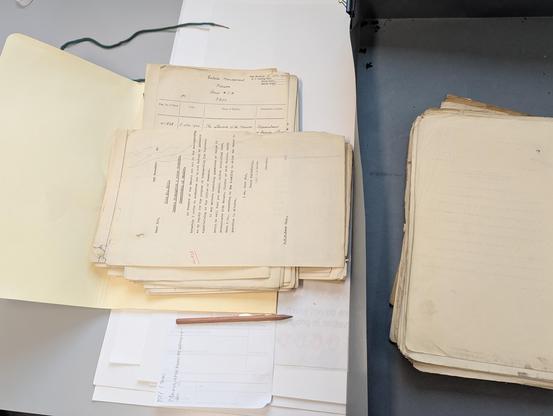
Spending my Friday in an intellectually happy place. Working solitary in a heritage library surveying book conditions.
Spending my Friday in an intellectually happy place. Working solitary in a heritage library surveying book conditions.
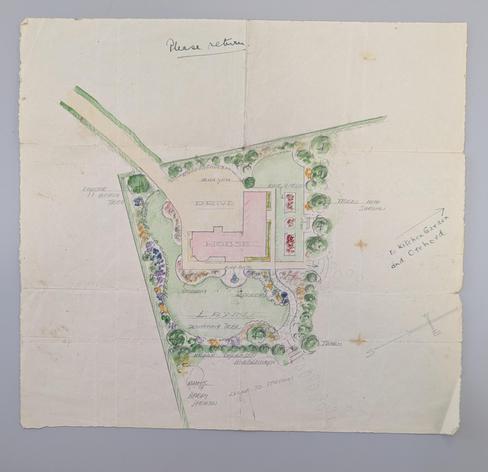
A charming garden design for a parsonage near Portsmouth, UK
Lambeth Palace Library, QAB/7/6/uncatalogued
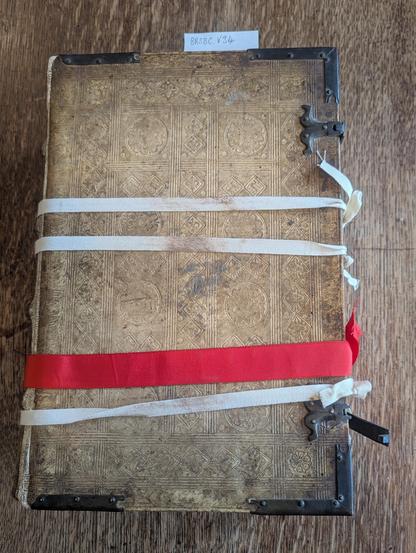
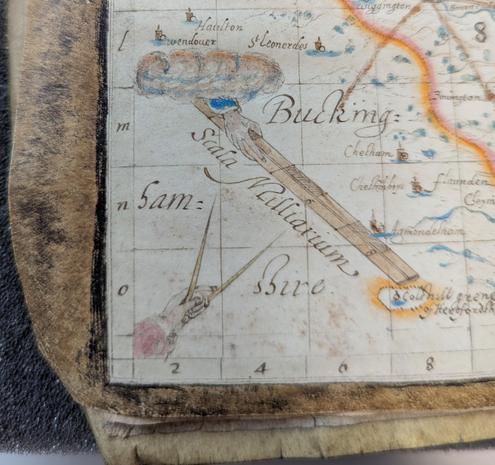
Lovely map of Herefordshire in a late 16th century manuscript, Lambeth Palace Library MS 521
This volume is being condition reported before being displayed later in 2026.

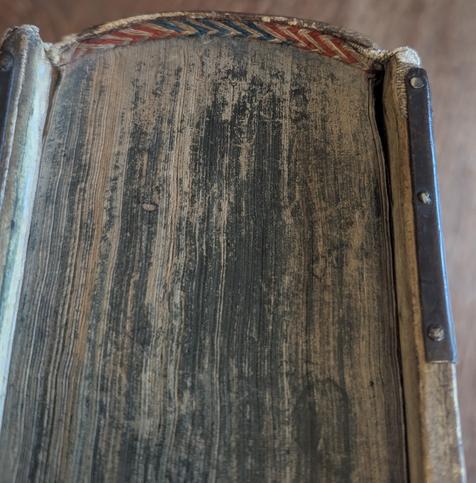
An example of the Canadian Conservation Institute's Agent of Deterioration - Pests
A substantial nibble from this marble paper covered pamphlet binding at Lambeth Palace Library, Arches/L/20

Extremophile molds: The hidden threat eating away at museum treasures (Scientific American)
https://www.scientificamerican.com/article/how-extremophile-molds-are-destroying-museum-artifacts/
My favorite line:
> Letting go of the shame is the only way we can learn about these molds
Holds true across the board in this field: physical or digital.
#Digipres #Archives #GLAM #Entropy #Conservation #CollectionCare
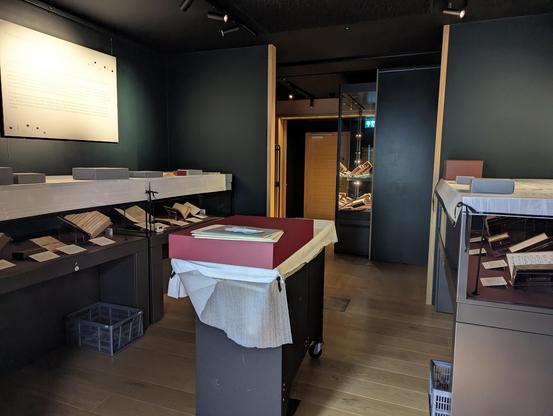
Exhibition Room prepared for decanting. Installation, necessarily, takes ages. Decanting is fairly swift, even when purposely working slow.
Vitrines covered, boxes in place, keys ready, steps available, radio tuned and playing.
Seven cases, approximately 30 items, took two of us about an hour.
Next steps include condition checks, light exposure analysis and recording.
Next installation will start January 2026.
#CollectionCare
#Exhibitions
#MedievalManuscripts
#IlluminatedManuscripts
Let’s talk about data security: Restoring a TMS database
So, yesterday we took a backup of our TMS database. Today, we learn how to restore it. This is also a check you should be doing after having taken your first backup and also regularly after you have taken backups because like I have mentioned here otherwise you can’t be sure you have backed up anything. Or, like a friend of mine who deals with a lot of IT messes put it:
“I bought a book!”
“Are there words inside it?”
“Huh? Of course. I didn’t check, but there are always words inside a book, right?”
Before you haven’t checked, you just assume, you aren’t sure. And if there is one rule every collections professional knows by heart it is this: Never assume, always make sure!
Step 1: Again, log into the server you want the database to restore to and open Microsoft SQL Server Management Studio
You already know how to do that by now. If not, re-read step 1 in this article.
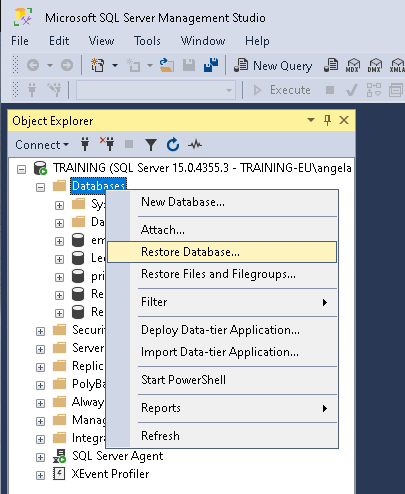
Step 2: Navigate to the Restore menu
Go to the folder “Databases”, right-click on it and select “Restore Database…”
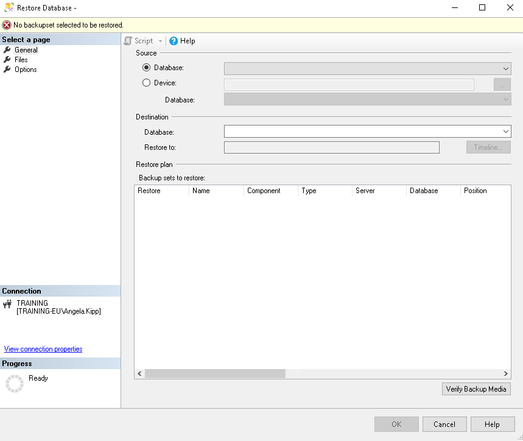
Step 3: Chose your backup file
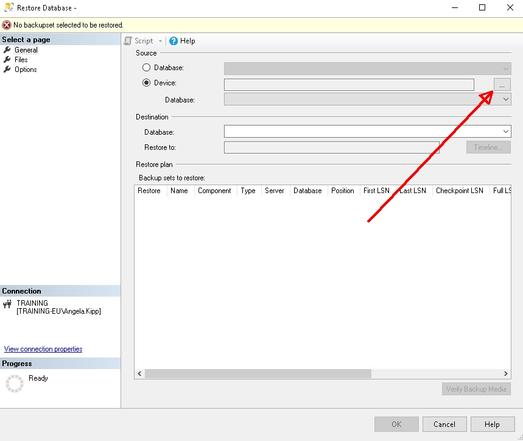
Up comes a rather bleak screen:
Go to “Device” and click on the three dots …
You get another rather bleak screen from which you choose “Add…”
You are getting a look at your file system from which you select the backup file you want to restore from. You might remember I cautioned you to store it in a place you can easily find it in Step 6 in in the previous article, right?
When you have found the right file, you click “OK”.
On the next screen you also click “OK”.
Step 4: Restore your database
Now you are on this screen again, but now it is populated with your chosen backup, including the date and time it would restore to:
You can see how my database “Leer” (yours might be called “TMS” or something else) is showing up both as the source and as the destination. If you really want to overwrite your current database this is fine, for example because something went horribly wrong with your current database and you want to restore it to an older version.
But if you just want to test if our backup file is okay, you don’t want to do that! Imagine something went wrong with the backup. We would be overwriting our totally fine current database with a corrupted backup! Big mistake!
So, for testing, instead of the “Leer” as destination I simply typed another name. I chose “TMSTEST”:
Then I clicked “OK”.
The database will now be restored to a new destination. If the backup file is okay and you have enough storage space you will get this screen after a while:
You can now click “OK”.
Step 5: Test your database
You should now see an additional database in your databases folder (mine shows up, of course, as “TMSTEST” because I called it that way):
If that worked fine, your backup file is okay. But just because I am a bit anal about my data, just to check, just to make sure, I run the mother of all TMS queries: “Select * From Objects”.
Only when it runs smoothly and the number of objects I get back matches my expectations, I am satisfied.
Housekeeping
Backup files are rather large. Which is logical, because they contain all your valuable data, right? So, after testing to make sure my backup is okay, I deleted that new database again by right-clicking on TMSTEST and choosing “Delete” so it doesn’t clog my server:
Also, because the backup files are so large, I tend to compress them before I move them to a different server. I use the software 7-Zip for it since it proved to be rather reliable (https://www.7-zip.org/). If you don’t have it on your server, you need to install it, first.
Go to your Windows Explorer and find your backup file. Right-click on it, choose “7-Zip” and select the option “Add to [whatever your backup is called].7z”.
You can now see how the backup is compressed. Wait until it is done (fetch a coffee or a tea, this might take a while, depending on the size of your database).
After it is finished, you will see a second file on your file system:
You will notice how much smaller the compressed file is. This is much easier to move to another server, unpack, and restore there, right?
Because I am paranoid I will move the .7z file to a cloud storage that I trust now and try if I can unpack it there without issues. If that is the case I can go back and delete the .bak file and just retain the smaller .7z file.
Take your backups, take them to a safe location, and take good care!
Angela
#collectionCare #collectionsManagement #dataBase #dataSecurity #database #documentation #MuseumDocumentation
Let’s talk about data security: How to back-up your TMS database
This is a step-by-step guide on how to backup your database if you are using a product of The Museum System (TMS) by Gallery Systems. If you use a different system it will work differently. Ask your vendor about it.
Step 1: Log into your database server and open Microsoft SQL Server Management Studio
You usually find it fastest if you start typing “SQL Server Management…” into the Windows search box.
Step 2: Enter your credentials
You will be prompted to enter your login credentials. If you are on NT Authentication usually all you have to do is click on “Connect”. If you have another form of authentication you will have to enter those login details. Your IT will tell you what to enter in that case.
Step 3: Find your database
In the tree hierarchy, open the folder “Databases” and find your database. It is usually called something like “TMS”. In my case it is called “Leer”.
Step 4: Navigate to the backup menu
Right click on your database, choose “Tasks” and then “Back Up…”
If that option is greyed out, you might not have the rights to do this. in which case you should talk to your IT so you get those rights.
Step 5: Chose your backup method
You will get to this screen:
Here you can choose if you want to do a full or differential backup (we talked about that here). You select that in the drop-down “Backup type”. We chose “Full” for this backup.
As a destination, usually “Disk” is fine, since you probably want to have the backup on your computer first and then transfer it to a cloud later.
Sometimes you will see a backup file already in the screen below that. If that’s the case, remove it, first.
Then click on “Add…”
Step 6: Add the file you want to back up to
By default, Microsoft suggest a rather cryptic sub-folder for your backups. I’d recommend adding a folder in a more prominent place that you can easily find and back up to there. You can see mine being “M:\Backups”.
Enter a file name for your backup. This can be the date you took it (Best Practice is to note the date in a year-month-day format so you can easily sort by date if you have multiple backup files) or a significant pointer to when you took it, for example “BeforeUpgradeTo995” if this is your backup before upgrading to a new version. Don’t forget to add “.bak” as a file ending, otherwise you might run into difficulties to restore it, later.
You can see that I called mine “AfterCI2025.bak” because it is the backup I took after adding a significant amount of information from our user conference.
Once you entered the name, hit “OK”.
Step 7: Take your backup
After that you just need to click on “OK” and your backup will be taken. If you have enough disc space in your chosen location, all is fine, otherwise it will throw an error message.
That was it. Wasn’t too hard, was it? And now you are good to go and bring your database to a safe location. I will do another post on how to compress the backup and restore it on another server.
Take your backup and take care!
Angela
#backup #cataloging #collectionCare #collections #collectionsManagement #dataSecurity #database #DatabaseCareIsCollectionsCare #howTo #museum #museums #security


Heads up: Bug when buying Managing Previously Unmanaged Collections from Amazon
Two things happened today:
I finally got my author’s copies of Managing Previously Unmanaged Collections and I was notified that there is a problem with ordering the book from Amazon:
When you are ordering from Amazon.com and you are on the website of the paperback https://www.amazon.com/Managing-Previously-Unmanaged-Collections-Practical/dp/1538190648/ and then click on the “Kindle” version you are directed to the old 2016 edition of the book.
Conversely, if you go to Amazon in Germany or the UK and are on the “Kindle” version https://www.amazon.de/-/en/Angela-Kipp-ebook/dp/B0D7R1N7KC/ and then switch to the paperback version you get the old version of the paperback.
Just a heads-up, since I learned today that people bought the old version by accident that way.
I do, however recommend buying from your local bookshop or directly from the publisher (https://rowman.com/ISBN/9781538190630/Managing-Previously-Unmanaged-Collections-A-Practical-Guide-for-Museums-Second-Edition) anyway.
#book #bookstodon #collectionCare #collectionsManagement #museum #registrar