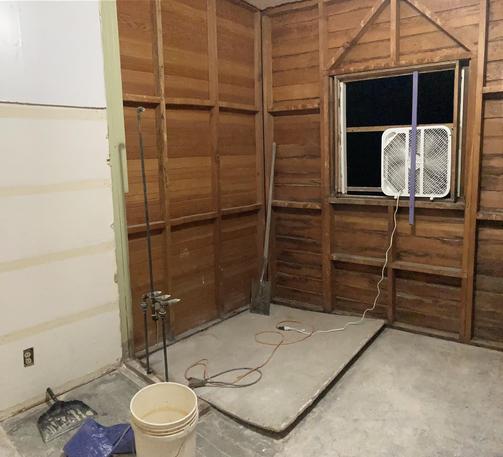
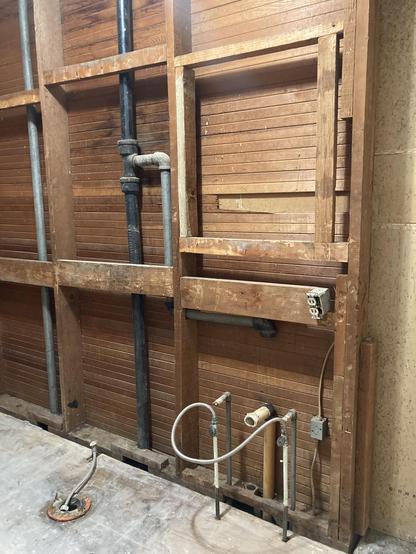
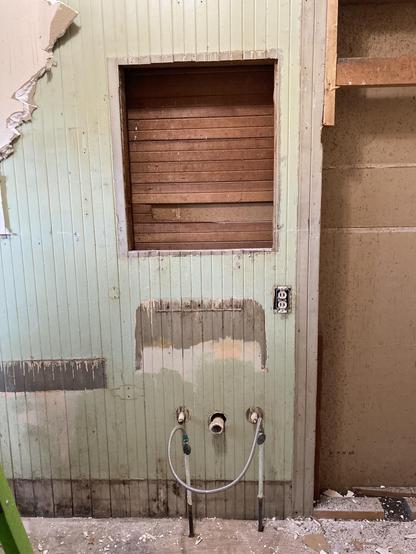
Bathroom remodel and pack rat eviction day.

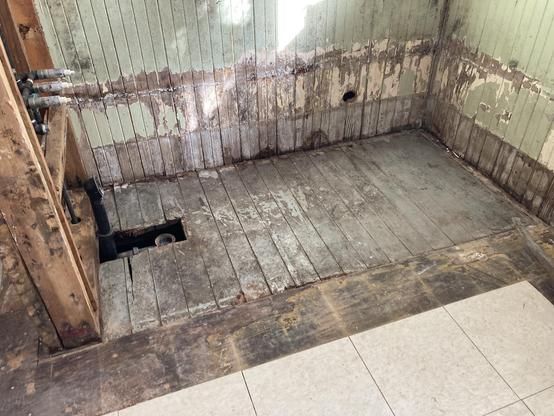
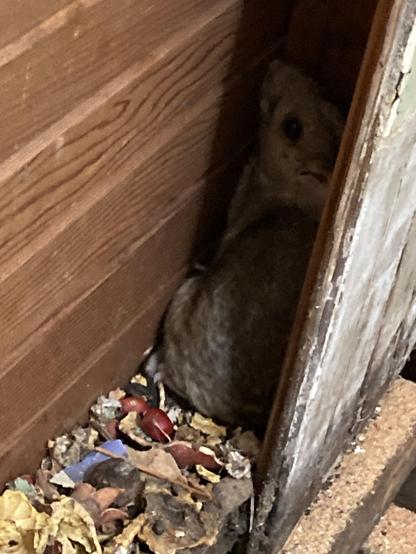
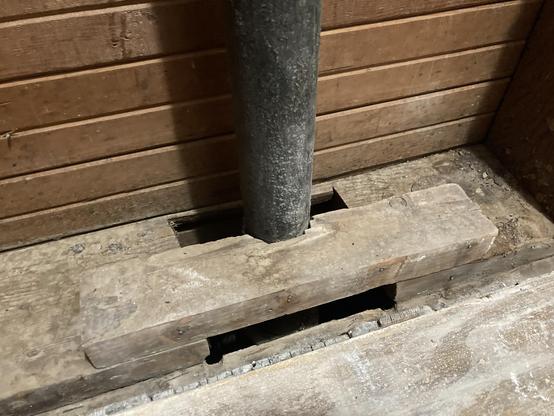
There's been a pack rat under the bathtub and in the wall between the bathroom and my bedroom for years. It got in through the bathtub drain penetration that was never sealed up when they remodeled the place in the '90s.

It finally got too smelly to the point where even though this is not how I want to spend my time, energy and money at the moment, I couldn't ignore it anymore.

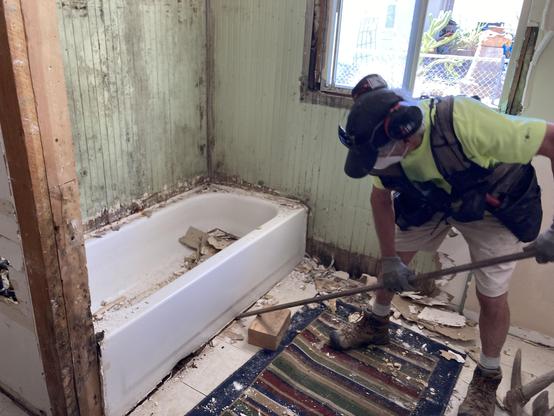
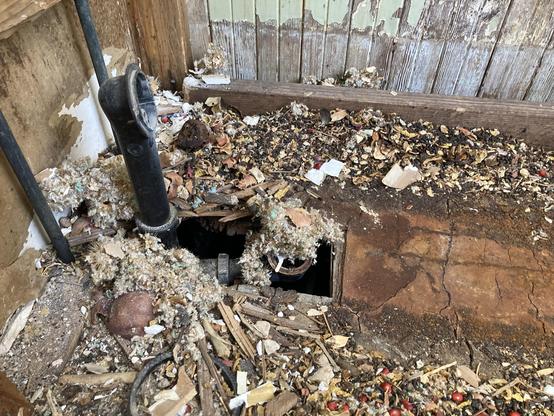
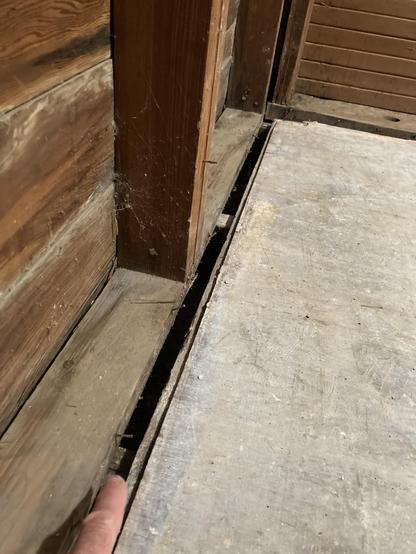
First picture is my contractor friend prying the old tub up. Second picture shows the mass of pack rat poop, cactus thorns and nest material that had accumulated under there. The red things are from a bush I have outside called Sophora davidii. It has gorgeous cobalt flowers and beige pods full of bright red seeds. They are not edible, but I think the pack rat just thinks they're pretty.

#Remodel #Gross #Remodeling #JoysOfHomeOwnership

I was wearing an N95 respirator, but once I got into it I was seriously wishing I had put on a Tyvek suit. After several rounds of sweeping and cleaning and scooping and vacuuming, with an exhaust fan blowing dust out through the window, I took my clothes off in the laundry room and went straight to the shower.

Now Michael is in there bleach mopping the whole room. We're gonna let it dry out before going back in and doing more work.

Rat shit around here may contain Hantavirus and Leptospira bacteria.

The nests are also home to "kissing bugs" (family Triatominae) that spread Chagas Disease. The kissing bugs feed on your blood and poop on your skin. When you itch the bites, possibly unconsciously in your sleep, you can spread the feces into the wound, providing an entryway for the parasite Trypanosoma cruzi that causes Chagas disease.

I knew this was gonna be a big, gross job, which is why I had put it off for so long. But doing a search for what illnesses pack rats in Southern Arizona might carry, plus the increasing smell, was enough to convince me that It Is Time.

And just for fun they were cockroaches living under there too.

By the way, here's a pro tip for sealing up plumbing intrusions and making them rat proof and cockroach proof:

Wrap the hole with multiple layers of quarter inch or half inch hardware cloth nailed or stapled to the surrounding wood and wired tightly to the pipe. Create a multi layer wire cage in the opening. Then fill the whole space with spray foam.

Rodents will not be able to chew through this, it will keep out roaches and you get the added benefit of sealing against airflow.

This is what we will do around the drain pipe when we replace the bathtub. I'll post photos when we get around to it. But this method is cheap, easy and very effective.

Progress!
This is the bathtub area after all the rat poo had been cleaned up. I shoveled and swept it all out, then he used a shop vac on it, then we bleach mopped the whole room.

That flooring is 7/8" clear, old growth fir tongue and groove. It provides both the subfloor and the floor for the entire house. Subsequent remodels have involved putting 3/16 plywood over it, then carpet or stick-on cheap linoleum tiles on that, but I'm ripping that out and replacing it with probably 5/8 plywood. Only the bathroom is getting done right now.

Still haven't decided on the finish floor.

What the shower alcove looks like this evening at quitting time. I opened up the floor, removed the crappy old siding and scraped up all the old linoleum tiles.

The green you see is a tarp laying on the ground in the crawlspace underneath the house. I crawled under and spread it out to catch all the rat poo and cactus thorns that I knew would fall down there. I'll pull it out tomorrow and we'll get underneath there and start figuring out the new plumbing.

And look who I found! In the fir tongue and groove siding behind the shower unit a hole had been chewed into the wall cavity. When I started taking that apart, I found the rat hiding in there!

Such a cutie. I grabbed a couple towels and was able to corner him up in the wall cavity grab him and throw him out the window. He scampered over the wall into the neighbors yard.

Between the neighbor's cat, the great horned owl that lives nearby, the large rattlesnake that the neighbor across the alley found the other day, the Harris' hawks, the coyotes and the bobcats, I don't think he will be around for too long. I will not miss the little fucker, but it's gonna take forever to get the smell out of there even with bleach.

Day Two of #RatShitRemodel.

According to the deed, this house was built in 1945, though the realtor back in 2007 said that she thought it was 1925. Either way, it's ~ century old and has gone through several remodels, none of them particularly "up to spec."

The more we tore into everything, the more information we got about what was actually in the walls and under the floor.

By late afternoon today it became fairly apparent to both of us (even to me who is paying for all this) that we should strip it to the bones and start from scratch. So that's what we did!

We removed what in some cases was two layers of sheet rock and the original bead board underneath it.

More description in alt text.

The vanity and toilet area when those things were removed and the sheet rock was stripped off. The original bead board is what you're seeing, covered in (certainly lead based) sickly green paint. But, that wood is clear, tight grain, old growth fir and the back sides are still raw wood and in great shape. We tore all this off and I will be reusing it, which I'll describe later.

The style of this house is what I described as "low budget Craftsman" or maybe "Craftsman-inspired." As I, over time, remodel each section, Craftsman style will be a rough guide, but not something I try to adhere to dutifully.

You can see the paint "scar" left by the very tall baseboards, a common feature of Craftsman style. The hole in the wall was a medicine cabinet and you can see the original sink mark below that and the toilet tank mark lower on the left.

#RatShitRemodel

This is the original cast-iron vent stack, where it comes up from the crawlspace. Note the giant gaps left behind and around it! It's rather amazing that the rats never found this hole and created a nest in this wall too.

No rats, but it was full of a century of cockroach frass, as well as a few roaches. I was not as kind with the roaches as I was with the rat yesterday. Just sayin

All these gaps will get sealed tight when we're done.

#RatShitRemodel

Here's something interesting. It may not be obvious, so I'll explain it. Modern stick framed houses are built in a manner known as platform framing. Floor joists are laid across from one part of the foundation to the next, spanning the gap above what will become the crawlspace. And then a solid sheet of, typically, 1-1/8 inch tongue and groove plywood sub flooring is screwed and glued to the top of the joists. This creates a very solid integral platform that is extremely stable. Then the walls are framed on top of that.

In this house, the joists were set and then the wall plate was built directly on top of the joists. Then the sub flooring, in this case one by four tongue and groove boards, was put down on top of the joists after the fact.

When they did so, they left this huge gap that allows any creatures from the crawlspace to access wall cavities if there are any irregularities. That's how the cockroaches were getting in.

Based on things like the type of material, the date stamped on the sheetrock and so, we figure one of the remodels happened in the late 1950s and another one in the late '80s or '90s, and possibly some smaller modifications here or there over the years.

We are tearing all of this old stuff out: wall coverings, wiring, plumbing — and replacing it with efficient, nontoxic, safer modern materials.

But I will note a certain wistfulness in doing this. Peeling through the layers, we find things like carpenter's marks from people who have probably passed away long ago. I can imagine the builders in 1945 melting lead and pouring it into the joints of the vent stack, or someone else 40 years ago being proud of their new, modern looking, white sheetrock covered bathroom. No more ugly, green lead paint!

As we peel off the layers, it's easy to imagine the lives that have been lived in that space, as well as the people who built it. How many people? Who were they? Were they happy?

#RatShitRemodel

Each wall we open up is like an archaeology dig. We have fun trying to decipher the original purpose of each piece of orphan pipe, strangely placed hole or puzzling method of framing.

It all tells the history of the house and the people who have lived here and built it, as well as keeping a record of the styles and materials that were popular over the last hundred years.

But we are tearing it all out. I noted previously I feel a little wistful about that. 50 years from now, a future remodeler will not have this experience. They will only find the original framing and what we will be adding in the next week as we put it all back together.

It will be nice! Rat proof! Cockroach proof! Insulated! A new fancy shower. Nothing will leak. The toilet will flush properly.

But the ghosts that have lived hidden in the walls will be gone. And that feels a little sad.

#RatShitRemodel

@Mikal I know exactly how you feel. When I did our bathroom remodel we discovered that half of it used to be the pantry, and the mystery of the bumpout was solved, as it was created so there was a place for the bathtub to sit when indoor plumbing was added to the house. We found the original pantry countertop, resused as part of the wall.

We did repurpose the beadboard ceiling into a closet on the back porch.

Before you seal everything up, put an envelope of your photos in the wall as a surprise for the next person that does a complete remodel.