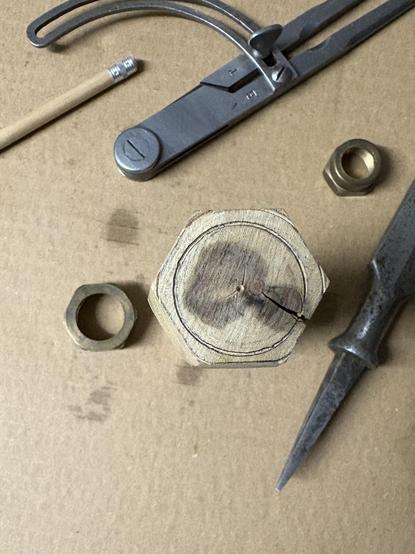
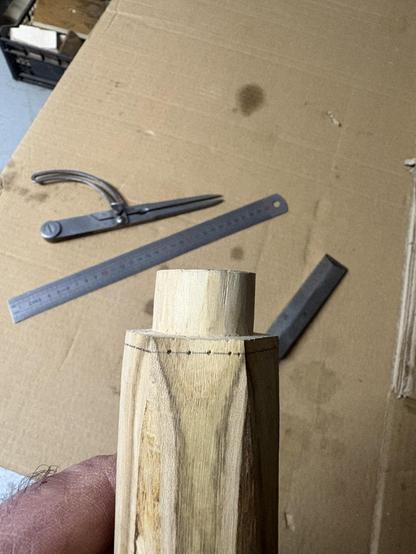
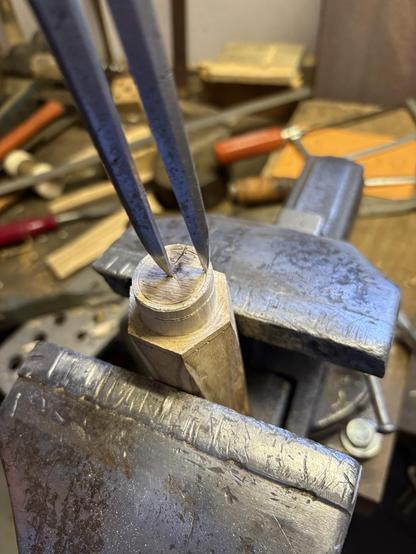
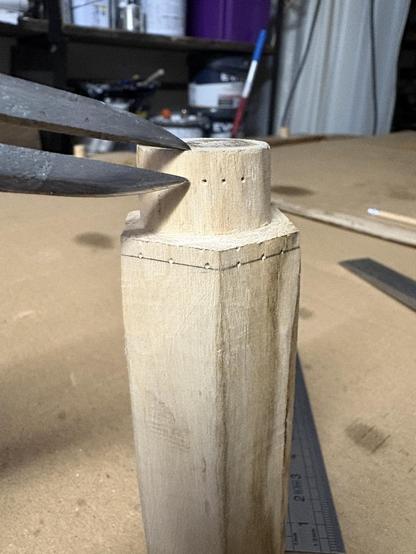
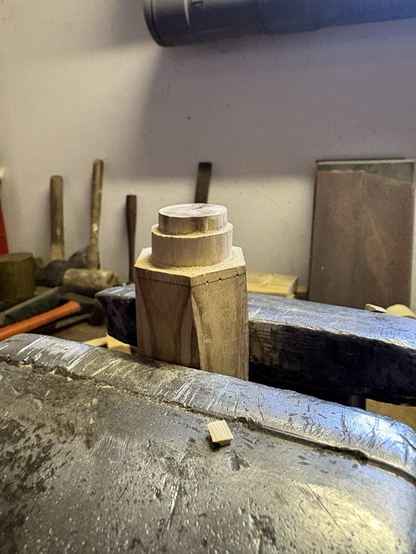
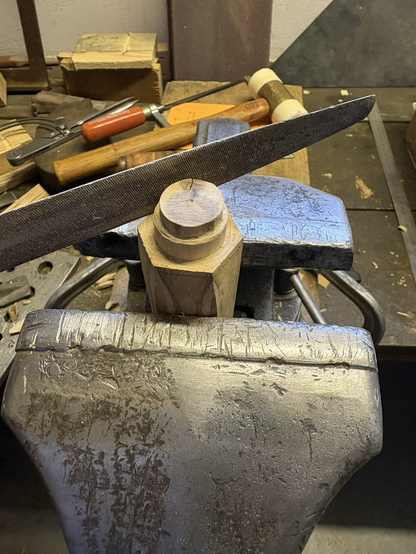
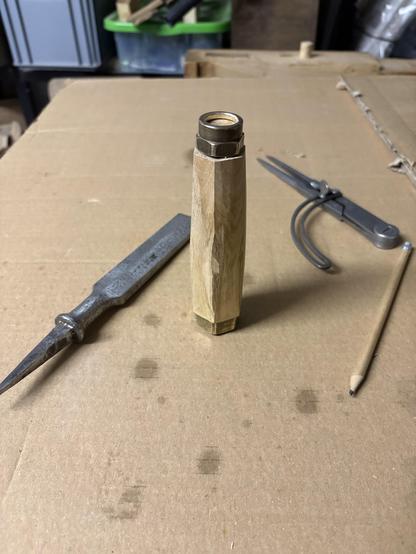
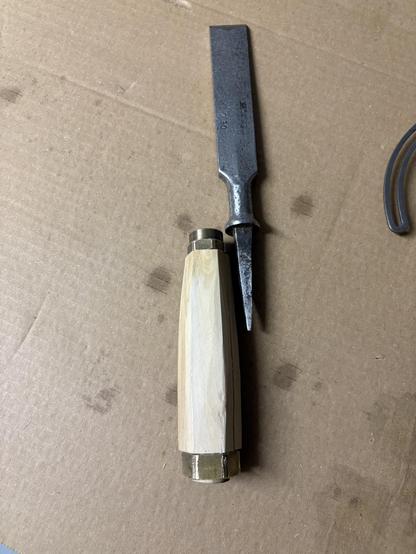
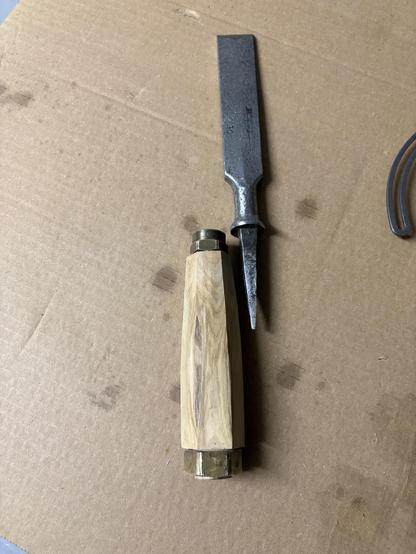
I started restoring this ‘ciseaux bedane’ a while back and got sidetracked. Still some hand grinding to do on bottom, but it was almost there. These chisels are meant to be whacked hard, and I’ll need to put a handle on it with two ferrules, so I bumped it up as my test for using threaded brass plumbing fittings as ferrules. Strong.

I only had one large fitting for the butt, but realized the round bolster on this chisel was close to the diameter of a fitting on a butane regulator. Voilà. Test ferrules.

These fittings have six sides. So I’ll make the handle six-sided to match them and taper it on a slight arc. This will have a different feel from a more typical octagon handle.

To make it more challenging, I have a piece of laurel I’ve wanted to use, but it has a crack from drying over the last year. I’ll fill the crack with wood dust epoxy. The ferrules too will get epoxy on the threads for a solid constrictor grip.

I’ve got the stick roughly shaped now. I’ll refine it more after ferrules are dry fitted, and again after epoxy work.

The trickiest bit of this operation is getting the ferrule seats right. It’s not the much easier task of making them the same inner diameter of a brass tube and sliding the tube on to depth.

#woodworking

Here the seat shaping is compounded in two ways. First, the bigger part of the seat is sized to the valley of a fitting’s threads. The inner diameter (thread peaks) would be too small.

Also, fittings have a desirable internal flange on one end, adding strength against mallet whacks and deformation. But the flange requires making the ferrule seats stepped to this narrower internal diameter so the seat can exit the fitting by a couple mil (butt end ferrule) or be cut flush (bolster end ferrule).

In my case, there’s also the matter of getting the six sides of fittings lined up with the handle’s sides, else it won’t look and feel good.

That is dictated by ‘screwing’ the fittings onto threads cut on the seats. But they need to abut firmly with seat shoulders when done, so there’s a potential for having to lengthen the seat by small amounts until ferrules are turned both snug and aligned correctly.

In retrospect, I could have avoided that last bit of finessing by leaving the handle initially round and shaping it to the ferrules after they were dry-fitted.

Either way, same result.

You also wouldn’t have to do what I’m trying with the six sides; rather just make the handle a tapered round and file the arrises off the fittings, making those round, too.

I could still do that with the fittings, and soften the handle’s arrises, if it feels uncomfortable with them. We’ll see.

The butt ferrule is dry fit. It mounted as conceived, but with caveats, which I’ll list after. Maybe you can guess them ahead.

So, laid out and shaped the seat as normal. (Btw, all hand work here. No lathe, no drill press…) Again, target diameter for seat is the valley of the fitting’s threads, but I knew I’d be a little wide at first.

(That bottom line was a mistake, but will go away.)

At this point I could have started refining the main seat diameter to get fitting threads started...

Instead, I went straight to laying out and cutting the stepped shoulder for the fitting flange; 3x2mm on this fitting.

I used the same method as with the main seat. Circle on end. Dividers for marking depth (dots all around). And cut along dotted line.

Btw I like using a small metal saw for that work. Great control. Same saw I use to cut new saw teeth.

After cutting, chiseling, filing, I get the step.

Here I made a shortsighted mistake. Instead of logically turning the fitting upside down to first test fit and finesse the smaller flanged hole (for an easy win), I attacked it the other way by filing the main seat first, to get that screwed on up to the flange.

That was bad. I ended up inadvertently trying to force the flanged step through before it was ready, and that ended up stripping off some top threads on main seat.

After a lot of back and forth creep-up filing, it screws on with help.

The main caveat and lesson learned so far is, the fitting’s threads are rather large and simply do not cut a path through the wood. If I were to make a habit out of using fittings for ferrules, I’d get some matching dies and cut threads on the wood seats first.

In this case wood was clogging up threads, and that was also ripping threads off.

In the end, this screws on surprisingly tight, but the threads are not grabbing much. Epoxy will be necessary.

@wedge Any concerns with the epoxy holding up under the hammering?

@sigsegv

Yes, since the threads didn’t cut as deep as I wanted. But there are definitely threads grabbing something, and some space in between, evidently. So epoxy definitely has something to grab. Plus the flange acts a bit like a cup hold epoxy in around the seat. It will be solid wood plastic and brass all the way through. That’s probably better than a brass ring by itself.

If not, I’ll make a new handle with a 3mil-wall steel ring ferrule . :)

Another caveat is, without first cutting threads with a die, you don’t have much control of the fittings path. It ended up askew at shoulder by a mil, made looking worse because the arrises on the fitting are chamfered on the corners, which you can see here.

That won’t look so bad later when handle is tapered to ferrule and epoxy fills in. But it’s not perfection :)

Related, the hexagon shape is comfortable. I like it better than octagon. It seems to fit my grip like it’s meant to.

But half the arrises on this handle blank are still live edge. Maybe less after finishing the tapering, but not totally. I’m leaning now to filing the fittings round and softening the handle arrises that remain. That should help make it look better in the end. Less industrial. :)

So, all this again at the bolster end.

Btw, this fitting as a butt ferrule may not, I realize, be ideal for wooden mallets striking the ferrule corner a lot. The brass edge might start wreaking havoc on the mallet.

That’s one reason for having the stepped seat, so wood comes through the end and helps buffer the blow. I use a nylon mallet currently and have no problems. Caps are replaceable in any case.

You could also round over the back of the fitting, and I will. Plenty of brass there with the flange for doing so.

The flanged end of the smaller fitting mates with the bolster almost perfectly. I’d be happier if it was another 2mil wider, but this is pretty good.

That bolster though. A railroad spike. I had to file out the flange a tiny bit just to get it over the base of the bolster.

That’s going to be a slimline fit!

I don’t know much about laurel wood. Perhaps it wasn’t the best choice. But the grain on this piece is super dense and it carves like a dream. All of this is just drawknife shaping so far and the finish is like glass. One side has nice tan and yellow shades, almost a green hue in area, and the other is completely white.

Handle is a bit shorter than I’d like for this.

Anyway, next steps are to deal with the crack, finish shaping, and do something with the brass.

Btw, I didn’t step the bolster-end ferrule seat for the smaller fitting because that smaller hole diameter will be bored completely to accommodate the tang. Once the blade is set, I’ll fill that shallow void around the flange with epoxy.
@wedge That chisel looks like it has had a hard life. I have couple of old marples chisels that have been dated to post-1875 with triple shamrock logo. I need to do new handles for those. so definitely watching this thread for inspiration.

@Rajiv

It was very rusty and pitted. The pits on the top side, however, shouldn’t be a problem. I’ll leave them for aesthetic texture. :)

The bottom has to be ground smooth, though. Sides too. It’s stamped ‘30’ but will be around 28 when done.