About two years ago, I got a free computer from a Buy Nothing group. The catch? It supposedly didn’t work.

Sure enough, it was stuck in a BIOS boot loop. But all it really needed was a reflash from the backup BIOS. After that, I upgraded the hard drive to an SSD, added some RGB fans, and it was good to go.

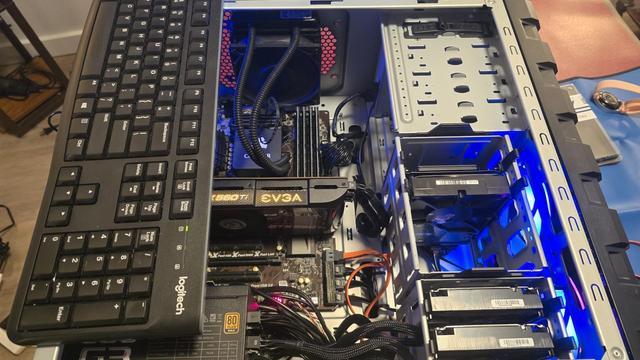
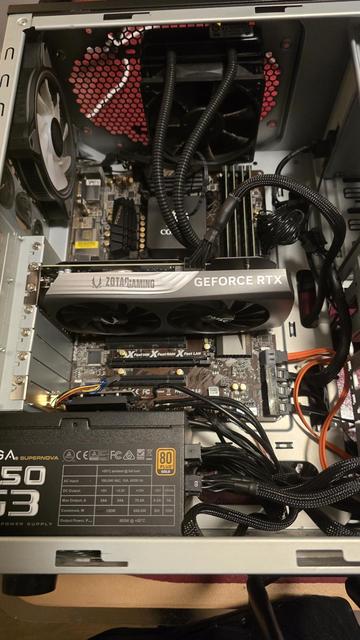
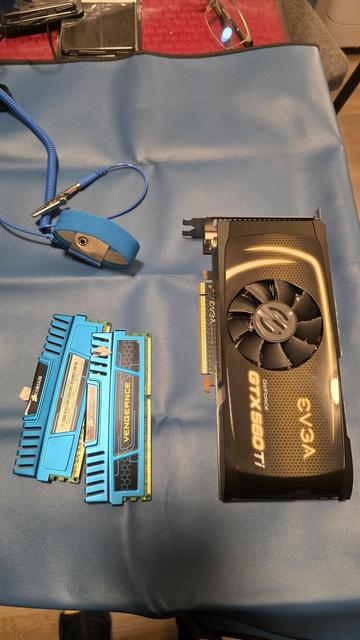
All worked well until a couple of months ago, when a windstorm fried the motherboard. A couple of days ago, I finally got a replacement mobo—so the disassembly and reassembly process begins.

Here’s the motherboard—not new, but it seems to be in fairly good condition. So, let’s transplant the processor from the old mobo to this one.
Next are the memory modules. These ones are rather slow compared to what the motherboard can support, so I’ll replace them later.

Mobo I/O shields are nerve-wracking to me! A while back, I got a bad cut on a finger while trying to install one in a case with sharp edges. Ever since, I’ve taken my time and used extreme care with them.

Now, I’ve placed the new motherboard in the case and screwed it in securely. I want to note that while removing the old mobo, I found many of the chassis mounting screws were loose—so it’s a good thing I was able to tighten them properly to avoid any vibration issues.

Power cables, USB headers, and front panel controls are in place. I’m a bit concerned about the front case control connectors—there’s a conflict between the manual and the labels printed on the motherboard. I’ve decided to go with what the PCB itself indicates.

Last time I fully assembled a PC, adding a cooler to the CPU meant putting a single dot of thermal compound in the center. Nowadays, I’ve seen people use diagonal lines, crosses, dots in the corners—you name it. Since the current CPU is square and small enough, I went with the good ol’ center pea method. Do you all have a favorite way to apply the compound?

Anyway, the AIO liquid cooler is in place.

Time for a quick, bare-bones test… and it’s alive!!! Or, at least as alive as a motherboard without boot disks and other peripherals can be…
GPU and wireless NIC are in. Please don’t mind the cable management...
First boot, and… we have video output!
Finally, I am able to go into the UEFI setup utility. I think I'll leave it here for today. I want to rest for the evening, and i am glad that i have a computer that boots up sgain!

The new SSD arrived today. I promptly proceeded to continue with the OS installation process, only to find that the CMOS had reset. I proceeded to change the board battery, which implied removing the GPU, as the battery is below it. Fortunately I have several CR-2032 batteries ready for action.

When reconnecting everything back, I mistakenly connected the wrong boot disk, and it took me several minutes to figure out why a totally different drive was appearing instead of the brand new one.

Having sorted that out, the server is finally installed!

alright. since I am using my home server more seriously, it desperately needed a ram upgrade. the original 8GB (2x4) are falling short...

also, I originally got the computer with a gtx560ti GPU, which linux kernel 6.5x (or so) no longer supports. given that I am running jellyfin, that means i haven't been able to use hardware transcoding.

that ends today.

i just finished installing 32GB (4x8) RAM, and a RTX4060 GPU. bear in mind that the mobo is Sandy Bridge based, so there's a limit on which hardware I am able to use, yet for a home server it should get the job done.

#PCUpgrade #HardwareUpgrade #PCBuild #TechSetup

server is running! that extra ram certainly gave it a lot of room to breathe and be comfortable.

after enabling hardware transcoding in jellyfin, I am finally able to stream 4k content and omg, it is day and night difference. the transcoding in the new GPU is blazing fast!

this upgrade was totally worth it!

@technotenshi
What do you use to run Jellyfin off of the computer. I've been trying Yuno Host, but I'm having issued. I think they're me issues, but still. Something that had access to a regular OS GUI would be nice.
@Tourma I don't use anything special than docker compose, and vim to edit the compose files. the fanciest i do is using vscode to ssh into the computer and edit the files from there.

@technotenshi
Ssh is the one thing going right for me. :p
I suppose I should look into docker. Right noe I'm hopi ng to find something that sits atop a OS with a GUI to make things easier. I'm learning a lot about bash, but I think I'd have more fun if there were fewer learning curves.

Thanks for letting me know!