#tinkerbell_oss #tinkerbell_oss Ok been digger a bit deeper, is 64bit hardware required? Given the missing symbol naming:
#tinkerbell_oss Hah success! Had to do the cert steps on a 64 bit machine tho
#tinkerbell_oss Turns out netbooting a RPi is a shitshow, got it to work somewhat. But it's far from easy :(
#tinkerbell_oss Figured out what's wrong today and what is causing this error, TL;DR I need a custom kernel/bootloader to be able to run workflows, to be continued:
#tinkerbell_oss Decided to skip auto provisioning for now. Not because of #tinkerbell_oss but due to the fact that the RPI4 set up I've been following requires a custom kernel and initramfs to be able to run workflows from netboot: https://t.co/VejBOwwTP0

GitHub - ContainerSolutions/tinkerbell-rpi4-workflow: Instructions and configuration files to create tinkerbell workflow for raspberry pi 4
Instructions and configuration files to create tinkerbell workflow for raspberry pi 4 - GitHub - ContainerSolutions/tinkerbell-rpi4-workflow: Instructions and configuration files to create tinkerb...
#tinkerbell_oss Still figuring out how to create that kernel and initramfs and that's going to take a while. And I really wanted to have at least SOMETHING running. So this is my MVP home #k8s cluster running #k3s. Didn't bother with the SSD yet, running purely from SDcards for now.
#tinkerbell_oss Got something else to fix for booting from SSD, but will also fix that later.
For now, the next step is getting GitHub Action runners on it to start building applications for it and have a way to deploy directly to it. There are several solutions for that, should be fun :D
If anything, I learned that arm and arm64 support for many Helm charts/Docker images out there aren't as good as I hoped for.
This is partially why I'm doing this project, aside from having some use cases in the house
This literally sums up my day: https://t.co/szbGzcHxiu
Essentially lots of Docker images only have an amd64 version, maybe an arm64 but rarely an arm(7) image so running anything on the RPI3's in the cluster is unlikely unless I start building images for it.
Now the GitHub Actions Runner Helm chart I'm using also only has amd64 and
arm64 versions.
So that is going to be fun. The cool thing is setting that up is really really easy, like scary easy. Writing a Helm chart to add all the of the runner deployment and autoscaling definitions for that. Also considering putting them directly in a projects
deployment. But that results in the chicken and egg problem, so either the first deployment to the cluster has to be done manually or I'll have to store them at a central location.
However the first thing on the menu is getting Helm to work and be able to deploy from within the
cluster using a GitHub Actions Runner.
When that works, I'm locking all network and permissions within the cluster and the network as much as possible.
Securing the cluster is high on the last. Today was RBAC for deployments, tomorrow it's locking down the network: https://t.co/ED4GeOwmRB
Locking down the network didn't fully go as planned as I kept fully isolating the cluster from accessing anything in the network. This sucks if you want to host HTTP based services for inside your own network 🤣. Today I did something different however
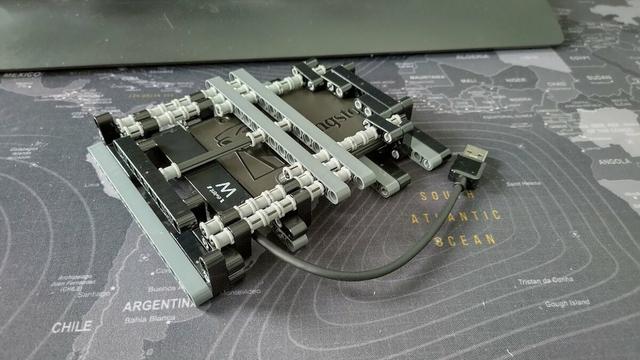
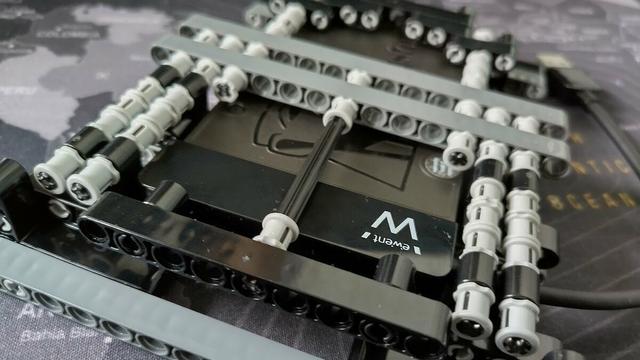
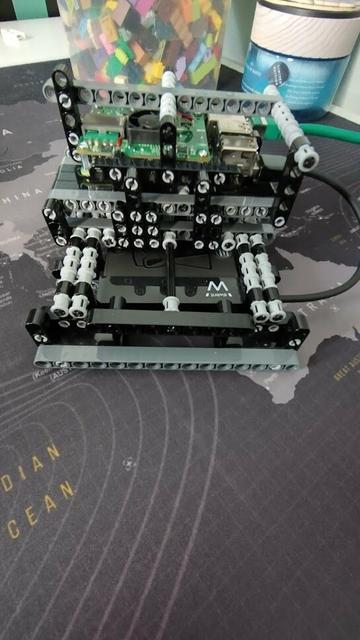
So the second #LEGO Pick a Brick order to prototype with came in today. And with a more Technic focussed order, I've been able to build a simpler, more open, and more stable (still missing parts) casing for the RPI node.
The other thing I prototyped with the skeleton. Namelijk long "legs" going into the hight.
All parts for the next RPI4 8GB node arrived! Building the #LEGO Technic enclosure for it tonight:
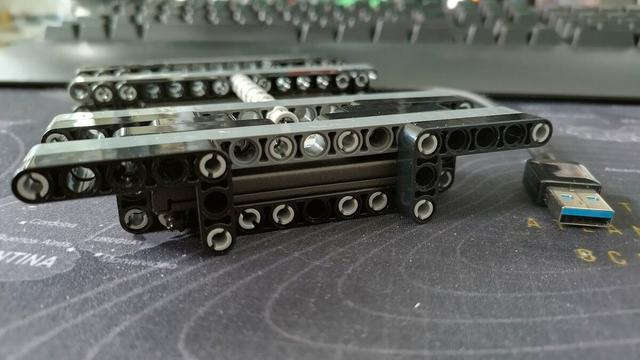
It currently also has a "swing" mode as I'm still learning all the parts I need for this:
Ok this is a crude but effective way of making a PoC/MVP enclosure. This is by far not what I had in mind for this, but the USB code tension is a major theme, and I need to solidify the structure a lot more, but this will do for the coming time:
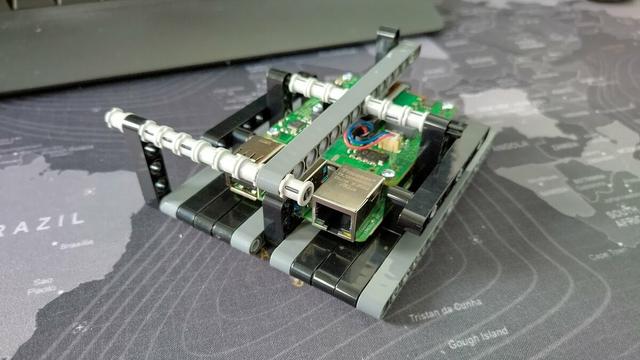
It's alive! Well only the body, there is no SDcard in it yet as I need to first update the network provisioning for this VLAN. But now I have a node to experiment with that on while the master node does all the being a k8s alone (:P)
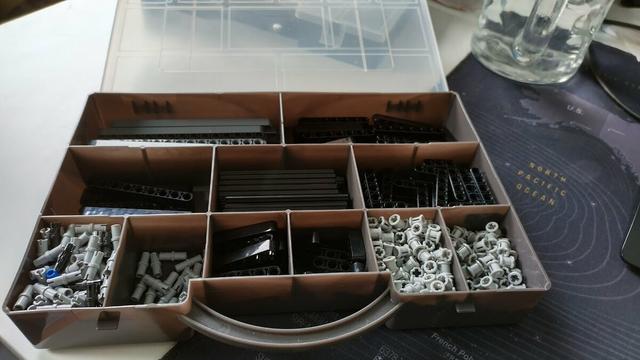
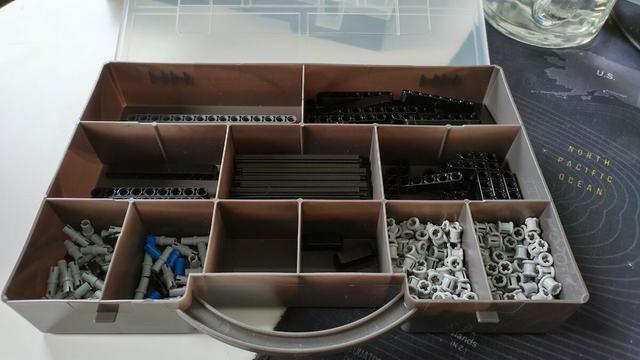
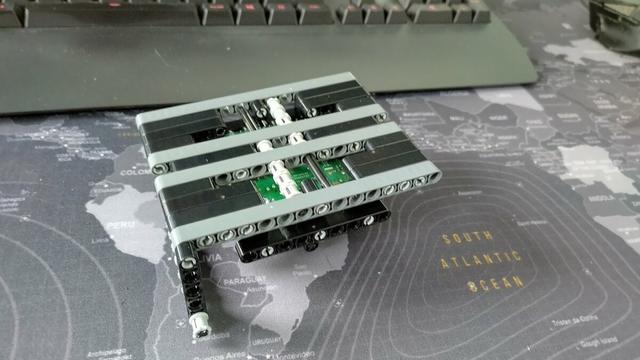
If there is anything I've learned so far is that building a solid enclosure for the node and SSD, is that it is harder than it looks. Partially because I don't have all the required parts because I'm ordering as I'm learning. So I have a couple 100 parts already, but everytime
I order it's mainly parts I didn't have enough of the previous time. So it's a slow process, but it means that even though I'm ordering way more than I need per node. It also means I have a whole bunch of parts I need anyway to build the enclosures for the other nodes.
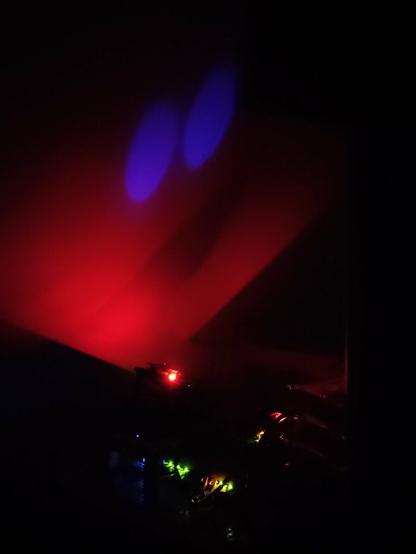
Dark shot of the cluster in progress. This thing will become a light show when done 🤣
Argh, one step forward two steps backward. I really love the idea of #tinkerbell_oss and everything call that you can do with it. But I haven't even gotten around getting the workflows to run and do their job. (It's also not #tinkerbell_oss that is to blame here for the record!)
It's that the RPI's make you jump through all kinds of hooks with PXE and net booting it. I'm probably better off building my own image that streams the k3sos iso to the SSD and kexec's into that or something.
Because all I want is a fresh node when it comes up, no reuse of whatever was previously on that node. It's maybe not what you'd normally do for a "home lab" but I'd like it because there is no litter left behind.
So my afternoon on this project started pretty well, with #k3os booting from SDcard. Next step was booting it from the SSD. Should be easy right?
So my afternoon looked a lot like this, /boot file or directory not found. Now there is a huge clue what is wrong in the block device name.
That p in sdap1 shouldn't be there when using an SSD over USB, but it has to be there for when doing this from an SDcard. The script I'm using has this somewhat hardcoded, and it took me long enough to release that the "fix" pointed out in this issue: https://t.co/RWujfwXkFF

How to correctly fix init.resizefs when booting rpi from ssd · Issue #27 · sgielen/picl-k3os-image-generator
When generating the image for raspberry pi and burning it to a ssd, so that the rpi boots from the usb disk instead of the sd card everything it needs to be changed is this line ('p1' to &#...
Solves it, and makes the whole thing boot and works without a hitch. Next up is making sure I'm using the latest #k3os version, as for some reason the script doesn't pick up the latest version as provided. (Or I can just let it upgrade it self until the latest version
There is nothing running on it yet obviously, but it is up and running:
That also makes that there are now two Kubernetes clusters up and running in our house
One of the things I wanted SSD's for, is A) SDcards wear out fast under high I/O, B) speed, but C) https://t.co/0nq5EhdEMv for persistent volumes. (With a S3 based backup/restore for real persistence.)

One of the things I want to try now knowing how that script works. Is to hardcode sda in it, and boot from SDcard when SSD doesn't have an MBR. Now when booting from SDcard it will install k3os on the SSD, and up on reboot k3os supports scripts and I'm looking into removing the
MBR after it has booted from the SSD. So that the next time it is powered on again it will reinstall just as if it's a fresh node.

And combined both nodes into a single new cluster. With nothing on it yet, but will #terraform apply in the morning loading some of the basics on it:

And yes, a bare #k3s/#k3os #kubernetes cluster looks really boring :D
Installed https://t.co/0nq5EgW3UX just now (through terraform through a GitHub Actions self-hosted runner on the cluster (yes it's a bit meta)). And due to the amount of pods (24!!!!), it took the cluster a while to download all OCI images, extract them, and spin the pods up
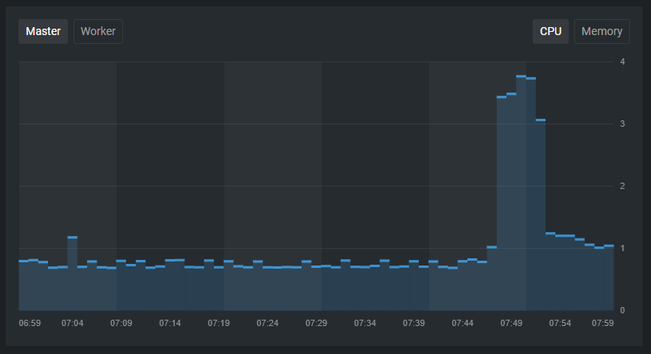
using default settings (so 3 replica's for most of the things).
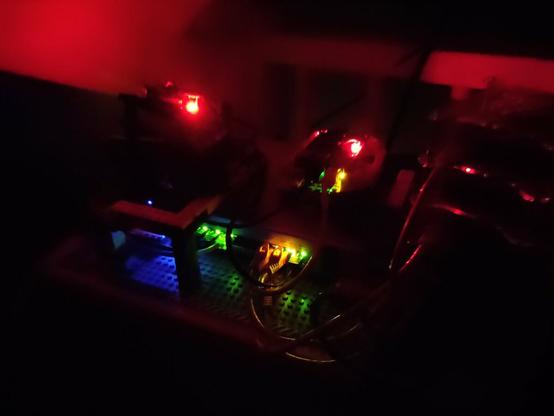
Alright so with the latest #k3os and #raspberrypi firmware the #PoE+ fans are kicking in. The downside, they are audible when they ramp up to cool. Which happens every few 1 - 20 seconds pretty much. Need to tweak that they are pinning 10 RPM higher by default, I think

Ow the yellow/green lines are the fans, and the blue/orange is the CPU temp on the nodes
What to name the third node (the theme is infinity stones):
Since the previous poll resulted in a tie, let's have round two a.k.a. the finals (the theme is still infinity stones):
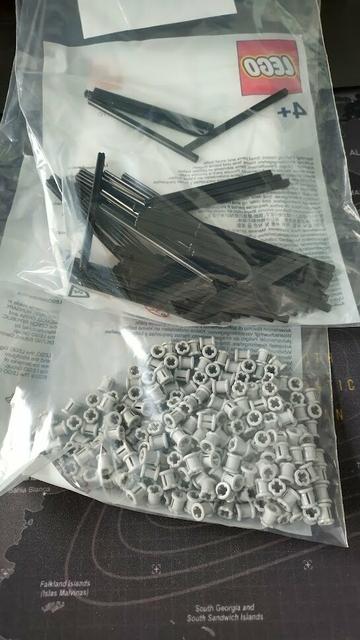
Waiting for a #LEGO Pick a Brick order with "some" parts for the nodes housing. One of the major lessons from the last few days was that the USB <-> SATA adapter #LED blinking during the night can affect our sleep. And I prefer a good night rest, so will attempt to build a less
light leaking housing for it. And those parts were missing. (Also hoarding for future and current nodes once I've settled on a design.)