[大工の基礎]木材の見分け方、使い方(板編)建築概論-木材の知識
#carpenterskills #japanesetools #woodworking #woodworkingtools #sharpening #Japaneseculture #大工道具 #diy #大工 #Yomogiya #研ぎもの #砥石 #天然砥石 #人造砥石 #carpenter #家具デザイン研究室 #家具デザイン研究室 #carpenterskills #...
[大工の基礎]木材の見分け方、使い方(板編)建築概論-木材の知識
#carpenterskills #japanesetools #woodworking #woodworkingtools #sharpening #Japaneseculture #大工道具 #diy #大工 #Yomogiya #研ぎもの #砥石 #天然砥石 #人造砥石 #carpenter #家具デザイン研究室 #家具デザイン研究室 #carpenterskills #...
[大工の基礎]木材の知識(背割り、元末、背腹の解説)建築概論
#carpenterskills #japanesetools #woodworking #woodworkingtools #sharpening #Japaneseculture #大工道具 #diy #大工 #Yomogiya #研ぎもの #砥石 #天然砥石 #人造砥石 #carpenter #家具デザイン研究室 #家具デザイン研究室 #carpenterskills #ja...
I've been touching up our kitchen knives for a long time, and putting off a 'proper" sharpening.
Today I decided to take a stab (heh) at it. I started a little too late in the day to finish all of the knives before dusk, but I managed to get seven out of ten sharp enough to slice the sacrificial tomato cleanly at every part of the blade. I'll do the remaining three tomorrow.
I focused on doing things as quickly as possible: raise a burr from both sides on a coarse stone (330 grit), polish it off on a fine stone (600 grit), test on the tomato, done.
I am pleased to report that the 600-grit quick touch-up sharpening I did on the Kai kitchen knife the other day is working just fine. I usually go up to 1200 grit on the DMT diamond stones, but with such a thin blade, it's not necessary (especially considering that the factory edge was in the 250-grit range).
We got a (non-fancy, ~US$5) Kai knife. It has a very thin blade, and is pleasantly sharp out of the box.
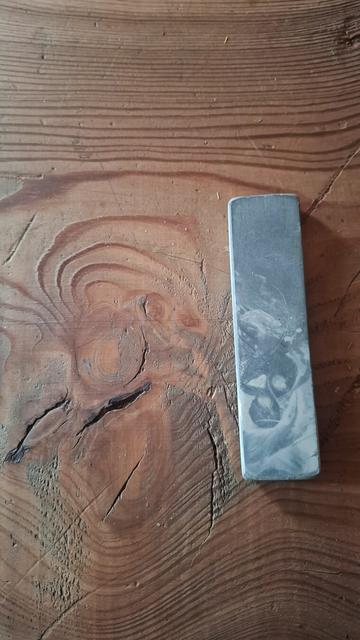
It needed sharpening after a few months of use, so I stuck it under the microscope. Turns out the blade has a very narrow and quite coarsely-ground bevel on one side (first photo: note coarse striations perpendicular to edge), and is polished flat on the other side. I estimate (just by eye) that the factory grind is about 250 grit.
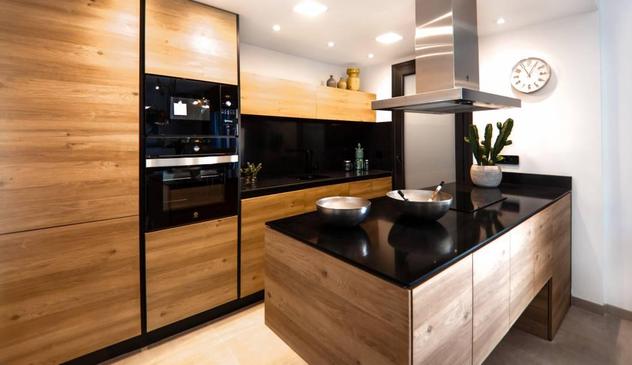
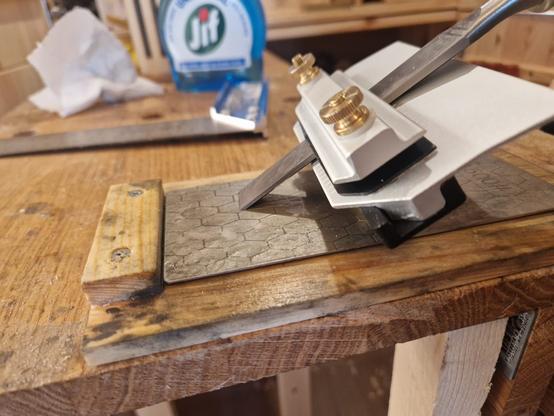
I sharpened freehand on a DMT "fine" (~600 grit) diamond plate. I hold the blade at an angle to the surface of the steel plate (just habit), so the new grind marks are at an angle to the edge. The second photo shows polished (brighter) steel at the very edge of the blade as well as a bit further in, with the original perpendicular coarse striations in between.
This shows that the blade was originally hollow-ground on a grinding wheel (which is what one would expect). Because the bevel is slightly concave, the flat steel plate was able to wear away only the "high spots" of the steel on the edges. I could have switched to a coarse stone and worked the entire bevel flat, but that was not necessary. I just wanted a quick touch-up.
Sharpening tools
When I took up woodworking and bought some chisels a while back, I got slightly disappointed. The chisels were OK, but not as sharp as I would have liked. I have three vintage Stanley planes. Two of them were really sharp upon arriving, but they had also become duller over time. So it was time to get into sharpening After some investigation I bought diamond plates as they were an easy start. I also bought a jig to hold chisels and plane blades. The diamond plates are fast to set up. The […]https://rabbitholes.morkcloud.com/2026/01/25/sharpening-tools/
And then today the xmas present I bought myself finally arrived, I put it on the grinder and just spin it by hand (power off) and it grinds into the outer housing and stops moving.
The fecking grinder's arbour must be slightly bent or otherwise not running true.
I've been sharpening on an oval for nine months.
Now I get to strip the entire thing down to see if it's repairable. FML.