 🐰
🐰
one done, 29 to go #tinygo #niceBadge #gopherConEU , based (mostly copied!) from the great work of conf2025badge from @sago35 /cc @TinyGo
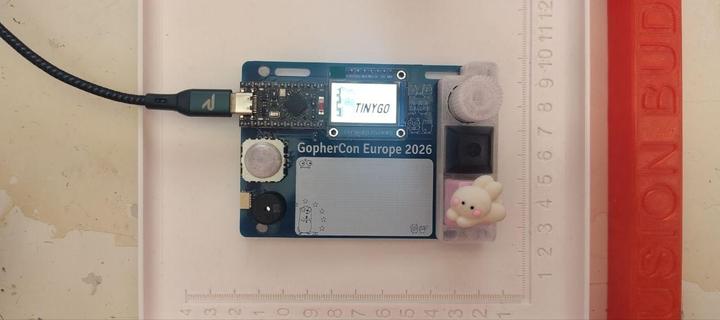
Visit the official repository to download the example code and get the latest version. Bill of Materials # Component Notes 1 PCB NiceBadge PCB, see hardware/PCB-kicad/ 1 nice!nano or compatible nRF52840 microcontroller board 1 ST7789 display SPI 1.14" 135×240 px 1 Rotary encoder Alps EC11E with push switch 1 Analog joystick FJ08K-S 1 Passive buzzer 5.5 mm 2 RGB LED SK6812MINI-E (WS2812 compatible), bottom-mount 2 Pull-up resistor 4.7 kΩ axial 2 Key switch Cherry MX compatible 2 Key cap MX stem 2 Key socket Cherry MX hot-swap 1 Qwiic / StemmQT connector JST SH 4-pin 1 Battery connector JST 2.0 PH 2-pin 2 Flathead screw M2.1 × 10 mm or M2.0 × 10 mm 1 Printed back cover FDM printed, see hardware/stl/ 1 Printed front frame FDM printed, see hardware/stl/ Tools Soldering iron + solder Flux Fine-tip tweezers Helping hands or PCB holder Isopropyl alcohol + brush (cleanup) Assembly Steps Step 1 - Solder the StemmQT connector (back) Solder the JST SH 4-pin Qwiic / StemmQT connector on the back of the PCB. The connector is surface-mounted; you might use some flux to help you with the process, add some solder to the board, put the connector and push gently with the iron.
one done, 29 to go #tinygo #niceBadge #gopherConEU , based (mostly copied!) from the great work of conf2025badge from @sago35 /cc @TinyGo