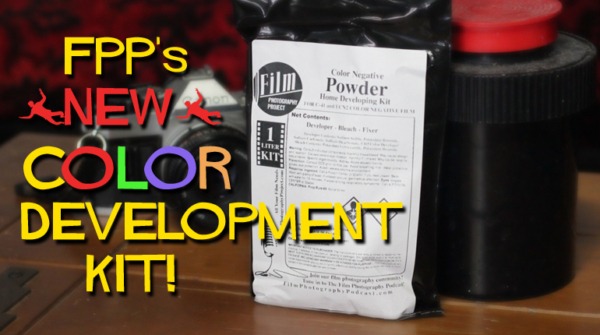
FPP’s “NEW” Color Negative Home Development Kit!

On February 23, 2021 the FPP added a new photo chemistry kit to its arsenal of DIY film development kits!
FPP COLOR NEGATIVE DEVELOPMENT KIT (For C-41 and ECN2 Color Negative Film)
Thekit can be ordered HERE. It contains the photo chemistry to develop color negatives and a detailed instruction sheet to walk you through the process. You will need (not included) the basic darkroom tools - tank, reel, beaker, etc. - to develop your color film as well as following the basic protocol of film developing (load film into your tank in darkness, etc.) More details on STUFF you need in our blog - What stuff do I need to develop film at home?!
This new kit contains DEVELOPER - BLEACH - FIXER - How To Use It?
DEVELOPER - It's best to mix the chemicals in the order in which they are numbered. Distilled water is recommended.
- Heat around 800ml of distilled or filtered water to around 106F.
- Add Developer chemicals one by one (#1 to #5) while stirring.
- Dissolve each before moving onto the next.
- Stir until fully dissolved.
- Add additional water until you get a full liter.
For BLEACH and FIXER - Do the same as above.
DEVELOPING – Developer temp is very important. Many folks use an Immersion Circulator (Sous Vide Style Heater) to bring their water up to temperature.
Typical agitation (every 30 sec or so). This developer kit is re-usable. When finished developing your rolls, pour each (developer, bleach, fixer) back into the container. (Make sure you do not cross-contaminate. Keep your DEVELOPER away from your BLEACH and FIXER). You can develop 20 rolls of 35mm film with each kit. Kit should keep for well over a month if you squeeze out excess air and tightly cap each bottle. FPP 1-Liter Containers are recommended as you can easily squeeze out excess air. Store away from sunlight.
Note that Kodak Vision3 ECN2 motion picture film contains a black carbon REM JET layer. This layer can be removed in your last wash. (After your Fixer rinse your film in a half bucket of hot water (80 - 102 degrees F). With your thumb, gently rub the non-emulsion side of your film as you remove it from your film reel. Careful not to scratch the emulsion of your film. You will see the black rem jet in your water as you rinse.) Rem Jet particles that contaminate your developer may not look pretty – but will not affect the developer. Many folks have other Rem Jet removal methods – consult The Google.
That's it! It's a slight variation to our previously offered kit. You might have noticed that there is no STABILIZER step. Fact is, stabilizer is not needed for any modern day films. Comments? Shoot an email to the pod! [email protected]
The post FPP's "NEW" Color Negative Home Development Kit! appeared first on The Film Photography Project.
#howtowhatis #developfilmathome #fppc41kit #fppecn2kit #homedeveloping