Ok the #FastBot assembly documents and STL files are available. You get a zip file which has an epub / HTML version of the instructions, all of the STL files, and a graphic cross reference of the 3D parts.

@paulrickards
Oh this reminds me @smerp lately put out a series, describing in detail how to make one of his #fastbot
Oh this reminds me @smerp lately put out a series, describing in detail how to make one of his #fastbot
I recorded the #FastBot torture test plot for your amusement / edification. #plotterbuild
Device parameters: X & Y top speed 166mm/s, X acceleration 12Kmm/s^2, Y acceleration 3Kmm/s^2, pen lift speed 83mm/s, pen lift acceleration 8Kmm/s^2, pen lift distance about 3mm.
It's about 10 minutes long, and includes the vector graphics resonance test and a filled text pen lift test. There's audio but it's faint. The shaking is the entire table wobbling...
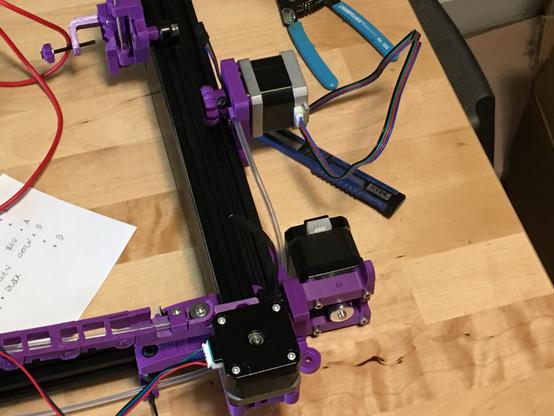
Some #plotterbuild #fastbot notes. I’m presently doing a bit of production plotting on the machine built for you all the past couple months.
What I found making it ready to go: the y rollers were a little loose, the rail was rattling.
To fix: slide rail to middle of y axis. Loosen both Y tension knobs. Loosen left roller bolts. Remove belt lock from rear left side of rail. Pop left side of rail off frame. Loosen left roller mount bolts, slide inward 1-2mm. Reassemble/tighten/tension.
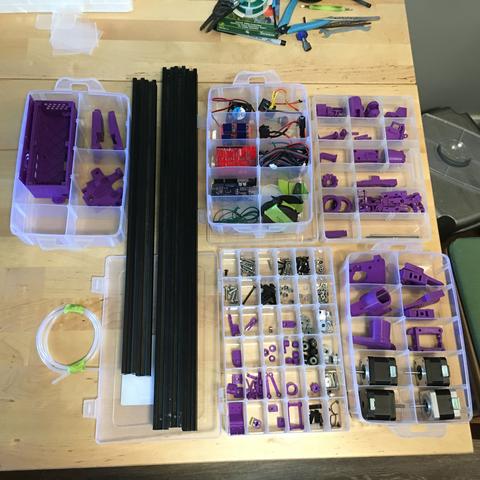
Okay, let's FINISH this #FastBot #plotterbuild are you readyyyyyy? Parts:
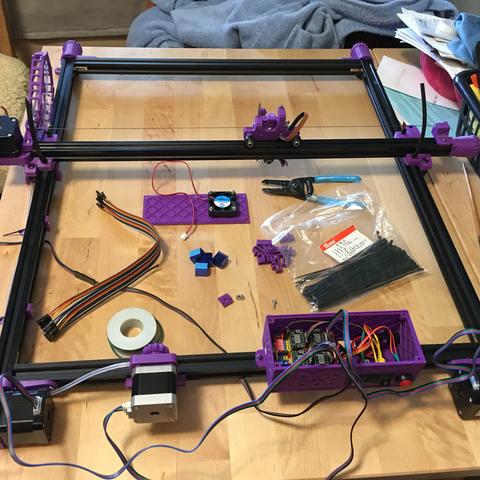
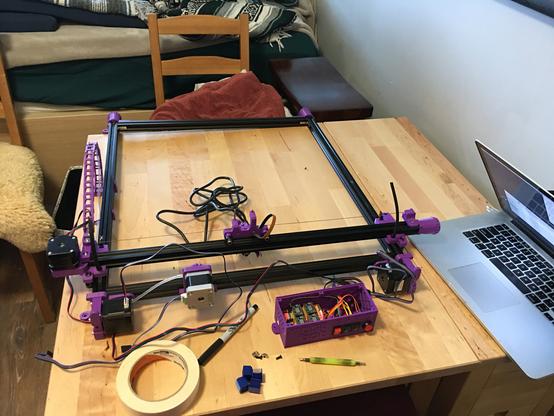
machine as it exists now
controller box lid with fan installed
1x 30cm or so Dupont to bare end wire
1x variable length hookup wire for grounding
7x 3x8mm machine screws
1x 3mm t-slot nut
4x driver heat sinks (came with drivers)
a few zip ties
3D printed parts
10x or so t-slot cable clips
Nx cable chain clips (one per cable chain segment)
1x end stop / ground clamp
This is going to be long-ish, sorry
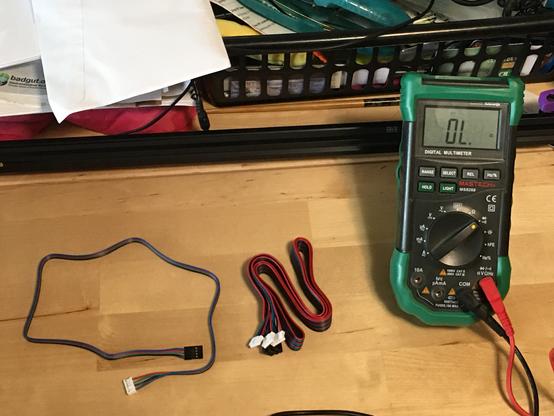
Moving forward with #FastBot #plotterbuild -- today is testing the motors and getting the cables properly labeled. Parts:
2x 3x8mm machine bolts
2x 3mm t-slot nuts
assembled machine with motor cables in place but not routed (don't do that yet)
assembled controller box
computer running CNC control software (Lightburn in my case)
Masking tape
Pen
Paper
Okay let's do some #FastBot #plotterbuild today is figuring out the wiring for the motors. Parts:
4x motor cables -- 4 pin Dupont (driver side) to six pin PH2.0 motor side. Length?
Three of the four motors are on the back rail of the plotter, and the controller box goes in the middle of the back rail of the plotter, so those three cables can be short.
Measure it to be sure - distance from motor to middle of rear rail plus 20cm or so for routing. All three can be the same, maybe 50cm?
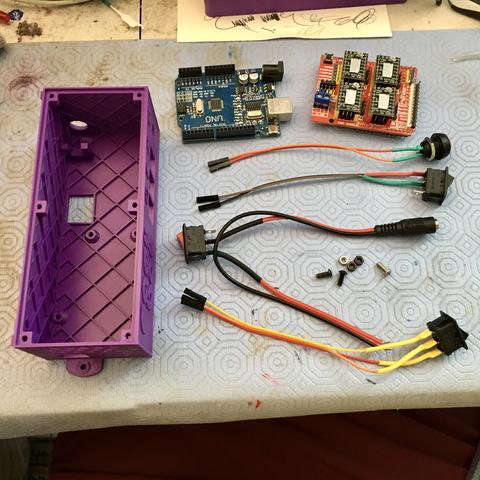
More #FastBot #plotterbuild -- today: assembling the controller box. Parts:
1x 3d printed FastBot box
1x 3d printed box cover (not shown)
1x Arduino UNO (firmware already on board)
1x CNC shield with drivers (already set up)
4x switches (we wired up earlier)
3x 3x8mm machine bolts
4x 3x20mm machine bolts (not shown)
7x 3mm hex nuts
1x 40x40x10mm 5v cooling fan (not shown)
It's a fun day of making things pretty. Let's go.
Hey let's do some #FastBot #plotterbuild -- since I don't have to photograph anything today, we can just jump in. Parts needed:
1x Arduino UNO board (plotter controller)
1x USB cable
1x computer of some kind: linux, mac or windows
Today is about firmware, the software that gets loaded onto the UNO. This isn't going to be micro-managed, you're going to have to learn some stuff, download software, run it, and follow other instructions to get everything going.