Quest for a new EasyFire flame detector sensor and overriding the broken photo sensor
tl;dr: Siemens photo resistive flame detector QRB1B-A070B70A is a suitable replacement for the Danfoss 057H7101 LDS sensor, that is so end of life, that I couldn’t even find it’s datasheet anywhere on the net. It did cost me 35 EUR.
Every time the central heater breaks down it’s in the wintertime and on a holiday or vacation. It’s probably some sort of law. So I was not amused then the heater started throwing up showing error messages of the sort “No flame detected”. This sometimes happens and it’s usually enough to simply reset the system to start another burn. It’s an older pellet system by KWB called EasyFire. I’d not go for such a system again but back when this was hot (haha, sorry) people were trying to sell me gas or oil instead and look where that went 😛
Anyway, I knew something was up when the errors started to pile up. Every time I checked the firebox I found no unburned pellets and only ashes so starting the fire was not the problem (this time) so I checked the flame detector sensor itself. That is a photoelectric cell that is used to detect light – and in this specific case a yellow light. This type of sensor is also found in oil burners. Gas burners usually have one that detects blue light so they are *not* compatible.
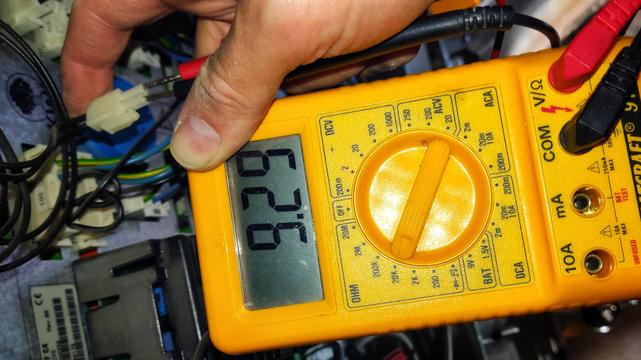
To check for the light of a flame it’s resistance is measured by the controller of the central heater. It’s my understanding they usually come in two different sensitivities, normal and high, but both types apparently have a “dark resistance” in the MΩ area and drop to KΩ when light could be detected.
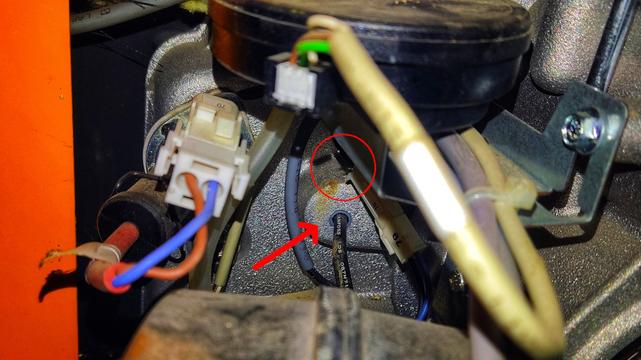
The sensor is a little hard to reach and can be found next to the spiral conveyor motor on the left backside behind a cover plate. The cover was secured with 3 screws in my case and could be removed easily. The sensor itself is secured with a tiny hexagon socket grub screw and getting this opened is a challenge due to it’s location. I marked the easily overlooked grub screw with a red circle on the photo. It’s directly over the sensor itself.
Once that’s opened (no need to get it out completely!) the sensor can be pulled out and while I could still measure something of it with a light source (that is *not* LED) it did definitely not work as expected any more thanks to it’s cap melted half off and grime blocking it’s photoelectric cell.
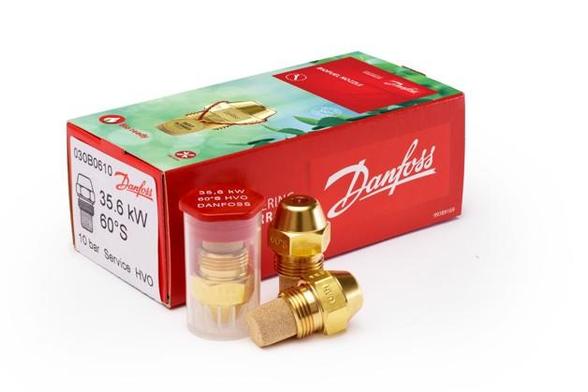
And this is where the easy part stopped because I could not find anything on this sensor *at all*. It’s label says it’s a Danfoss 057H7101 LDS but I only managed to find a datasheet for the 057H7105 and upwards so it is total guesswork that this is close enough and the 057H7108 is *probably* also compatible but according to the Danfoss website also end of life already. The 057H7108 is at least also blue (which means it’s a LDS / high sensitivity version) and it’s length would fit alas I could not source the part from any shop any more probably because it is no longer produced. The product info on the Danfoss website has also no guide what part might be a proper replacement so well done Danfoss *slow clap*. Anyway, here are the characteristics for this type of sensor that is *probably* what the 057H7101 is about as well:
- Rated voltage 230V ac
- Operating range 195-253 V ac
- Frequency 50-60 Hz
- Flame sensor measuring condition 12V dc +/- 2% with Ri=100 KΩ +/- 2%
- Signal output Max. 85 µA
- Recommended signal output (light) ≥ 65 µA
- Flame signal for no light (dark) ≤ 5 µA
- Ambient temperature operation -20 to + 70°C
- Ambient temperature transport -30 to + 70°C
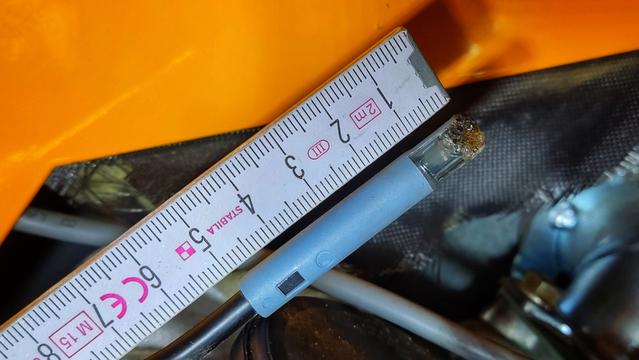
- Housing length 50 mm
- Housing diameter 8.8 mm
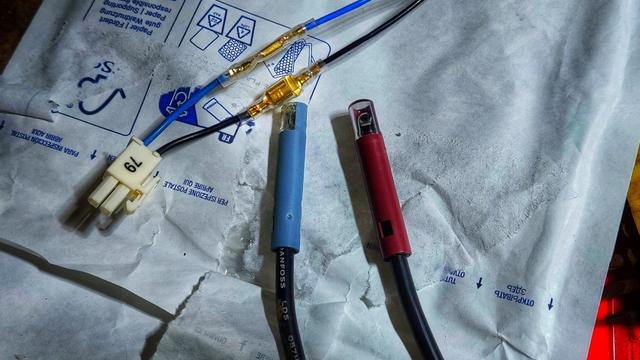
I looked around for a while and found a sensor by Siemens that seems to be a good match for this. The QRB1B has the same form factor and the A070B70A type has the same length and comes also without a flange or clamp. Other variants can probably be made to fit as well since the flange/clamps are accessories that can be removed easily. It does have a slightly lower temperature range of -20 to +60 °C for operation though but that is still good enough for me / pellets. It’s housing diameter is also 8.8 mm on paper but in reality it came with 8.9 mm and I had to sand it down carefully a little bit in the end but who is counting at this point 🤷 I was happy to find a sensor that would match close enough already and it did cost me “only” 35 EUR. All that was left was cutting the old wires close to the original connector used by KWB and use some of my own to wire everything together again.
The new sensor is doing it’s job for several days now and meanwhile spring arrived so it’s operation isn’t that critical any more. I’m considering to get another replacement part for the future though since I doubt that this one will also work for >10 years.
Researching all this and debugging the error itself took quite some time and of course it was all during a vacation and of course we were all down with a cold and absolutely needed that heater to function and it broke down for good on a Sunday on top. So I had to override this system until the replacement part was identified and arrived and connected because I was absolutely not going to pay for an emergency repair.
⚠️ A flame detector / watcher is a critical safety sensor and messing with this may result in injury or death so do not repeat what I do here at home. And if you do use your brain. I’m not responsible for anything you may make of this and I would absolutely NOT do this with a gas or oil burner because should there really be no flame or the flame die the system will no longer stop adding fuel until the system *may* detect out of place values from the exhaust sensor and stop because of that. For a pellet system this means that the firebox may be flooded with pellets and that is easily fixed but gas and oil are a whole different story 🤯
To do so I crammed two Dupont connectors on the pins of the sensor socket for the flame watcher of the KWB EasyFire. The socket in question has the number 201 on my model (KWB KSM EF C4). Now the next steps only work when the boiler is cold and the heater wants to start the next burn. So I simply disabled the automatic start until the system was cold again.
Now I opened the firebox, lit a fire starter and threw it in. This model has the ash box right in-front of the firebox and another sensor detects a missing box so it has to be reinstalled again. Probably a good idea to empty the box before so this can be done easily. I have some practice with this, because the heating element used to start the fire broke down several times before already too and this is the way to bridge the time until a new heating element arrives.
Now that I was sure that there was definitely a flame going I enabled the system again and *waited* until the system was in the middle of it’s start-up procedure. This means I can *hear* the fan of the fire starter wind up and the spiral conveyor motor engage to shove in pellets. The system says what it is doing on it’s operational info screen and tries to inflame the pellets 3 times waiting for fitting sensor readings from the flame watcher and(!) the exhaust sensor.
There’s no need to wait 3 times, of course. The fire starter does burn for a few minutes only so after 5 minutes I connected a bunch of prepared resistors in a chain to the Dupont wires. I went with 3x 2.2KΩ simply because I had them around. This results in ~8.8kΩ in the end, which is close to the reading I could get from the broken photo sensor when it was in a good mood. Doesn’t matter too much though as long as this is in the KΩ area.
Again this was highly temporary and got old fast. Anyway, now the system “detects” a flame and goes into the “ignite completely” mode, which means it shoves in pellets from time to time and checks for the heat levels to raise and the exhaust sensors to deliver fitting data. After a few more minutes it should end up in “Working” mode and start it’s ~2h long burn.
I checked on the system during these ~2h again and again to make sure nothing went wrong, keeping a close eye on temperatures. The system stops on it’s own once the buffer is warm enough. From here it stops shoving in new pellets and lets the fire burn down. I disconnected my resistors after 30 more minutes again, when I could be reasonable sure that no flame could be going any more. The system will eventually start cleaning out the ashes and after that I disabled it again so make sure that the next burn would not start on it’s own.
Again: Don’t try this at home. I struggle with this system long enough now that I have some idea what’s going on and I hate wasting money on small problems like this. YMMV.
This content is licensed under a Creative Commons CC0 Universal Public Domain Dedication license.
https://beko.famkos.net/2026/04/20/quest-for-a-new-easyfire-flame-detector-sensor-and-overriding-the-broken-photo-sensor/
#Danfoss #KWB