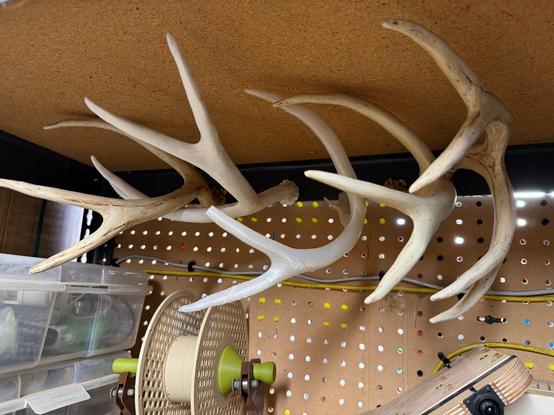
Costume antlers in various stages of incomplete post processing. Their embedded magnets have held them to the metal of this utility shelf for five years. They're likely destined for the rubbish bin.
Costume antlers in various stages of incomplete post processing. Their embedded magnets have held them to the metal of this utility shelf for five years. They're likely destined for the rubbish bin.
This was the paragon print in my eleven years with the now defunct Lulzbot TAZ 4 3D printer. The costume antlers that I made in 2019 look about as real as I could make them. There was a lot of post processing. Each PLA antler was wrapped in thin layer kaolin clay and then painted. They mounted using magnets that mated with a circlet worn under my bandana.
Amazingly they weigh only 35g. So they're very easy to wear. Sadly, by the time I finished them, the pandemic started. I have never worn this pair in public.
I did wear earlier iterations of the project in the preceding years, but none of those were as fine as these.


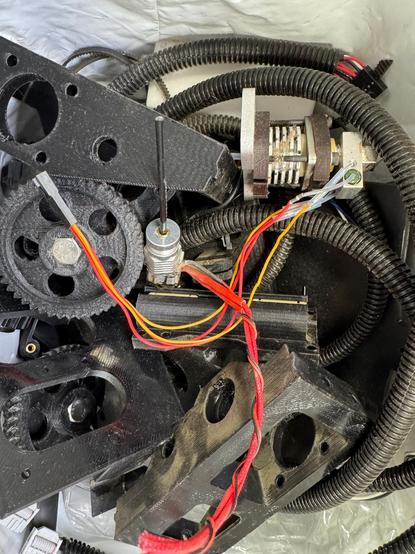
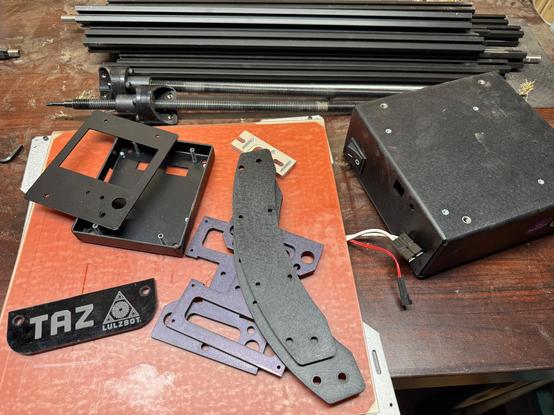
The end of an era. This is all that remains of my longest lasting 3D printer, a Lulzbot TAZ 4 purchased in 2014. It was a good machine that served me well.
A couple years ago, I modified it for use as an automated macro focusing rail. I could easily convert it back and forth between its printing and photographic roles. see https://www.twobraids.com/2023/02/my-first-year-of-macro-photography.html
In 2024, I've stopped using it and I'd like repurpose the space it occupies.
There is no market for an old TAZ 4, so I completely dismantled it for recycling.
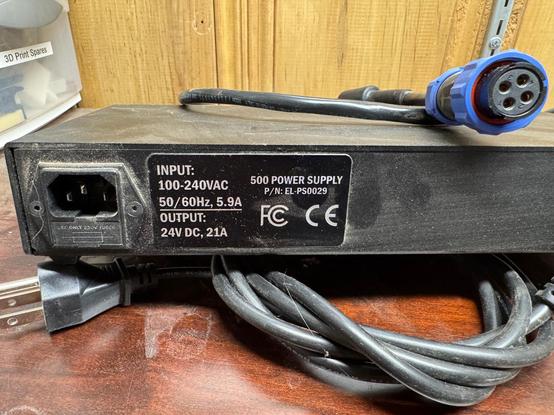
I have no use for a 24V DC 21A power supply. Anyone want it?

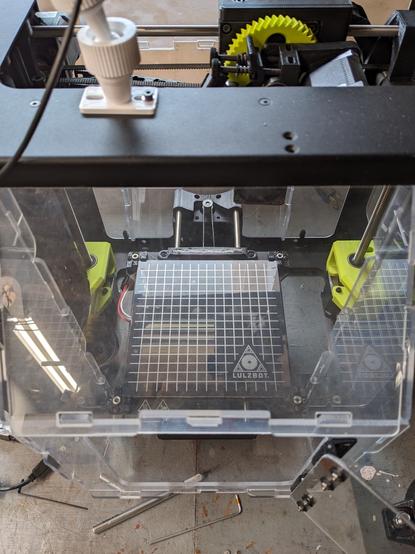
Upgrading my Lulzbot Mini with the modular heated print bed. The finish on the heat spreader is so pretty, I'm almost sad it's going to be hidden when I install the flexible magnetic bed base and spring steel print surface on top.

First 3D print of the New Year completed! The ABS part didn't lift from the print bed this time!
This is a mirrored version of the mesh shoe shelf support I posted earlier.
I'm looking forward to printing something in another colour now. Got 4 colours to choose from (black, red, green and blue)
✔️ Level Z axis (to 0.05mm difference from left and right - hoping it's precise enough)
✔️ Add ABS slurry to glass print bed
✔️ Add tabs on corners of part to help prevent delamination from print bed
✔️ Slice the part in #PrusaSlicer
✔️ Load up g-code in Pronterface, heat up bed and hot end
✔️ Start print!


