Damn Small Linux 4.4.9 on 86Box with Socket 370 [1998]
Did you know that Damn Small Linux 2024 RC7 is different from the classic DSL Linux distribution, which focused on being a small distribution that has the size of 50 MB? Unlike the classic Damn Small Linux, which can fit on a business card sized CD-ROM, the modern version doesn’t fit on a mini CD because it has a size of 718 MB.
Our focus in this article is testing Damn Small Linux 4.4.9 on an 86Box emulated machine with a Socket 370 [1998] motherboard. You can download it from here.
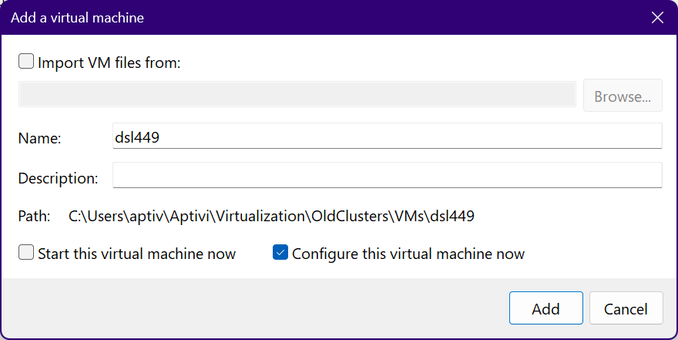
We’ve configured the virtual machine as follows:
We’ve configured a virtual machine to run with:
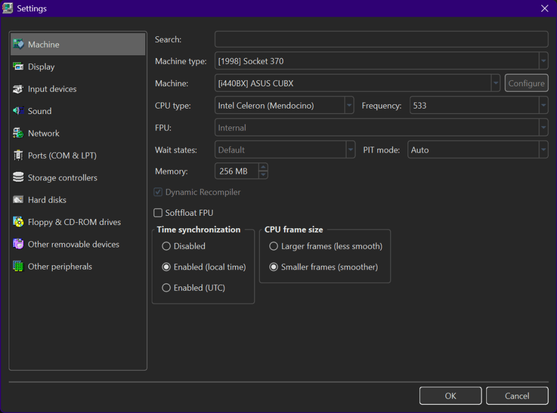
- Machine type: [1998] Socket 370
- Machine: [i440BX] ASUS CUBX
- CPU: Intel Celeron (Mendocino) @ 533 MHz
- Memory: 256 MB
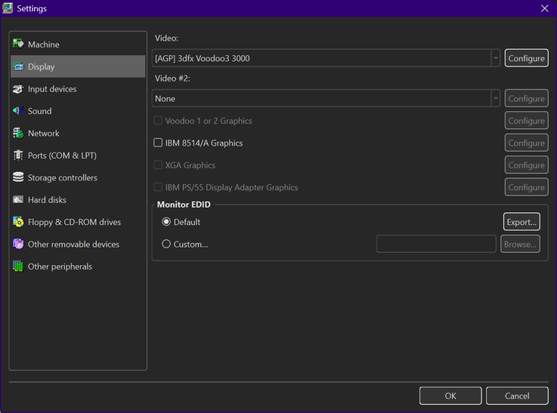
- Video: [AGP] 3dfx Voodoo3 3000
- Keyboard: AT Keyboard
- Mouse: PS/2 Mouse
- Sound card: [ISA16] Gravis UltraSound
- Floppy disk controller: Internal device
- Hard disk controller 1: Internal device
- New hard disk: dsl449.vhd
- C/H/S: 2080/16/63
- Size: 1024 MB
- Bus: IDE
- Channel: 0:0
- CD-ROM drive 1: ATAPI (0:1) TOSHIBA CD-ROM XM-6702B 1007 (48x)
Once everything is configured as above, we can now start the virtual machine. Insert the Damn Small Linux 4.4.9 disc called dsl-4.4.9.iso to the CD-ROM reader, then configure BIOS as necessary.
Once done, let Damn Small Linux start.
The desktop looks familiar and old-fashioned, which brings classical eras and nostalgia. However, how did people install Damn Small Linux to the hard drive (if they wanted to do so)?
We started with opening the DSL menu and navigating to Apps > Tools > Install to Hard Drive.
Sounds simple, right?
Wrong! It immediately asks you for the partition block name for your hard drive, such as hda1 or sda1.
So, let’s overturn the steps for a bit and open the root terminal shell to partition the disk manually using fdisk /dev/hda. Why /dev/hda? Because the hard drive was installed and configured as an IDE drive (primary master drive) instead of SCSI.
Next, we need to create an 800 MB first primary partition (type 83) which will hold the Damn Small Linux system files, which will be identified as sda1. Afterwards, we need to create a second partition which will be the swap partition (type 82) identified as sda2.
After the partitioning step, we need to write the partition table to the disk before continuing with the installer, but only after we’ve verified that we made the partition table correctly.
Now that we have enough information to select the correct disks, we need to write hda1 to the “Enter the target partition” prompt, which points to the 800 MB partition we’ll install DSL to.
After that, we’ll need to support a single user, while running DSL with ext3 as the filesystem. The format process then begins, and the installation process starts.
After the installation finishes, we need to install the bootloader to the hard drive’s MBR, with GRUB as the bootloader.
After that, we need to reboot the system.
After that, Damn Small Linux installed on the hard disk runs like below:
As this is a first time run, DSL then prompted us to provide both the root password and the default user password.
After that, DSL GUI is now running, and we can verify the Linux version, which is 2.4.31.
However, we need to manually set up the swap partition, since the hard drive installer didn’t prompt for the swap creation and enablement. So, we need to manually run both mkswap /dev/hda2 and swapon /dev/hda2 as root.
Now, when DSL starts up, the swap space gets automatically enabled.
#86Box #DamnSmallLinux #DamnSmallLinux449 #DSL #DSL449 #Linux #news #Retrocomputing #Tech #Technology #update