
Benchwarming party is tomorrow!
A lot of the dimensions came from the limitations of the material I had on hand. A friend gave me a stack of 2x4s, and I processed them to get the most I could out of the boards for the top. So the thickness, length, and width were mostly dictated by that. I tried to maximize the size of the bench since I often work with large material. Case in point, first project was some sound panels that were the same size or larger than the top.
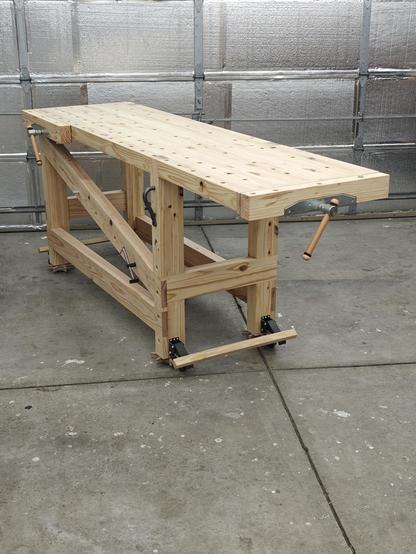
For the design, I watched a ton of videos and tried to pick out the best parts. It was important to me to have the legs flush with the edge of the top so I could work with material vertically ans clamp to the legs.
The bracing I commented on elsewhere, but I wanted some extra structure, some extra weight, and dog holes on the working side.
I didn’t feel the need for fancy joinery, but I wanted the strength so I used half laps everywhere, which still turned out to be a challenge with the size of the parts.
Here are some pictures though since I know I won’t get around to the writeup very soon
It probably is overkill structurally, but I had some other thoughts around this.
For the face vise, I wanted some dog holes on the side of the bench so I can rest larger material on dogs and use the vise on the other end. The diagonal brace give me somewhat arbitrary positioning, increasing in height with length. I’ll find out if this ends up being useful. So far I’ve only used the furthest and highest dog hole.
As for storage, I left the other side open just for that. Not sure exactly what that will look like yet. I’ll probably add some combination of frequent tools on the vise side and drawers on the open side.
It was a great learning experience! Almost all of my joints were too big for the power tools I have, so I got to learn some hand tool techniques. It did take way longer than any YouTube video would suggest.
Holdfast taytools.com/narex-hot-forged-workbench-holdfast-…
Bench dog screw clamp taytools.com/taytools-adjustable-workbench-bench-…
Flip down casters www.amazon.com/gp/aw/d/B08BR7R4WN
I just got the same ones I got for my table saw a while back. They work fine once installed, but it’s a royal pain to assemble them. I had to get clever with vise grips to tighten the nut.
Adding the bar across is very nice, you get two wheels with one motion and don’t need to squeeze behind the bench if it’s against a wall. Making it longer than the width of the bench helps catch it with your foot, it can get a stuck flat against the bench when the wheels are disengaged.