If I make another one, I'm going to change pretty much everything except the colour.
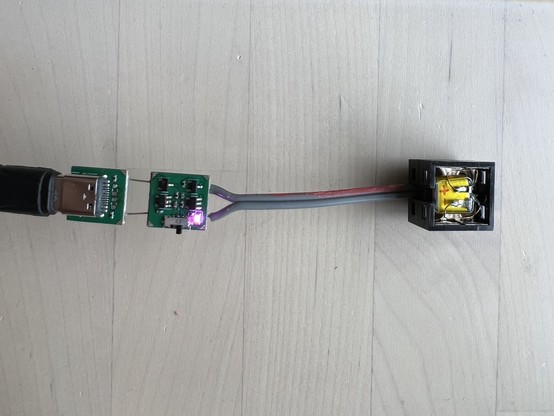
This build was a bit of a washout overall, but since the boards are made up of distinct modules connected by wide traces it’s very easy to break it down and reuse bits. Here’s the usb segment & battery charger segment from one of the casualties charging a little Lego clip-on battery.
The first two boards from this batch powered up just fine. The next one was dead, and I thought maybe I saw smoke? The next one let the smoke out immediately. I stopped plugging them in after that while I tracked down what was going on. It turns out that for one of the 100K pull down resistors I'd actually ordered 1Ω.
The nice thing about 1 Ohm resistors is it makes the maths very easy when you're working out how badly you cocked up.
This one survived the process. It's even almost practical.
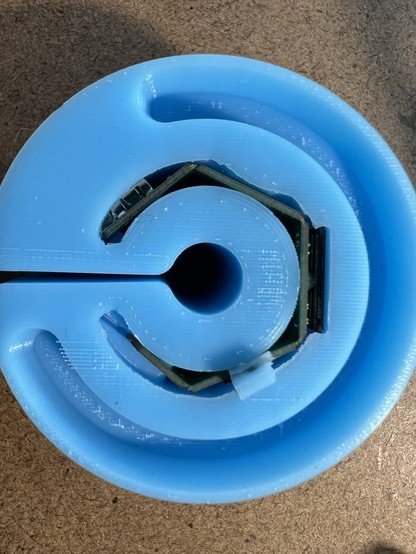
The capacitive touch pad in the ring is just 4 copper pads each connected to a gpio - no external components. A PIO program times how long the pad takes to pull high using the internal pull-up resistors.
This worked well. The capacitive sensor works by discharging the pad through a resistor and timing how long it takes. Previously I was doing this a few thousand times in a loop and returning the accumulated time. Here I'm doing it the other way round - spending a fixed time in the loop, and counting how many charge / discharge cycles it can do. My aim was to make it easier to tune the sample period, but it turns out noticeably smoother and less noisy this way too.
@ancientjames Ooh, I love this way of detecting touch position with capacitive touch! I've been working on a thing that uses capacitive touch, but I have large unbroken areas of copper leaf on a surface that detect touch, and I was trying to figure out a way to detect movement. The main problem with your approach for my use case is it requires multiple GPIOs for one touch area, and I'm trying to detect 10 different touch areas. 🙂
@owengoss There's all sorts of interesting ways to interleave the pads to reduce the number of sensor channels you need. (I'd like to try the 'duplexed slider' here https://www.silabs.com/documents/public/application-notes/AN0040.pdf because it's such a neat approach)
@ancientjames very cool! That looks like a handy resource, thanks for sharing. I’ve just sort of been fumbling my way through things so far. Probably a good idea to read some things. 😅
@owengoss some of the stuff I’ve read on layout requirements, if I’d read it before I did my first stud-touch, would have convinced me that shape was never going to work and I shouldn’t bother. So there’s that.